Contribute
Register

Blackintosh Pro G5

Status
Not open for further replies.
Joined
Apr 28, 2011
Messages
186
Motherboard
Asus Z170 VIII Maximus Gene
CPU
i7-6700K
Graphics
GTX 1070
Mobile Phone
  1. iOS
Hi everyone

After seeing the first case mod of a G5 I knew I wanted one too (just like many others :) ). Since I'm not a real handyman, I think I literally checked out everyone's build that I could possibly find.

When I finally came across my victim, my grandpa's old mac pro, the game began... :).

At first, all I really wanted was to just enable the case to host windows hardware (duh) without any notion of how I'd do that. I just stressed out this part because I want to warn others to NOT just go and start drilling in there! I found out the hard way; when you're test fitting based on assumptions, you're gonna have a hard time... Doing this fast and dirty is not the way to an awesome job.

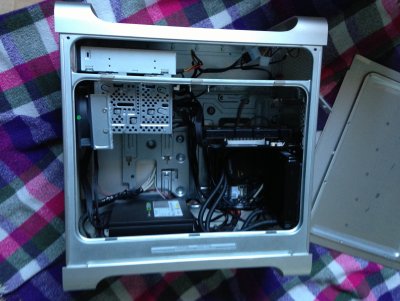
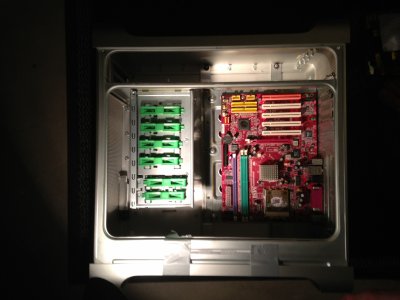
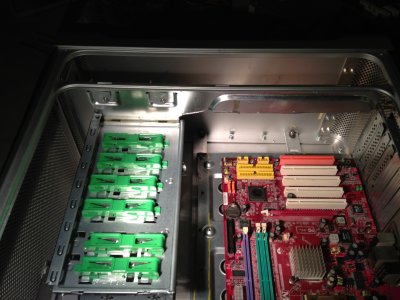
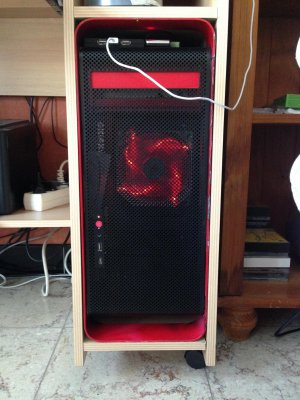
That's why I decided to share my first attempt at my build, which I've had for some months before deciding it had to change.

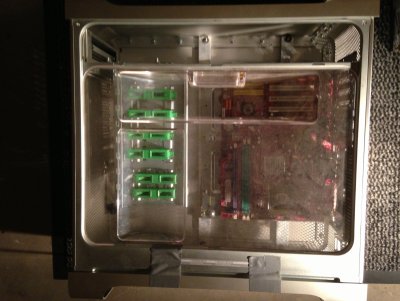
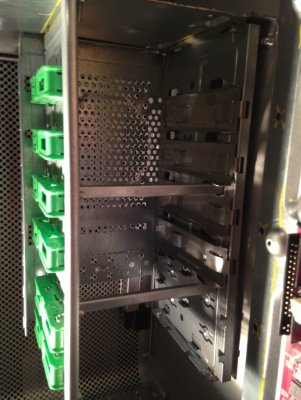
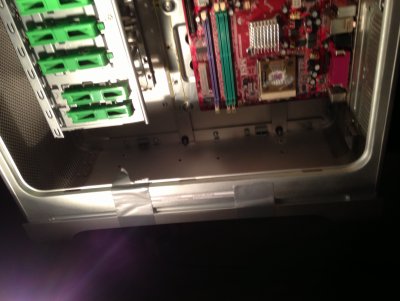
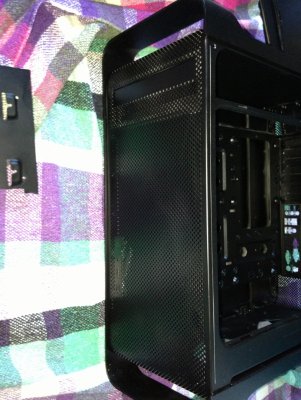
As you can see, for one the cable management was a mess. I chose a modular psu but unlucky for me, the cables are flat. That's why I couldn't really bend them the way I wanted to. Also, the HDD rack was really clumsily made, with a 120mm fan installed in a really clumsy way. But hey, it worked :p.

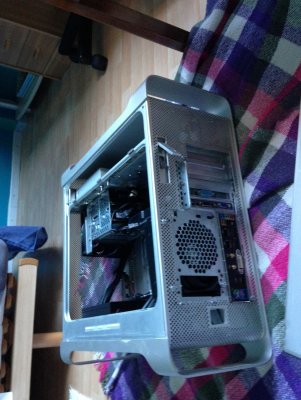
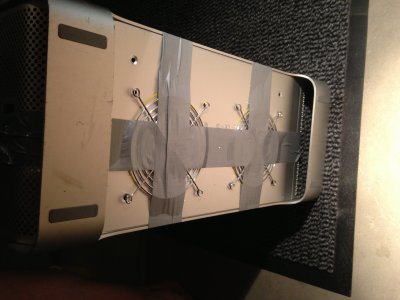
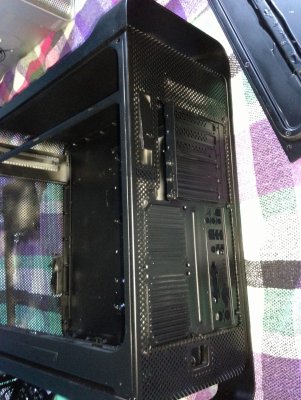
Also the back of the case was a disaster; I tried to install a 120mm fan where there was supposed to be a 92mm fan. Basically I used the entire mobo tray from an old HP desktop. The reason I installed the 120mm fan anyway was because that's where I mounted my Antec Kühler H20 620.

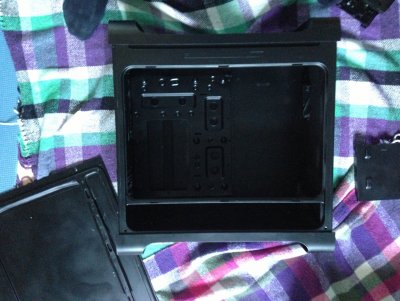
While installing the fan on the back, I accidentally broke off the two clips underneath the fan grill so there was a hole... I didn't like the sight so I knew one day I'd wanna change that.

Also note how I managed to break the plastic door lock mechanism so I had to McGiver it all back together =P.
 

Attachments

  • 1.jpg
    1.jpg
    1.1 MB · Views: 733
  • 2.jpg
    2.jpg
    1 MB · Views: 618
So with my first build effort as it was, I decided to browse the internet and search for another G5. The entire idea was to find a second one and make it the way I wanted the first one to be. The first one will then be reused and hopefully "repaired" to again a piece of art.

My "Idea List" with my new G5:

1) NOT make use of Mountain Mods / The Laser Hive premodded stuff.

I'm not saying these are bad or anything, but they give me the feeling that all the effort is done by someone else + I don't intend to pay for these. Instead I'll try to reuse the mobo tray from an old leftover desktop I can find at work. (I work in a computer store and recycle the broken stuff).

2) NOT glue / BJweld standoffs in the case, instead use 2 aluminum strips and mount the mobo on there.

Originally I was gonna do it that way (even bought compound glue and stuff), but along the process I found a way better method. I didn't find this idea on any International hackintosh related forum. Instead, it was on some smaller dutch website. Once I saw his idea I knew that was so simple that it was actually genius! Just attach 2 strips and mount it all on there! That way it's not gonna move, it doesn't imply any drilling in the actual case and it's great for the clumsy ones like I am :p.

3) Cut the side-panel to only accommodate the optical drive. The rest will be cut out (but I'll leave a stroke of approx. 2 cm on top for the attachments).

4) Attach a HDD rack I found in an old Acer desktop to the other side of the side-panel for the optical.

Just like the first one, I cut out a hole for the psu so the air would leave the case underneath. This time, instead of trying to fit the water cooler around a too small fan grill, I decided to cut a second hole next to the one for the psu. (Note that in the picture I thought that my psu had a 120mm fan, I had to enlarge it afterwards...).

The HDD rack has room for a 92mm fan which I think should do to keep my HDD's cool.

The backside of the case now has two nice 80mm fan grills, which I think looks way nicer than the HP one I had before! Two 80mm fans should do for some airflow since all other parts have their own fan and since I'm not a gamer.

I was also very pleased to see that this time the plastic window actually fitted!
 

Attachments

  • 4.jpg
    4.jpg
    964.3 KB · Views: 540
  • 6.jpg
    6.jpg
    1 MB · Views: 495
  • 7.jpg
    7.jpg
    1.1 MB · Views: 501
  • 8.jpg
    8.jpg
    1 MB · Views: 530
  • 9.jpg
    9.jpg
    990.4 KB · Views: 499
  • 10.jpg
    10.jpg
    1.1 MB · Views: 476
  • 11.jpg
    11.jpg
    1,008 KB · Views: 452
  • 12.jpg
    12.jpg
    1 MB · Views: 430
My case seemed ready to install, but some drama happened!

My girlfriend moved the case while it was lying on it's side, so it got scratched really bad ><.

That's how I came up with the idea to paint the entire case black! Not only does it add something to its originality, it will also allow me to sand the case entirely and level the scratches!

Only downside, I had never spraypainted before...

Here are the results.
 

Attachments

  • 13.jpg
    13.jpg
    1.1 MB · Views: 586
  • 14.jpg
    14.jpg
    1 MB · Views: 621
  • 15.jpg
    15.jpg
    1 MB · Views: 612
With the case being completely black it still missed something.

I replaced the front fan (the one cooling the HDD's) with a red shark 120mm fan. The entire bracket stands on the PSU.

I also painted the outer front edge red. Along with the power button, the LED, the DVD tray and the insides of the "feet".

Since my case sits in a desk, I didn't bother to change the paint of the rest.

Here's the end result of the build:
 

Attachments

  • photo (1).jpg
    photo (1).jpg
    783.2 KB · Views: 565
Interesting build. I am curious about you saying you didn't want to use the mountain mod or laser hive kit, yet you did just use the back of another case. Kinda the same thing really as you used a pre-existing back and attached it to the case.

What did you use to paint it with?
 
Interesting build. I am curious about you saying you didn't want to use the mountain mod or laser hive kit, yet you did just use the back of another case. Kinda the same thing really as you used a pre-existing back and attached it to the case.

What did you use to paint it with?

It can be a lot cheaper to buy a cheap or used case and come up with an out standing back.

Both my builds were done this way.

http://www.tonymacx86.com/powermac-g5/79323-g5-mod-something-just-little-different.html
 
Interesting build. I am curious about you saying you didn't want to use the mountain mod or laser hive kit, yet you did just use the back of another case. Kinda the same thing really as you used a pre-existing back and attached it to the case.

What did you use to paint it with?

I just used cans of paint from the cheapest shop around here. I initially bought some paint in a car repair centre. The shop I went is called "Action" in Belgium. One can of paint costs like €1,50 so it's super cheap :).

Although, I now use it to paint anything! Even my guitars ^^.
 
What sort of paint have you used to paint it black. im interested in doing the same with a case ive just purchased and your paintjob looks really smooth.

cheers
 
What sort of paint have you used to paint it black. im interested in doing the same with a case ive just purchased and your paintjob looks really smooth.

cheers

Hey there

Well I just used some cans of spray paint, and the cheapest one I could find :p.

I've gotta admit, painting really was hard for me to get it right. But once I got the hang of it, I was really happy with the results :). The only downside with spray paint is that it's very easily scratched compared to retail painted cases...

Oh well, DIY is always more rewarding ^^
 
Status
Not open for further replies.
Back
Top