- Joined
- Mar 16, 2011
- Messages
- 44
- Motherboard
- Bitfenix Prodigy, Intel 520 SSD
- CPU
- IvyBridge i7-3770K, 16GB 2400MHz RAM
- Graphics
- ATi Radeon 6870 of course !
- Mac
- Mobile Phone
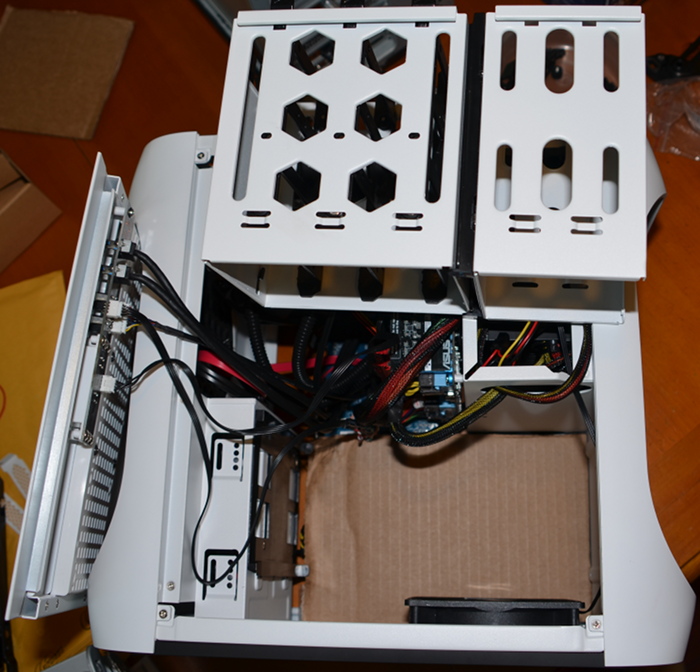
GED's Prodigy: i7-3770K - Asus P8Z77-I Deluxe - 16GB 2400MHz RAM - GA Radeon HD6870

Components
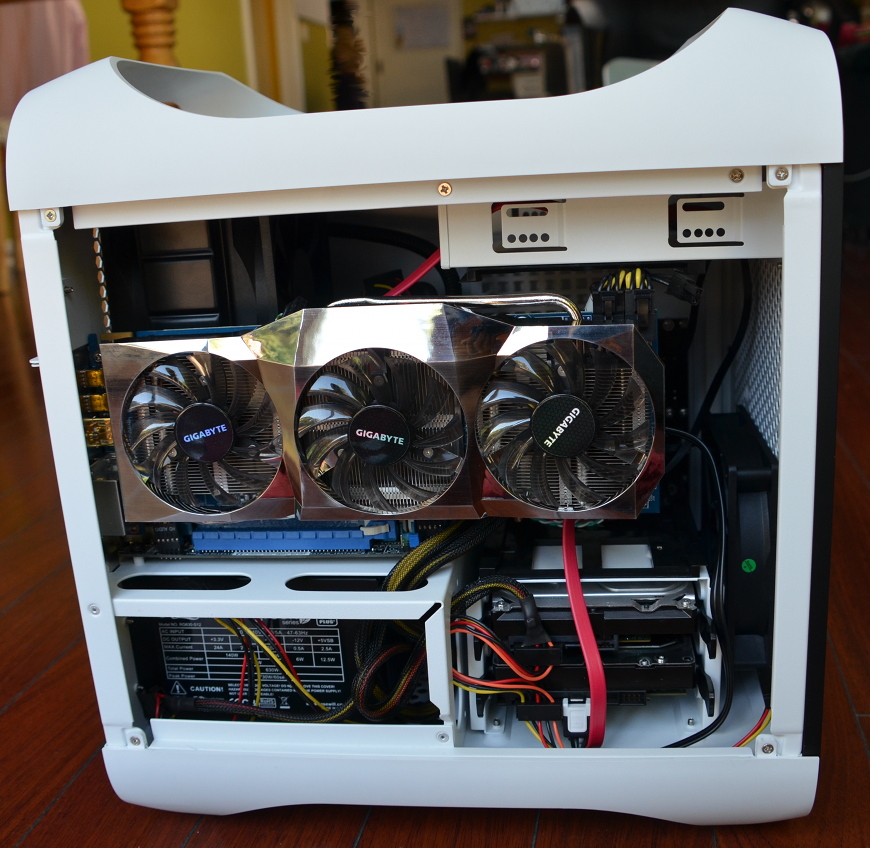
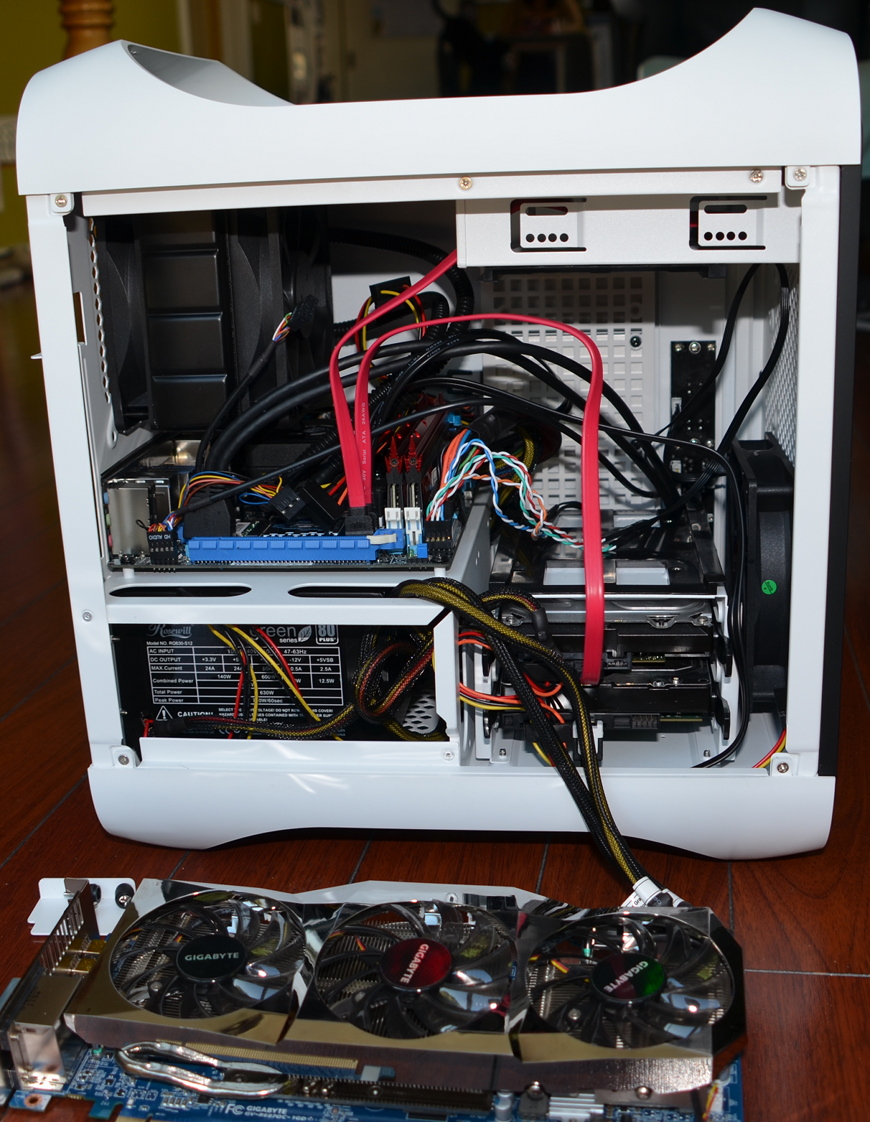
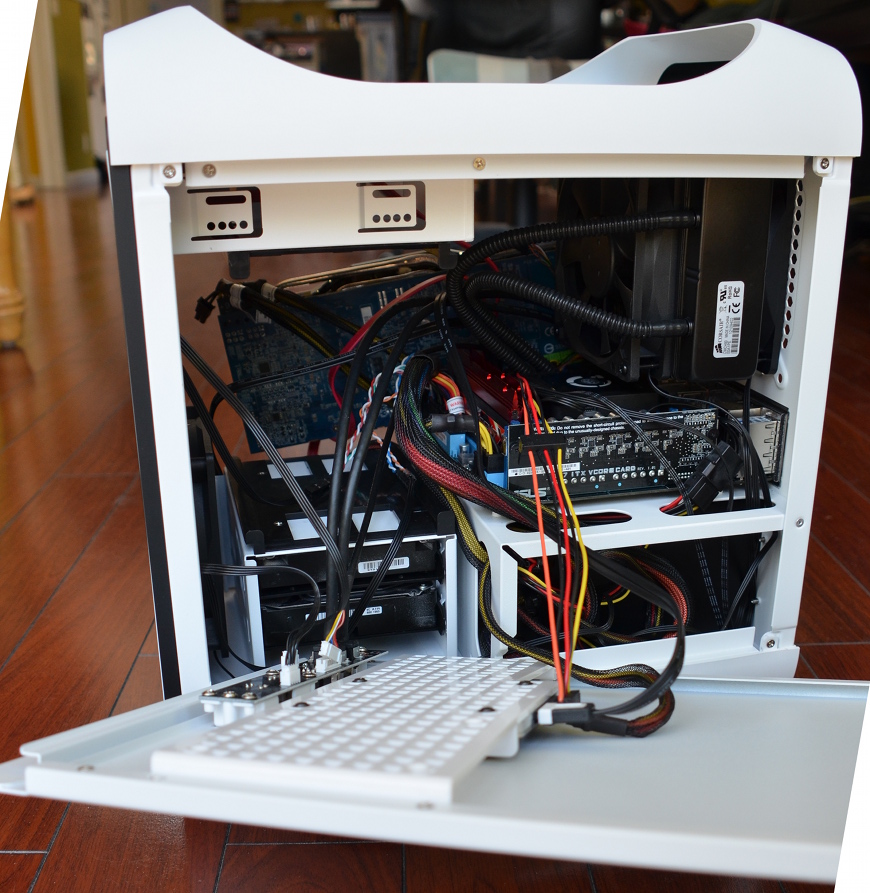
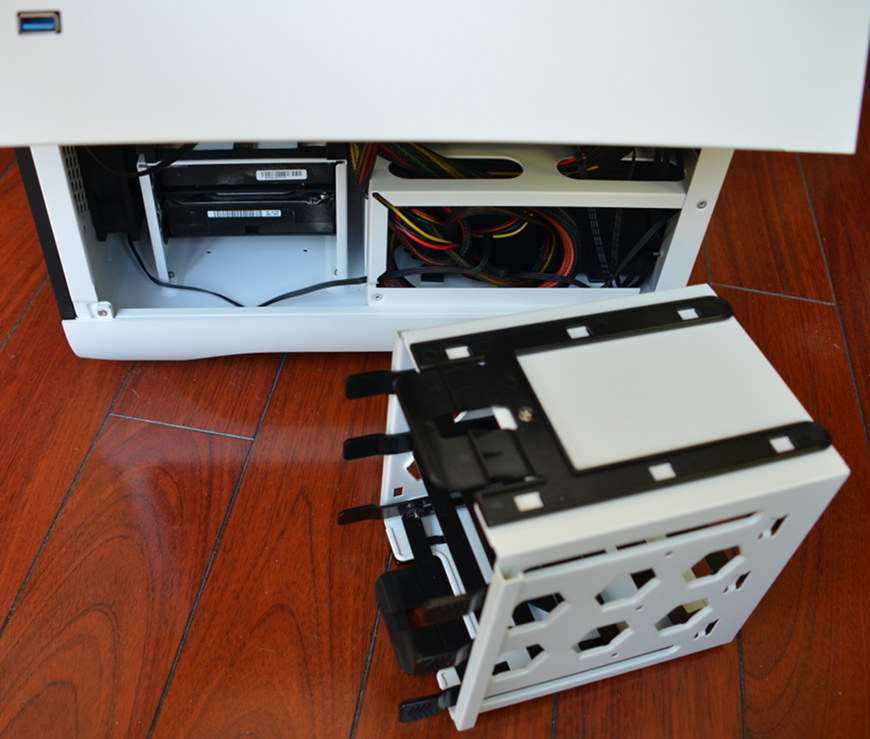
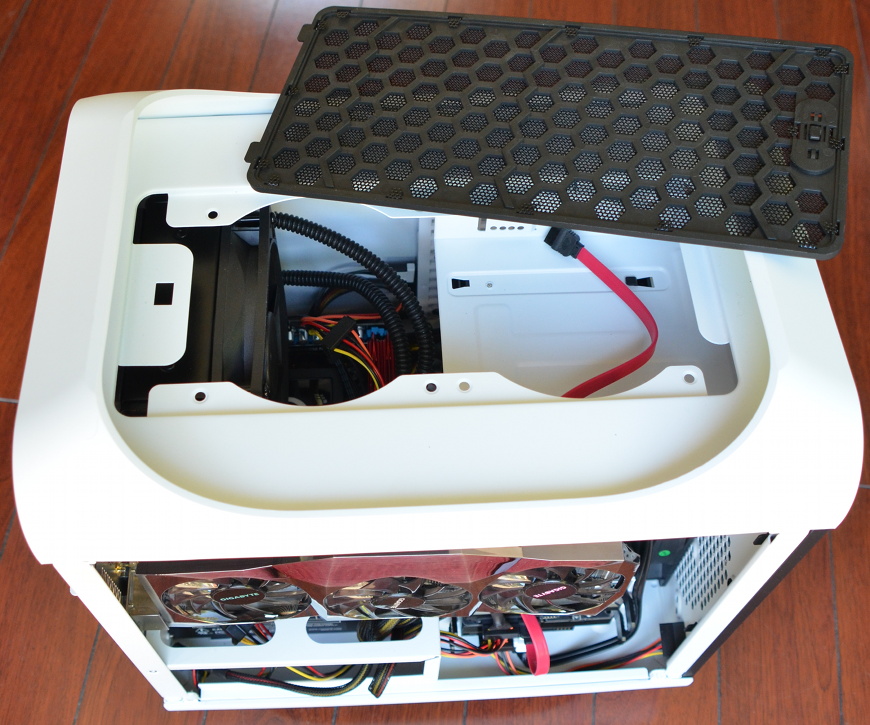
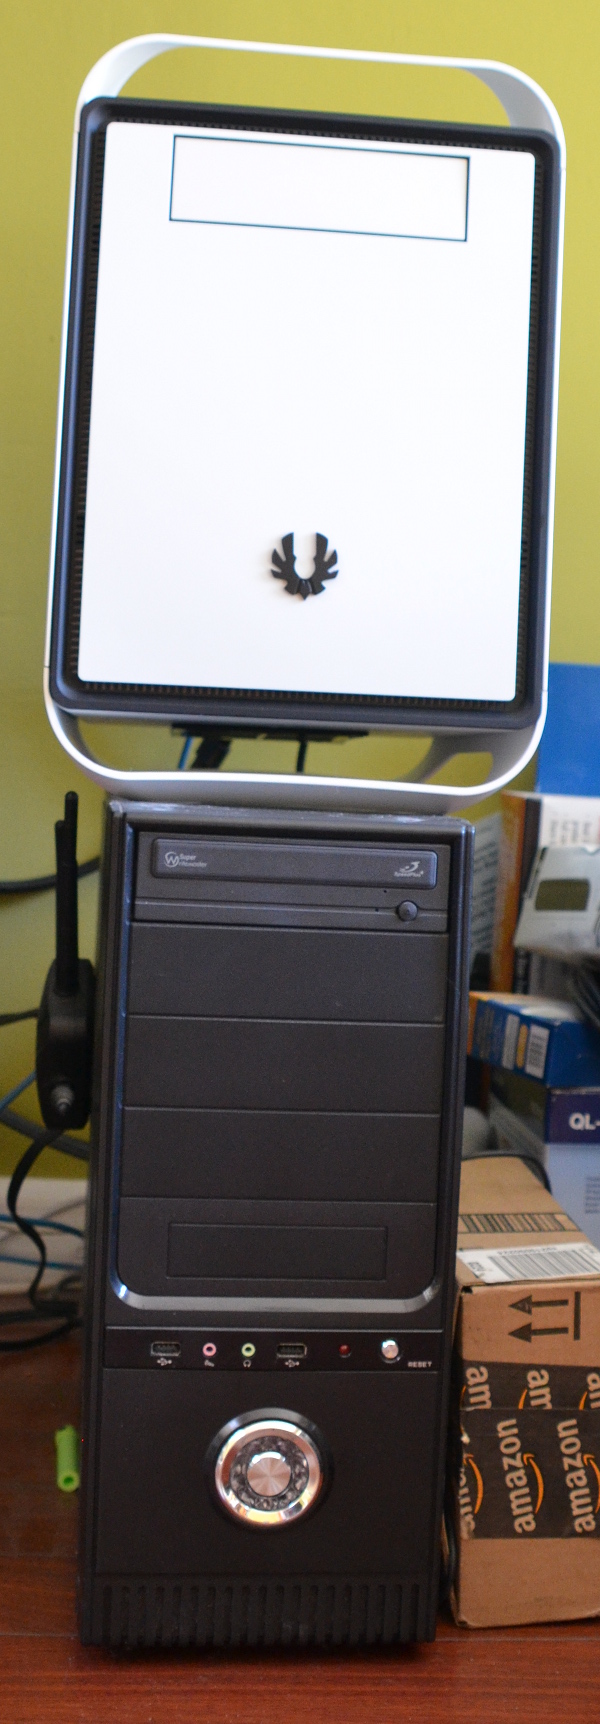
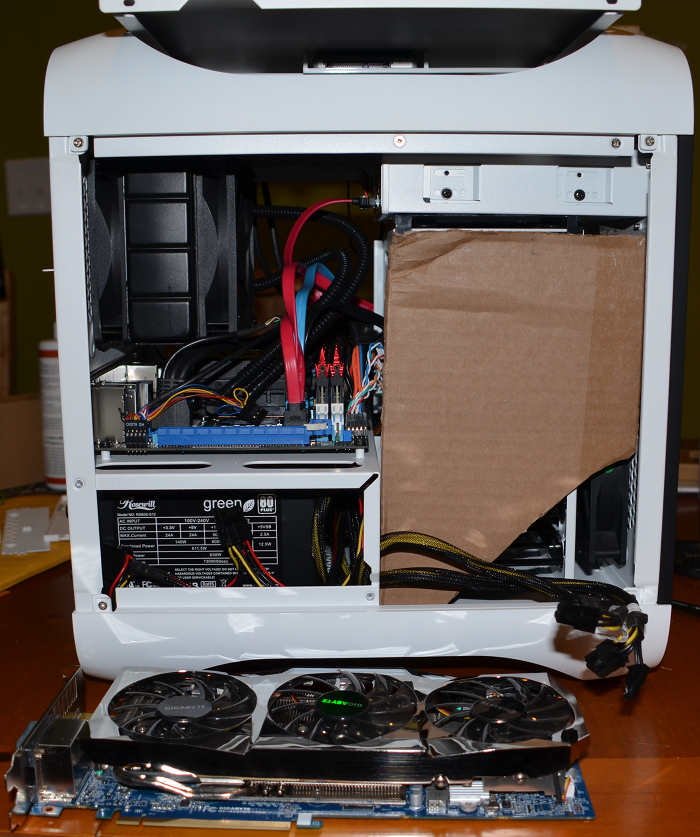
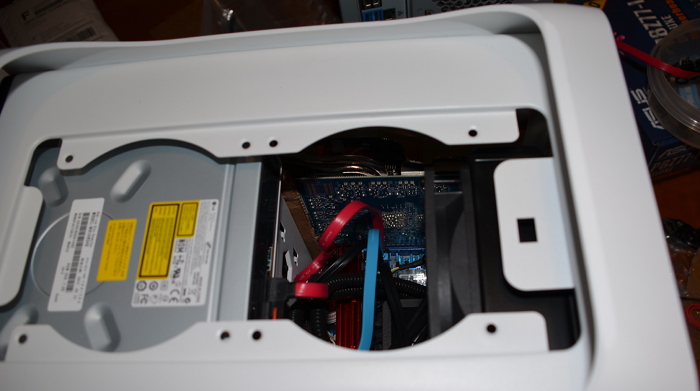
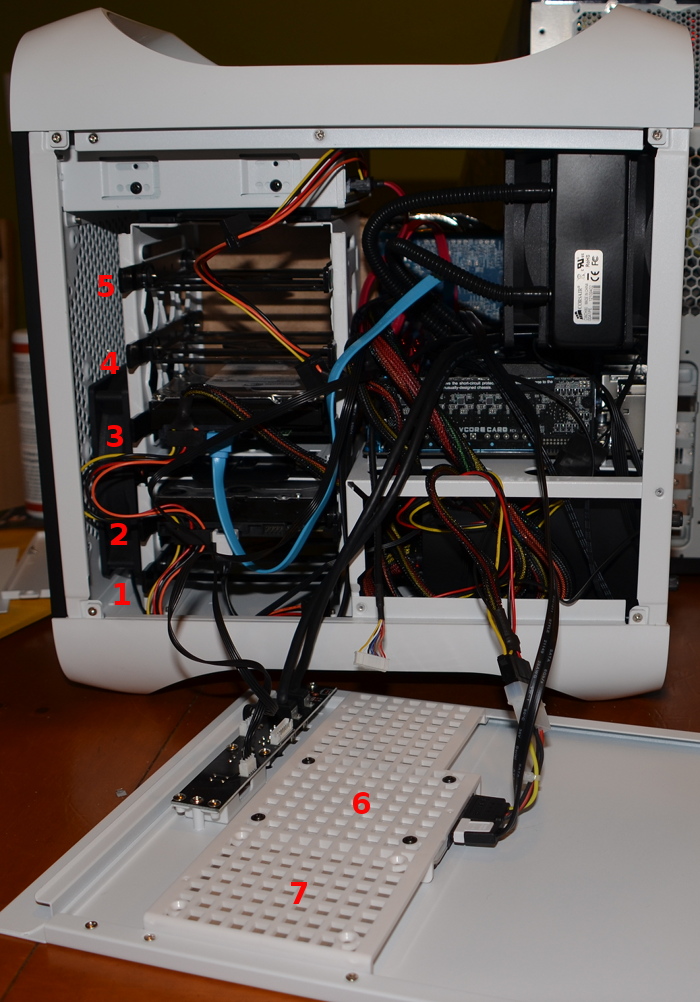
Bitfenix Prodigy White Case
http://www.newegg.com/Product/Product.aspx?Item=N82E16811345017
Rosewill Green Series RG630-S12 630W 80 PLUS Certified "Compatible with Core i7,i5" Power Supply
http://www.newegg.com/Product/Product.aspx?Item=N82E16817182200
ASUS P8Z77-I Deluxe LGA 1155 Intel Z77 HDMI SATA 6Gb/s USB 3.0 Mini ITX Intel Motherboard with USB BIOS
http://www.newegg.com/Product/Product.aspx?Item=N82E16813131840
Intel Core i7-3770K Ivy Bridge 3.5GHz (3.9GHz Turbo) LGA 1155 77W Quad-Core Desktop Processor Intel HD Graphics 4000 BX80637I73770Kp
http://www.newegg.com/Product/Product.aspx?Item=N82E16819116501
CORSAIR H80 (CWCH80) High Performance Liquid CPU Cooler
http://www.newegg.com/Product/Product.aspx?Item=N82E16835181016
G.SKILL Trident X Series 16GB (2 x 8GB) 240-Pin DDR3 SDRAM DDR3 2400 (PC3 19200) Desktop Memory Model F3-2400C10D-16GTX
http://www.newegg.com/Product/Product.aspx?Item=N82E16820231589
Intel 520 Series Cherryville SSDSC2CW240A310 2.5" 240GB SATA III MLC Internal Solid State Drive (SSD) - OEM
http://www.newegg.com/Product/Product.aspx?Item=N82E16820167088
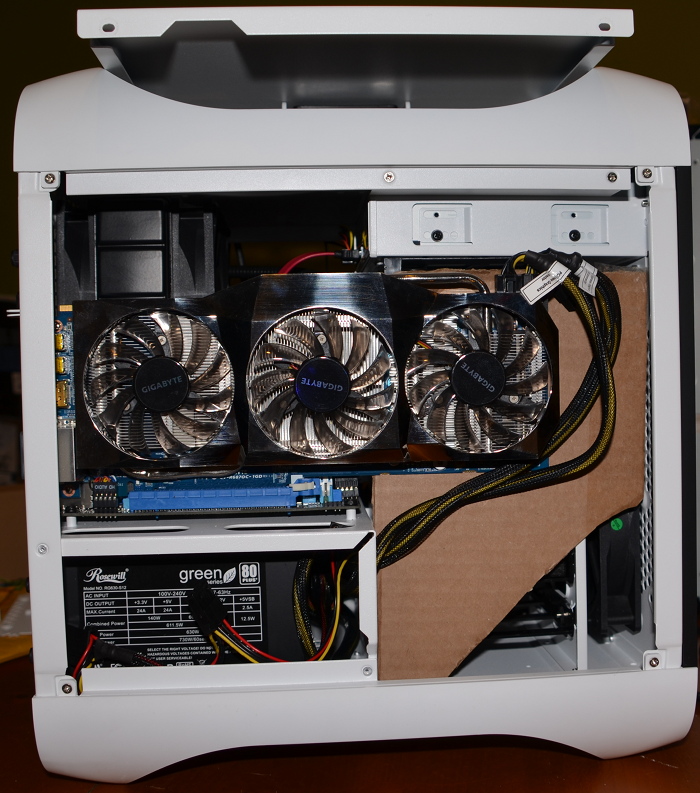
GIGABYTE GV-R687OC-1GD Radeon HD 6870 1GB 256-bit GDDR5
http://www.newegg.com/Product/Product.aspx?Item=N82E16814125357
Apple OS X Lion 10.7.4 @ Mac Apps Store
Mac App Store - OS X Lion
ADATA 16GB USB 3.0 Flash Drive
http://www.newegg.com/Product/Product.aspx?Item=N82E16820211572
LG SATA BDXL Blu-ray Burner,3D Play Back (WH14NS40) - OEM
http://www.newegg.com/Product/Product.aspx?Item=N82E16827136250
Mac BluRay Player
http://www.macblurayplayer.com/
Already Owned
ASUS BT-211 USB Bluetooth dongle
http://www.amazon.com/Asus-Mini-Bluetooth-Dongle-USB-BT211/dp/B0041UJVI2/ref=sr_1_1?ie=UTF8&qid=1346219083&sr=8-1&keywords=ASUS+USB-BT21
IOGear GUH287 USB Hub + Card Reader
http://www.amazon.com/IOGEAR-Card-Reader-GUH287-Black/dp/B00330OVIG/ref=sr_1_1?s=electronics&ie=UTF8&qid=1346219183&sr=1-1&keywords=iogear+guh287
Western Digital Caviar Black WD1002FAEX 1TB 7200 RPM 64MB Cache SATA 6.0Gb/s 3.5" Internal Hard Drive -Bare Drive
http://www.newegg.com/Product/Product.aspx?Item=N82E16822136533
StarTech SV431DVIUAHR 4 Port High Resolution USB DVI Dual Link KVM Switch with Audio
http://www.newegg.com/Product/Product.aspx?Item=N82E16817707176
Dell 3007 WFP-HC LCD Monitor
Dell 3007 WFP-HC | eBay
Matias Tactile Pro 3 Keyboard & random wheel mouse
Matias Tactile Pro 3
Comments
I initially started with the Zotac Z77 ITX motherboard as I liked it better due to the mSATA port. That board that I bought on amazon did not work, so I went back to newegg and ordered the ASUS (the ASRock ITX has the wrong Ethernet chip).
The Bitfenix Prodigy case requires a small Power Supply (depth of 140mm/5.51")
Initially, I wanted the i3570K (3.4GHz instead of 3.5GHz) but the comments from GSkill support in the reviews of the memory seemed to indicate that the memory was only certified for the 3770K +$130

The Bluray player is dirt-cheap ($59). The last one I had bought cost me several hundreds, and this one even burns 128GB disks.
Lion 10.7 install
Took me a while to be able to get it to work, so I've captured the exact process:
1.1 Go in BIOS, load Optimal defaults.
1.2 BIOS: Under Advanced/USB Configuration, disable Intel xHCI Mode and disable EHCI Hand-Off (Disabled by default in BIOS).
1.3 BIOS: Under Advanced/Onboard Devices Configuration, disable Asmedia USB 3
1.4 BIOS: I did not touch X.M.P. (Ai Tweaker/Ai Overclock Tuner).
1.5 BIOS: Under Boot disable "Wait For 'F1' If Error" (to avoid a potential catch-22: no keyboard detected, press F1 key to continue)
1.6 BIOS: while in 'Boot', make sure that your USB stick is recognized as the Boot Option #1, otherwise click on "Hard Drive BBS Priorities" to make your USB stick #1
2.1 USB stick made with UniBeast 1.4.0 on my Snow Leopard machine
2.2 Run BridgeHelper 5.0.0 to "USB" on my Snow Leopard machine to update the USB stick with an IvyBridge kernel (Unibeast install the standard Lion 10.7.4 kernel which crashes with IvyBridge CPUs)
2.3 copied BridgeHelper 5.0.0 and MultiBeast 4.6.1 on the USB stick too.
3.1 Boot on the "USB" stick. When at the beginning of install, go to menu Utilities, and pick "Disk Utility". Format partition/disk Quit "Disk Utility" and install Lion from stick.
3.2 I partitioned the 240GB as 32G for Lion and the rest for System, both formatted as HFS.
4. Reboot from USB stick -> USB, Utilities -> Terminal:
rm /Volume/Lion/mach_kernel
reboot
5.1 Reboot, At the Chimera prompt, do not pick the usual "USB" try boot from "Lion" hard drive - will fail with "Can't find" error and will return you to chimera prompt: USB/Lion. This second time, choose "USB" stick. That boots you to Lion from your hard drive in 1280x800, and to finish the install: I did not provide personal information, nor an apple ID, and created an "admin" account (different from my usual account). Identify directly connected keyboard as ANSI. Command-N to open a new finder window and navigate to the USB stick where BridgeHelper & MultiBeast are waiting.
5.2 In Lion, I run BridgeHelper 5.0.0 to update the HD to an IvyBridge kernel. it includes:
- Intel HD4000 kexts for testing
- Updated USB kexts for 7 series chipset (Intel Z77) USB ports.
- Patched AppleAHCIPort.kext for 7 series chipset (Intel Z77) SATA ports
5.3 Multibeast v4.6.1 (to install drivers and create a boot setup with Chimera)
Multibeast:
- Check System Utilites
- Open Drivers & Bootladers
- Open Kext & Enablers
- Open Audio
- Open Realtek ALC8xx
- Open Non-DSDT HDAEnabler
- Check ALC898
- Open Patched AppleHDA
- Check ALC898
- Open Disk
- I did NOT check IOAHCIBlockStorageInjector, as I believe that BridgeHelper 5.0.0 already takes care of that.
- Check TRIM support (My Intel 520 SSD supports TRIM)
- Nothing under Graphics
- Open Miscellaneous
- Check FakeSMC
- Open FakeSMC Plugins
- Check Motherboard plugins
- Check AMD Radeon plugins (I have an Gigabyte 6870 AMD Radeon card in the PCIE slot)
- Check HWMonitor application, which installs an app that hides in your menu bar and gives you info on the temperature/speed of your hardware)
- Open Patched AppleIntelCPUPowerManagement
- Check OS X 10.7.4 Ivy Bridge
- Open Network
- Check hnak's AppleIntelE1000e Ethernet
- Open Bootloaders
- Check Chimera v1.10.0 r1394
- Open Customization
- Open System Definitions
- Open Mac Pro
- Check MacPro 3,1 (This is the default from booting with the Stick, I have had problems in the past where TimeMachine refused to restore the backup complaining that the machine type was not the same as the one on which the backup was made).
- Open Themes
- Check tonymacx86 remixed.
Press the Continue button, Enter your password and let MultiBeast install…
7. Eject USB stick, Apple Menu -> Restart,
8.1 Up and running with my screen native (2500x1600) resolution is now detected and enabled by default
8.2 I downloaded SuperDuper and used it to clone the Lion as System. Created in /Extra an org.chameleon.boot.plist and made the "System" partition the default boot disk.
8.3 I created my personal user account on the "System" partition on the SSD and moved away the freshly created Music/Pictures/Public and replaced them with symlinks to the 1TB rotating harddrive various directories. That way my growing collection of Pictures, Music & Movies is on the regular harddrive, while the rest (small) of my account is on the ~200GB speedy SSD.
---
I've not yet tested sleep with Lion.
I've been playing with a light overclocking. I can with no troubles boost the memory from 1333MHz to 2400MHz. However any attempt to increase the CPU freq gives me a curious case of disappearing keyboard & mouse: during BIOS and Chimera both keyboard and mouse are present, but upon reaching the Apple login screen, I cannot enter my password as neither the mouse nor the keyboard react anymore.... Adding more keyboards/mouses are still not recognized....
Current GeekBench 32-bit score is 15854
The Asus MB comes with a min-PCIE card which is supposed to give me Bluetooth and Wifi. None work. no BT, no Wifi.
I'm connected by wired Ethernet.
The system is much more noisier than my previous Antec Solo build. I'm guessing the 3 fans on the 6870 are for something there...
There has definitively been something wrong with USB: very often my keyboard and mouse are not recognized upon boot.
Mountain Lion 10.8 install
I mostly followed the easy (Thanks tonymac and gang) instructions at http://www.tonymacx86.com/61-unibeast-install-os-x-mountain-lion-any-supported-intel-based-pc.html
Remove the ATi AMD Radeon 6870, and plug my screen in the DVI connector for the onboard HD4000.
Boot on the USB stick and choose your "MountainLion" disk partition.
Keep installing until you're at the desktop.
System Preferences -> Security
Click the lock to make changes. Enter your password.
Allow applications downloaded from: anywhere.
Multibeast v5.0.2 (to install drivers and create a boot setup with Chimera)
Multibeast:
- I did NOT check UserDSDST
- Open Drivers & Bootloaders
- Open Drivers
- Open Audio
- Open Realtek ALC8xx
- Open Without DSDT
- Check ALC898
- Open Disk
- Check TRIM Enabler (My Intel 520 SSD supports TRIM)
- Nothing under Graphics
- Open Miscellaneous
- Check FakeSMC
- Open FakeSMC Plugins
- Check Motherboard plugins
- Check AMD Radeon plugins (I have an Gigabyte 6870 AMD Radeon card in the PCIE slot)
- Check HWMonitor application, which installs an app that hides in your menu bar and gives you info on the temperature/speed of your hardware)
- Open Network
- Check hnak's AppleIntelE1000e Ethernet
- Open System
- Open Patched AppleIntelCPUPowerManagement
- Check OS X 10.8.0
- Open Bootloaders
- Check Chimera 1.11.1 r1394
- Open Customizations
- Open System Definitions
- Open Mac Pro
- Check MacPro 3,1 (This is the default from booting with the Stick, I have had problems in the past where TimeMachine refused to restore the backup complaining that the machine type was not the same as the one on which the backup was made).
- Open Themes
- Check tonymacx86.
Press the Continue button, Enter your password and let MultiBeast install…
After MultiBeast finishes, create a /Extra/org.Chameleon.Boot.plist using a terminal.
Code:
<?xml version="1.0" encoding="UTF-8"?>
<!DOCTYPE plist PUBLIC "-//Apple//DTD PLIST 1.0//EN" "http://www.apple.com/DTDs/PropertyList-1.0.dtd">
<plist version="1.0">
<dict>
        <key>Boot Banner</key>
        <string>No</string>
        <key>GraphicsEnabler</key>
        <string>Yes</string>
        <key>Kernel Flags</key>
        <string>PCIRootUID=1</string>
        <key>Timeout</key>
        <string>4</string>
        <key>GenerateCStates</key>
        <string>Yes</string>
        <key>GeneratePStates</key>
        <string>Yes</string>
        <key>Default Partition</key>
        <string>hd(0,3)</string>

</dict>
</plist>
Eject USB stick, Apple Menu -> Restart,
You should now boot from your internal HD.
Apple Menu -> Shutdown
Cut the power, and re-bolt in the ATi AMD Radeon HD6870
Reboot, and now I am using the PCI-express GPU, and I can boost the resolution from 1280x800 to 2560x1600.
Sleep does not work (fans keep running, and no way to wake up)
USB seems to work way better: my keyboard and mouse have yet to disappear...
Thanks! I would like to thank tonymac and the community here for all their support.
What does not work for me:
Sleep & Cpuspeed does not work for me. I understand that there are hacked UEFI bios that I could use, but I did not try those as sleep is not important to me.
The two USB 3.0 ASmedia ports are disabled in the BIOS. I have enough (4 x USB 3.0 & 4 x USB 2.0) ports already on the motherboard.
The built-in Wifi + Bluetooth are not recognized. I use wired Ethernet, so no need for Wifi. And I use a $10 USB dongle for bluetooth.
Overclocking: RAM has been overclocked at 2400MHz and is very stable. When using Lion, I was not able to overclock significantly the CPU without having stability issues.
Mountain Lion's Airplay mirroring. Despite updating to an iMac 12,2 system type and setting the integrated DVI port as the first port to init, I could not get the OS airplay mirroring working. The iTunes (and only iTunes) airplay mirroring does work fine and that is enough for me to send my iTunes movies to the Apple TV.
Edit Log:
2012Aug21: Added Mountain Lion install instructions.
2012Aug21: Added Mac BluRay Player & Bluray drive
2012Aug28: Added the Bluetooth and card reader that I forgot.
2012Aug28: Added a what does not work section.