
- Joined
- Oct 18, 2011
- Messages
- 12
- Motherboard
- GA-Z77N-Wifi
- CPU
- i5 3570k @ 4.2
- Graphics
- Zotaz GTX 660
- Mac
- Classic Mac
- Mobile Phone
Humlebien's Unkabunka Build: Core i5-3570K | GA-Z77N-Wifi | 8GB RAM | HD4000 - GTX 660 NEW
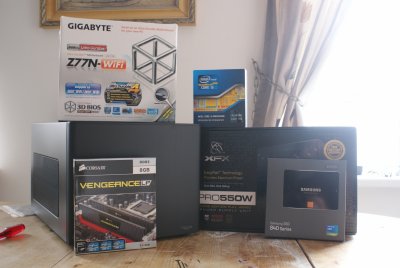
Components
Apple OS X Mountain Lion @ Mac Apps Store
https://itunes.apple.com/us/app/os-x-mountain-lion/id537386512
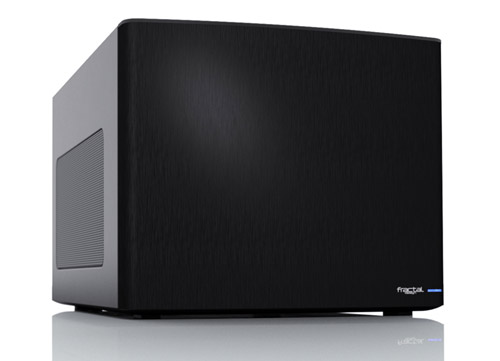
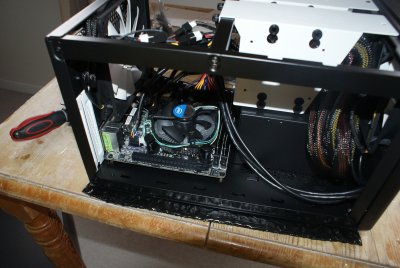
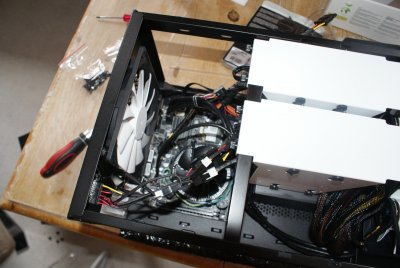
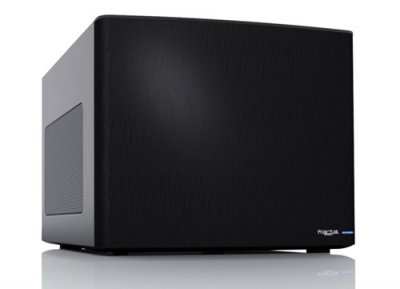
Case: Fractal Design Node 304
http://www.newegg.com/Product/Product.aspx?Item=N82E16811352027
Processor: Intel Core i5-3570K Ivy Bridge (Stock Cooler)
http://www.newegg.com/Product/Product.aspx?Item=N82E16819116504
Harddrive: Samsung 840 Basic SSD - 120GB
http://www.newegg.com/Product/Product.aspx?Item=N82E16820147188
Motherboard: GigaByte GA-Z77N-WIFI
http://www.newegg.com/Product/Product.aspx?Item=N82E16813128568
Memory: Corsair Vengeance 8GB DDR3 1600MHz (2x4)
http://www.newegg.com/Product/Product.aspx?Item=N82E16820233280
PSU: XFX ProSeries Core Edition FW - 550W
http://www.newegg.com/Product/Product.aspx?Item=N82E16817207013
Comments
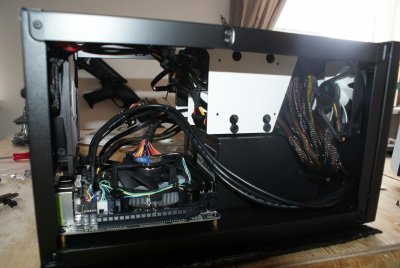
This is my first build. Using it for Xcode and Adobe Software for the most.
Used Bitterlemon's build as a Guide:
http://www.tonymacx86.com/golden-bu...ip-build-ga-z77n-wifi-i5-3570k-hd-6870-a.html
After assembling the components into the case, I set the BIOS using this guide:
http://www.tonymacx86.com/99-quick-g...55-boards.html
This is a build without use of DSDT.
This build went so smooth, much smother than i imagined!
Thinking about adding a 7xxx AMD Card when/if they are fully supported.
I chose the XFX 550W PSU in the last minute. My first Option was a cheap Corsair, but then i saw the new XFX PSUs is build with Seasonic components, and the price was about the same. i'm glad i did because its small and quiet!
Installation
Step 1 - BIOS
- First Load Optimized Defaults
- Set your Hardrive boot order to the P0: option (not UEFI)
Under Peripherals:
xHCI Mode = AUTO
xHCI Hand-off = Enabled
EHCI Hand-off = Enabled
Init Display = IGFX (if HD 4000)
VRAM = 64mb
Under Power Management:
High Precision Event Timer = Enabled
Power on by Keyboard = Any Key
Power on by Mouse = Move
Wake on LAN = Disabled (May not be there.)
Bios Features:
Intel Virtualization Technology = Enabled
VT-d = Disabled (ignore this if you have the Z77N-Wifi)
Overclock Configuration:
Extreme Memory Profile (XMP) = Profile 1 (to run at 1600 MHz)
change Turbo radio to 42 on all cores. (The Z77N-WIFI motherboard is NOT a great OC board max on 3570K was 4.2 stable.)
- Save & Exit
Step 2 - Unibeast
Follow this guide here http://tonymacx86.blogspot.dk/2011/10/unibeast-install-mac-os-x-lion-using.html
(you can put your DSDT file, Updates and Chimera installer in here as well.)
- Hit F12 to boot from USB
- Boot from Unibeast USB dongle (If you can’t get to the installer try with –v or –x –v)
- Format your drive.
- Install OSX Mountain Lion to your newly formatted Drive.
Step 3 – 10.8.3
- Install Update 10.8.3.
- Reboot machine.
- Boot on to Unibeast USB drive.
- Boot into OSX Mountain Lion .
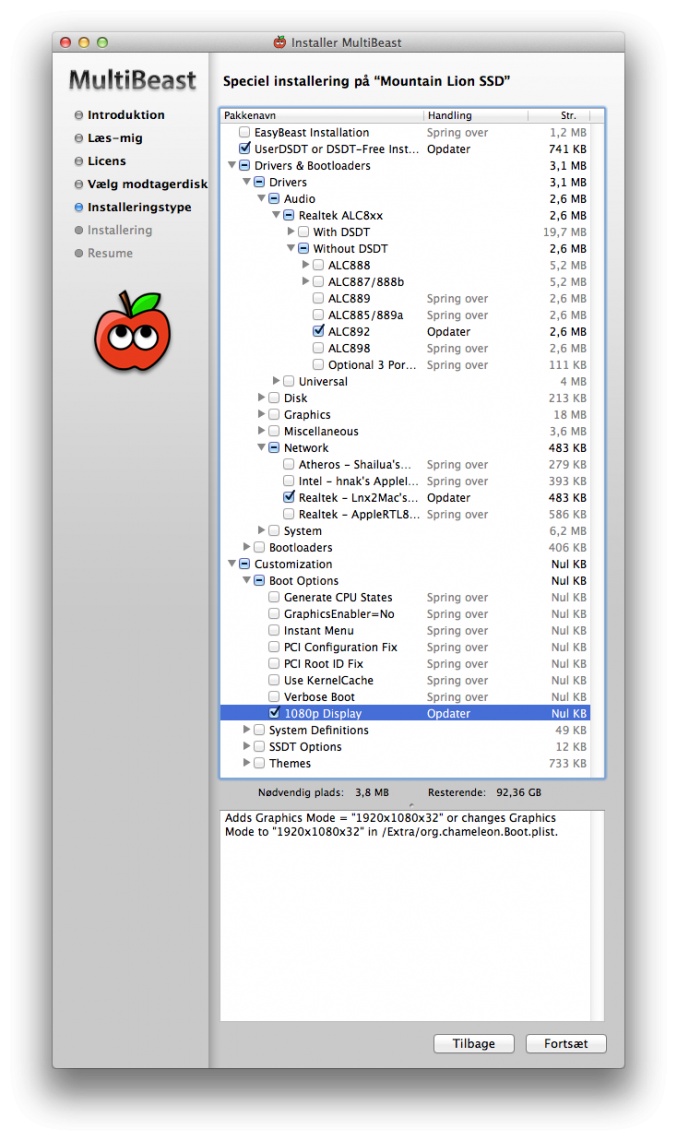
Step 4 – MultiBeast
- Start the latest MultiBeast.
Choose the following settings:
1. UserDSDT or DSDT-free installation
2. driver & bootloaders – drivers – audio – without DSDT – Realtek ALC8xx - ALC892
3. driver & bootloaders – drivers – network – Realtek AppleRTL8169Ethernet
4. Customization – Boot Options – 1080p Display
Info!
Choose “driver & bootloaders – drivers – audio – with DSDT – Realtek ALC8xx - ALC892”
if you have DSDT and want HDMI Audio (but be aware, you lose Sleep Functions.)
- Reboot when all installations are done.
- Boot on to Unibeast USB drive.
- Boot into OSX Mountain Lion .
Step 5 – Chimera
- Download and install latest Chimera.
- Reboot
- Now it should boot Mountain Lion without the Unibeast USB Drive.
Step 6 – Trim
- Use this to Enable Trim for Samsung SSD Drive: http://www.groths.org/trim-enabler/
You are now ready to enjoy!
Summary and Notes
UPDATE: 21/11-2014 - Installed "Antipop" to remove pop sound when Sound goes to sleep. Installed "Sound Siphon" to control HDMI Audio volume (Genies! way better than the outdated SoundFlower app).
UPDATE: 20/11-2014 - Made a custom DSDT and SSDT with many series7 fixes and enabled Nvidia/HD4000 HDMI sound, changed to Mac mini 6.2 for better speedstep - Changed Realtek ethernet driver to the new RTL8111 v.1.2.2.
- ATTACHED MY DSDT & SSDT FILES (Remember that SSDT is running 4.2GHz)
UPDATE: 12/05-2014 - Added a Zotac Nvidia GTX660 2gb - worked out of the box.
UPDATE: 06/06-2013 - Installed Realtek - AppleRTL8169Ethernet instead of the Lnx2mac's one, to eliminate an network error, where it would'nt reconnect if IP was lost, due to router restart.
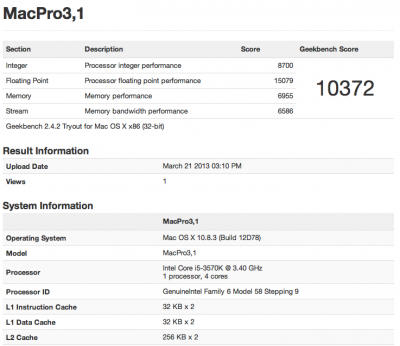
UPDATE: 29/03-2013 - Been using this build for a week now, and no big problems so far, there is some small things i would like to make better.
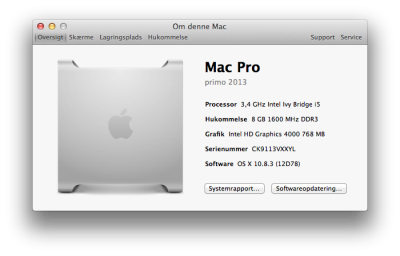
Fully Working:
OS X Mountain Lion 10.8.3
Intel HD4000
All Audio Jacks
Ethernet Connection (port #2 )
All USB 3.0 ports (full 3.0 speed with 3.0 devices) after DSDT, Ipads now charge via USB.
Apps/Updates from the App Store
Java, Flash, everything.
Thanks to tonymacx86.com and this wonderful Community!
Attachments
-
 DSC07449.jpg1 MB · Views: 544
 -
 DSC07450.jpg1 MB · Views: 528
 -
 DSC07451.jpg1.1 MB · Views: 423
 -
 DSC07452.jpg1 MB · Views: 339
 -
 Skærmbillede 2013-03-21 kl. 16.13.15.png75 KB · Views: 434
 -
 Skærmbillede 2013-03-29 kl. 13.59.29.png103.8 KB · Views: 457
 -
 Skærmbillede 2013-03-29 kl. 14.01.08.jpg192 KB · Views: 393
 -
 fractal.jpg15.6 KB · Views: 430
 -
DSDT.aml38.3 KB · Views: 200
-
ssdt.aml1.8 KB · Views: 196
-
org.chameleon.Boot.plist820 bytes · Views: 287
-
 MaciASL Sources.png27.3 KB · Views: 256
Last edited by a moderator:
