Contribute
Register

Sandybridge i5 - GA-P67A-UD4-B3 BIOS V. F3 - Limited Success

Status
Not open for further replies.
Joined
Mar 24, 2011
Messages
19
Mac
  1. 0
Classic Mac
  1. 0
Mobile Phone
  1. 0
See below for current details.

This is the box as it is configured for install. Same as my profile, except one WD Caviar Black 500GB SATA drive on a SATA2 port. When viewed in Windows 7, it shows as an unallocated drive with a GUID partition table in 'Disk Management', so the drive should be accessible for formatting.

I've followed these directions to the letter, including bios settings the '-x' and 'PCIRootUID=1' and both. Because I'd read on the forum that others had success using 8GB RAM with GA-P67A-UD4-B3, I even gave that a shot too.

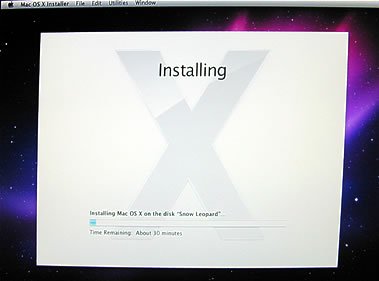
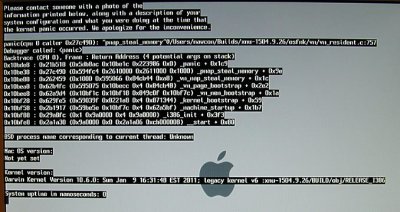
At the point where I insert the Snow Leopard install disc, the DVD chugs away for about 2-3 minutes, and then I get a gray screen with the apple logo that hangs forever - no spinning pinwheel.

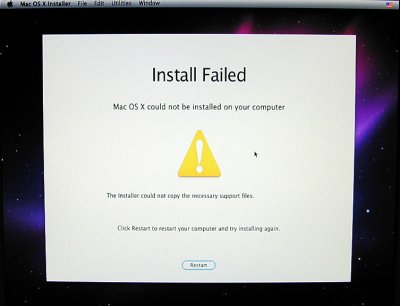
I'm looking forward to ferretting this out, but I was hoping someone might be able to point out whatever I might have forgotten for a sandybridge build. I am unable to get to step 8.

Is there some extra step I'm missing?
 
Re: Sandybridge i5 - stuck at gray apple icon during install

Okay, I did a little more searching and found this earlier post about sandybridge.

It basically says to use iboot-legacy iso instead of iboot with slighty different directions than the normal iboot-multibeast install method. But now, I have it at least installing. Woohoo!
 

Attachments

  • my.1st.hackintosh.awww.jpg
    my.1st.hackintosh.awww.jpg
    13.1 KB · Views: 297
Re: Sandybridge i5 - Install Failed - then, Kernel Panic...

I've run into some new challenges. I was having trouble with the hard drive, so I decided to make sure it actually worked. I formatted it for windows and transferred a file to the drive as a quick test. It seemed to work all right. I then disconnected all the hardware except the 500GB HD and began again with iBoot Legacy using 4GB.
iboot-legacy.jpg

I reformatted the HD to journaled, etc., and started the install. It took about an hour and then I got 'Install Failed'. See image attached.
Alert.jpg

Then I tried with 8GB, since this mobo is supposed to be able to do that. Everything happened exactly the same way, so I assume it has little to do with the increased memory. I've tried and repeated this several times. Sometimes I get 'ebios read errors' eight times before the Mac OSX DVD is recognized. Sometimes I don't. It goes away too fast to get a photo. Occasionally, I get this kernel panic message too. (See a photo of that below as well.)
kernel-panic-screen-half-size.jpg

My system is in the profile and linked in the first post of this thread - and here.

I would be grateful for assistance with the kernel panic and anything else I might have missed.

Cheers.
 

Attachments

  • kernel-panic-screen-half-size.jpg
    kernel-panic-screen-half-size.jpg
    80.7 KB · Views: 283
  • Alert.jpg
    Alert.jpg
    94.6 KB · Views: 289
  • iboot-legacy.jpg
    iboot-legacy.jpg
    118.6 KB · Views: 315
Re: Sandybridge i5 - Install Failed - then, Kernel Panic...

Yoga said:
All I can recommend is to try again, using Gordo's guide. Your system is very similar.

viewtopic.php?f=79&t=16323
Yoga, Thanks for your reply. Following those directions gave me a kernel panic too. However, when did it without using "GraphicsEnabler=No maxmem=4096" at boot, I was able to get much further than previously before it gave me the install failed screen again. Since I'm using an ATI 5770, it's native to Mac.

I am beginning to wonder if something might be unusual with my bios because of the ebios read errors. I'm also wondering if it might have to do with the hard drive. It's supposed to be SATA3 capable, but it will only work in the SATA2 port. I'm assuming it doesn't matter whether I use a cable marked 'SATA3' or 'SATA2'. Others have suggested that any SATA cable will work with SATA2 or SATA3.

So I'm still reading, researching and looking for solutions. Again, Thank you. I'd be grateful any other insights.

Cheers.
 
Re: Sandybridge i5 - Install Failed - then, Kernel Panic...

That pmap error happened to me once before, I had no way of getting around it. The only fix was to mount the SSD in an eSata enclosure and complete the install from another Mac (OS X is great here, you can run the OS installer on an existing system and point to an external HDD/SSD as the target. Same goes for combo update, BridgeHelper and MultiBeast).

Not the best advice I know, as you need someone with a Mac handy, plus the enclosure (USB enclosures can be bought for about £20 if you're willing to try this route).

Otherwise, the only thing that springs to mind is that you have some temperamental RAM. Have you tried using only one single stick, and different sticks?
 
Re: Sandybridge i5 - Install Failed - then, Kernel Panic...

Yoga said:
That pmap error happened to me once before, I had no way of getting around it. The only fix was to mount the SSD in an eSata enclosure and complete the install from another Mac (OS X is great here, you can run the OS installer on an existing system and point to an external HDD/SSD as the target. Same goes for combo update, BridgeHelper and MultiBeast).

Not the best advice I know, as you need someone with a Mac handy, plus the enclosure (USB enclosures can be bought for about £20 if you're willing to try this route).

Otherwise, the only thing that springs to mind is that you have some temperamental RAM. Have you tried using only one single stick, and different sticks?
I don't have access to a mac. Bummer. I've decided to buy another brand of ram - Corsair Vengeance. I'll use a stick of that to see if it can get me going. This is also my work computer, so I'm having to do it when I have the time - hence the sporadic replies. Please stand by...
 
Re: Sandybridge i5 - Install Failed - then, Kernel Panic...

gr33nman said:
Yoga said:
That pmap error happened to me once before, I had no way of getting around it. The only fix was to mount the SSD in an eSata enclosure and complete the install from another Mac (OS X is great here, you can run the OS installer on an existing system and point to an external HDD/SSD as the target. Same goes for combo update, BridgeHelper and MultiBeast).

Not the best advice I know, as you need someone with a Mac handy, plus the enclosure (USB enclosures can be bought for about £20 if you're willing to try this route).

Otherwise, the only thing that springs to mind is that you have some temperamental RAM. Have you tried using only one single stick, and different sticks?
I don't have access to a mac. Bummer. I've decided to buy another brand of ram - Corsair Vengeance. I'll use a stick of that to see if it can get me going. This is also my work computer, so I'm having to do it when I have the time - hence the sporadic replies. Please stand by...

Good luck :¬)
 
Yoga said:
Good luck :¬)

Okay, I've managed to get it installed on my machine, but I've still got some ways to go to get it fully functional.

Here are the steps that worked for me:
  1. Buy Snow Leopard Install DVD.[/*:m:29ld2gjc]
  2. Download these items:
    • iBoot 3.0.1 (Also: Make this iso into a CD.)[/*:m:29ld2gjc]
    • BridgeHelper-2.1.0.zip[/*:m:29ld2gjc]
    • MultiBeast-3.5.2.zip[/*:m:29ld2gjc]
    • MacOSXUpd10.6.7.dmg[/*:m:29ld2gjc]
    • MacOSXUpd10.6.7MBPEarly2011.dmg[/*:m:29ld2gjc]
    • DSDT.aml from Stylusrowm's install.[/*:m:29ld2gjc]
    • Unzip all these downloads. Put everything except the iBoot iso onto a thumb drive.[/*:m:29ld2gjc]
    [/*:m:29ld2gjc]
  3. Set the BIOS:
    • Flash BIOS to latest version: F3.[/*:m:29ld2gjc]
    • PCH SATA Control Mode: ACHI[/*:m:29ld2gjc]
    • First Boot Device: CDROM[/*:m:29ld2gjc]
    • Second Boot Device: Hard Disk[/*:m:29ld2gjc]
    • ACPI Suspend Type: S3(STR)[/*:m:29ld2gjc]
    • HPET Support: Enabled[/*:m:29ld2gjc]
    • HPET Mode: 64-bit Mode[/*:m:29ld2gjc]
    • Performance Enhance: Standard[/*:m:29ld2gjc]
    • CPU Clock Ratio: 32x[/*:m:29ld2gjc]
    • Extreme Memory Profile: Disabled[/*:m:29ld2gjc]
    [/*:m:29ld2gjc]
  4. Set up my hardware:
    • One Monitor, One Keyboard, One mouse[/*:m:29ld2gjc]
    • One 500MB Hard Drive, SATA3[/*:m:29ld2gjc]
    • 8GB RAM - Corsair Vengeance - (Blue Fins)[/*:m:29ld2gjc]
    • Unplug all other hard drives, pci cards, microphones, peripherals, etc.[/*:m:29ld2gjc]
    [/*:m:29ld2gjc]
  5. Start the install:
    • Boot with iBoot 3.0 cd[/*:m:29ld2gjc]
    • At iBoot screen, eject iBoot cd and insert Snow Leopard Install CD.[/*:m:29ld2gjc]
    • When the CD has revved up, press the F5 key to rescan available drives.[/*:m:29ld2gjc]
    • Select OS X Installer and allow it to boot.[/*:m:29ld2gjc]
    • When the Installer Desktop appears, choose 'Utilities -> Disk Utility'[/*:m:29ld2gjc]
    • Select the hard disk.[/*:m:29ld2gjc]
    • Select 'Partition' tab.[/*:m:29ld2gjc]
    • Click Options and select GUID Partition Table[/*:m:29ld2gjc]
    • Since this is a 500GB Disk, we do not exceed the 1TB limit. Create a single partition using the entire disk. [/*:m:29ld2gjc]
    • Make sure 'Mac OS Extended (Journaled) is selected.[/*:m:29ld2gjc]
    • Click 'Apply' to partition the disk.[/*:m:29ld2gjc]
    • When it's done, quit out of the Disk Utility.[/*:m:29ld2gjc]
    • In the Installer window, click 'Continue' and 'Agree'.[/*:m:29ld2gjc]
    • This took about 20 - 30 minutes to install. It will ask you to restart.[/*:m:29ld2gjc]
    • Remove the OS X Installer Disk, insert the iBoot 3 CD, and reboot.[/*:m:29ld2gjc]
    • Select the Snow Leopard hard drive. (No Bling Video Appeared for me.)[/*:m:29ld2gjc]
    • It boots into OS X 10.[/*:m:29ld2gjc]
    [/*:m:29ld2gjc][/list:eek::29ld2gjc]
    This is as far as I have gotten with success.
    I've tried a number of strategies thereafter, and now could use some suggestions as to the best method for continuing.

    What I've learned along the way:
    • The Early 2011 combo update (MacOSXUpd10.6.7MBPEarly2011.dmg) does not work for me. I get 'This software is not supported on your system'. [/*:m:29ld2gjc]
    • I tried using stylusrowm's dsdt.aml with detrimental results, probably due to the fact that my BIOS version is F3, not F2, so I am opting for EasyBeast.[/*:m:29ld2gjc]
    • While I'd like to do all the easybeast stuff at once, I'm guessing it may be better to do a little of it at a time to see what works and what doesn't.[/*:m:29ld2gjc]
    • Upon restart after install, the audio starts out with a bunch of loud random measured ticking. After a while, the audio stops. I could use suggestions on how to continue with audio.[/*:m:29ld2gjc]
    • Regardless of what keyboard I use, during the install, I have to unplug and re-plug the keyboard a couple times during the procedure in order for the installer to recognize the keyboard. I have a microsoft keyboard and an HP keyboard. Neither of them is USB, though I could use an adapter to make one USB if that will make a difference. Thoughts?[/*:m:29ld2gjc]
    • I'm not sure whether I need to install any ATI stuff for my machine, since the ATI Radeon HD 5770 is supposed to be native to apple. When I do add those on multibeast, I get weird graphic results and have to start all over. However, while my video shows up fine during the install, I can hear that the fan seems to be going at 100% on the GPU. If I attempt 'GraphicEnablers=no' at install, I get nothing. I could use suggestions on what to do for this graphics card.[/*:m:29ld2gjc]
    • It doesn't matter whether I use 4GB or 8GB RAM, so long as I use the Corsair Vengeance RAM. Results are identical for any install.[/*:m:29ld2gjc]
    • After installing MacOSXUpd10.6.7.dmg and bridgehelper without closing, as soon as I open multibeast, I get a fault that closes all installers. I have to restart multibeast. Invariably, after I get to this point I cannot boot into my new mac system, with or without iBoot.[/*:m:29ld2gjc]
    • The G.Skill RAM doesn't seem to work for installs.[/*:m:29ld2gjc]
    • The install goes much faster for me using the SATA3 disk on a SATA3 port.[/*:m:29ld2gjc]
    • I don't have to reformat the hard drive between attempts to install, but it helps to delete all files from the previous install if I want a clean install. So if the drive is already formatted, I just go to the 'Erase' tab and erase all the files instead.[/*:m:29ld2gjc]
    • When I use multibeast to install Chameleon 2.0 RC5 - Sandy Bridge, PCI Root ID fix for Chameleon and Chameleon Instant Menu, it doesn't boot without iBoot. I get an endless gray screen with the whirring wait icon. I'm not sure this is a chameleon thing or something else. I could use suggestions on how to get the machine to boot on its own.[/*:m:29ld2gjc]
    • Update: When attempting this work-around, /Extra/smbios.plist does not exist. The /Extra folder does not exist, even as a hidden folder.[/*:m:29ld2gjc]

    I'm going to try some more things but in essence, I could use suggestions about the strategy behind why certain things are done so I can figure out how to get networking and sound up and running.
 
To get this working:
Make a fresh install.
Use latest multibeast (3.5.2 atm) and install easybeast + latest macbooks smbios
Install bridgehelper.

Make sure you have graphics enabler = yes
Everything will be ok, except sound, sleep, pwm, and ethernet.

Reboot
Cross your fingers.
If it's fine, try to make a DSDT using dsdt SE and google.
 
Status
Not open for further replies.
Back
Top