EDIT 11/12/2020
This is a
HUGE thread and realized that I haven't update the first post in
years.
Hackintoshing has come a LONG way since this thread started.
It is now possible to have a really clean solid hackintosh with this board.
I've been using it for years, and it's still my main system.
Nowadays, it's all OpenCore. This post shares my experience with BigSur on OpenCore 0.6.3
getting a rx580 would solve this, but, from what I read, it's a very minor or zero upgrade to the 970 ... Yeah, I got an RX580, I've always used AMD cards since Apple has supported them the whole time. I would probably have gone with Nvidia otherwise. Good to know about the open core and...

www.tonymacx86.com
EDIT 03/16/2015
By popular-ish demand I've included all my settings.
This is for clover USB UEFI booting a stock 2600k processor. You should always adapt this for you own needs.
Basically, just format a USB drive to 1 partition, click on options, and make it a GUID partition table.
Make the partition a MacOS exttended (journaled) and call it clover for example.
Get the clover installer. Change the install location to that usb drive
click on customize.
You need to have the first two option ticked. (Install for UEFI booting only, install clover to the ESP)
At this point, we don;t care about the other options because you are going to flush out all that with the attached files.
INSTALL
Start Clover Configurator
it will ask you to mount the EFI partition. Click mount EFI partition.
It then goes to the mount EFI partition of clover configurator, and you click on mount efi partition
In finder, you should now have a EFI volume mounted. Delete that that EFI folder and copy my EFI folder there.
View attachment 130649
Back in clover configurator, go to FILE -> Import Configuration
Browse to /Volumes/EFI/CLOVER/config.plist
I left out this info for obvious reasons.
<key>SerialNumber</key>
<string></string>
<key>SmUUID</key>
<string></string>
You should gererate your own using Clover Configurator.
Click on SMBIOS section, the click on the magic wand to the right.
Select the imac picture on the left. This board is an iMac12,2
If you have another processor other than a 2600k, you might want to replace
/Volumes/EFI/EFI/CLOVER/ACPI/patched/SSDT.aml
with an appropriate SSDT.aml
It's all patched for onboard audio, trim, etc. You can mayme remove the second APPLEHDA kernel patch (DE10EA0B...) it was a hex edit to get audio on my quadro working. You could use it and swap the target for your own nvidia device id though (replace DE10E50B)
There is a patched DSDT in there that is pretty solid, it enables HDMI/DP audio.
Here are my bios settings, I've got PXE enabled, but if you're not using that, feel free to disable.
View attachment 130651
Plug the USB drive in a USB2 port!
FOLLOWING IS OLD!
EDIT 02/13/2015: Clover
Good success using Clover look at this post further along in the thread.
http://www.tonymacx86.com/general-help/21075-ga-z68xp-ud3p-owners-110.html#post983924
EDIT 08/30/2012: Mountain Lion and UEFI Bios
There has been a HUGE development in the ongoing story for this board.
Gigabyte has released a UEFI bios and it makes this board osx compatible with no DSDT! ")
http://www.gigabyte.com/products/product-page.aspx?pid=3912#bios
I used freedos to install this. You can't just flash it in flash as far as I know. Takes about 2-3 minutes.
Loading optimized defaults, setting everything to ahci, you should be ready to install Mountain lion from USB.
I've attached a screenshot of the multibeast options I used and well, it's the easiest osx install I've ever done.
GA-Z68XP-UD3P - bios U1e Multibeast options.png
In my testing, the smbios.plist for this board is macpro3,1. Imac 12,2 would make sense, but on my setup, the computer goes to sleep and immediately wakes up again. Not so with macpro3.1.
You should looking into generating your own .plist file using chameleon wizard to get a random serial number. THis helps with iCloud/appstore
Just thought I'd update the 1st post since this thread is ginormous and wouldn't want new owners wasting time with old news.
UEFI : FTW!
UNaltered original posts pre-Mountain Lion 10.8
Ok, so the thread got huge, and a lot was said.

Thanks to all that contributed into getting this puppy up and running.
First, install steps, the easiest is probably the following :
-Update the motherboard bios
-Create a standalone unibeast usb drive for a direct install. There are other ways to get a proper usb install stick too.
-When done, why not put the lastest multibeast and dsdt on the usb key?
-Install Lion, boot into it.
-Get the dsdt from this site, rename it to dsdt.aml and place it on the desktop.
-Run multibeast and select the options in the attached image.
Some info :
Audio :
All you need is ALC8xxHDA if you are using the dsdt. Ditch the rollback.
Things have changed, use this for audio
http://tonymacx86.blogspot.com/2012/01/new-optimized-audio-drivers-for-onboard.html It's a drop in replacement for applehda. Don't forget to fix permissions and update kernel cache.
Also included in the attachments is an applehda for those with nvidia gfx cards. It needs a dsdt enabling hdmi-audio on pcie-x16. This dsdt is included in this post. Absolutely all credit goes to Toleda for this.
IOAHCIBlockstorageinjector : Use this so your drives don't look like external drives, cosmetic, but would be cool to have this in the dsdt properly... anyone?
TRIM ENABLER : If you have a ssd
OpenCL enabler : If you're into that
 FakeSMC and related plugins
 : Absolutely mandatory but not the plugins, although they come in handy say, when overclocking among other things (BELOW)
USB 3.0 drivers, you can use these, but for some reason, the one included in this post offer way more performance and stability. Ongoing.
AppleRTC patch. You need this or suffer bios resets and much frustration.
 Network :
Absolutely use the Realtek 2.0.6 for 10.7 if ou want your usb to work properly waking from sleep.
(This single thing kept me on snowleopard for almost 6 months it was annoying me so much)
Chimera, you need a bootloader
/Extra/org.chameleon.Boot.plist
You can check the boot.plist options or take mine as a base. These work great, modify gfx resolution. Adding darkwake=0 makes the screen come up faster, or if you've had to click the mouse twice to make the box resume, this solves it.
Code:
t<?xml version="1.0" encoding="UTF-8"?>
<!DOCTYPE plist PUBLIC "-//Apple//DTD PLIST 1.0//EN" "http://www.apple.com/DTDs/PropertyList-1.0.dtd">
<plist version="1.0">
<dict>
    <key>Kernel</key>
    <string>mach_kernel</string>
    <key>Kernel Flags</key>
    <string>npci=0x2000 darkwake=0</string>
    <key>GraphicsEnabler</key>
    <string>Yes</string>
    <key>Timeout</key>
    <string>2</string>
    <key>Legacy Logo</key>
    <string>Yes</string>
    <key>EthernetBuiltIn</key>
    <string>Yes</string>
    <key>GenerateCStates</key>
    <string>Yes</string>
    <key>GeneratePStates</key>
    <string>Yes</string>
    <key>UseKernelCache</key>
    <string>Yes</string>
    <key>Graphics Mode</key>
    <string>1920x1200x32</string>
</dict>
</plist>
System definitions
Ok so this isn't really definitive, but here's my experience :
You either want imac12,2 or macpro3,1
Either will work, but on my rig with a quadro 4000, imac12,2 results in sluggish graphics.
Go macpro3,1 first and call it a day. Seriously. It works.
BONUS : Overclocking 
These settings have been verified stable by a lot of owners in the thread and I include them here since it's a a free performance boost that should give you around 16 000 in geekbench 64, if you've got a decent cooler.
Example, but there are a lot like this, just get something that fits in the case. All I can say is that this one is cheap, easy to install and provides wiggle room for ram sticks that have coolers on them :
http://www.newegg.ca/Product/Product.aspx?Item=N82E16835233082
The settings come from this thread :
http://forums.tweaktown.com/gigabyte/46051-gigabyte-z68xp-ud3p-2600k-oc-settings.html
Code:
GIGABYTE GA-Z68X-UD3P-B3
MB Intelligent Tweaker
CPU Clock Ratio .....................................:45
CPU  Frequency.......................................:4500Mhz
PWM Frequency Control................................: [Auto]
CPU Over Current Protection..........................: [Auto]
Internal CPU PLL Overvoltage.........................: [Disabled]
Real Time Ratio Changes In OS .......................: [Enabled]
Intel(R) Turbo Boost Tech ...........................: [Disabled]
Turbo Ratio (Core 1).................................: [Auto]
Turbo Ratio (Core 2).................................: [Auto]
Turbo Ratio (Core 3).................................: [Auto]
Turbo Ratio (Core 4).................................: [Auto]
Turbo Power Limit (Watts)............................: [Auto]
Turbo Current Limit (Amps)...........................: [Auto]
CPU Cores Enabled ...................................: [All]
CPU Multi Threading..................................: [Enabled]
CPU Enhanced Halt (C1E) .............................: [Auto
C3/C6 State Support .................................: [Auto]
CPU Thermal Monitor .................................: [Auto]
CPU EIST Function ...................................: [Auto]
Bi-Directional PROCHOT ..............................: [Auto]
Advanced Frequency Settings Sub Menu (Continued)
BCLK/DMI/PEG Clock Control ..........................:[Disabled]
BCLK/DMI/PEG Frequency(0.1MHz) ......................: 100
Extreme Memory Profile (X.M.P.).........................:[Disabled]
System Memory Multiplier (SPD) .........................:16.00
Memory Frequency(Mhz).....................................:1600


Extreme Memory Profile (XMP).........................: [Disabled]
System Memory Multiplier (SPD) ......................: 16.00
Performance Enhance .....................................: Turbo
DRAM Timing Selectable (SPD) ........................: Quick
Channel Interleaving .......................................: [Auto]
Rank Interleaving ............................................: [Auto]


CAS Latency Time .............................: 9
tRCD ................................................: 9
tRP ..................................................: 9
tRAS ................................................: 27
tRC ..................................................: [Auto]
tRRD ................................................: [Auto]
tWTR ...............................................: [Auto]
tWR .................................................: [Auto]
tWTP ................................................: [Auto]
tWL ..................................................: [Auto]
tRFC .................................................: [Auto]
tRTP .................................................: [Auto]
tFAW ................................................: [Auto]
Command Rate (CMD) ........................: 2
IO Latency .........................................: [Auto]
Round Trip Latency .............................: [Auto]


CAS Latency Time ...............................: 9
tRCD ..................................................: 9
tRP ....................................................: 9
tRAS ..................................................: 27
tRC ....................................................: [Auto]
tRRD ..................................................: [Auto]
tWTR .................................................: [Auto]
tWR ...................................................: [Auto]
tWTP .................................................: [Auto]
tWL ...................................................: [Auto]
tRFC ..................................................: [Auto]
tRTP ..................................................: [Auto]
tFAW .................................................: [Auto]
Command Rate (CMD) .........................: 2
IO Latency ..........................................: [Auto]
Round Trip Latency ..............................: [Auto]


CPU
Multi-Steps Load-Line ...........................: [Level10]
CPU Vcore ...........................................: 1.320v
x Dynamic Vcore (DVID)...........................: 0.00v
QPI/VTT Voltage 1.050v .......................: 1.050
System Agent Voltage 0.920v ................: 0.925v <-- Should I decrease this to 0.920 ?
MCH/ICH
CPU PLL 1.800v ....................................: 1.800v
DRAM
DRAM Voltage 1.500v ...........................: 1.580v
DRAM Termination 0.750v .....................: [Auto]
Ch-A Data VRef. 0.750v ........................: [Auto]
Ch-B Data VRef. 0.750v ........................: [Auto]
Ch-A Address VRef. 0.750v ...................: [Auto]
Ch-B Address VRef. 0.750v ...................: [Auto]


Isochronous Support ............................:  [Enabled]
Virtualization Technology .....................:  [Enabled]
CAVEATS :
1- What's up with all that FireWire GUID ffffffffffffffff is invalid! crap?
Anyone know how to solve this?
2- Does your keyboard wake from sleep like 10 seconds after your monitor? If so, check without your BT adapter. Slows my wake... YMMV
ORIGINAL POST
Hey, been lurking a while, but have been in the scene since deadmoo.
The progress made since then is astonishing.
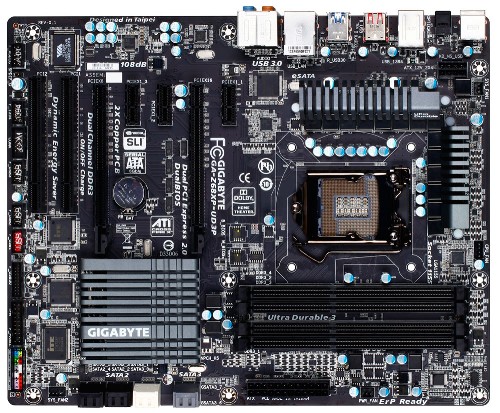
Sold off my previous build, and now bought this board.
http://www.gigabyte.com/products/product-page.aspx?pid=3912#sp
There´s no dsdt on this site yet, but these gigabyte boards are so similar I figured what the hey, I´ll spring for this one, it has 8 sata ports.
I´ll be adding to this thread as I go, the parts are on their way.
Agility 3 sata3
Quadro 4000 (Want display port to hdmi on this WITH audio, I have a feeling this is going to be fun  )
)
If you´ve got this board, feel free to say hello!!
Hey, been lurking a while, but have been in the scene since deadmoo.
The progress made since then is astonishing.
Sold off my previous build, and now bought this board.
http://www.gigabyte.com/products/product-page.aspx?pid=3912#sp
There´s no dsdt on this site yet, but these gigabyte boards are so similar I figured what the hey, I´ll spring for this one, it has 8 sata ports.
I´ll be adding to this thread as I go, the parts are on their way.
Agility 3 sata3
Quadro 4000 (Want display port to hdmi on this WITH audio, I have a feeling this is going to be fun )
If you´ve got this board, feel free to say hello!!