- Joined
- May 27, 2010
- Messages
- 2,364
- Motherboard
- Dell Optiplex 9030 All in One
- CPU
- i5-4690K
- Graphics
- HD 4600
- Mac
- Classic Mac
- Mobile Phone

This project has been complete (more or less) for some time now.
The aims of it were to re-use the G5 water cooler and build it around my Zotac z77 board with a Kepler 660 GTX card. There are not too many mini ITX cases out there that allow the use of a dual slot card as well as water cooler and I have often thought that there might be a demand for this sort of case.

Here is the Component list at the moment (I'll add model numbers and links after the thread is up and running):
MSI 660 GTX
Zotac Z77 - ITX
64gb mSATA card
64gb Crucial SSD
500GB HD
1TB HD
9.5mm slim DVD RW drive
Silverstone 450W modular PSU
Recycled G5 cooling radiator and pump
Zalman CPU block
Pump top reservoir for G5 pump
Acrylic sheets in 3, 5 and 10mm thickness.
As you can see from the component list I wanted this build to be fully featured to test out some design concepts (I could actually have included an extra 2.5 drive to make it 4 disk drives!) but also leave the option to have a version that looked minimalistic.
The design revolves around having the boot drive and DVD drive completely concealed within a compartment underneath the ITX board and then any other large drives are optional so that if they are not used anyone can look into the perspex case and see a very clean build.

The base of the build has a sandwich construction with a 3mm bottom board, a 10mm intermediate board shaped to take boot drive and DVD drive and a 5mm top board that takes the mobo, cooler, graphics card and other bits and pieces. Cavities and entry/exit holes in the different layers provide cable routing and component specific functions.

The concept is that power and data cables for the drives disappear into the base which to the casual observer looks solid. The base however is shaped to fit the component outlines and by using 9.5mm drives housed within a 10mm perspex layer no fixings are needed to hold the drives in position as their movement is restricted by the case around them.
Ideally the bottom layer would, instead of being a perspex layer be a PCB layer with integrated connectors so that there would be no need for cables to be routed around inside the layered sandwich.
I did not want to use a metal skeleton or a metal IO shield for this case so I had to work out how to best construct a perspex 3D case without glue.
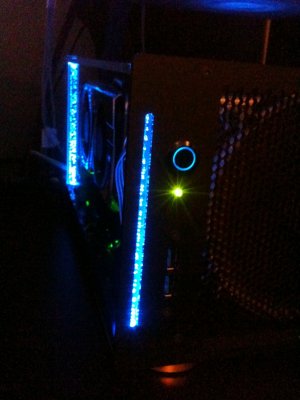
I decided to make the case from an outer skeleton of components that revolved around the use of some 12mm perspex “bubble rods” to provide a visual break at the four corners and to light them invisibly from underneath with blue LEDs. These rods were drilled top and bottom to take 3mm threaded inserts and those were used to fix a top canopy piece in place.


The canopy has a construction that allows front and back panels to be screwed to it, and has slots to allow side wall panels to be inserted. The case can run with the side panels on or off depending on the look that is wanted.
Because one of the aims was to have a relatively powerful system I did not opt for the often used pico power supplies but wanted 400w or more of power and an effective cooler.

The great candidate for this is the Silverstone modular range of micro ATX supplies and to incorporate that I used the canopy panel to suspend the PSU from as well as the usual mount points on the rear.
Also on the canopy you will see removable plate that can be used with a hot swap connection to mount externally any size of hard drive. This makes messing around with different operating systems or system tweaks a doddle as you can just stick a hard drive temporarily on the roof! The plate also has room on the underside to suspend a hard drive inside the enclosure

As you can see with the left side panel off, the G5 cooling system adds quite a lot of bulk to this build, but not having a separate water reservoir helps.
Instead I opted for a tank top reservoir. I mounted the pump via some vibration isolating rubber strips. However, if you still have the original mac under housing for the pump, I’d suggest you use that as it has vibration isolating springs inside it. Unfortunately in my build those springs had rusted away completely........but this is what the pump looked like before removing the spring housing and replacing the top part with the reservoir:

The pump is rated at 10w, which actually makes the water cooler suitable for even low power picopsu set ups if you want to.

The CPU block I used was a Zalman socket 1155 item that was relatively cheap but simple to fit. Here you can see it squeezed onto the board underneath the power supply. The anti kink springs are essential here. You could easily replace the cooling set up though with an integrated H60, or H80 set up or similar.
Looking at the other side of the case you can see the graphics card. I don’t game much but wanted a modern card and so the GTX 660 seemed ideal.


Another feature of this case is the fact that it doesn’t have a full IO rear panel like some, but instead uses a simple ventilated design to allow air out as needed.
All my own designs feature the hexagon hole arrangements somewhere because (a) the hexagon formation is the strongest geometrical formation allowing maximum ventilation per unit area and (b) it fits with my own company name and was inspiration for it!

This rear panel can be left to being the very last piece to put on during the build and is secured by 4 screws that go into captive nuts held in the bottom panel and the canopy.
After putting this panel in place, thumbscrews are then used to secure the panel to the power supply unit.
All in all I am really happy with the way this build shaped up.
I will post some pictures of it tidied up in due course (shorter cables, proper hotswap connector on the top panel and with a cooler variation) but I thought it’d be nice to share this with you all and see how you can pack a huge amount in a small space and still have it run cool!
I’ll also post a few pic.s of it running and with the cool blue lighting illuminating the bubble rods....