- Joined
- Nov 17, 2009
- Messages
- 7,366
- Motherboard
- Z370N WIFI
- CPU
- i7 8700K
- Graphics
- HD 630
- Mac
- Classic Mac
- Mobile Phone

How to Install OS X Yosemite using Clover
Clover is a new and exciting open source EFI bootloader. Developed over the past 2 years by a group of developers at Project OS X led by Slice, Clover aims to solve problems inherent in existing OS X installation methods and legacy bootloaders:
- Boots troublesome desktop and laptop BIOS/UEFI
- Uses native OS X installation media
- Ability to patch DSDT/kernel/kexts at boot time
- Creates OS X Recovery partition
- No boot0 error with 4K Advanced Format drives
- Solves multi-boot issues with Linux and Windows 7/8
- Solves traditional bootloader NVRAM issues related to iMessage/FaceTime
Clover is also in beta stage, and is not guaranteed to work well for all systems. Development has been fast and furious, with many major changes appearing in the code all the time. Clover can be a moving target, difficult to pin down- almost, it seems, by design. Recent changes, however, have stabilized things enough to be a reliable alternative for those adventurous enough to learn something new.
Overview
1. Download the OS X Yosemite Application from the Mac App Store
2. Prepare a Installer USB flash drive
3. Install OS X Yosemite
4. Install the bootloader and drivers to system drive
STEP 1: Download OS X Yosemite
The full operating system is a free download for anyone who has purchased Mac OS X Snow Leopard, Lion, or Mountain Lion. Download the Application from the Mac App Store using your Apple ID on any Mac or functional computer running Mac OS X 10.6.8 or later.
1. Open Mac App Store
2. Log in with your Apple ID
3. Download OS X Yosemite
The Application Install OS X Yosemite will appear in /Applications.
STEP 2: Prepare Bootable USB Drive
This step extracts the OS X Installer contents, then installs Clover bootloader to the USB stick.
1. Insert the USB drive
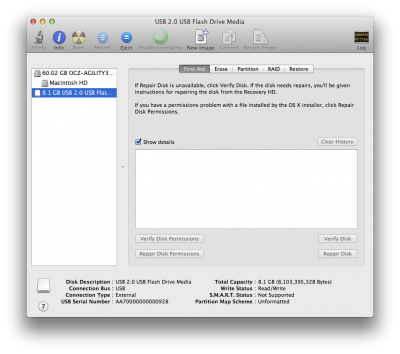
2. Open /Applications/Utilities/Disk Utility
3. Highlight the USB drive in left column
4. Click on the Partition tab
5. Click Current and choose 1 Partition
6. Click Options...
7. Choose GUID Partition Table
8. Under Name: type USB (You can rename it later)
9. Under Format: choose Mac OS Extended (Journaled)
10. Click Apply then Partition
11. Open /Applications/Utilities/Terminal
12. Type the following, enter password and hit enter. This command completely erases the USB, then creates native OS X installer media from the Install OS X Yosemite Application.
Code:
sudo /Applications/Install\ OS\ X\ Yosemite.app/Contents/Resources/createinstallmedia --volume /Volumes/USB --applicationpath /Applications/Install\ OS\ X\ Yosemite.app --no interactionUpon completion, the USB will be renamed Install OS X Yosemite.
13. Download the latest version of Clover from sourceforge
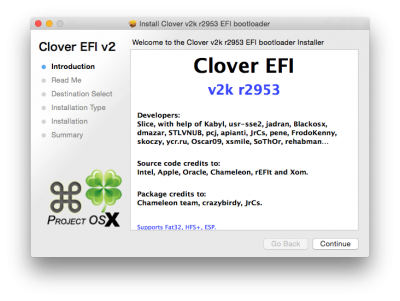
14. Open Clover package installer
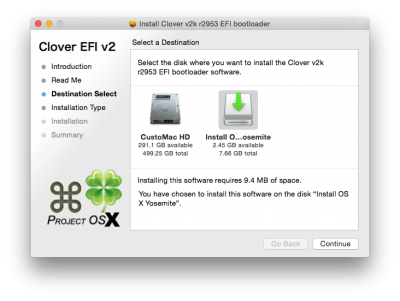
15. Hit Continue, Continue, Change Install Location...
16. Choose the USB, now called Install OS X Yosemite
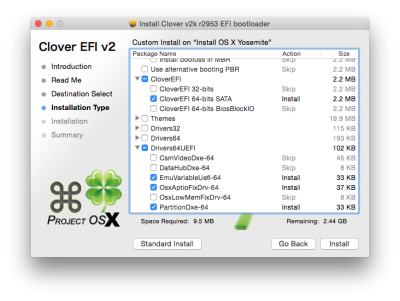
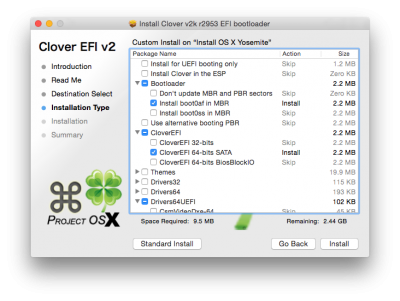
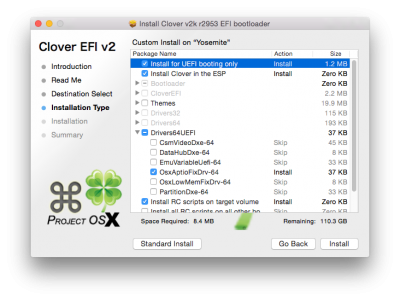
17. Hit Customize and install Clover to the same USB with the following Custom Install settings:
NOTE: There are a few different ways to setup Clover on the USB. Using Legacy Mode is the simplest and most reliable for 5, 6, 7, 8, and 9 Series Gigabyte motherboards with standard default BIOS or UEFI settings. For all other UEFI-based systems such as ASUS 7, 8, and 9 Series motherboards, use UEFI Boot Mode to install to the EFI partition of the USB for UEFI booting only.
A few more changes need to be made to the default Clover installation:
21. Navigate to /EFI/CLOVER/kexts/ and create a folder called 10.10
22. Navigate to /EFI/CLOVER/kexts/10.10/ and add FakeSMC.kext
23. Navigate to /EFI/CLOVER/kexts/10.10/ and add your ethernet kext
24. Navigate to /EFI/CLOVER/kexts/10.10/ and add NullCPUPowerManagement.kext
25. Navigate to /EFI/CLOVER/drivers64UEFI/ remove VBoxHfs-64.efi and add HFSPlus.efi
26. (Optional) Navigate to /EFI/CLOVER/ACPI/patched/ and add DSDT.aml and SSDT.aml
*See attached config.plist for a working minimal configuration.
STEP 3: Install OS X Yosemite
Unlike UniBeast, this is a 3 part installation process. The system will reboot twice in order to finish the installation and the recovery partition.
1. Turn on the computer
2. Press the hotkey to choose boot device
3. Choose USB
If using a USB 3.0 port, the boot manager screen may appear, at which point proceed with steps a-b.
a. Choose Boot Manager
b. Choose EFI USB Device
5. The system will then boot into OS X Installer
6. For a new installation of OS X, you MUST erase and format the destination drive according to the following steps before continuing. If you are upgrading from Snow Leopard, Lion, or Mountain Lion and you want to keep your files and apps, skip steps a-j.
a. Choose Disk Utility
b. Highlight your target hard drive for the Yosemite installation in left column.
c. Click Partition tab
d. Click Current and choose 1 Partition
e. Click Options...
f. Choose GUID Partition Table
g. Under Name: type Yosemite (You can rename it later)
h. Under Format: choose Mac OS Extended (Journaled)
i. Click Apply then Partition
j. Close Disk Utility
c. Click Partition tab
d. Click Current and choose 1 Partition
e. Click Options...
f. Choose GUID Partition Table
g. Under Name: type Yosemite (You can rename it later)
h. Under Format: choose Mac OS Extended (Journaled)
i. Click Apply then Partition
j. Close Disk Utility
7. When the installer asks you where to install, choose Yosemite, or your existing install.
8. Upon completion, system will restart a 1st time
9. Press the hotkey to choose boot device
10. Choose USB
11. When Clover boot screen is visible, choose Boot OS X Install from OS X Install OS X Yosemite
The system will boot into the new drive, create the recovery partition, and complete the installation. Upon completion, system will restart a 2nd time.
12. Press the hotkey to choose boot device
13. When Clover boot screen is visible, choose Yosemite
14. The system will launch OS X Setup
STEP 4: Post-Installation
At this point, the easiest way to proceed is to install the bootloader, grab backups from the root of your USB drive, and copy the files that worked directly to the system drive's EFI partition. However, getting post-installation 100% right for your system is something that needs to be done on a case by case basis. No single Clover setup will work perfectly for every system.
1. Download the latest version of Clover from sourceforge
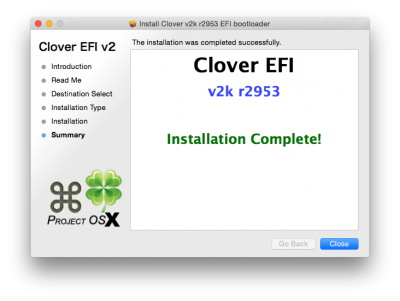
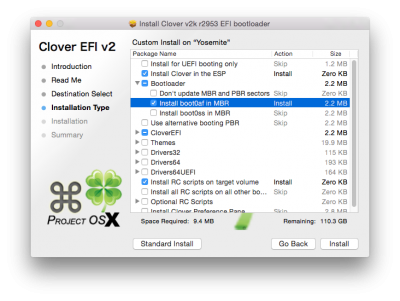
2. Install Clover to Yosemite with the following Custom settings:These settings will install the bootloader to the system drive's EFI partition automatically as part of the scripting. After completion, the system drive's EFI partition will automatically mount.
A few more changes need to be made to the default Clover installation:
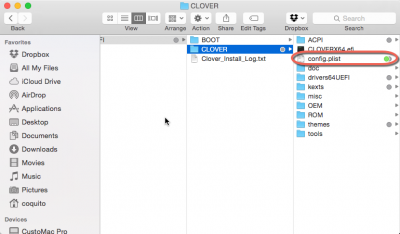
3. Navigate to /Volumes/EFI/EFI/CLOVER/ and edit config.plist
4. Navigate to /Volumes/EFI/EFI/CLOVER/kexts/ and create a folder called 10.10
5. Navigate to /Volumes/EFI/EFI/CLOVER/kexts/10.10/ and add FakeSMC.kext
6. Navigate to /Volumes/EFI/EFI/CLOVER/kexts/10.10/ and add your ethernet kext
7. (Optional) Navigate to /Volumes/EFI/EFI/CLOVER/ACPI/patched/ and add DSDT.aml and SSDT.aml
NOTE: Kexts can be installed to /System/Library/Extensions/ instead of using the kexts folder.
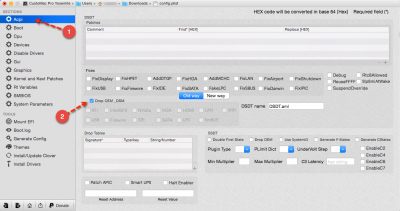
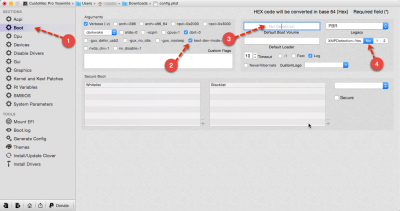
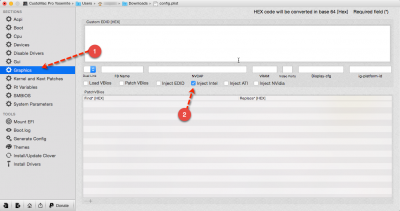
See attached config.plist for a working minimal configuration. For more details and documentation navigate to /EFI/CLOVER/doc. To help navigate the config.plist and add a system definition, check out Clover Configurator. For a GUI to mount/unmount EFI partition, see EFI Mounter v2.
You've reached the end of the universal setup guide. If you have issues, please create a support thread in the Desktop Support or Laptop Support forums. Special thanks to toleda and Going Bald for their testing and comments during the making of this guide. Good luck!
Clover Developers:
Slice, with help of Kabyl, usr-sse2, jadran, Blackosx, dmazar, STLVNUB, pcj, apianti, JrCs, pene, FrodoKenny, skoczy, ycr.ru, Oscar09, xsmile, SoThOr…
Source code credits:
Intel, Apple, Oracle, Chameleon, rEFIt and Xom.
Official Clover Links:
Sourceforge: Clover
Project OS X
Clover Wiki
Related:
tonymacx86 Clover Theme
Test Drive: How to Create a Clover USB
Sample config.plists:
Select the sample config.plist for your system.
config.plist Standard
For desktop systems with Intel HD 4000, 4600, ATI/AMD Radeon HD 5xxx, 6xxx, 7xxx, R9 2xx, 3xx, NVIDIA GeForce 6xx, 7xx, 9xx, TITAN. Equivalent to Chimera/Chameleon GraphicsEnabler=No IGPEnabler=Yes.
config plist - Inject NVIDIA
For desktop systems with older NVIDIA graphics cards such as GeForce 8xxx, 9xxx, 2xx, 4xx, 610, and 630. Equivalent to Chimera/Chameleon GraphicsEnabler=Yes.
config plist - Inject ATI
For desktop systems with older ATI graphics cards such as ATI Radeon 4xxx. Equivalent to Chimera/Chameleon GraphicsEnabler=Yes.
Attachments
Last edited by a moderator:

