- Joined
- Sep 21, 2013
- Messages
- 3
- Motherboard
- ASUS P9X79-LE
- CPU
- i7 3970X
- Graphics
- GTX 670
- Mac
ZALMAN Hackintosh Sound Card for Yosemite
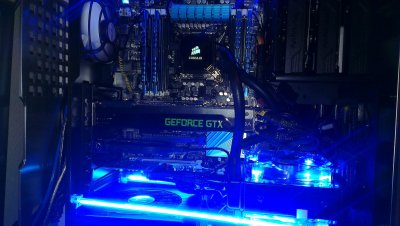
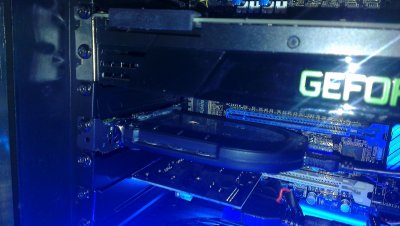
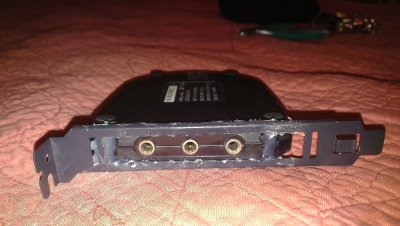
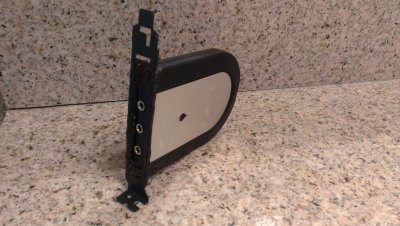
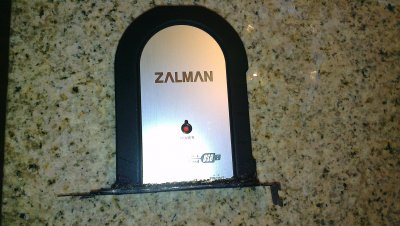
Hello friends, ever since I built my ASUS P9X79-LE, i7 3970X Hackintosh I’ve been struggling with audio. It’s not that I couldn’t get it working, I could, it’s just that the sound quality was awful and there was this loud boom every time I would boot up and the OS loaded (pretty embarrassing). I tried every audio solution and kext that I could get to work and I just couldn’t get the sound that would complement my speakers. Well, I found a great alternative. The ZALMAN ZM-RSSC USB sound card. I bought mine new on eBay for only $9.89 (with free shipping!). Because I wanted a clean uniformed look I didn’t want a solution where I would have to look at an external device hanging off the back of my computer. So I took a vented PCI slot cover (or whatever it’s called) and cut out a slot so that it would allow me to access the three audio ports. Then using a glue gun I glued it to the ZALMAN ZM-RSSC to the slot cover. Put it in the computer, ran the USB mini power cord through a wire vent in my case. Powered up my machine and it now has clear and powerful sound - and I do mean powerful! I could barely turn it up without the sound blasting through the house (BTW, the ZALMAN has three volume dials on it). Needless to say I’m very pleased with myself. This is a great solution guys.
Hello friends, ever since I built my ASUS P9X79-LE, i7 3970X Hackintosh I’ve been struggling with audio. It’s not that I couldn’t get it working, I could, it’s just that the sound quality was awful and there was this loud boom every time I would boot up and the OS loaded (pretty embarrassing). I tried every audio solution and kext that I could get to work and I just couldn’t get the sound that would complement my speakers. Well, I found a great alternative. The ZALMAN ZM-RSSC USB sound card. I bought mine new on eBay for only $9.89 (with free shipping!). Because I wanted a clean uniformed look I didn’t want a solution where I would have to look at an external device hanging off the back of my computer. So I took a vented PCI slot cover (or whatever it’s called) and cut out a slot so that it would allow me to access the three audio ports. Then using a glue gun I glued it to the ZALMAN ZM-RSSC to the slot cover. Put it in the computer, ran the USB mini power cord through a wire vent in my case. Powered up my machine and it now has clear and powerful sound - and I do mean powerful!
I could barely turn it up without the sound blasting through the house (BTW, the ZALMAN has three volume dials on it). Needless to say I’m very pleased with myself. This is a great solution guys.