
- Joined
- Aug 31, 2010
- Messages
- 3,888
- Motherboard
- Asrock Z87E-ITX
- CPU
- i7-4770S
- Graphics
- GTX 760
- Mac
- Mobile Phone
WonkeyDonkey's NAS/Small Server Build :
Asrock Z87E-ITX - Core i7 4771 - 16GB RAM - HD4600

ComponentsAsrock Z87E-ITX - Core i7 4771 - 16GB RAM - HD4600
Samsung 850 EVO 2TB SSD (x2)
https://www.amazon.com/SAMSUNG-Vertical-Internal-Solid-MZ-75E2T0B-AM/dp/B01LAG09DA
Samsung 850 EVO 250GB mSata SSD
https://www.amazon.com/Samsung-850-EVO-Internal-MZ-M5E250BW/dp/B00TGIVTP2
HP NC360T Dual Port Giagbit Ethernet LAN Card
https://www.amazon.com/HP-412648-B21-PCI-Express-GigaBit-Adapter/dp/B000J3OPOU
Compulab fit-Headless 4K HDMI Headless Adapter
https://www.amazon.com/CompuLab-4K-Display-Emulator-fit-Headless/dp/B00JKFTYA8
Alternative 1080p Version Headless Adapter
https://www.amazon.com/CompuLab-fit-Headless-Display-Emulator/dp/B00FLZXGJ6
Already Owned
Asrock Z87E-ITX Motherboard
https://www.amazon.com/ASRock-Z87E-ITX-Channel-Mini-ITX-Motherboard/dp/B00D3IKMEK
Intel Haswell Core i7 4771 Processor
https://www.amazon.com/Intel-I7-4771-1150-Processor-BX80646I74771/dp/B00EF1G9D2
G.Skill Ripjaws Series (2x8GB) F3-2133C9D-16GXH 240-Pin DDR3 SDRAM PC3-17066 (2133)
https://www.amazon.com/G-SKILL-RipjawsX-240-Pin-Desktop-F3-2133C9D-16GXH/dp/B007CZDS64
Noctua NH-L9i Low Profile Cooler
https://www.amazon.com/Noctua-Low-Profile-Cooler-Retail-Cooling/dp/B009VCAJ7W
Dell DW1510 Wireless Network Adapter AGN (Broadcom 4322 Chipset)
https://www.amazon.com/BCM94322-Dual-band-Wirless-802-11a-Netbooks/dp/B00LP52BNI
NCase M1 (V5) Mini-ITX Chassis (Silver)
https://www.ncases.com/
Note : There is no monitor, keyboard or mouse associated with this build since it runs headless. There are 2 headless adapters listed above; the 1080p model is the recommended option unless you already run a 4K screen.
Comments
This build is less about the hardware and more about how I setup and use the system for its intended role. We don’t see many builds that are used for NAS or server purposes; this is my take on that exact purpose. The build uses standard desktop hardware, and I have splashed the cash a little on some SSD’s.
For anybody who hasn't looked at NAS before or knows much about it, it stands for Network Attached Storage. It is typically large capacity storage and as the name suggests, is connected over the network. Its a bit like having another computer connected, except that it doesn't usually have its own screen, keyboard or mouse; and this is what the term 'headless' refers to. There are many commercial ones available from companies such as Synology, QNap, Western Digital, and with those you simply buy one or more hard drives, add them to the NAS unit, then plug it in to your existing setup. With the capacities available in modern hard drives, it means you can have tons of extra storage available, without having to cram it all into your existing desktop computer.
In respect of the NAS part of my system, I opted for 2 x 2TB SSD’s from Samsung. 4TB total space was ideal for my needs; I currently have around 1.5TB of data on there, so plenty of room for future needs. These SSD’s also give me the performance I want when running virtual machines over the network. If money was no object, I could have easily used 4 of these SSD's, or opted for the newest 4TB models, which could have potentially given me a whopping 16TB of SSD capacity. Using mechanical drives I could have gone even higher with 8TB and 10TB models readily available.
The OSX software is installed on the mSata SSD and not on the 4TB mass storage volume. Installing the OS to the mass storage area of a system like this is not a good idea, you can find out why in the notes at post #2.
The dual port LAN card gives me a total of 3 x gigabit Ethernet ports (Including the motherboard one); this covers the network connection requirements perfectly. The network services run across all 3 ports at gigabit speeds. I found my network card on eBay from a local seller at a good price; it uses the Intel 82571EB controller and is fully supported using AppleIntelE1000E.kext.
In terms of network services, I had several that I wanted running, and I’m pleased to say they all work without issue:
Database Server
I use the PostgreSQL open source database to compliment the development work I do. This is installed on the NAS/server and listens to several internal IP addresses that I added to the configuration. It can be accessed and configured over the network using pgAdmin4.
Time Machine Server
Time machine runs over the network and keeps backups of my desktop system.
Virtual Machine Server
Virtualbox is installed on the server. This is free to use and is a very good virtualization solution. It also has the ability to run the VM’s in headless mode, which is perfect for my network setup.
Music Sharing
Done by using library sharing in iTunes; my desktop connects to this and plays my music across the network.
Video Sharing
I don’t use iTunes for this even though it is possible. I use a very nice app called Serviio. This shares my entire video collection over the network and also plays well with my TV, iPad etc. This app can also share music and pictures although I haven’t used that part of it. The basic version is free and you can pay a small upgrade fee to enable some extra functionality, which I have done.
Shared Files/Folders
I have a top level folder on the NAS storage volume which I call ‘DataStore’; everything is stored here and neatly arranged in sub folders. Because the NAS and my desktop are both running OSX, the shared folders are available over the network direct to my desktop system.
Server Considerations
OSX has a server add-on package available from the App Store at a modest price; I have this and did test it out, but the reality was that it offered lots of what I didn’t need and not so much of what I was interested in. A desktop installation of OSX and some well chosen options means you can do it without the server package. The result is a system that is customized to my exact needs, with no unnecessary bells & whistles.
In the Sharing options of System Preferences, I enabled Screen Sharing and File Sharing; this is a key point to remember when running in headless mode. Another key point for file sharing is that I enabled AFP but did not enable SMB. They dont play so well together in OSX resulting in a network performance hit. If you need to access standalone Windows machines (Normally SMB) then you may need to enable it, but you will likely see a performance drop. Depending on your requirements, you could screen share into a Windows system instead, without the need for SMB.
If you are wondering what that AFP and SMB stuff is all about then here is a quick primer. AFP stands for Apple Filing Protocol. It is proprietary to Apple and is used to provide file services over a network. It is used in conjunction with other network services and for any old school OSX users, was formerly known as AppleTalk. SMB is a Microsoft protocol and stands for Server Message Block and again is used for delivering file services over a network; think printing, sharing, transferring of files.
Access to the server is done using the screen share function that is built into OSX and works very well. The server shows up on my desktop as a connected server, and just a single button click starts the screen sharing, it really could not be any simpler.
The headless adapter is a small piece of hardware that plugs into the video port and emulates a monitor being connected. The 4K model allows you to set additional screen resolutions above 1080p. If you run an OSX system without a monitor or headless adapter connected, you can sometimes see performance issues, so this cheap piece of hardware comes highly recommended. If you do not have a 4K or other large resolution screen, then the cheaper option is the Mac Mini version of this adapter, which offers up to 1080p resolution (See Alternative 1080p Version in Components list above); this will be fine for the majority of users irrespective of screen size. I have tested both of these adapter models. Both work equally well in a real mac and a hackintosh, and both make the screen sharing smooth as butter.
I have several virtual machines that I run over the network. In Virtualbox, you can right click on a VM and choose to run it in headless mode and this is the same mode as the server itself. OSX screen sharing does not work great with Microsoft guest VM's, but there is an answer. Microsoft has its very own RDP remote access tool available in OSX; its a free download and allows direct access to the Windows based client VM’s. Most modern Linux distributions can support both AFP and SMB; to use linux as a client VM usually means just installing a couple of extra packages to help support screen sharing.
The mass storage volume that uses the 2 SSD’s is done using RAID0. I won’t get into any kind of discussion over this choice. I set this up using the command line raid setup of disk utility. Another more robust option would be to use RAID1 or RAID10 or even a commercial tool; SoftRAID provides an excellent package for this, but at a cost. I may upgrade to the softraid package in the future but have no plans to do so at the moment. If you want to learn more about different RAID levels and what they mean, have a look at this article by PCMag.
Network performance was a key consideration for this build and it performs brilliantly. All of the connections, both physical and virtual are set to gigabit speeds; there is no lag or slowdowns when screen sharing or transferring data. Ping results are all sub-second speeds and even installing/tweaking software on the server using screen sharing runs as fast as it does on a normal desktop.
The hardware choices were a no-brainer. I have previously used the motherboard and CPU combination for a desktop hackintosh system and they are very stable and well supported in OSX. I have a DSDT and SSDT that are optimized for this system and provide full hardware recognition, USB port configuration and all important power management. Power usage is very low, and the system runs 24/7. I could have opted for a slower i3 or i5 CPU for this build, but I wanted to keep good performance for my virtual machines and database server.
The final consideration is system noise, or lack of it. I always insist on silent builds for my hackintosh systems, and this one is no different. The only moving part is the low profile Noctua cooler, and this together with the ample ventilation provided by the chassis means I have a totally silent build that runs very cool.
I honestly could not be any happier with this build. It uses standard desktop hardware, a normal OSX installation, together with a few tweaks and a couple of extra packages. It fulfills its role perfectly. You could build something similar but cheaper using normal hard drives, a lower grade chipset/motherboard and maybe an i3 or i5 CPU.
System setup
The installation is done using the standard tonymacx86 tools - UniBeast/MultiBeast and Clover. This is in effect a normal desktop installation. After you have the desktop up and running and all the hardware configured, you can then start enabling the various network services one at a time until you have everything you need. I kept a screen and keyboard/mouse connected to the server to complete the setup, then unplugged them and inserted the headless adapter once it was complete.
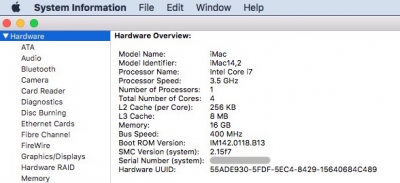
The system definition is iMac14,2, which is perfectly suited for the Haswell processor and Z87 chipset on the motherboard, and graphics are done via HD4600 and the headless adapter. This in turn frees up the PCIEx16 slot for the dual port ethernet card. The OSX version is 10.11.6 El Capitan.
There are just 3 third party kexts used on this system:
FakeSMC : Needed on any hackintosh system, provided by MultiBeast/Clover.
RealtekALC : Provided by MultiBeast
AppleIntelE1000E : Provided by MultiBeast
Trim is enabled on all of the SSD’s, including the RAID volume, and comes courtesy of the ‘trimforce’ command available in OSX.
Attachments

Last edited:
