Contribute
Register

Windows 10 Installation STOPS at SETUP.

Status
Not open for further replies.
Is your monitor connected to the Nvidia card? Do you also have a monitor connected to the motherboard?
Yes, I'm using a Nvidia Card. GTX 680 to be exact.

I have my monitor connected to the motherboard, yes. The big reason that this had worked compared to the other times I tried (and failed), is pulling out EVERY INTERNAL DRIVE and EXTERNAL DRIVE that is not part of the Bootup for Windows or the SSD you want to install on. That just might be the trick for you.

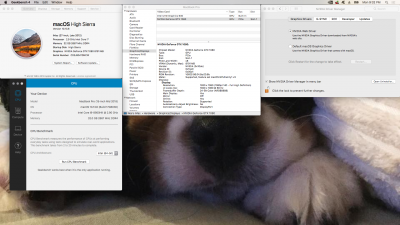
My current issue I haven't found an answer for online yet, is why my Windows is running very slow. I'm curious why my steam games used to run fast before my boot from El Capitan to my current High Sierra... It wont play games fast on Mac or the Windows side. I think it has something to do with my GTX card not running with the right settings in BIOS or... something... Not sure yet. I'll keep you posted.
 
  • My approach is using no other software for dual booting except Clover EFI from the MacOS system disk as the bootloader for Windows and if you have Linux in the mix, for that too.
  • Since you have a running MacOS with Clover as a boot loader, the following are my steps [and theses are basically Going Bald has described in his Guide.]
    • Connecting the Blank Target SSD for Windows to the SATA port 1 (SATA port 0 being MacOS High Sierra) , boot into your current macOS HS desktop.
    • Using Disk Utility, Erase the Target Disk For Windows 10 ( calling it Windows 10) as if you were going to use it for a Mac.
      • This is to get an EFI Partition similar in size (200+MB) at the beginning of the disk like the HS System disk (because Windows' Automatic partitioning during its installation makes it less user-friendly for Clover controlled Dual Boot)
    • Now you have a GPT partitioned disk with an EFI that is perfect on the Windows 10 Target disk .
    • Optionally, shutting down and disconnecting MacOS System Disk's Power or SATA cable is the next best step to avoid any conflicts from MacOS System Disk during boot with Windows USB Installer Flash drive for Windows Installation. I suggest this to first time Multi-booters)
    • Insert your Windows 10 UEFI USB installer Disk (I've presumed you have already created it and not intending to use the DVD Disc for Windows 10 Installation) and reboot
    • Go to F12 Boot Device Selection screen ( or BIOS with del key if needed) to choose Windows UEFI USB Installer Disk to boot.
    • Choose to Custom Install
    • DO NOT Delete the 210 MB FAT formatted EFI Partition.
    • Delete the Rest of the HFS+J system partition you had created in mac's DU as a sham to make free space to install Windows 10
    • Now, start the installation on the "freed up space" for Windows 10 Installer USB to create an NTFS formatted system partition and eventually install Windows Boot Manager in the 210MB EFI.
    • After all the usual Automatic Reboots, (you can even update and install all other Apps you need to make your Windows 10 the way you want) and completion of Win10 Installation, Shut Down the PC.
    • Remove Win10 USB Installer Disk.
    • Reconnect disconnected MacOS System Disk to SATA Port 0
    • Repower >Reboot>Del >BIOS
    • Make sure macOS High Sierra UEFI Disk is #1 on Boot Priority.
    • Disable any and all other Disks in that Boot Option list
    • Make Sure All other BIOS menu are selected to boot MacOS HS Disk as in your originally working Hackintosh
    • F10 to Save BIOS setup and reboot
    • To ensure Selecting MacOS HS disk to enter CLOVER, press F12 and Select HS Disk
    • Find both HS and Win10 System Disks in Clover Boot Manager.
    • Boot HS and confirm it is still working OK
    • Reboot and from CBM screen , launch Win10 and make sure everything is OK
  • ****In my systems with macOS HS SSD in APFS formatting , I edit HS CLOVER>config.plist>Gui> Hide Volume section as in uploaded image hiding "Preboot" to reduce Clutter and Confusion of CBM screen from unnecessary APFS partitions.
  • **** I also edit the EFI from booting macOS System Disk to add an edited Microsoft Folder to the EFI Partition to prevent any future Windows Disk Boot issue[see image]
Totally worked. Awesome!
 
400E51A0-8460-44A0-B9B8-F3A4BEB94452.png
Using Disk Utility, Erase the Target Disk For Windows 10 ( calling it Windows 10) as if you were going to use it for a Mac.

For this step what type of format should i use ? APFS? exFat?
Using Disk Utility, Erase the Target Disk For Windows 10 ( calling it Windows 10) as if you were going to use it for a Mac.

For this step what type of format should i use ? APFS? exFat?
Use OS X Disk Utility to format your Windows target drive as “Extended Journaled / HFS”
The reason for this is genius; Disk Utility inherently creates a tiny EFI partition, at the beginning of aforementioned scheme/map... Why is this so important?
When actually INSTALLING Windows, choose “Custom” and target should be the remaining free space, just above the EFI partition that was created when formatting the drive with Disk Utility.
It really is genius.
Not sure who figured it first, but I know where I read about it first; @GoingBald here on TonyMac

If it matters... I’m running 3 OS’ on 3 drives:
NVMe0=OS X High Sierra / NVMe1=My own Linux distro (written and compiled on top of Vmlinuz)
HDD=Windows 10, and two different storage partitions

AW17R5
i9 / GTX1080
 

Attachments

  • CB68937B-77C3-4F3F-A015-89A5D000076A.png
    CB68937B-77C3-4F3F-A015-89A5D000076A.png
    1.5 MB · Views: 65
View attachment 403853

Use OS X Disk Utility to format your Windows target drive as “Extended Journaled / HFS”
The reason for this is genius; Disk Utility inherently creates a tiny EFI partition, at the beginning of aforementioned scheme/map... Why is this so important?
When actually INSTALLING Windows, choose “Custom” and target should be the remaining free space, just above the EFI partition that was created when formatting the drive with Disk Utility.
It really is genius.
Not sure who figured it first, but I know where I read about it first; @GoingBald here on TonyMac

If it matters... I’m running 3 OS’ on 3 drives:
NVMe0=OS X High Sierra / NVMe1=My own Linux distro (written and compiled on top of Vmlinuz)
HDD=Windows 10, and two different storage partitions

AW17R5
i9 / GTX1080

GUID partition also helps as clover will recognize it at boot screen. I’ve had to convert standard windows drives to guid mapping which is doable but if you do it before installation it is much simpler.
 
Status
Not open for further replies.
Back
Top