- Joined
- Mar 24, 2015
- Messages
- 5
- Motherboard
- G5-Hackintosh
- CPU
- i7 4790k @ 4.6ghz
- Graphics
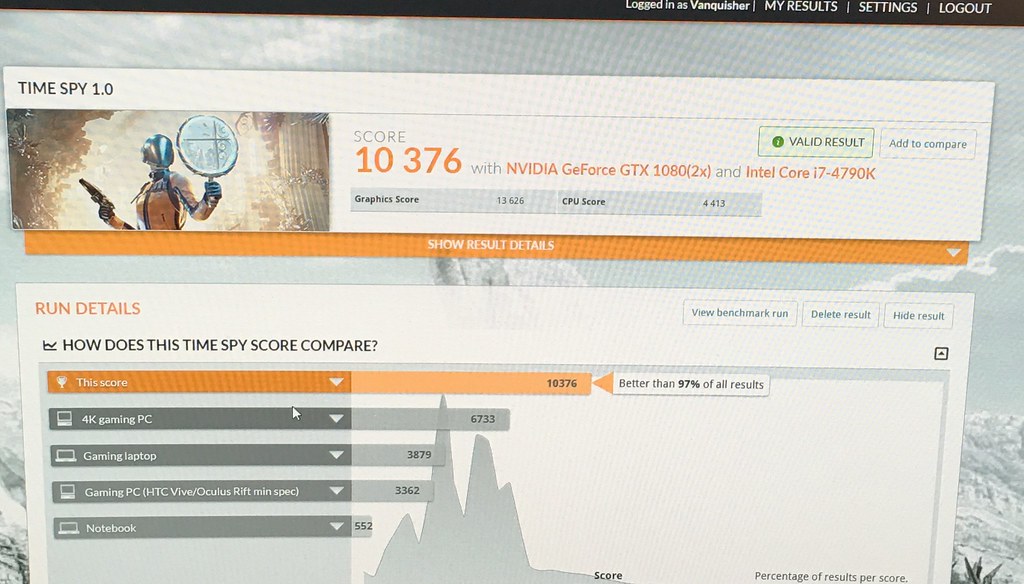
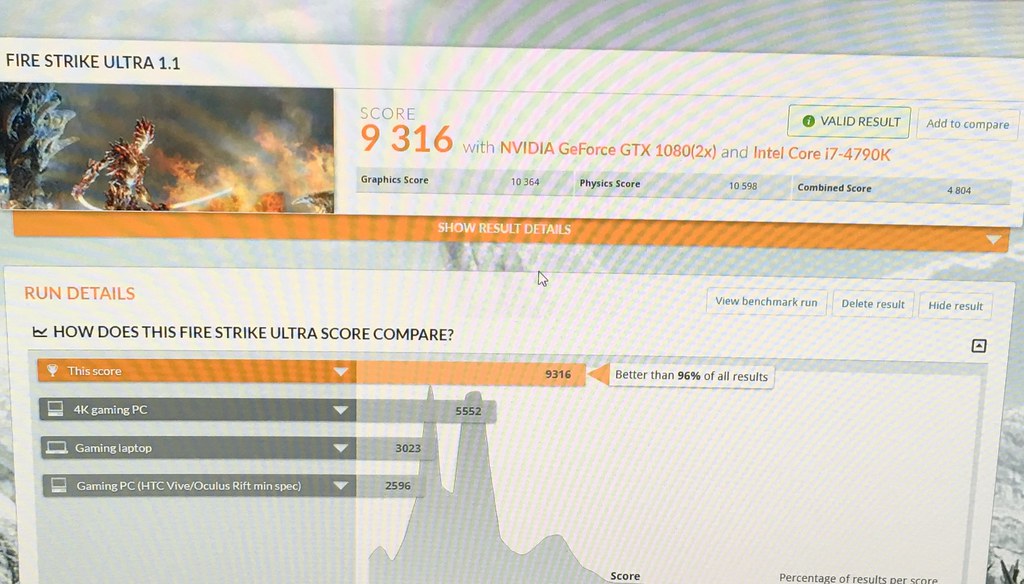
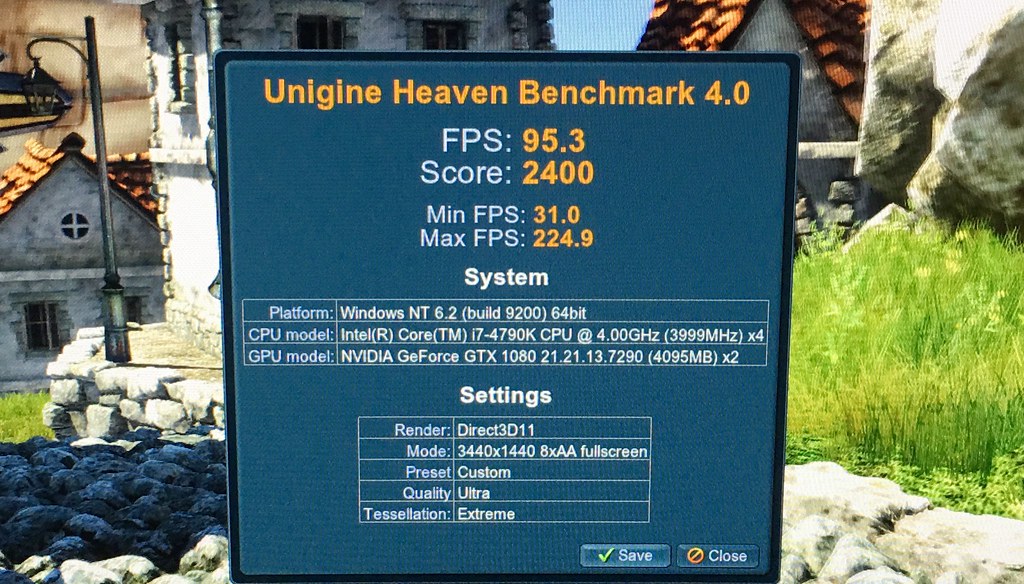
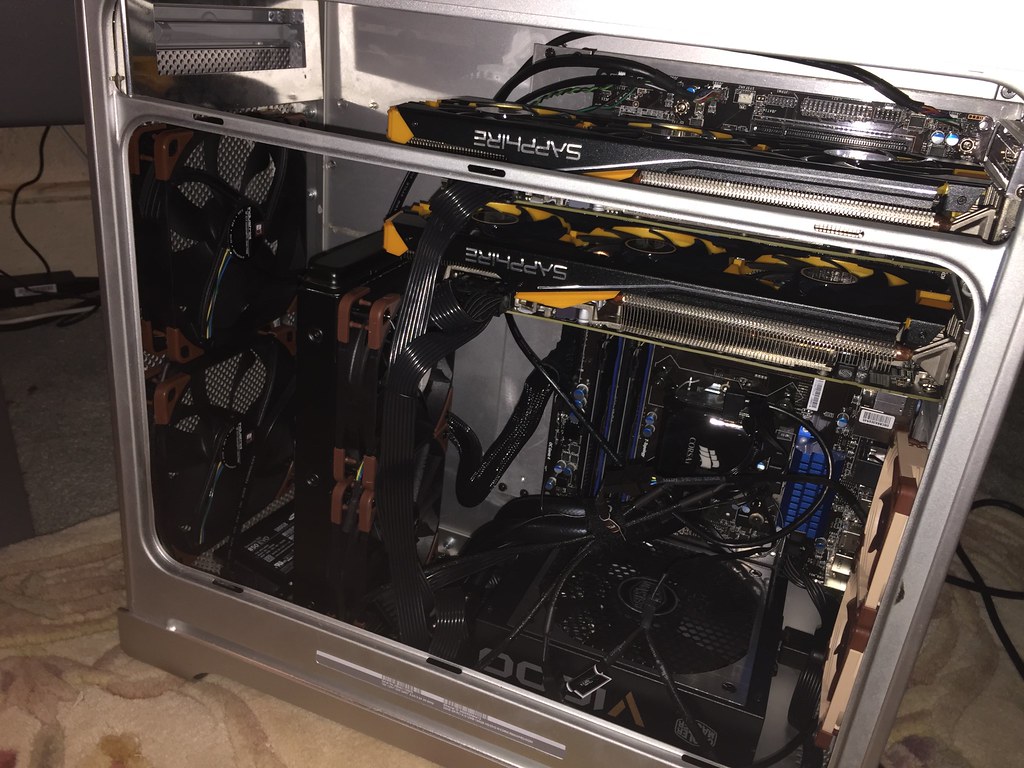
- 2x ASUS STRIX ROG GTX 1080 (SLI HB Bridge)
- Mac
Hey guys,
First post here and just want to say I learned a ton from this forum while getting ready to undertake this project. So much knowledge here made it a lot easier.
Started off with a G5 that I got from a co-worker that was just going to toss it to the curb. Said i'd give it a home and I got it for free. Win.
Specs for the build:
Basically day 1 followed some tutorials here and on the net and disassembled most of it and took all the motherboard standoffs out.

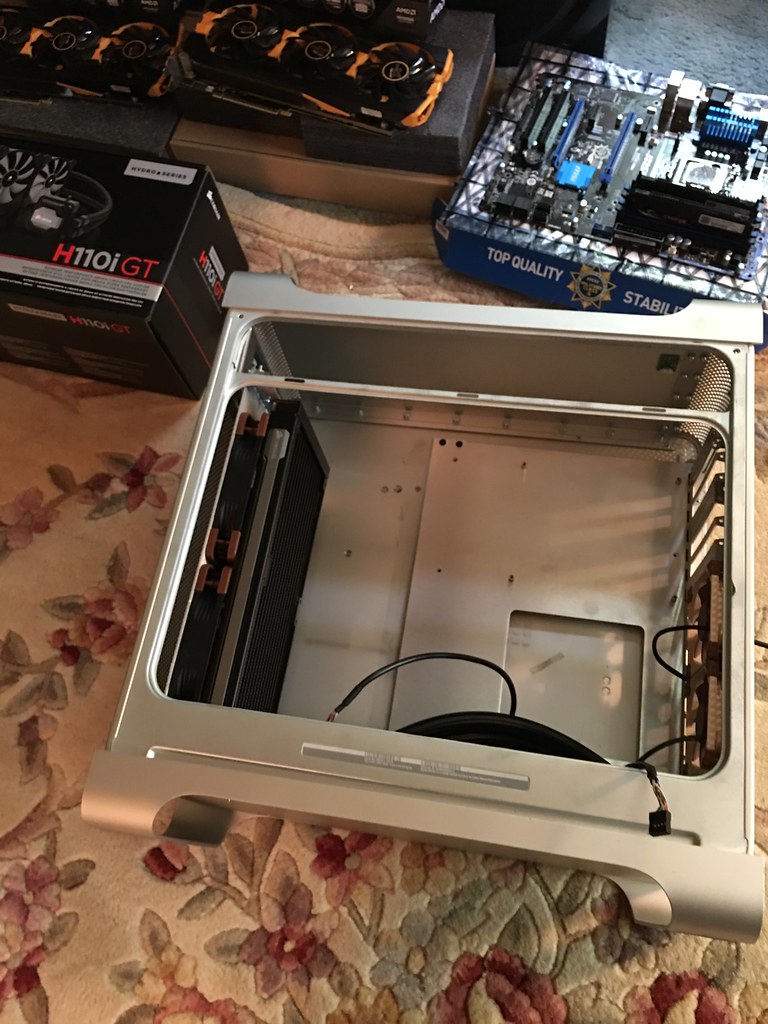
I opted for the mountain mods tray it seemed like a nice kit and a good starting point so I ordered that up and went from there. Few pics I mocked up the rear panel on the back and started taking measurements. I honestly didn't care for the latch since the side panel pretty much locks into place without it. So I decided not to cut the mountain mods tray to accommodate.


Now to get the mountain mods tray in and test fit the mobo. Once I had the mobo in I used JB Kwik Weld on the two motherboard standoffs I reused from the g5 case. Two on the top and bottom of the left side of the mountain mods tray.
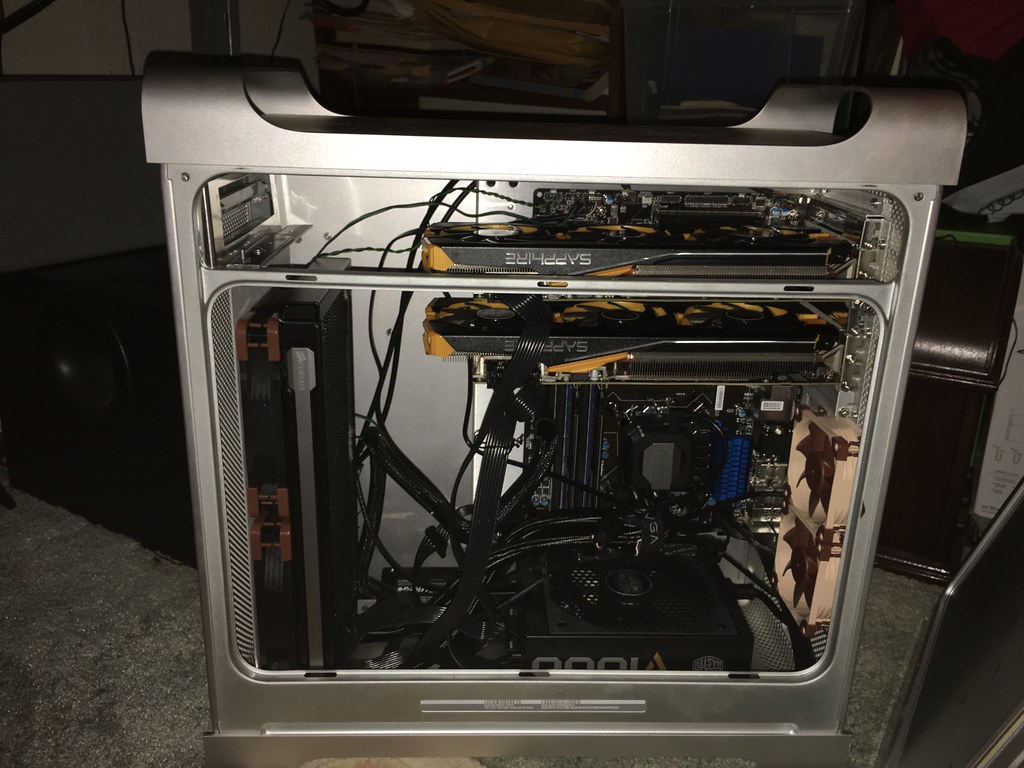
Also at the same time thanks to an awesome article on here about the G5 front panel pinout for the connector I rounded up some old wires and cut and soldered the connections together and then shrink wrapped them all. Turned out well and everything but FW on the front works.


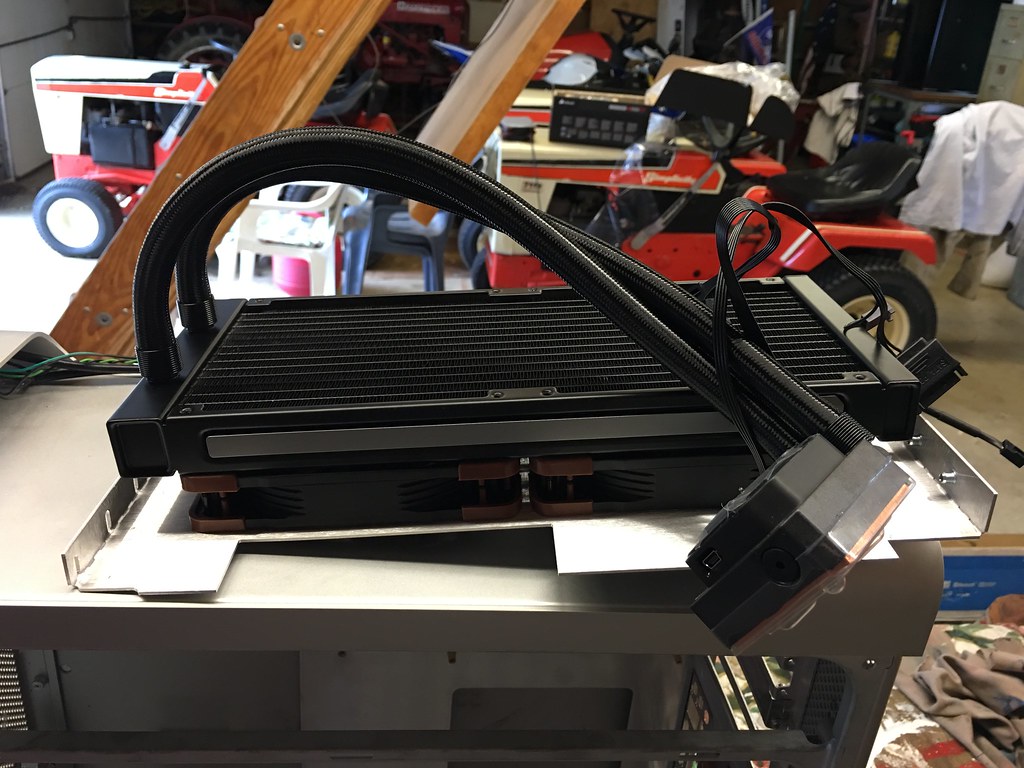
Once the JB Weld was cured about 4hrs per the instructions I assembled the rest of it. I attached the h100i using one of the already drilled holes for the PSU on the bottom of the case. I attached the one side using L brackets from Lowes with rubber washers to cut down on case vibrations. I had to drill one hole there for the other L bracket but no biggie. Even though there isn't anything attached to the top of the cooler its in there solid as rock. For the front 120s I used Scotch indoor adhesive strips. They hold up to 4lbs and honestly they worked awesome without me having to fab a bracket or drill into the front mesh.


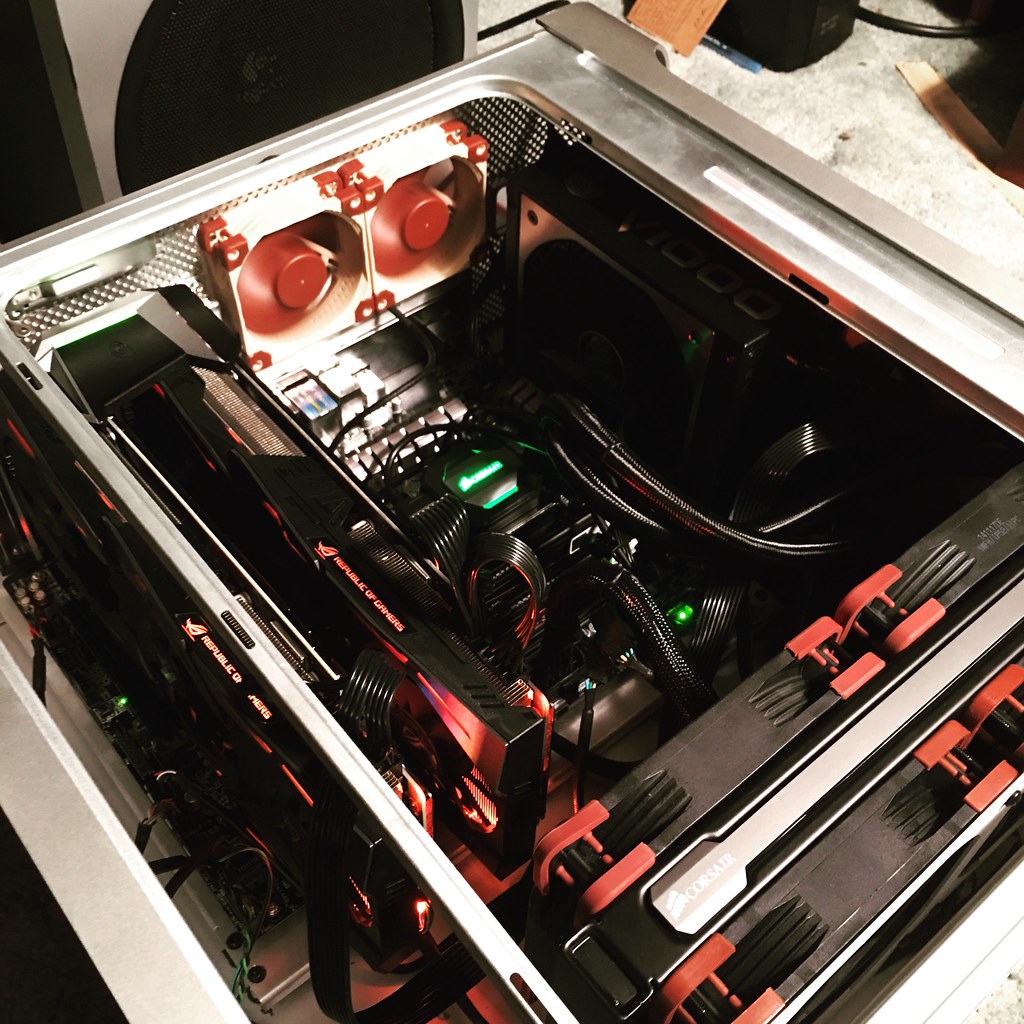
The build is still a work in progress, I want to cut the top tray and put the front section back in to the left of the mountain mods tray. I'll use that to put the drive caddy back up there. Beyond that maybe some cable management here and there but overall very very happy with the build. Will keep this updated as I go.
First post here and just want to say I learned a ton from this forum while getting ready to undertake this project. So much knowledge here made it a lot easier.
Started off with a G5 that I got from a co-worker that was just going to toss it to the curb. Said i'd give it a home and I got it for free. Win.
Specs for the build:
- Intel Core i7 4790K
- MSI Z97 PC Mate
- 16GB DDR3 GSKILL Sniper Ram XMP Ready
- EVGA 80 Plus Bronze Cert 750W PSU
- Sapphire Tri-X Radeon R9 290
- Corsair H100i Liquid Cooler
- 500GB Samsung 850 EVO SSD
- 1TB WD Green Drive (For Storage)
- Corsair AF120 White LED Fans (Intake Fans) / Coolmaster 80mm (Exhaust Fans)
Basically day 1 followed some tutorials here and on the net and disassembled most of it and took all the motherboard standoffs out.
I opted for the mountain mods tray it seemed like a nice kit and a good starting point so I ordered that up and went from there. Few pics I mocked up the rear panel on the back and started taking measurements. I honestly didn't care for the latch since the side panel pretty much locks into place without it. So I decided not to cut the mountain mods tray to accommodate.
Now to get the mountain mods tray in and test fit the mobo. Once I had the mobo in I used JB Kwik Weld on the two motherboard standoffs I reused from the g5 case. Two on the top and bottom of the left side of the mountain mods tray.
Also at the same time thanks to an awesome article on here about the G5 front panel pinout for the connector I rounded up some old wires and cut and soldered the connections together and then shrink wrapped them all. Turned out well and everything but FW on the front works.
Once the JB Weld was cured about 4hrs per the instructions I assembled the rest of it. I attached the h100i using one of the already drilled holes for the PSU on the bottom of the case. I attached the one side using L brackets from Lowes with rubber washers to cut down on case vibrations. I had to drill one hole there for the other L bracket but no biggie. Even though there isn't anything attached to the top of the cooler its in there solid as rock. For the front 120s I used Scotch indoor adhesive strips. They hold up to 4lbs and honestly they worked awesome without me having to fab a bracket or drill into the front mesh.
The build is still a work in progress, I want to cut the top tray and put the front section back in to the left of the mountain mods tray. I'll use that to put the drive caddy back up there. Beyond that maybe some cable management here and there but overall very very happy with the build. Will keep this updated as I go.
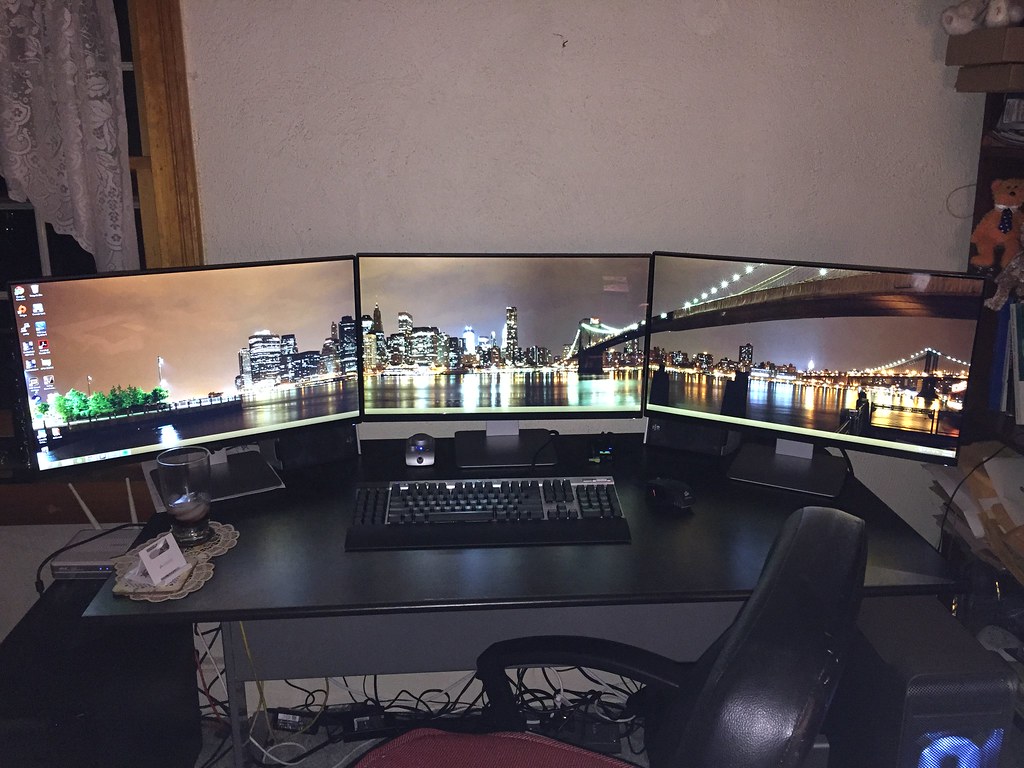


 i have the 120mm 2000rpm only. i suggest don't attach the fans on the perforated part as i can see on your photo(or it's the angle only).