Contribute
Register

[Updated] Stork's Thunderbolt Build: i5-3570K | GA-Z77X-UP5-TH | GTX 760

Status
Not open for further replies.
Thank you.

About work Mac's, I don't know. It's a MacBook Pro 15 in from 2015 wiwth 10.12.1 Sierra.

If you do not have access to Catalina, you can try that third-party utility by dosdude in that osxdaily link you posted.

I have no access to Catalina. I also tried the dosdude tool, but I am happy to try it again.

Thanks again! :D
 
Last edited:
Thank you.

About work Mac's, I don't know. It's a MacBook Pro 15 in from 2015 wiwth 10.12.1 Sierra.

I have no access to Catalina. I also tried the dosdude tool, but I am happy to try it again.

Thanks again! :D
Using what you have downloaded, you can try to build your own USB installer by following this guide (ignore Step 1 and Beta instructions).

Failing that, you can update your own MacBook to Mojave and then try Building a USB installer from that.
Cannot suggest anything else. Sorry.
 
Using what you have downloaded, you can try to build your own USB installer by following this guide (ignore Step 1 and Beta instructions).

Failing that, you can update your own MacBook to Mojave and then try Building a USB installer from that.
Cannot suggest anything else. Sorry.
THank you! I will try. I appreciate all of your efforts.
 
Last edited:
Good new and bad news.

The tool download worked!
1. Created a new stick via the UniBeast instructions referenced on page one of this thread (Stork's guide) and the install was going well... I have not tried to make my own USB installer as suggested (yet).
2. Formatted the destination drive (a 2TB SSD) and started the installation process
3. The machine rebooted once and automatically selected the HFS drive
4. The installation continued, but... I then got an error. The Mojave symbol appeared, and there was a message that Mojave could not be installed on my machine. An error occured while loading the installer resources... I have the same MB and an i7.

In the BIOS my USB is no longer has UEFI status. I will try again.
There could be lots of reasons for that error.
- Did you format the SSD via diskutility tool in the Installer of elsewhere before you started the Installer ?
- What format settings did you use ?
- HFS does not look correct as the Installer installs on APFS format drives.
- Have you checked your BIOS date & time is correct ?
- On first reboot, Clover boot screen should display the bootable drives. Did you select which drive to boot ?

Try again, take a photo of the screen before it restarts.
 
There could be lots of reasons for that error.
- Did you format the SSD via diskutility tool in the Installer of elsewhere before you started the Installer ?
No. Prior to the OS install screen, I ran the Disk Utility from the stick. The drive has only been formatted this way. Note, every time I try to install and I get a failure, I always reformat the drive on my next attempt.

- What format settings did you use ?
I formatted the drive as Mac Journaled GUID I think.

- HFS does not look correct as the Installer installs on APFS format drives.
That is odd. The first time clover launches I see two options:
- External
- HFS
You can also see that here in the instructions: https://www.tonymacx86.com/images/guides/screenshot0.png

So to be clear... I click on external. Everything was going well. I formated the drive as I described above with the Disk Utility tool and proceeded as instructed. The installer rebooted itself once. When clover booted it appeared to automatically choose the HFS option as shown in the screenshot.

- Have you checked your BIOS date & time is correct ?
I will check that.

- On first reboot, Clover boot screen should display the bootable drives. Did you select which drive to boot ?
I selected External, as per the instructions.

Try again, take a photo of the screen before it restarts.
I will take pictures and detail the steps during my next attempt later today... And... I will start from step 1.
 
Wow. I've built 3 hacks and this has been the most difficult upgrade. I am trying to provide as much relevant info as possible. I can't figure out what I'm doing wrong. Right now, I've built 2 USB sticks with UniBeast (UEFI option only) and I've configured the bios multiple times, but no stick has a UEFI option in a USB 2 port.

1. Bios Version: F12j
- Does the J matter? I downloaded the bios update from page 1 in the instructions in this thread
- Date and time corrected
System-Info.jpg


2. UniBeast 9.3 <-- should I use 9.2?
-- Found a new usb stick and formatted it (GUID + Mac Journaled). Not sure if it is USB 2 or 3.
-- Ran UniBeast (UEFI only --- no legacy) and created the stick
***** The creation of the stick took a lot longer than previous attempts with my original USB 3.0 stick. It took quite a few minutes.
stick.jpg

[Success]

3. BIOS Settings
-- Back to my hack. Put the USB stick in a USB 2.0 port.
-- Start machine and enter bios settings. The BIOS has been configured from a prior attempt. NOTE my USB stick does not have the UEFI option
-- Optimized all settings (f7) and reboot back into the bios (still no UEFI option)
-- Config BIOS as per the instructions on page 1, save and reboot -> Hit F12 to get the list of bootable options --> No UEFI option

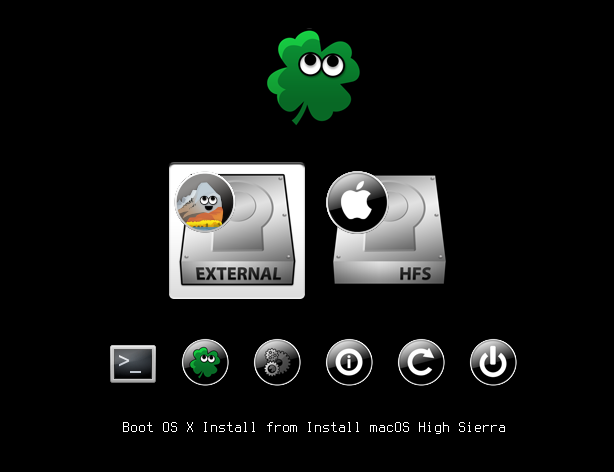
* If I boot using the stick, I get a message that there is no bootable drive.
* Repeat step 3 and double check all settings. I have screenshots.

M.I.T. / Advanced Freq Settings
mit.jpg


Peripheals --> I see I have an option in my BIOS that no other screenshot seems to have (USB Per-Port Disable Control)... Note the config. Also... The options at the bottom of the peripherals screen are correct according to the instructions. I can provide an image if needed.
INIT Display First -> IGFX
Internal Graphics -> Auto
Internal Graphics Memory -> 32M
XHCI Hand-off -> Enabled
EHCI Hand-Off -> Enabled

Periph1.jpg


Power Management:
pwr.jpg


Bios Features:
B-Features.jpg


Boot Options: I hit F10 and then F12 to get the boot options. I want to boot to the Kingston option, but there is no UEFI available for it. I just created a stick. The config seems to be correct. I've tried both USB 2 ports.

Note: The Samsung SSD option is the drive I want to reformat and install to...

boot-options.jpg


Any help would be appreciated. My next steps:
- Since the Kingston Data TRaveler is not working, back to my original USB stick and starting over again.
- UniBeast made my original USB 3.0 stick quickly!
- Popped the USB 3.0 stick in a USB 2.0 port and F12 (No UEFI option)
- In the BIOS -> F7 for Optimized setting and boot back into the bios
- Config BIOS as instructed -> Boot back into BIOS
---- In BIOS features my original USB stick has no UEFI option (so confused)
- F10 (save and restart) --> F12 -- still no UEFI option in the boot options
 

Attachments

  • stick.jpg
    stick.jpg
    9.5 KB · Views: 39
Last edited:
SUCCESS PERHAPS? [In Progress]

So... I plug in both UniBeast sticks in both USB 2.0 ports -> F12
-- Now I get a UEFI option. Wow.


In Clover.

Now the only challenge I have is figuring out which external option I should select to start. Since I have two USB sticks Clover shows:
External | External | HFS

1. I select the 1st External option on the left. Both sticks have the same data.
2. When I get the chance I go into Disk Utility. I'm happy to be here.
3. I re-format the drive -> Mac Journaled
4. Exit Disk Utility & Select the Install OS option
5. Select install drive and engage

First install screen

- This is the first install screen and it says it'll only take a few minutes.
- Done! System reboots for the 1st time.

Clover Pt 2.
- System loads Clover and I do nothing
- Clover gives an automatic boot countdown and we begin...

I think this is working. Will update this post.

It worked! Thanks for your help! The only issue I need to troubleshoot now is the system report -> Thunderbolt -> No thunderbolt hardware found.
 
Last edited:
It worked! Thanks for your help!

Glad you solved the problem.
Looking at those BIOS screenshots, it looks like your BIOS is different from the one I am using.
You do not seem to have the CSM options.
When CSM is set to NEVER, then the "Boot Mode Selection" option disappears.
When CSM is set to ALWAYS, then the "Boot Mode Selection" appears and it needs to be set to "UEFI Only".

I have CSM set to ALWAYS because I am using an AMD RX580 GPU.

I am using a modded 12j BIOS. It is based on Mod9-12j BIOS that has NVMe boot support added.
But even Mod9-12J BIOS has CSM.
Check the "Boot Mode Selection" setting, and set it "UEFI Only" that will show your UEFI USB boot drive I believe.

200304150501.jpg


200304150541.jpg

The only issue I need to troubleshoot now is the system report -> Thunderbolt -> No thunderbolt hardware found.
That's normal I believe until you plugin a Thunderbolt device into the Thunderbolt socket (such as a Thunderbolt drive).
I do not have such a device.
 
Last edited:
Status
Not open for further replies.
Back
Top