- Joined
- Feb 2, 2013
- Messages
- 325
- Motherboard
- HP Pavilion 14-ce0501na
- CPU
- i5-8250U
- Graphics
- UHD 620
- Mobile Phone
Hi all,
This is long overdue, but it’s finally here - my personal jumping through hoops to get 10.11.5 up and running on my Z170-HD3P.
Since I wrote the first “Guide”(if you can call it that) my hardware has changed slightly, so the list is updated accordingly. Basicly I added a little more RAM and changed my SSD.
Gigabyte Z170 HD3P Rev1.0 motherboard. BIOS Version F5g
Intel® Core™ i5-6500 CPU @ 3.2 GHz
ASUS Radeon HD 7770 2GB GDDR5
4x8GB DDR4 2400Mhz Corsair Vengeance CL14
250GB Samsung 850 EVO
Now, regarding BIOS version - I am using a beta BIOS but it works, so unless someone reports newer version is working smoothly - I don’t think I’ll be replacing it for now. I have trouble with sleep/wake-up but I think my GPU is responsible for that. Anyway,
First off - you need to find a suitable flash drive. I have 7 lying around and only 1 of them will work with UniBeast 6.2.0 - a problem I never encountered with OSX versions prior to 10.11
So:
Download OS X El Capitan from the Appstore on a working Mac (or Hack) and create an OSX El Capitan 10.11.5 bootable flash drive using UniBeast.

SSDTs.zip

I will be adding stuff as I go if I find it necessary or if you guys ask me.
What works:
What does NOT work:
*NOTE*
For those endless boot menu entries! Please refer to the Skylake Testing Thread - I got help from there and it's working. Just please read it at least 5 times before you implement it, since it has been reported to prevent the machine from booting from the HDD(or SSD) you installed on!
http://tonymacx86.com/threads/testing-thread-skylake-platform-in-os-x.176407/page-35#post-1167324
Here's the old guide for whoever cares about 10.11.<5:
EDIT: I have now subscribed myself to this thread to avoid late responses. I will try my best to keep myself on top of things from now on. I do not claim myself to be a professional so bare with me - I am doing what I can
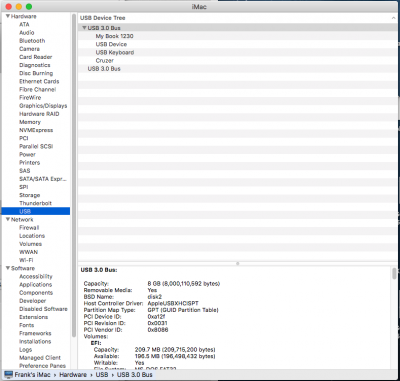
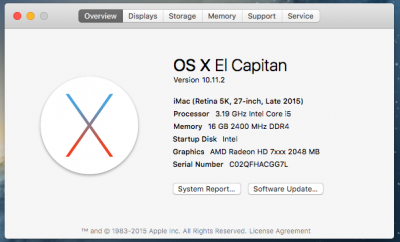
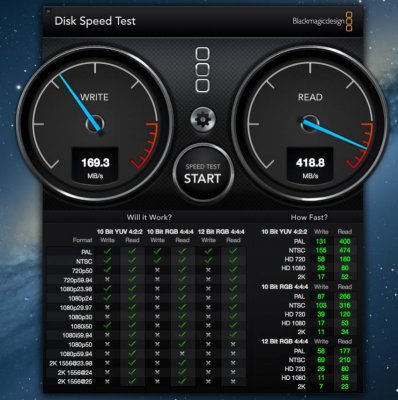
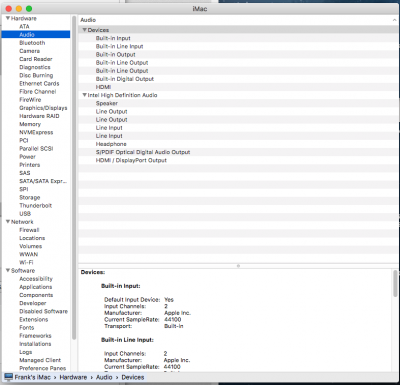
P.S. I hope I haven't missed something vital in the updated guide. I have some screenshots but this editor is giving me a headache - as sophisticated as it may be, so I'll just decide where to put them and post them later. They basically show my system specs and memory being read just fine as well as my GPU, etc.
Happy hacking, everyone!
This is long overdue, but it’s finally here - my personal jumping through hoops to get 10.11.5 up and running on my Z170-HD3P.
Since I wrote the first “Guide”(if you can call it that) my hardware has changed slightly, so the list is updated accordingly. Basicly I added a little more RAM and changed my SSD.
Gigabyte Z170 HD3P Rev1.0 motherboard. BIOS Version F5g
Intel® Core™ i5-6500 CPU @ 3.2 GHz
ASUS Radeon HD 7770 2GB GDDR5
4x8GB DDR4 2400Mhz Corsair Vengeance CL14
250GB Samsung 850 EVO
Now, regarding BIOS version - I am using a beta BIOS but it works, so unless someone reports newer version is working smoothly - I don’t think I’ll be replacing it for now. I have trouble with sleep/wake-up but I think my GPU is responsible for that. Anyway,
First off - you need to find a suitable flash drive. I have 7 lying around and only 1 of them will work with UniBeast 6.2.0 - a problem I never encountered with OSX versions prior to 10.11
So:
Download OS X El Capitan from the Appstore on a working Mac (or Hack) and create an OSX El Capitan 10.11.5 bootable flash drive using UniBeast.
- Please note UniBeast took me approximately 40 minutes for some reason. I don’t understand it but I’m not questioning it either.
- Settings I used in UniBeast are:
- UEFI BOOT
- NO Injections
- UEFI BOOT
- Boot up your machine and enter BIOS. Now here’s the tricky part - you have to make sure you set all the settings correctly - missing one will probably cause a kernel panic and your machine will not boot. Here’s the settings:
- Windows Features: Other OS
- Storage Boot: UEFI Only
- Secure Boot: Disabled
- Intel PPT: Disabled
- XHCI Hand-off: Enabled
- Super IO Configuration > Serial and Parallel Port - both Disabled
- VT-D: Disabled
- High Precision Timer: Disabled
- IOAPIC 24-119 Entries: Disabled
- Windows Features: Other OS
- Disconnect all the drives, cameras and other hardware and/or peripherals you won’t be using during the installation - they might interfere! Simply put - connect only the mouse, the keyboard and leave it at that.
- Boot up from your USB flash drive. Clover comes up - select your flash drive and hit Enter. For me it works like magic! No additional tweaks required. The OSX setup simply starts. Do your partitioning as you like and proceed with the installation.
- Note: In the Clover boot menu I added “kext-dev-mode=1” - just in case. I don’t know if it affects the installation process but I do know the kext I will be using need that argument, so I am typing it until I get to OSX desktop, so I can write that argument in my config.plist so it’s there every time.
- Now after the installation is done - boot off the USB and select your hard drive (or ssd). In my case it brings up the setup - without ANY changes to clover whatsoever.
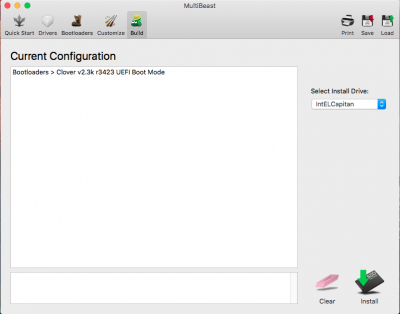
- Open up Multibeast and install CLOVER UEFI - ONLY THAT!

- Open terminal and type “diskutil list” - I have attached mine here:
- Mount both and copy the ENTIRE EFI folder FROM the USB DRIVE TO your LOCAL DRIVE. That will ensure you have CLOVER installed and booting!
SSDTs.zip
- One is for Audio
- The other is for HDMI Audio
I will be adding stuff as I go if I find it necessary or if you guys ask me.
What works:
- OS X (small tweaks
)
- Accelerated Graphics (OOB)
- Sound - Couple hoops to jump through, but it's working just fine!
- HDMI + Sound
- Speedstep (OOB)
- Memory is recognized properly (OOB)
- HWMonitor - courtesy of Tonymacx86 - via the MultiBeast app. Thanks, Tony! It won’t give me the CPU OR GPU rpms, but it does power consumption, speedstep and temperature + more - which is fine by me.
- Let me know
What does NOT work:
- Sleep - I can’t figure it out. If someone has a Radeon HD 7xxx solution - PLEASE - let me know!
- Facetime - I do not own a camera for my desktop - so cannot test.\
- All of my USBs are recognized as USB 3.0 - it doesn't bother me for now, so I'm leaving it as it is.
- USB 3.1 - AFAIK it’s not yet supported. I don’t have any USB 3.1 devices to test with anyway.
- Ask me and I’ll test it if I have it.
- iMessage - don't need it and I can't seem to find the time to solve it.
*NOTE*
For those endless boot menu entries! Please refer to the Skylake Testing Thread - I got help from there and it's working. Just please read it at least 5 times before you implement it, since it has been reported to prevent the machine from booting from the HDD(or SSD) you installed on!
http://tonymacx86.com/threads/testing-thread-skylake-platform-in-os-x.176407/page-35#post-1167324
Here's the old guide for whoever cares about 10.11.<5:
littlegreen said:Hey guys!
I have been struggling with this build for a while but now it is done and I thought I'd share my experience and glitches for those of you who have the same or a similar build.
My full hardware list:
Gigabyte Z170 HD3P Rev1.0 motherboard. BIOS Version F5g (latest as of today)
Intel® Core™ i5-6500 CPU @ 3.2 GHz
ASUS Radeon HD 7770 2GB GDDR5
2x8GB DDR4 2400Mhz Corsair Vengeance CL14
120GB Intel 520 Series SSD.
It's a budget build but it now runs smoothly and I love it.
What's working?
CPU stepping.
RAM detection (kind of - in "About this Mac" t's detected correctly, but GeekBench says it runs @ 0 MHz...)
Graphics
Sound.
HDMI
HDMI Sound.
All USB ports (haven't tested speeds yet but they are all recognized as USB 3.0 devices.....)
AppStore
Proper and quick shutdown and restart.
Sleep
What's not working?
My memory is 2x8GB DDR4 2400Mhz Corsair Vengeance CL14 but is recognized as 16GB 3200 MHz... doesn't bother me that much.
Re-seated the memory modules and it just worked!
Ask and I will check for you
What I can not test?
Facetime
iMessage
USB 3.1
.... tell me!
OK - here we go - what will you need?
1. A working Mac.
2. A USB flash-drive - at least 8 gigabytes.
3. A few hours.
Pre-requiered files:
Verde.kext - to enable HD 7770 acceleration. - with love from Russia
RTL8111.kext - to enable onboard LAN - curtesy of Mieze - thanks mate!!!
USBInjectAll.kext
FakeSMC.kext
The last two kexts are provided by UniBeast - thank you guys for that!!!
BIOS Settings:
Windows Features: Other OS
Storage Boot: UEFI Only
Secure Boot: Disabled
Intel PPT: Disabled
XHCI Hand-off: Enabled
Super IO Configuration > Serial and Parallel Port - both Disabled
VT-D: Disabled
High Precision Timer: Disabled
IOAPIC 24-119 Entries: Disabled
Getting any of these wrong probably will result in a kernel panic so you'd know you messed up
Note: Make sure you disconnect every piece of hardware you won't use during the installation. That includes cameras, wifi cards, additional hard drives, etc.
So get on a working mac, get the installer and run UniBeast - you know the drill
UEFI boot, no injections needed.
Now here is a tricky part:
1. Make sure you use the latest BIOS. Otherwise you don't have the IOAPIC 24-119 Entries option and sound will not work. AND you will need to patch config.plist to make the system bootable at all.
Besides, the installer should boot without any additional flags. dart=0 is included by default - worked just fine for me.
*** Big fat NOTE: If your system does not boot after the install is done disconnect your discrete graphics, use your integrated graphics to boot and finish the install.
That is what I had to do. And not just transfer the cable from the AMD to the Intel - properly switch settings in the BIOS and disconnect the Discrete Graphics.
One other thing that worked for me was in clover menu:
Options > Graphics Menu > Check Inject ATI > ID = 0x64401002 > boot. (Leave the rest as is)
Assuming you reached the desktop of your fresh install, here are the things you need to do:
Open MultiBeast, install ONLY Clover UEFI mode. NOTHING ELSE! (For now)
Do not do quick start or anything else! Go straight to "Bootloaders" click on Clover UEFI Mode and then "Build" ....
Next open terminal type "diskutil list" and look for your EFI partition (I'll upload a version of mine later). If no other hard drives attached it should be disk0s1 - so next command is "diskutil mount disk0s1"
This will mount your EFI partition so open it up, navigate to /EFI/CLOVER/KEXTS/ and delete all the folders, except 10.11. In that folder you need to have 4 files only - for now.
FakeSMC.kext
USBInjectAll.lext
Verde.kext
RealtekRTL8111.kext (make sure you use the latest version from Mieze - i.e. replace the file)
Now, if your system boots fine from the USB flash drive I would recommend you to copy the config.plist from the flash drive directly to your hard drive and work from there. It worked for me.
Regarding Graphics
All I use is Verde.kext - no injection, no fakeIDs. Just place it in /EFI/CLOVER/kexts/10.11 - that's it. Simple and update-proof.
How to get audio working [Big fat THANKS!!! to toleda ]
Turns out it's very easy! Once you know how to do it
ssdt_hdef-1-100-hdas.zip - Extract the SSDT file and Place it in your /EFI/CLOVER/ACPI/patched/ Folder.
Run audio_cloverALC-110.command.zip
Run MultiBeast and Install Drivers > Realtek ALCxxx > 887/888 Audio Codec
Reboot. Audio should now be present.
To Get HDMI audio [BIG Credits to toleda]
1. Make sure FixDisplay_0100 in config.plist is set to false
config.plist/ACPI/DSDT/Fixes/FixDisplay_0100/
2. Quickly follow the AMD/Nvidia HDMI Audio [Easy Guide]
Credits:
toleda - for the incredible help on getting audio to work! You're incredible! Thank you!
tonymacx86 and the team - for this website and community! You're all stars!
Mieze - for the updated LAN kext. Thank you!!!
[unknown] - for the Verde.kext Don't know who wrote it but it saved me from editing kexts! Thanks!
http://browser.primatelabs.com/geekbench3/4697981 - Geek Bench was higher couple days ago. Since I fixed how my memory is recognized it scores lower... hmmm....
View attachment RealtekRTL8111.kext.zip
View attachment EFI Folder.zip
EDIT: I have now subscribed myself to this thread to avoid late responses. I will try my best to keep myself on top of things from now on. I do not claim myself to be a professional so bare with me - I am doing what I can
P.S. I hope I haven't missed something vital in the updated guide. I have some screenshots but this editor is giving me a headache - as sophisticated as it may be, so I'll just decide where to put them and post them later. They basically show my system specs and memory being read just fine as well as my GPU, etc.
Happy hacking, everyone!
Attachments
Last edited:

