Contribute
Register

Update Directly to macOS High Sierra

Status
Not open for further replies.
Installation went smooth, after updating Nvidia Web Drivers the resolution returned to normal and second display came on.

MultiBeast fails to install audio drivers, any ideas for Realtek ALC892? Tried https://www.tonymacx86.com/threads/high-sierra-desktop-realtek-applehda-audio.226433/ and no go.

Also how can I clean up this garbage?

View attachment 285314

And although Cuda was updated to 9.0.197, it still pops up on every start saying "Update Required" although no update is available.

Anyone?
 
Thank you for this. I was stuck in upgrade hell until I found this guide. It worked like a charm.

Established users of macOS Sierra who wish to update directly to macOS High Sierra can do so just like a regular Mac would. These fully native methods require no USB creation or preparation and allow you to keep all of your files and settings.

Before you begin, we strongly recommend performing a full backup of your existing system using Carbon Copy Cloner. By doing this, you can always go back to your working macOS Sierra installation.

Guide: Update Directly to macOS High Sierra (APFS)
Apple is now using APFS (Apple File System) instead of HFS+ for the default file system in macOS High Sierra for solid state drives. If you have a SSD, this guide will auto-convert it to APFS by default. Users with traditional 'spinning' hard disk drives will remain on HFS+ by default. Using APFS with Clover requires copying the apfs.efi file from the installer to your Clover EFI. If you would like to update without converting to APFS use the HFS+ guide below.

1. Update your existing Clover install to v4173+ using MultiBeast or official Clover package.

2. Open Clover configuration folder on the root of your system drive or EFI Partition using EFI Mounter v3. Copy FakeSMC.kext and any other extra necessary kexts to /EFI/CLOVER/kexts/Other/. If you need essential kexts, download them here.

3. Copy apfs.efi to /EFI/CLOVER/drivers64UEFI/.

4. Download Install macOS High Sierra Application from the Mac App Store. When complete, the app will open. Please note, the Application will disappear after use.

5. Choose system drive for install (Example: Macintosh HD). When complete, the computer will automatically reboot.

6. At Clover boot screen, choose Boot macOS Install option (Example: Boot macOS Install from Macintosh HD). Choosing your system drive will go back to your previous installation without updating.

7. Complete the installation process- the computer will automatically reboot a few times.

8. At Clover boot screen, choose Boot macOS option (Example: Boot macOS from Macintosh HD). The computer will then complete the update.​


Alternative Guide: Update Directly to macOS High Sierra (HFS+)
Some users with solid state storage may choose to update to macOS High Sierra without converting to APFS filesystem, thus maintaining HFS+ filesystem. This guide will not auto-convert your HFS+ SSD to APFS.

1. Update your existing Clover install to v4173+ using MultiBeast or official Clover package.

2. Open Clover configuration folder on the root of your system drive or EFI Partition using EFI Mounter v3. Copy FakeSMC.kext and any other extra necessary kexts to /EFI/CLOVER/kexts/Other/. If you need essential kexts, download them here.

3. Download Install macOS High Sierra Application from the Mac App Store. When complete, the app will open. Close the window.

4. Open /Applications/Utilities/Terminal and type the following:

Code:
/Applications/Install\ macOS\ High\ Sierra.app/Contents/Resources/startosinstall --converttoapfs NO

5. At prompt, type A to agree to the License Agreement. When complete, the computer will automatically reboot.

6. At Clover boot screen, choose Boot macOS Install option (Example: Boot macOS Install from Macintosh HD). Choosing your system drive will go back to your previous installation without updating.

7. Complete the installation process- the computer will automatically reboot a few times.

8. At Clover boot screen, choose Boot macOS option (Example: Boot macOS from Macintosh HD). The computer will then complete the update.​

Please let us know how these guides work for you! Thanks and good luck!

Related:
NVIDIA Releases Alternate Graphics Drivers for macOS High Sierra 10.13.0 (378.10.10.10.15)
macOS High Sierra is Now Available on the Mac App Store
Apple Releases macOS High Sierra 'Golden Master' GM Candidate to Beta Testers
Apple's Policy on Apple File System (APFS) for High Sierra
macOS High Sierra To Be Released September 25, 2017
macOS High Sierra Public Beta 8 is Now Available
macOS High Sierra Public Beta 7 is Now Available
macOS High Sierra Public Beta 6 is Now Available
macOS High Sierra Public Beta 5 is Now Available
macOS High Sierra Public Beta 4 is Now Available
macOS High Sierra Public Beta 3 is Now Available
macOS High Sierra Public Beta 2 is Now Available
macOS High Sierra Public Beta is Now Available
How to Create a macOS High Sierra Public Beta Installation USB
Introducing the macOS High Sierra Critter!
High Sierra Desktop Support
High Sierra Desktop Guides
High Sierra Laptop Support
High Sierra Laptop Guides
Apple Reveals macOS High Sierra at WWDC - Available Fall 2017

i tried to install mac os high sierra in my desktop. but i cant install it. when i make the bootable flash drive then install the mac os sierra my graphics show only 7mb. and wifi usb card dosent work please anyone help me to edit config plist for my pc configuration.
here is my desktop pc configuration : Motherboard - Asus H81m-C
Processor : Intel(R) Core(TM) i7-4770 CPU @ 3.40GHZ
Memory : 8 GB
Graphics Chipset : AMD Radeon (TM) R9 270x
Usb wifi lan card : 802.11n USB Wireless Lan Card
 
Last edited by a moderator:
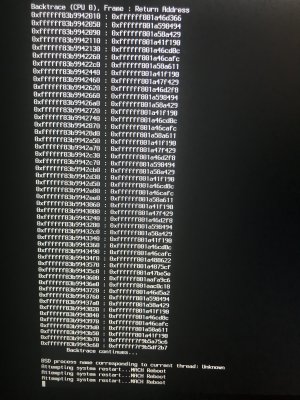
I've been trying to get this done since late afternoon yesterday and it's 3:30 AM now so I'm calling it. I've read through this entire thread and tried many things but every single time after the first reboot it gets stuck with a kernel panic and attempts a mach reboot. With all I've tried that's all I've ever gotten. I"ve got my 1080ti out now and running off of the onboard graphics (which is nicer because I've at least got acceleration). I tried with IG disabled in bios and nvidiagraphicscleanup, fakesmc, and lilu in Other. I've tried with whatevergreen.kext. I disabled web drivers. I've tried with intelgraphicscleanup and intel injection after I took out my card. I dropped MATS and DMAR. I've got apfs.efi in the right spot. Just can't seem to get it to boot the installer. I'm using iMac18,3 sysdef, if that matters. I'm also upgrading on an SSD. I'll attach my EFI folder if anybody could take a look and tell me if I'm missing something. I'd appreciate it.
 

Attachments

  • EFI.zip
    28.5 MB · Views: 85
  • fullsizeoutput_60d8.jpeg
    fullsizeoutput_60d8.jpeg
    4 MB · Views: 211
This is a guide not a help thread - For help start a new thread in the relevant forum area.
 
Yes and I’m trying to use this guide but I’m having problems. I must’ve gotten confused by the other people in the last 60+ pages posting about similar issues in this same thread looking for help using this guide. My apologies.
 
I must’ve gotten confused by the other people in the last 60+ pages posting about similar issues in this same thread looking for help using this guide.
Yes, it is confusing when everybody piles onto the same thread. That is why you should start one of your own.
 
Yet in the last 20 days worth of posts I didn’t see a single reply stating that to others. So after 10 hours and 60 pages you can understand my frustration at such a reply. But yeah. I guess I’ll start another thread. Tomorrow maybe. Time for sleep now.

And really, sincere apologies if I’m being curt. Tiredness and frustration is all it is.
 
Yet in the last 20 days worth of posts I didn’t see a single reply stating that to others.
Don't take it personally, my reminder post was not directed solely to you or I would have used a quoted reply.
 
need help! i can update appearently ok my sierra hackintosh to high sierra but when the direct update finish my computer reboot and there not seem to be a install of high sierra on my ssd. Clover only show me another HDDs but no SSD disk or any install of High Sierra. Any help please?
 
Status
Not open for further replies.
Back
Top