- Joined
- Nov 1, 2014
- Messages
- 12
- Motherboard
- Lenovo m93p tiny
- CPU
- i5-4570T
- Graphics
- hd4600
- Mac
- Classic Mac
- Mobile Phone
Hi Folks,
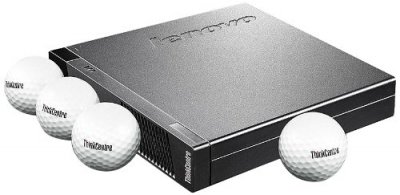
First, thanks to all the people that make stuff like this possible. Here are my notes from this 10.10.0 build using Unibeast / Multibeast on a refurb Lenovo m93p "tiny" form factor. These are sweet little machines the same size as a mac mini, and you can get them as low as $400 shipped after steep discounts on the refurb store. I've seen the m73 even lower, but they have slower processor options. There's a rare build of the m93p with the core i7 4765T, 4 core with HT for 8 cores in the OS! The machine I got in particular is only core i5 4570T dual core with HT, and I upgraded it with a 256GB M6S Plextor SSD and 16GB of Crucial DDR3.
Anyway, bluetooth is acting up, but seems to work most of the time? Geekbench is 3.2k/6.4k on the trial 32b version. Overall, it's 2.3x-4x faster than my current 2010 C2D mac mini.
TODO
PRE-INSTALL
INSTALL
POST-INSTALL
First, thanks to all the people that make stuff like this possible. Here are my notes from this 10.10.0 build using Unibeast / Multibeast on a refurb Lenovo m93p "tiny" form factor. These are sweet little machines the same size as a mac mini, and you can get them as low as $400 shipped after steep discounts on the refurb store. I've seen the m73 even lower, but they have slower processor options. There's a rare build of the m93p with the core i7 4765T, 4 core with HT for 8 cores in the OS! The machine I got in particular is only core i5 4570T dual core with HT, and I upgraded it with a 256GB M6S Plextor SSD and 16GB of Crucial DDR3.
Anyway, bluetooth is acting up, but seems to work most of the time? Geekbench is 3.2k/6.4k on the trial 32b version. Overall, it's 2.3x-4x faster than my current 2010 C2D mac mini.
TODO
- HDMI sound (not a big deal for me)
- Mic inputs (not a big deal for me, but the audio input on the front panel is supposedly a combo jack with mic input too)
- Proper power management? Sleep works, but doesn't wake on keyboard press. No idea if fans are acting right, but seem to be.
- Hot-plug display switching. The m93p "tiny" comes with a Display Port standard, but also has a made-to-order custom slot, and I lucked out that my refurb came with an HDMI input in that slot instead of something dumb that they offer like a USB 2.0 port or serial port. If I reboot with displays plugged in to both HDMI/DP, they both work, but unplugging and swapping them around doesn't work yet; not sure how much I'll look into it.
PRE-INSTALL
- BIOS settings
- Disable secure boot and virtualization stuff
- Patch vanilla kernel on a machine with perl or sed from http://www.insanelymac.com/forum/to...-locked-msrs-and-hp-envy-15-j063cl-i7-4700mq/ - snippet of the important part copied here where <usb> is whatever you've named your USB installer stick (keep this usb around! it's useful to have a patched kernel on a USB installer for 10.10.x upgrades):
Code:
Please note the kernel resides at /System/Library/Kernels/kernel.
For 10.10:
$ cp /Volumes/<usb>/System/Library/Kernels/kernel ~/Desktop/kernel_backup
$ cp /Volumes/<usb>/System/Library/Kernels/kernel ~/Desktop/kernel
$ perl -pi -e 's|\xe2\x00\x00\x00\x02\x00\x00\x00|\x00\x00\x00\x00\x02\x00\x00\x00|g' ~/Desktop/kernel
$ perl -pi -e 's|\xe2\x00\x00\x00\x4c\x00\x00\x00|\x00\x00\x00\x00\x4c\x00\x00\x00|g' ~/Desktop/kernel
$ perl -pi -e 's|\xe2\x00\x00\x00\x90\x01\x00\x00|\x00\x00\x00\x00\x90\x01\x00\x00|g' ~/Desktop/kernel
$ sudo cp ~/Desktop/kernel /Volumes/<usb>/System/Library/Kernels/kernel- Boot from Unibeast USB installer with DisplayPort plugged in, patched kernel on USB, and options “-x GraphicsEnabler=yes maxmem=8192” (I have 8GB SODIMM in the first slot, so probably just change to whatever size you have in the first slot. e.g. 2048, 4096, 8192)
- Install should go well
- Reboot from USB stick and copy over patched kernel to newly installed system
Code:
$ sudo cp /Volumes/<usb>/System/Library/Kernels/kernel /System/Library/Kernels/kernelPOST-INSTALL
- Reboot from HDD and install Multibeast profile:
Code:
easybeast
alc283
3rd party sata
trim enabler
forcelegacyrtc
evoreboot
fakesmc
nullcpupowermanagement
appleintele1000e
chimera
basic boot
kext dev mode
use kernel cache
mac pro 3,1
3. HDMI sound, mic input, combo mic+headset input all TBD
4. Intel wireless TBD / probably never. Should probably purchase different mini PCIe or usb wifi -- See post #3 for new half-height mini pcie wifi details!


