Contribute
Register

[Success] Skylake Asus Maximus VIII Ranger, i5-6600, GTX 1070 (Clover/High Sierra)

Status
Not open for further replies.
@brennan.ruth0723 - Hi, I'm glad you've posted on Going Bald's thread re: installing Windows 10 as I think they'll be better able to help you with this aspect of the Hackintosh process. It's such a long time since I installed Windows on my own system, that I've mostly forgotten how I managed to achieve dual-boot status (old age plays it's part in this too, of course) :).

Also, I forgot to ask earlier, but did you manage to get your onboard sound working in the end, and have you installed the Nvidia Web drivers and black screen fix (if you need it) for your Hackintosh & 1080 GPU so you have graphics acceleration under macOS?
Yes, I got the on-board sound working and the graphics card (web drivers) are working now! Many Thanks! One thing I did see when looking at the FakePCIID kexts was a solution for HDMI sound, have you done anything with this? I have my Hackintosh hooked up to a Vizio Monitor (TV really) that does sound.
 
@brennan.ruth0723 - I also have my Hackintosh attached to a TV via HDMI (my main display is a Dell monitor). However, I have it connected it via SPDIF - digital out - and I mainly use the TV for when I'm gaming with a headset in Windows, so my experience with HDMI audio isn't great, unfortunately.

However, I've just discovered that the tonymacx86 forum has a very good section for HDMI audio:
https://www.tonymacx86.com/forums/hdmi-audio.59/

This thread in particular promises a one-kext solution for the problem:
https://www.tonymacx86.com/threads/clover-hdmi-audio-for-nvidia-amd-cards-easy-way.145399/

And, once you get your Windows installation up & running, along with HDMI audio in macOS, it looks like you'll have most of your Hackintosh core functions available and installed. Congratulations! I hope you've managed to get bluetooth working too.

Regarding the Paragon software I mentioned earlier for Windows - if you do go down this route (and it's not necessary but a nice luxury) it might be worth waiting for macOS High Sierra, as that's going to bring a new APFS default filesystem to the table and Paragon will have to update their Windows software to be compatible with this. They currently offer HFS+ for Windows 11 and NTFS for Mac 15. I also recommend Carbon Copy Cloner (it's expensive but has a 30-day trial) if you ever decide to go down the macOS external (or internal) drive backup route as well.

Thanks for the info. I will give it a shot once I get Windows back online. I ran into another error screen after doing Going Bald's suggestion. I kept the macOS SSD disabled for the install. Waiting for his response.
 
@pbryanw I have finnaly gotten Windows 10 to install, had to disable the 3rd HDD I had installed (formated for MAC) and it installed with no issues. I decided to format this HDD drive for Windows, since I will be doing more gaming on Windows. This leads me to my question. You said:
Reboot to BIOS/UEFI and disable CSM. Save&exit, continue boot to desktop. Shut down, disconnect the drive."

Does this mean I should disable my Win10 SSD and HDD in PCH Storage Configuration and enable just my macOS SSD? I did not follow what you meant by "disconnecting the drive" Almost done..minus my BT issue on macOS
 
@brennan.ruth0723 - Hi, that's great to hear regarding your Windows install. Yes, that earlier bit was just me copying and pasting Going Bald's instructions. I don't think you have to disconnect your SSD after the Windows install.

You should be able to enable all 3 HDDs now, and put your macOS in the first boot position on your BIOS, as you noted.

Hopefully then Clover will pick up the new Windows install (I say hopefully - it's a long time since I setup my dual-boot system) and then when you want to boot into Windows, all you'll have to do is hold down a key on startup and select your boot drive. (I think you can also use the Startup Disk preference in macOS to do this too).

There's also ways to select which drive always boots first on startup - Windows or macOS - and that involves a little config.plist tinkering. I'll see if I can find a guide - edit: this may do it - you just need to use the DefaultVolume key I think in Boot.
 
Last edited:
@brennan.ruth0723 - Hi, that's great to hear regarding your Windows install. Yes, that earlier bit was just me copying and pasting Going Bald's instructions. I don't think you have to disconnect your SSD after the Windows install.

You should be able to enable all 3 HDDs now, and put your macOS in the first boot position on your BIOS, as you noted.

Hopefully then Clover will pick up the new Windows install (I say hopefully - it's a long time since I setup my dual-boot system) and then when you want to boot into Windows, all you'll have to do is hold down a key on startup and select your boot drive. (I think you can also use the Startup Disk preference in macOS to do this too).

There's also ways to select which drive always boots first on startup - Windows or macOS - and that involves a little config.plist tinkering. I'll see if I can find a guide - edit: this may do it - you just need to use the DefaultVolume key I think in Boot.
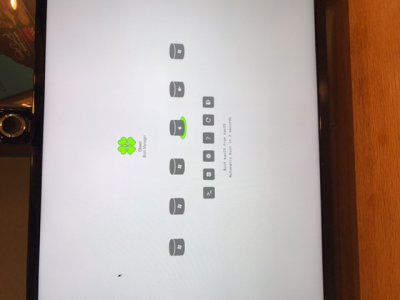
@pbryanw I got both OS's working and they show up in Clover and I can boot to both with no issues. osMac is my default, which is what I want. I need to figure out how to remove the extra Window's icons in Clover (see attached image) IMG_1299.JPG
 
@brennan.ruth0723 - Hi, disabling Legacy scanning in the Scan section of GUI in config.plist may hide those extra drives according to this ****** thread. This is my Scan section below:
Code:
<key>Scan</key>
        <dict>
            <key>Entries</key>
            <true/>
            <key>Kernel</key>
            <string>None</string>
            <key>Legacy</key>
            <false/>
            <key>Linux</key>
            <false/>
            <key>Tool</key>
            <false/>
        </dict>
If that doesn't do it then try the next section of this post.

You also should be able to edit the Custom part of your GUI section (or add one under GUI) in config.plist to achieve this. Here's mine in its entirety, which can be used as a template:
Code:
<key>Custom</key>
        <dict>
            <key>Entries</key>
            <array>
                <dict>
                    <key>Hidden</key>
                    <true/>
                    <key>Title</key>
                    <string>Hide Internal</string>
                    <key>Type</key>
                    <string>Other</string>
                    <key>VolumeType</key>
                    <string>Internal</string>
                </dict>
                <dict>
                    <key>FullTitle</key>
                    <string>Windows 10</string>
                    <key>Path</key>
                    <string>\EFI\Microsoft\Boot\bootmgfw.efi</string>
                    <key>Type</key>
                    <string>Windows</string>
                    <key>Volume</key>
                    <string>C0E630E1-FFA7-43AC-A1A1-3F9AB2F08D34</string>
                </dict>
                <dict>
                    <key>FullTitle</key>
                    <string>macOS</string>
                    <key>Type</key>
                    <string>OSX</string>
                    <key>Volume</key>
                    <string>C9A5C725-9E78-45F9-B388-AF36DB6065C3</string>
                </dict>
                <dict>
                    <key>AddArguments</key>
                    <string>nv_disable=1</string>
                    <key>FullTitle</key>
                    <string>macOS Recovery</string>
                    <key>Type</key>
                    <string>OSXRecovery</string>
                    <key>Volume</key>
                    <string>4DD55031-4CCF-4496-B13D-8F4581D21660</string>
                </dict>
            </array>
        </dict>
The Hide Internal entry, I think, might also rid of some of your extra entries. The other entries are to give names to your Windows & macOS partitions (the FullTitle parts, which you change to your own preference), when you select them in the Clover GUI. To get the Volume string for your drives, I think you can use the diskutil list command in terminal under macOS. Then:
Code:
diskutil info disk1s2
Where disk1s2 is the disk & partition you want information on. And you want the "Disk / Partition UUID" in the resulting text given by terminal, to put into the Volume string. However, I'm not entirely sure as I'm away from my main PC at the moment, so can't test it on my own Hackintosh. Again, if you get stuck feel free to ask for more help here, and on Tonymacx86. This part of the Clover wiki may help too: https://clover-wiki.zetam.org/configuration/gui
 
Last edited:
Thanks @pbryanw, I will give this a shot today. I am looking good now other than my Bluetooth issue. Need to get some wire adapters at my local computer store to address. Was thinking about my backup clover USB stick, I would just need to do the following steps you mentioned to update the stick:

  • Once the EFI partition is mounted, go back to your Clover USB drive with its newly created EFI folder
  • Delete this EFI folder
  • Then copy across the EFI folder from your macOS' EFI partition to the Clover USB Stick

Correct? So anytime I make changes to the EFI folder, I should copy to my USB stick.
 
Status
Not open for further replies.
Back
Top