- Joined
- Mar 15, 2017
- Messages
- 1
- Motherboard
- Asus P6T
- CPU
- Intel Core i7 920
- Graphics
- ATI 4870 Mac edition
- Mac
- Mobile Phone
Tyler62's Build: ASUS PT6 - i7-920 - ATI Radeon 4870
Components
Intel Core i7-920 Processor (second hand)
Asus P6T Motherboard (first edition / second hand)
Corsair 4 x 2GB Memory, XMS 3 @1666 MHz (unbuffered and not ECC / second hand)
Corsair VS550 550W (brand new)
https://www.amazon.com/dp/B00LMBWSI8/?tag=tonymacx86com-20
Antec Case unknown model (second hand).
Already Owned
ATI Radeon 4870 Mac Edition (i.e., with an Apple EFI already in its BIOS so you get the Apple logo at start up / coming from my Mac pro),
Western Digital 650 GB HDD SATA 2.0 Hard Disk Drive (coming from my Mac pro as well),
Comments
Hey, my name is Tyler, and I live in France. Sorry for my poor English. Hope you can get my words though.
Just found out the tonymacx86 website on late 2016. I’ve decided on early 2017 to build a new computer with hardware coming from my Mac Pro 4,1 (now upgraded to 5,1 on both firmware and hardware) + second hand and brand new PC stuff.
This is my first attempt on building a Hackintosh… After three weeks of struggle, it finally works ! Here’s the whole story.
Install method
El Capitan is… epic fail !
I’ve first installed Windows 7 to check the hardware integrity especially for second hand stuff. I’ve tested all the RAM modules with Memtest. Everything looked ok so it was time for the hackintosh operation.
My first intention was to use El Capitan (my home studio sound cards are not compatible with Sierra). But no success. Always had the « essentials.pkg » error during the install. I tried lots of different boot flags, made the bootable usb stick again… But definitely nothing worked.
After some search on the web, I found out it could come from the Corsair modules. One week later, I grabbed a Samsung DDR3 compatible module but as it was only 1GB, the install refused to start… Problem still unsolved !!!
Last night, Sierra saved my life
So, I’ve decided to make a Sierra bootable USB stick with my Mac Pro. I’ve injected the ATI drivers for the ATI 4870 be recognized. Simply followed the different steps here on tonymacx86, ie made a bootable USB in Legacy mode with UniBeast (for Sierra) and copied MultiBeast (for Sierra, too) as well for post-installation.
Tweaking the BIOS was quite easy as I only had to be careful about AHCI mode for SATA and disable the Intel virtualization. So far, so good.
Install with Sierra was successful at first try, without any boot flags or so… Can’t tell you how happy I was to get Mac OS desktop on screen !
Post-Install
it’s alive and it makes noise !!!
Post-install was very easy as well to be honest. Here are the parameters I used in MultiBeast. Just had to check in my motherboard’s manual to get the exact reference of the LAN chip.
MultiBeast Configuration - 2017-04-01 06:53:04
-----------------------------------------------------------------
Quick Start > Legacy Boot Mode
Drivers > Misc > FakeSMC v6.21-311-g2958f55.1723
Drivers > Misc > FakeSMC Plugins v6.21-311-g2958f55.1723
Drivers > Misc > FakeSMC HWMonitor Application v6.21-311-g2958f55.1723
Drivers > Misc > NullCPUPowerManagement v1.0.0d2
Drivers > Network > Realtek > RealtekRTL8111 v2.0.0
Bootloaders > Clover v2.3k r3766 Legacy Boot Mode
Customize > System Definitions > Mac Pro > Mac Pro 5,1
Customize > SSDT Options > Sandy Bridge Core i7
Drivers > Graphics > Inject ATI
After clicking on « build » and restart, everything was working as expected (LAN, USB 2.0, etc.) except audio. In system preferences, no output and no input. Headache was back again because I could not see the reference of my audio chip anywhere in MultiBeast.
After a quick search in tonymacx86 forum, I grabbed the « audio_cloverALC-120_v1.0f1.command » file and the « EFI mounter v3 ». After having launched the EFI mounter, I clicked on the audio_cloverALC-120_v1.0f1.command file to inject the audio drivers. Then, restart and the audio was fixed ! Shut down, restart and sleep worked as well. Hell YEAH !!!! Now I have a fully working hackintosh made with some old stuff !
Good operation because I invested 205 € to build a 690 € estimated Mac pro-like machine (estimation based on mac2sell website).
RAM, are you there ?
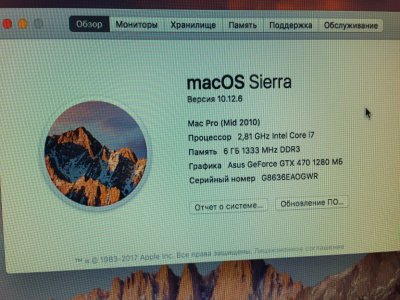
I’ve been using a Mac for more than a decade so I was a bit curious to check the system report on my brand new fake Mac. Even if I’ve injected a fake Mac Pro 5,1 in MultiBeast, the computer is recognized as an iMac… And I can only use 5 DIMMS max whereas my motherboard has 6 DIMMS. Maybe the motherboard I bought second hand is ****ed up in a way or so. Weird thing is I have 8 GB of RAM usable in Mac OS but only 6 GB in the mobo BIOS settings. In the system report, the RAM is DDR3 - 1333 MhZ – ECC whereas in reality, it’s DDR3 – 1066 Mhz – non ECC. Anyway, it works perfectly so never mind!
Conclusion
Big thank you to tonymacx86 community for all !!!! YOU GUYS ROCK !
Hope my experience will help someone with the same configuration J

