
- Joined
- May 8, 2012
- Messages
- 45
- Motherboard
- Gigabyte GA-H170
- CPU
- i7-6700
- Graphics
- EVGA NVIDIA GTX 770 4GB
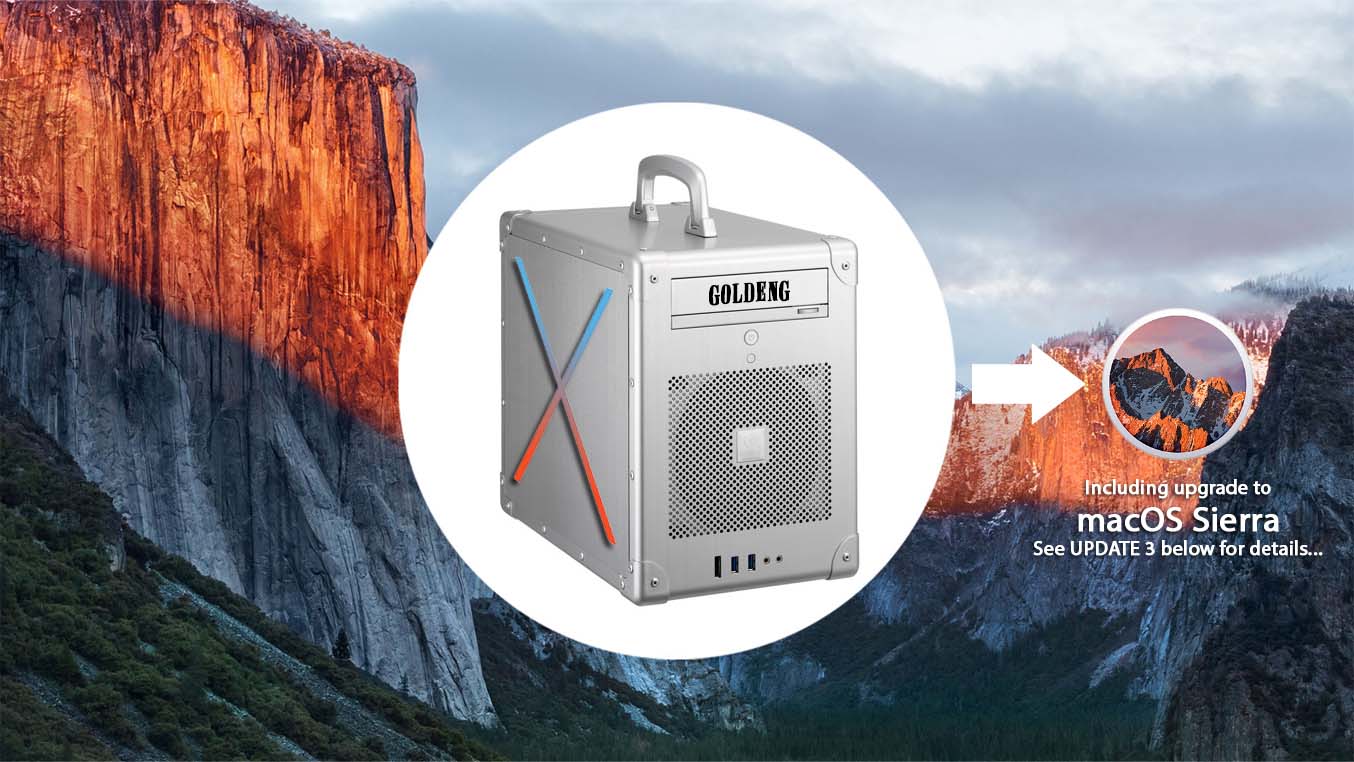
goldeng's Haswell CustoMac Mini Deluxe (mini-ITX)
Gigabyte GA-H97N-WiFi | i7-4790 | ATI Radeon 5770
Multiboot El Capitan/macOS Sierra & Windows 7
ComponentsGigabyte GA-H97N-WiFi | i7-4790 | ATI Radeon 5770
Multiboot El Capitan/macOS Sierra & Windows 7
Gigabyte GA-H97N-WiFi Motherboard: Newegg | Amazon
Hackintosh compatible WiFi card for replacing the Intel® one that comes with the board: Broadcom BCM94322HM8L: Amazon | eBay
Intel® 4th Gen (aka Haswell) Core i7-4790: Newegg | Amazon
Noctua NH-L9x65 Cooler (check end of post for pictures & details): Newegg | Amazon
G.Skill Value 2x8GB (16GB) F3-1600C11S-8GNT: Newegg | Amazon
Samsung SSD 850 EVO 2.5" 250GB (x2): Newegg | Amazon
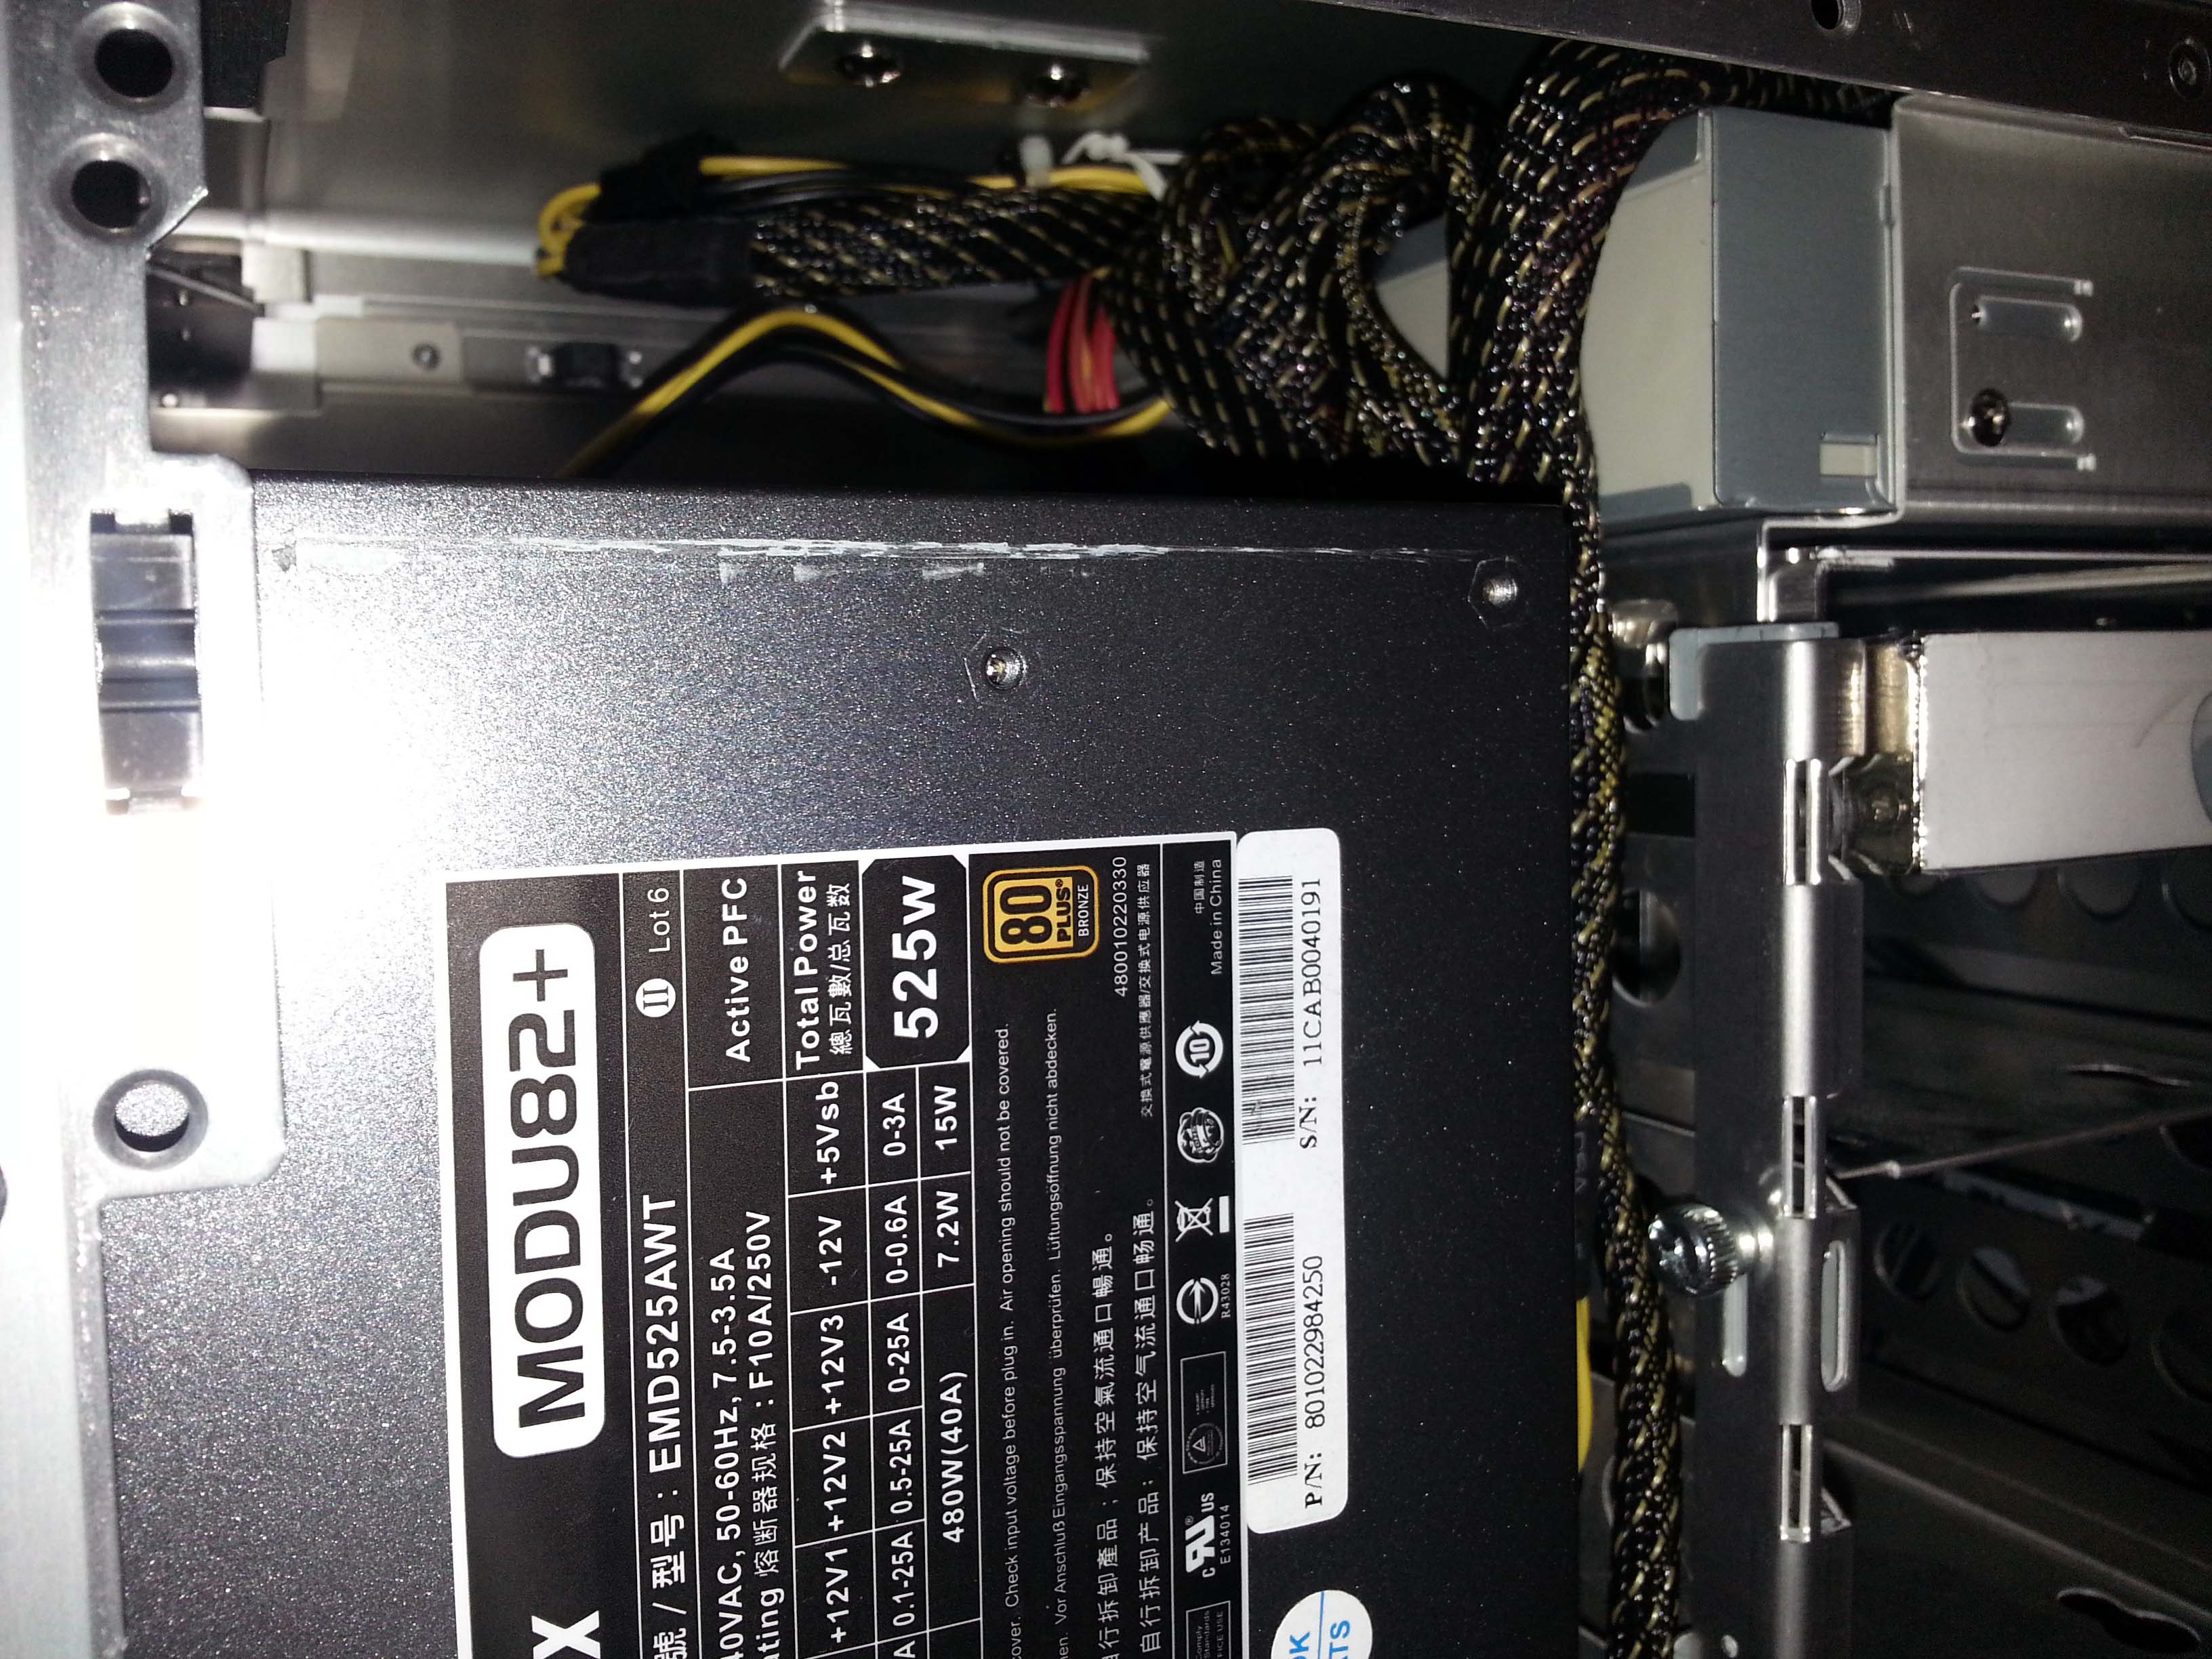
Enermax Modu82+ 525W Power Supply (PSU): Newegg
Ordinary Samsung DVD Burner Optical Drive: Amazon
Lian-Li PC-TU200A (A=Silver) Computer Case: Newegg | Amazon
Mac Box Set (OS X Snow Leopard, iLife, and iWork) Family Pack: eBay
Already Owned
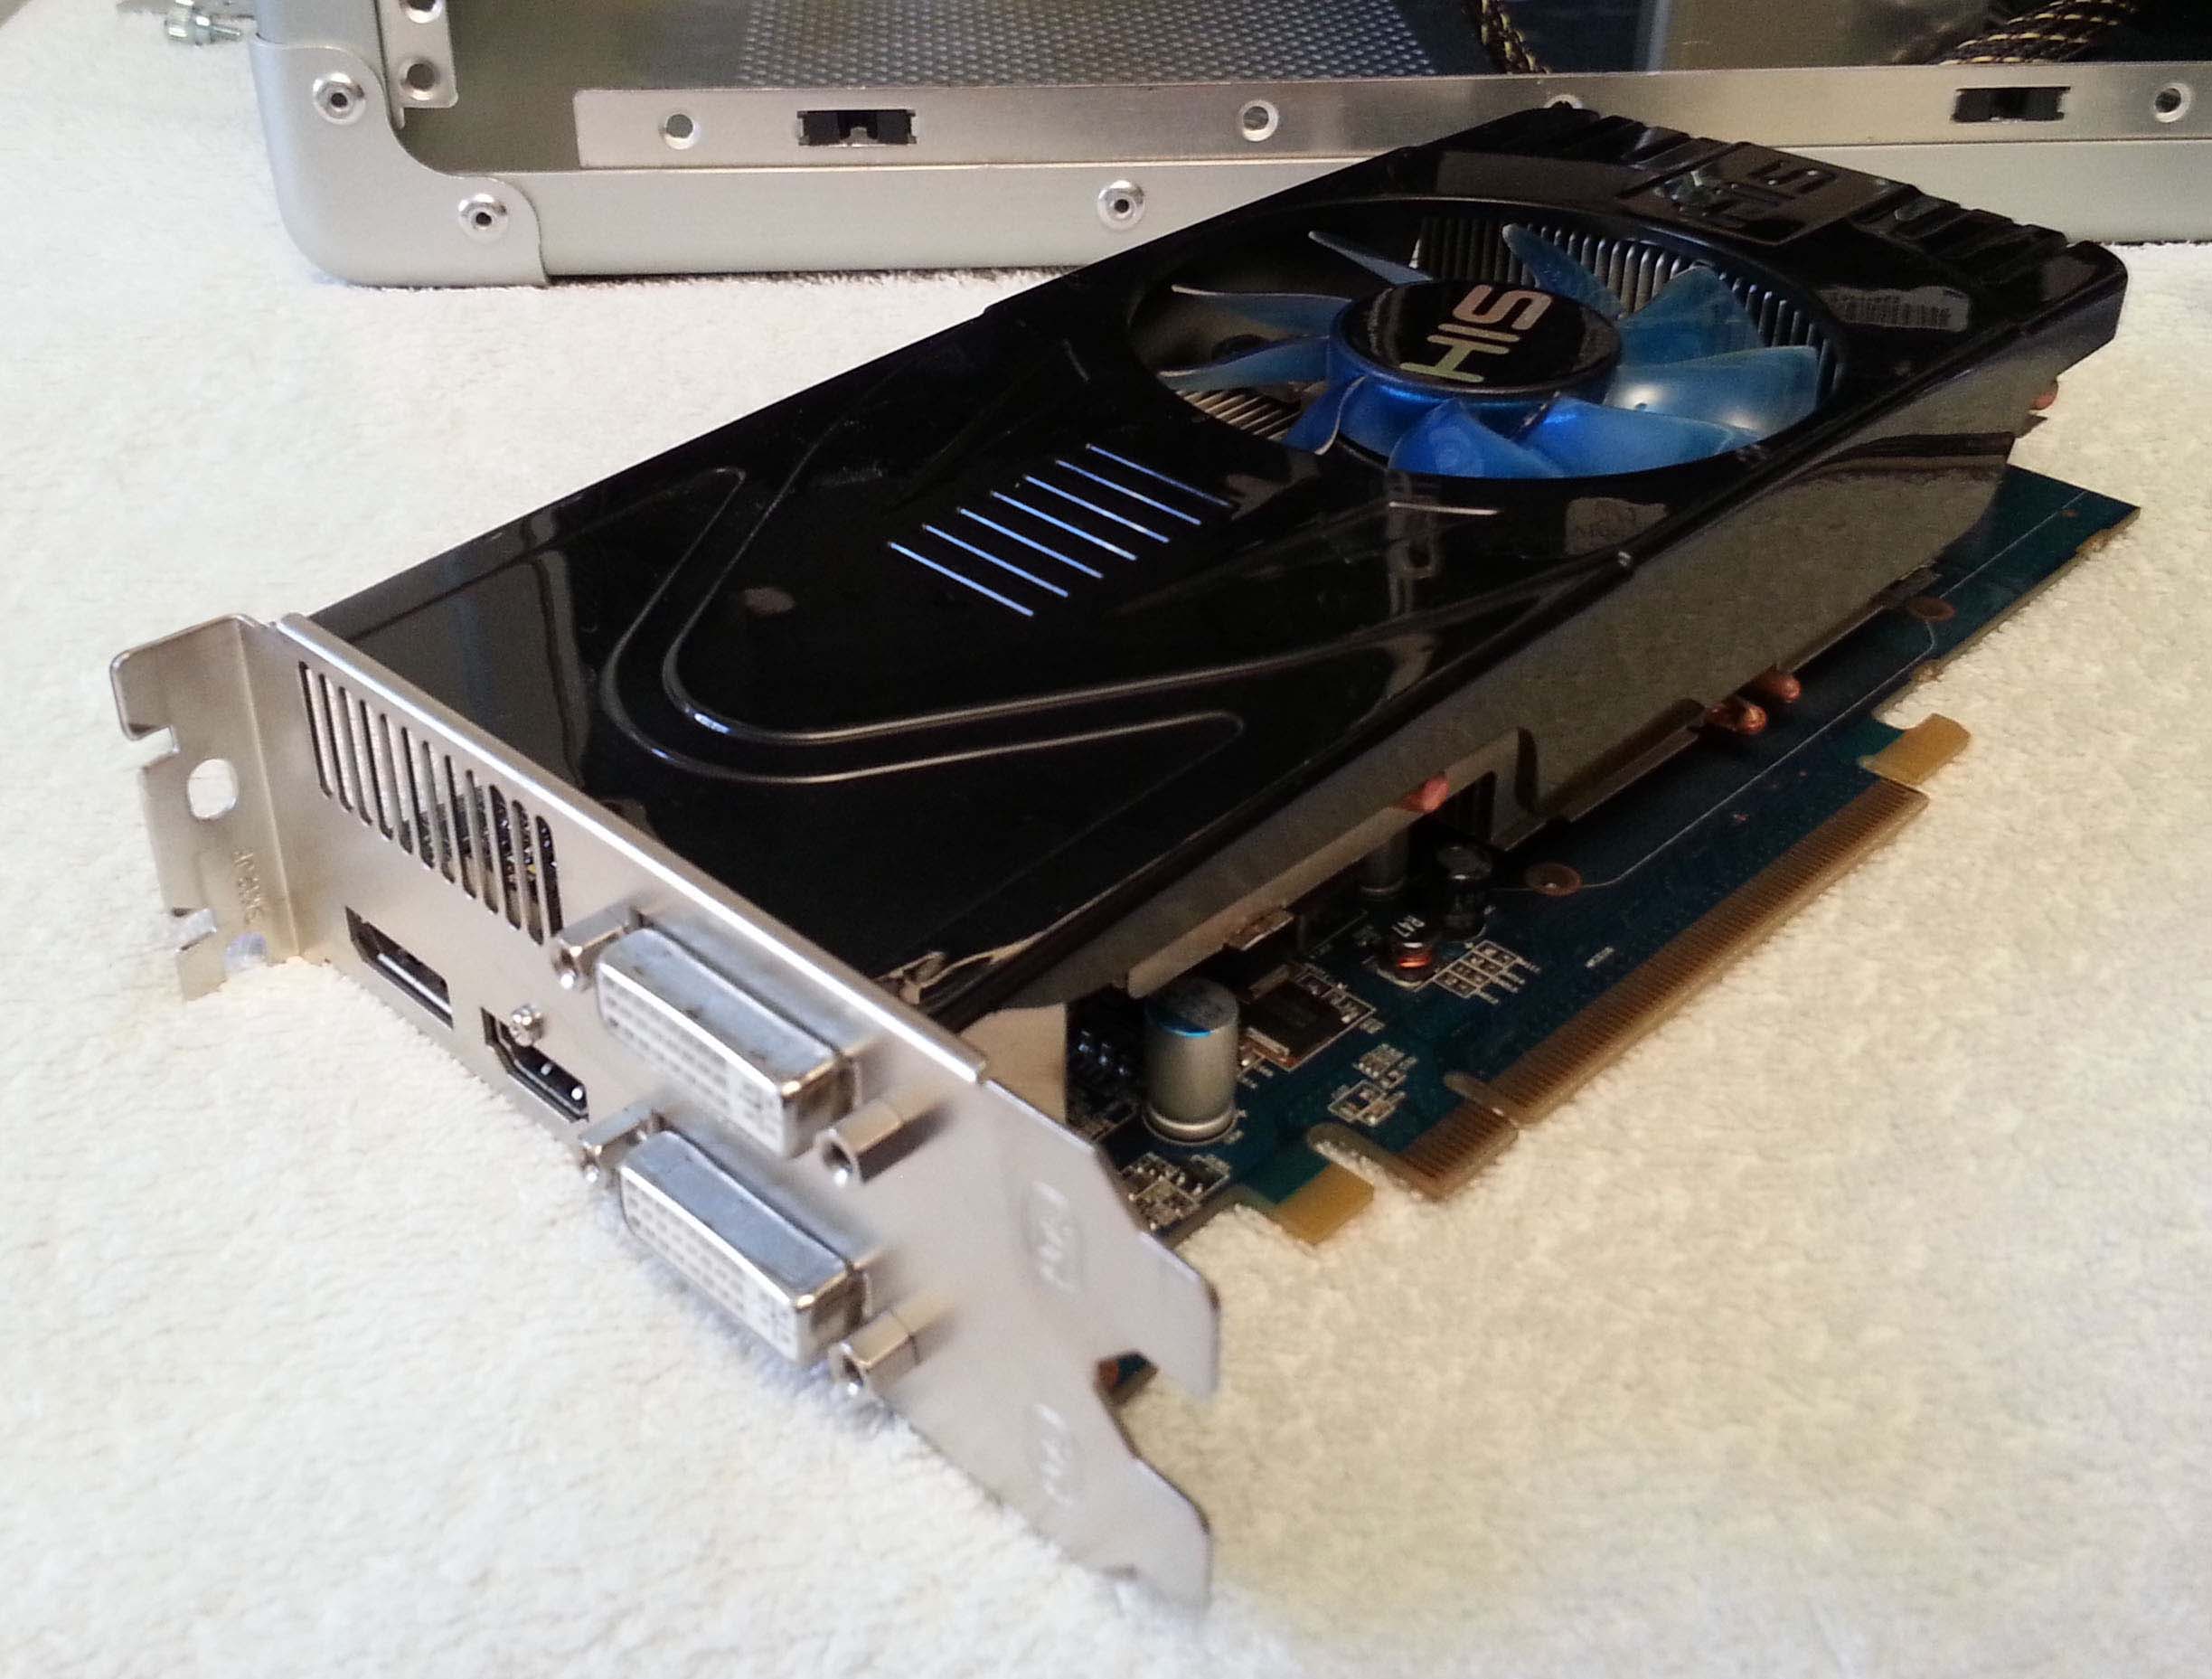
ATI (HIS) 5770 1GB Graphic Card: TigerDirect
Silverstone SDP09 2.5" to 3.5" SSD/HDD Adapter (x2): Newegg | Amazon
Comments
I always wanted to build a Hackintosh since the very beginning when Apple moved to use Intel® processors. Back then the procedure to build and configure a Hackintosh was almost impossible if you were new to this kind of stuff. But today however, thanks to the Hackintosh community and especially to everyone here on tonymacx86, building and configuring a Hackintosh became almost easy as installing Windows. And that's where I decided to build my first Hackintosh. I'll try to cover all the reasons why I chose each of the hardware pieces below.
Case
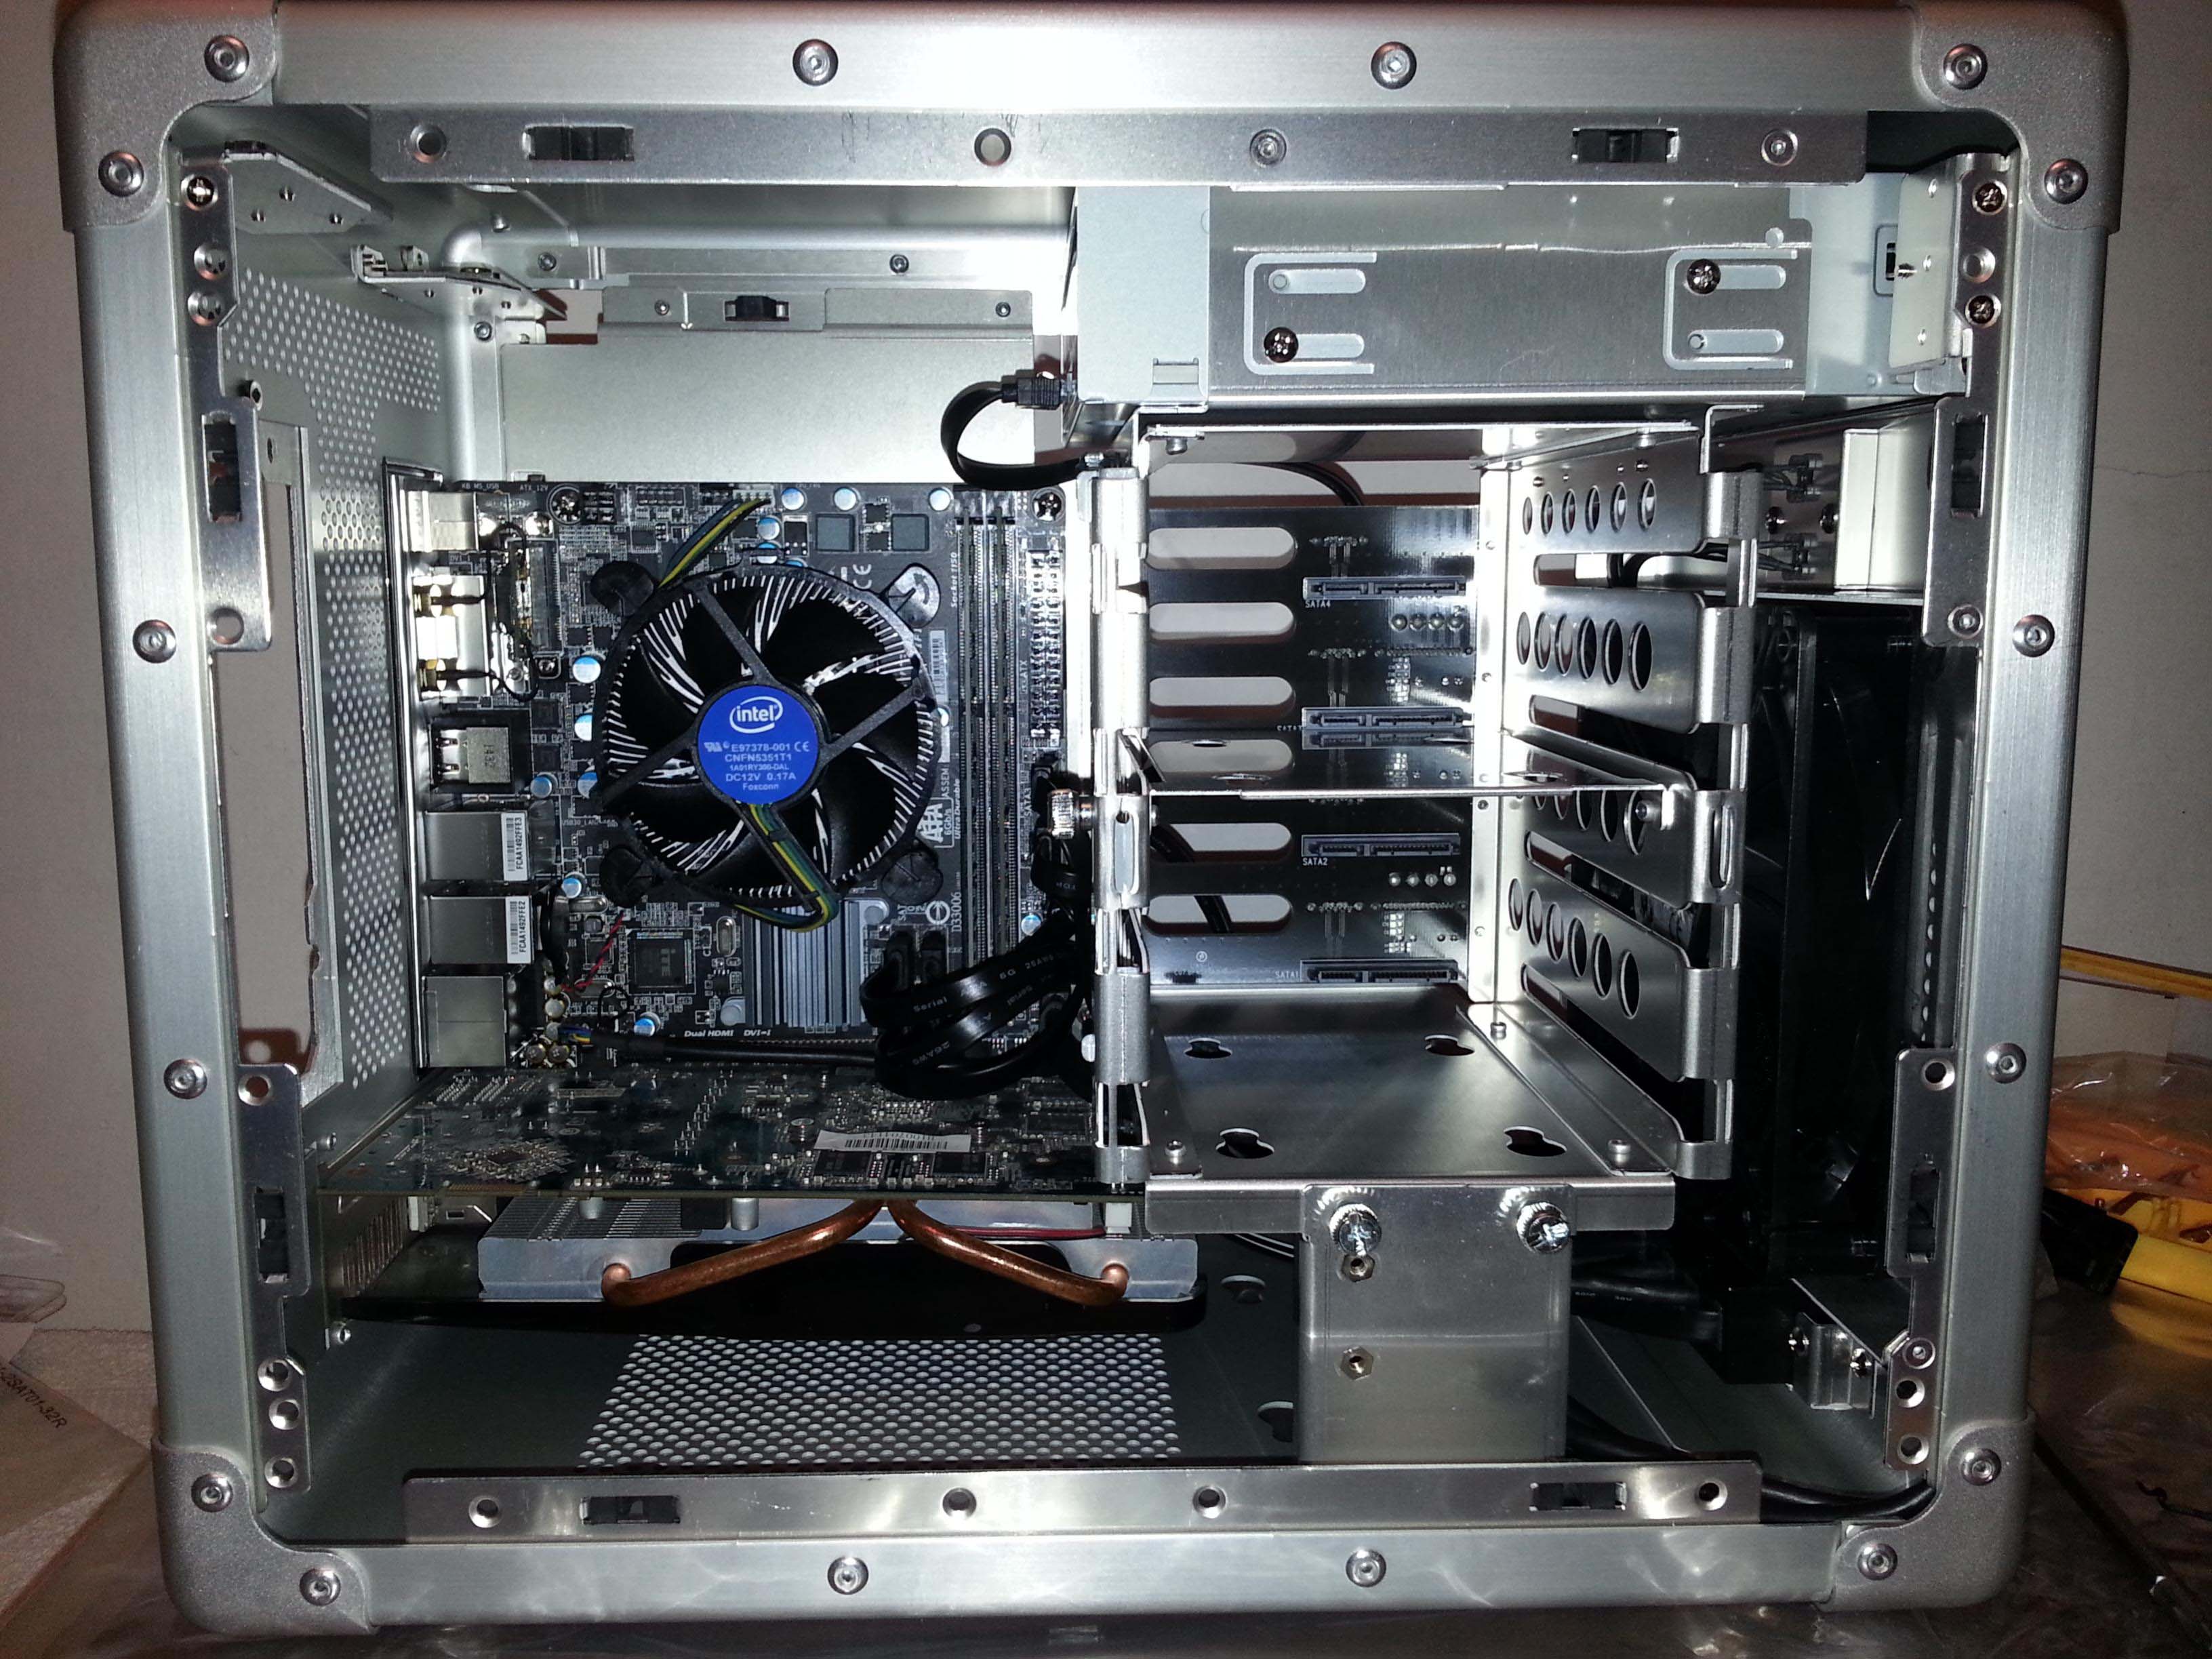
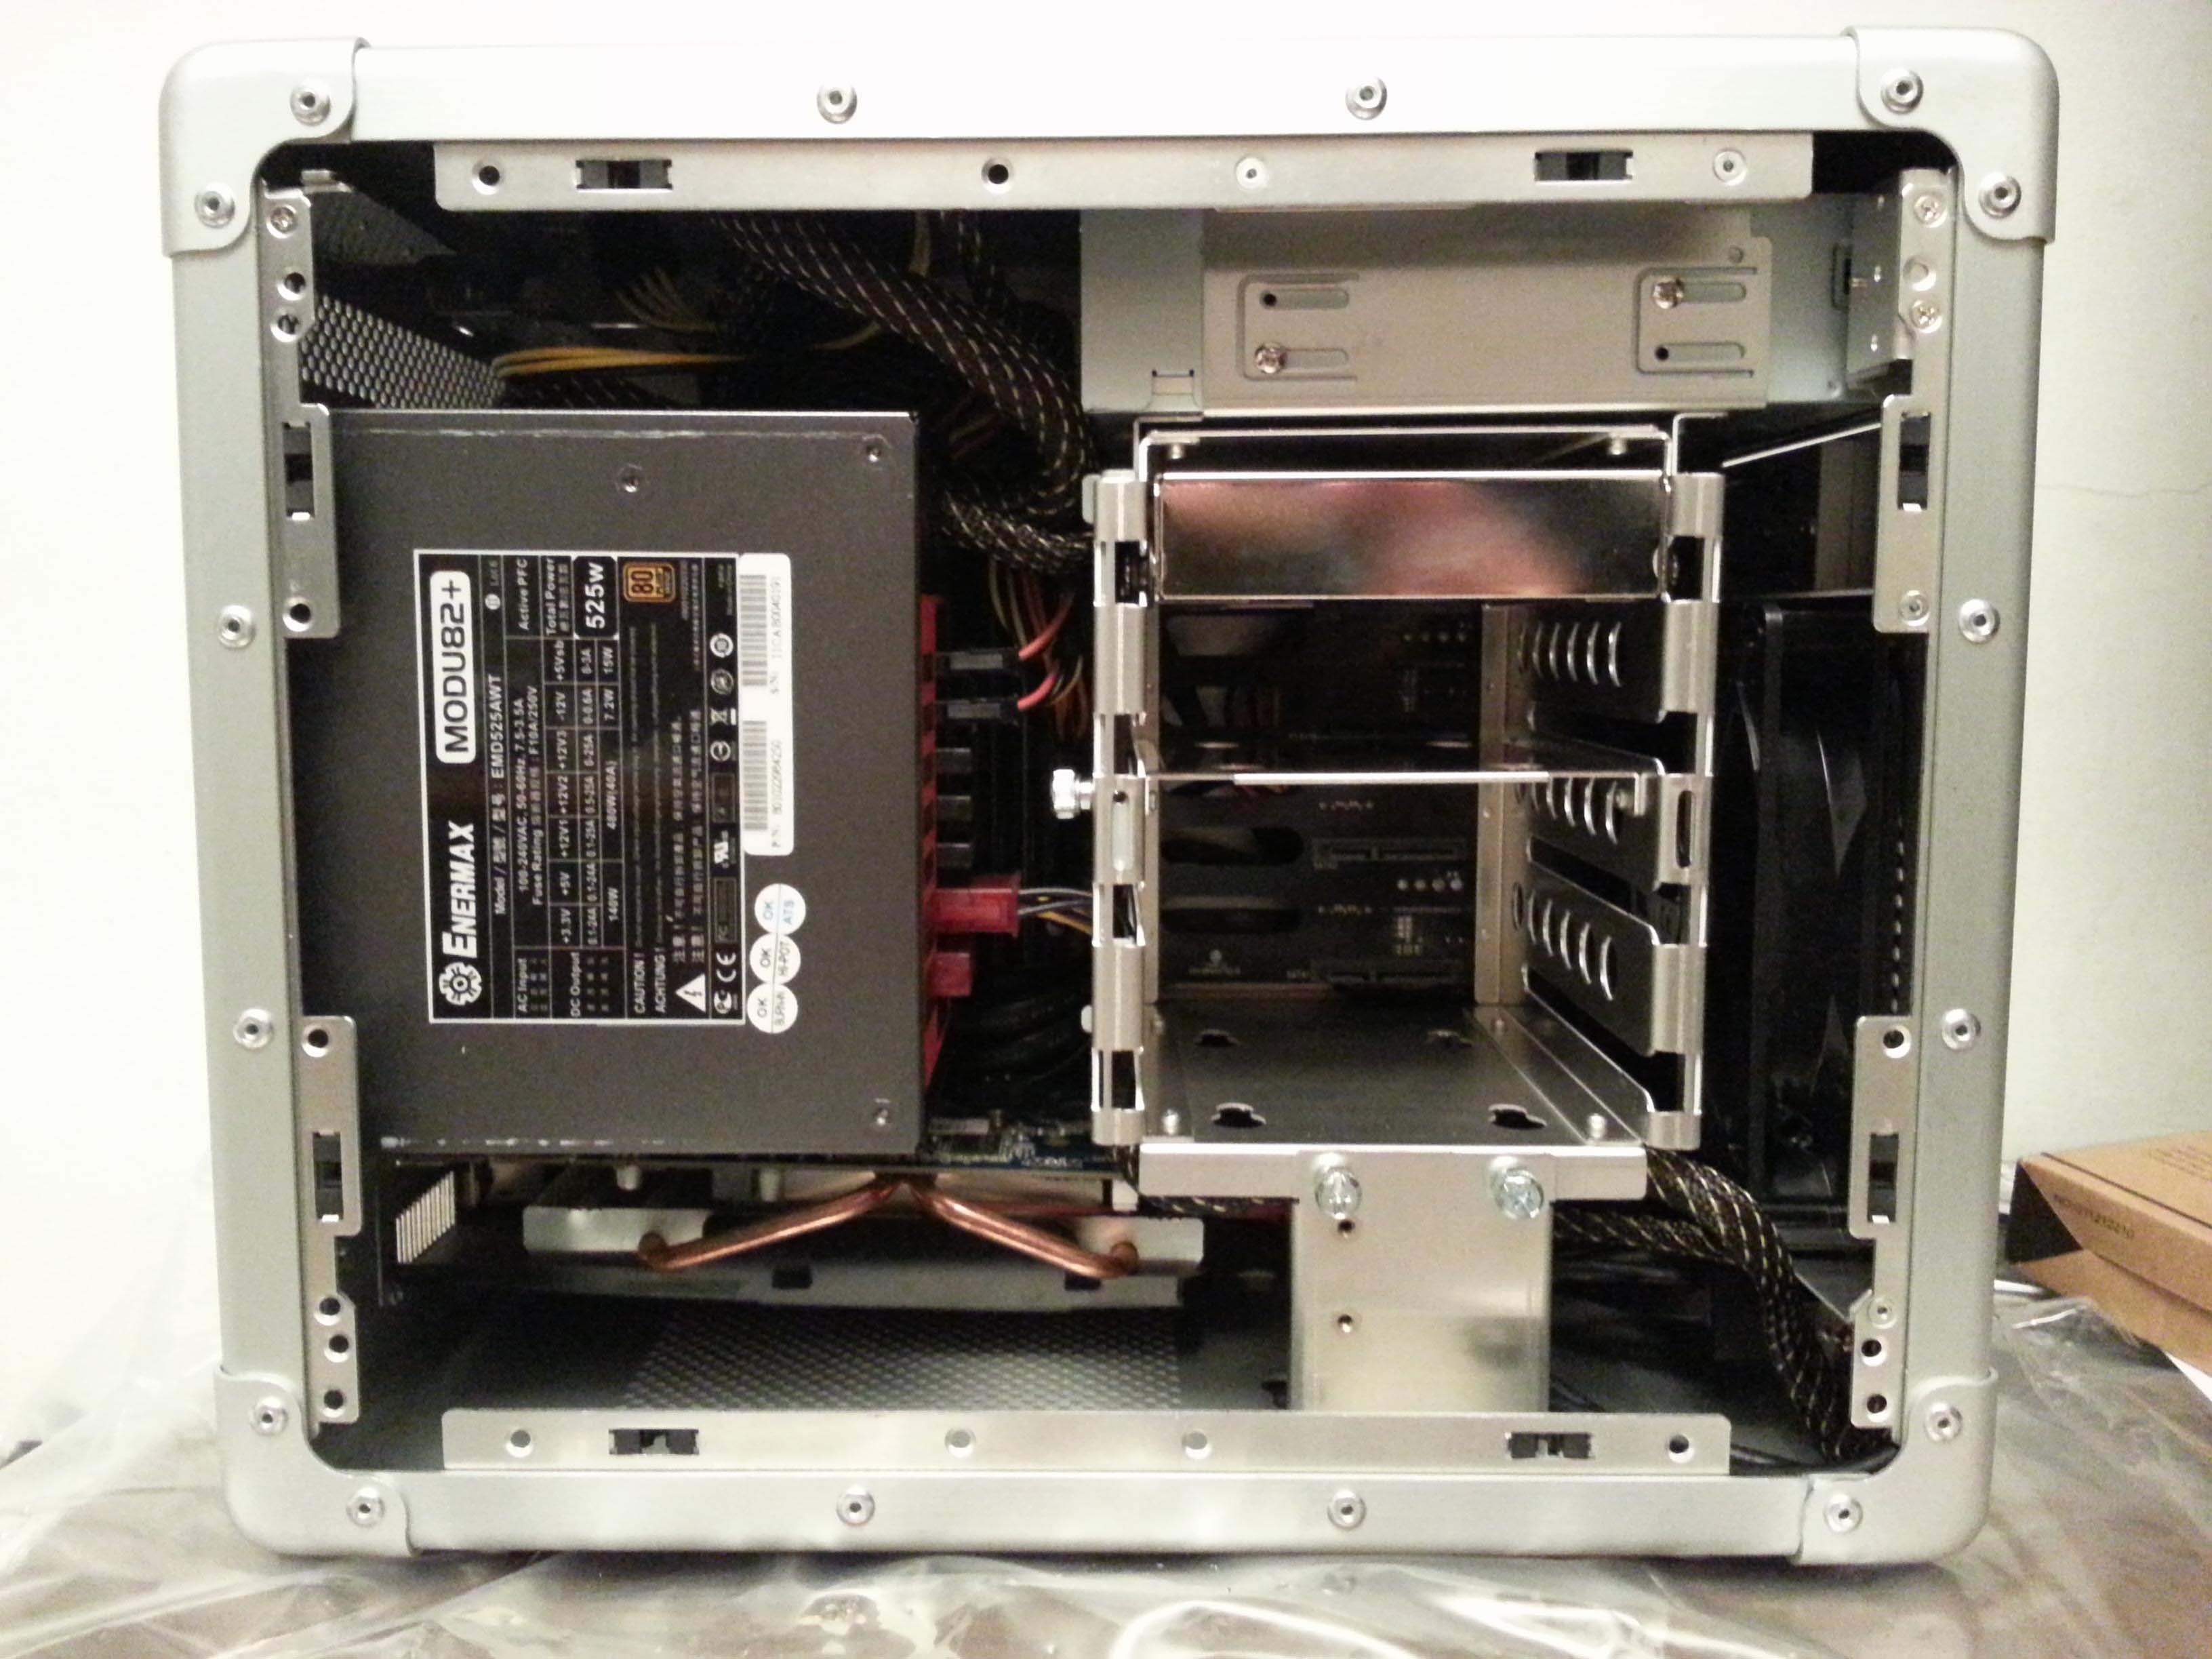
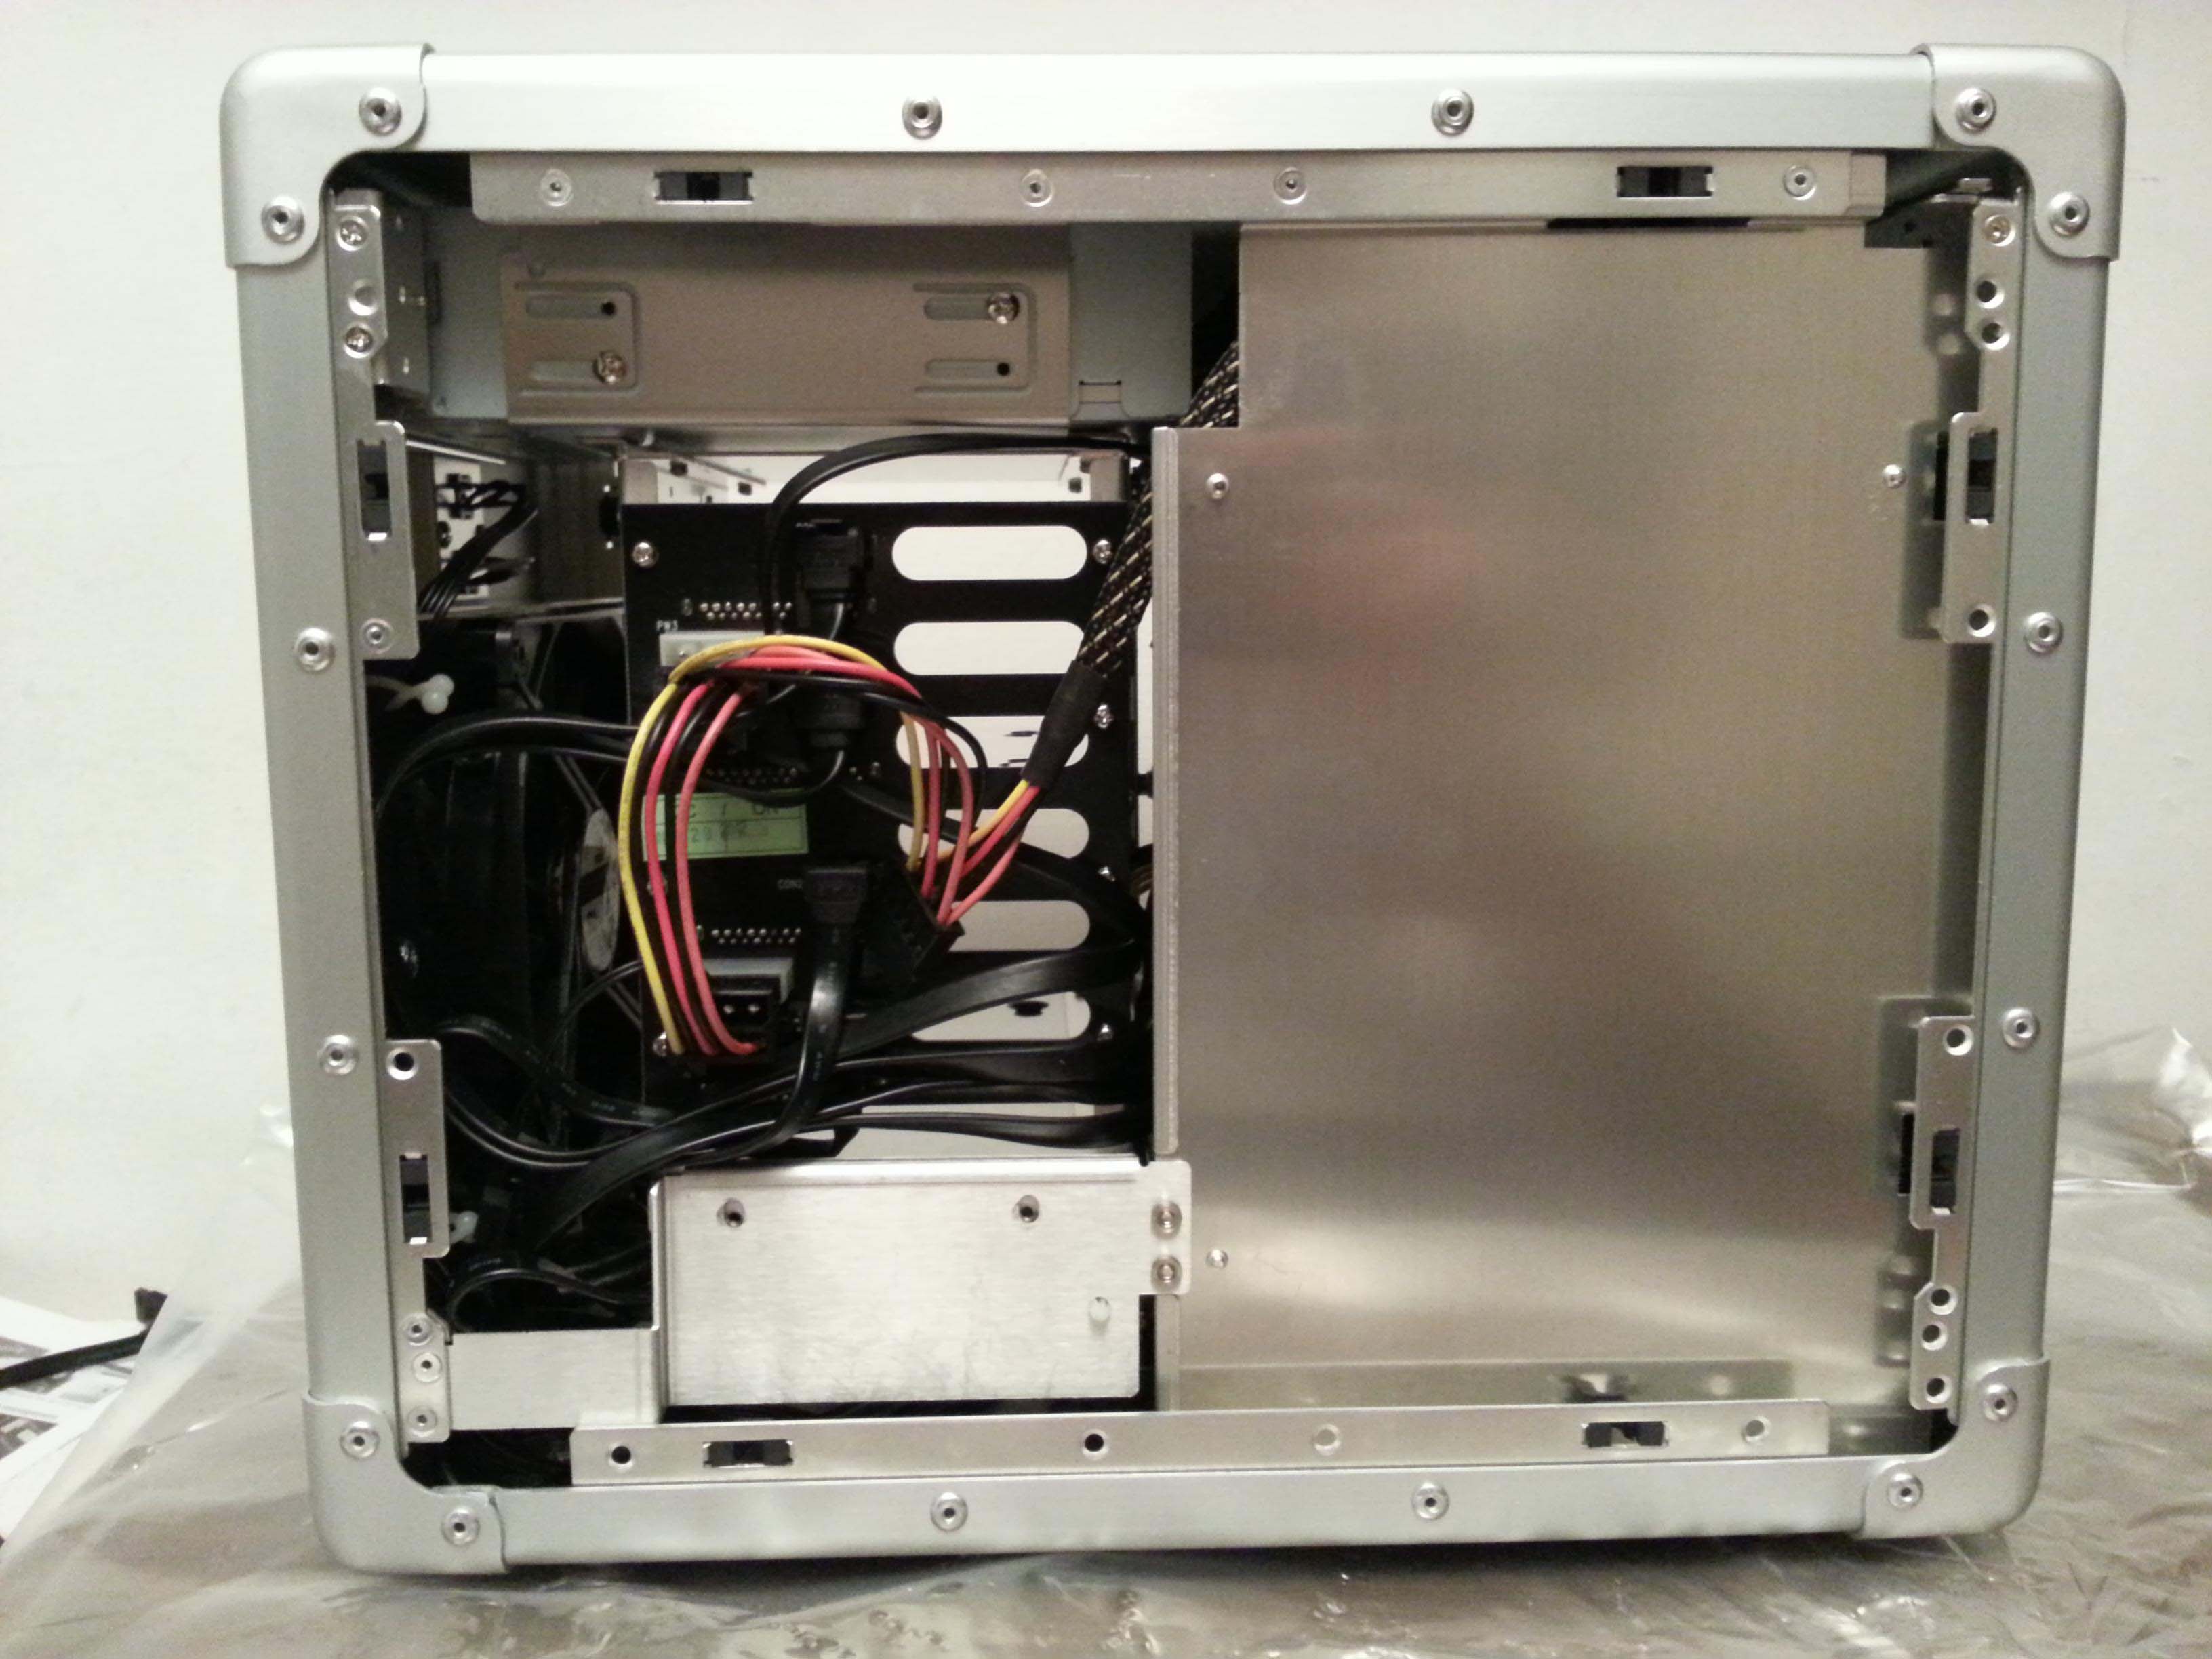
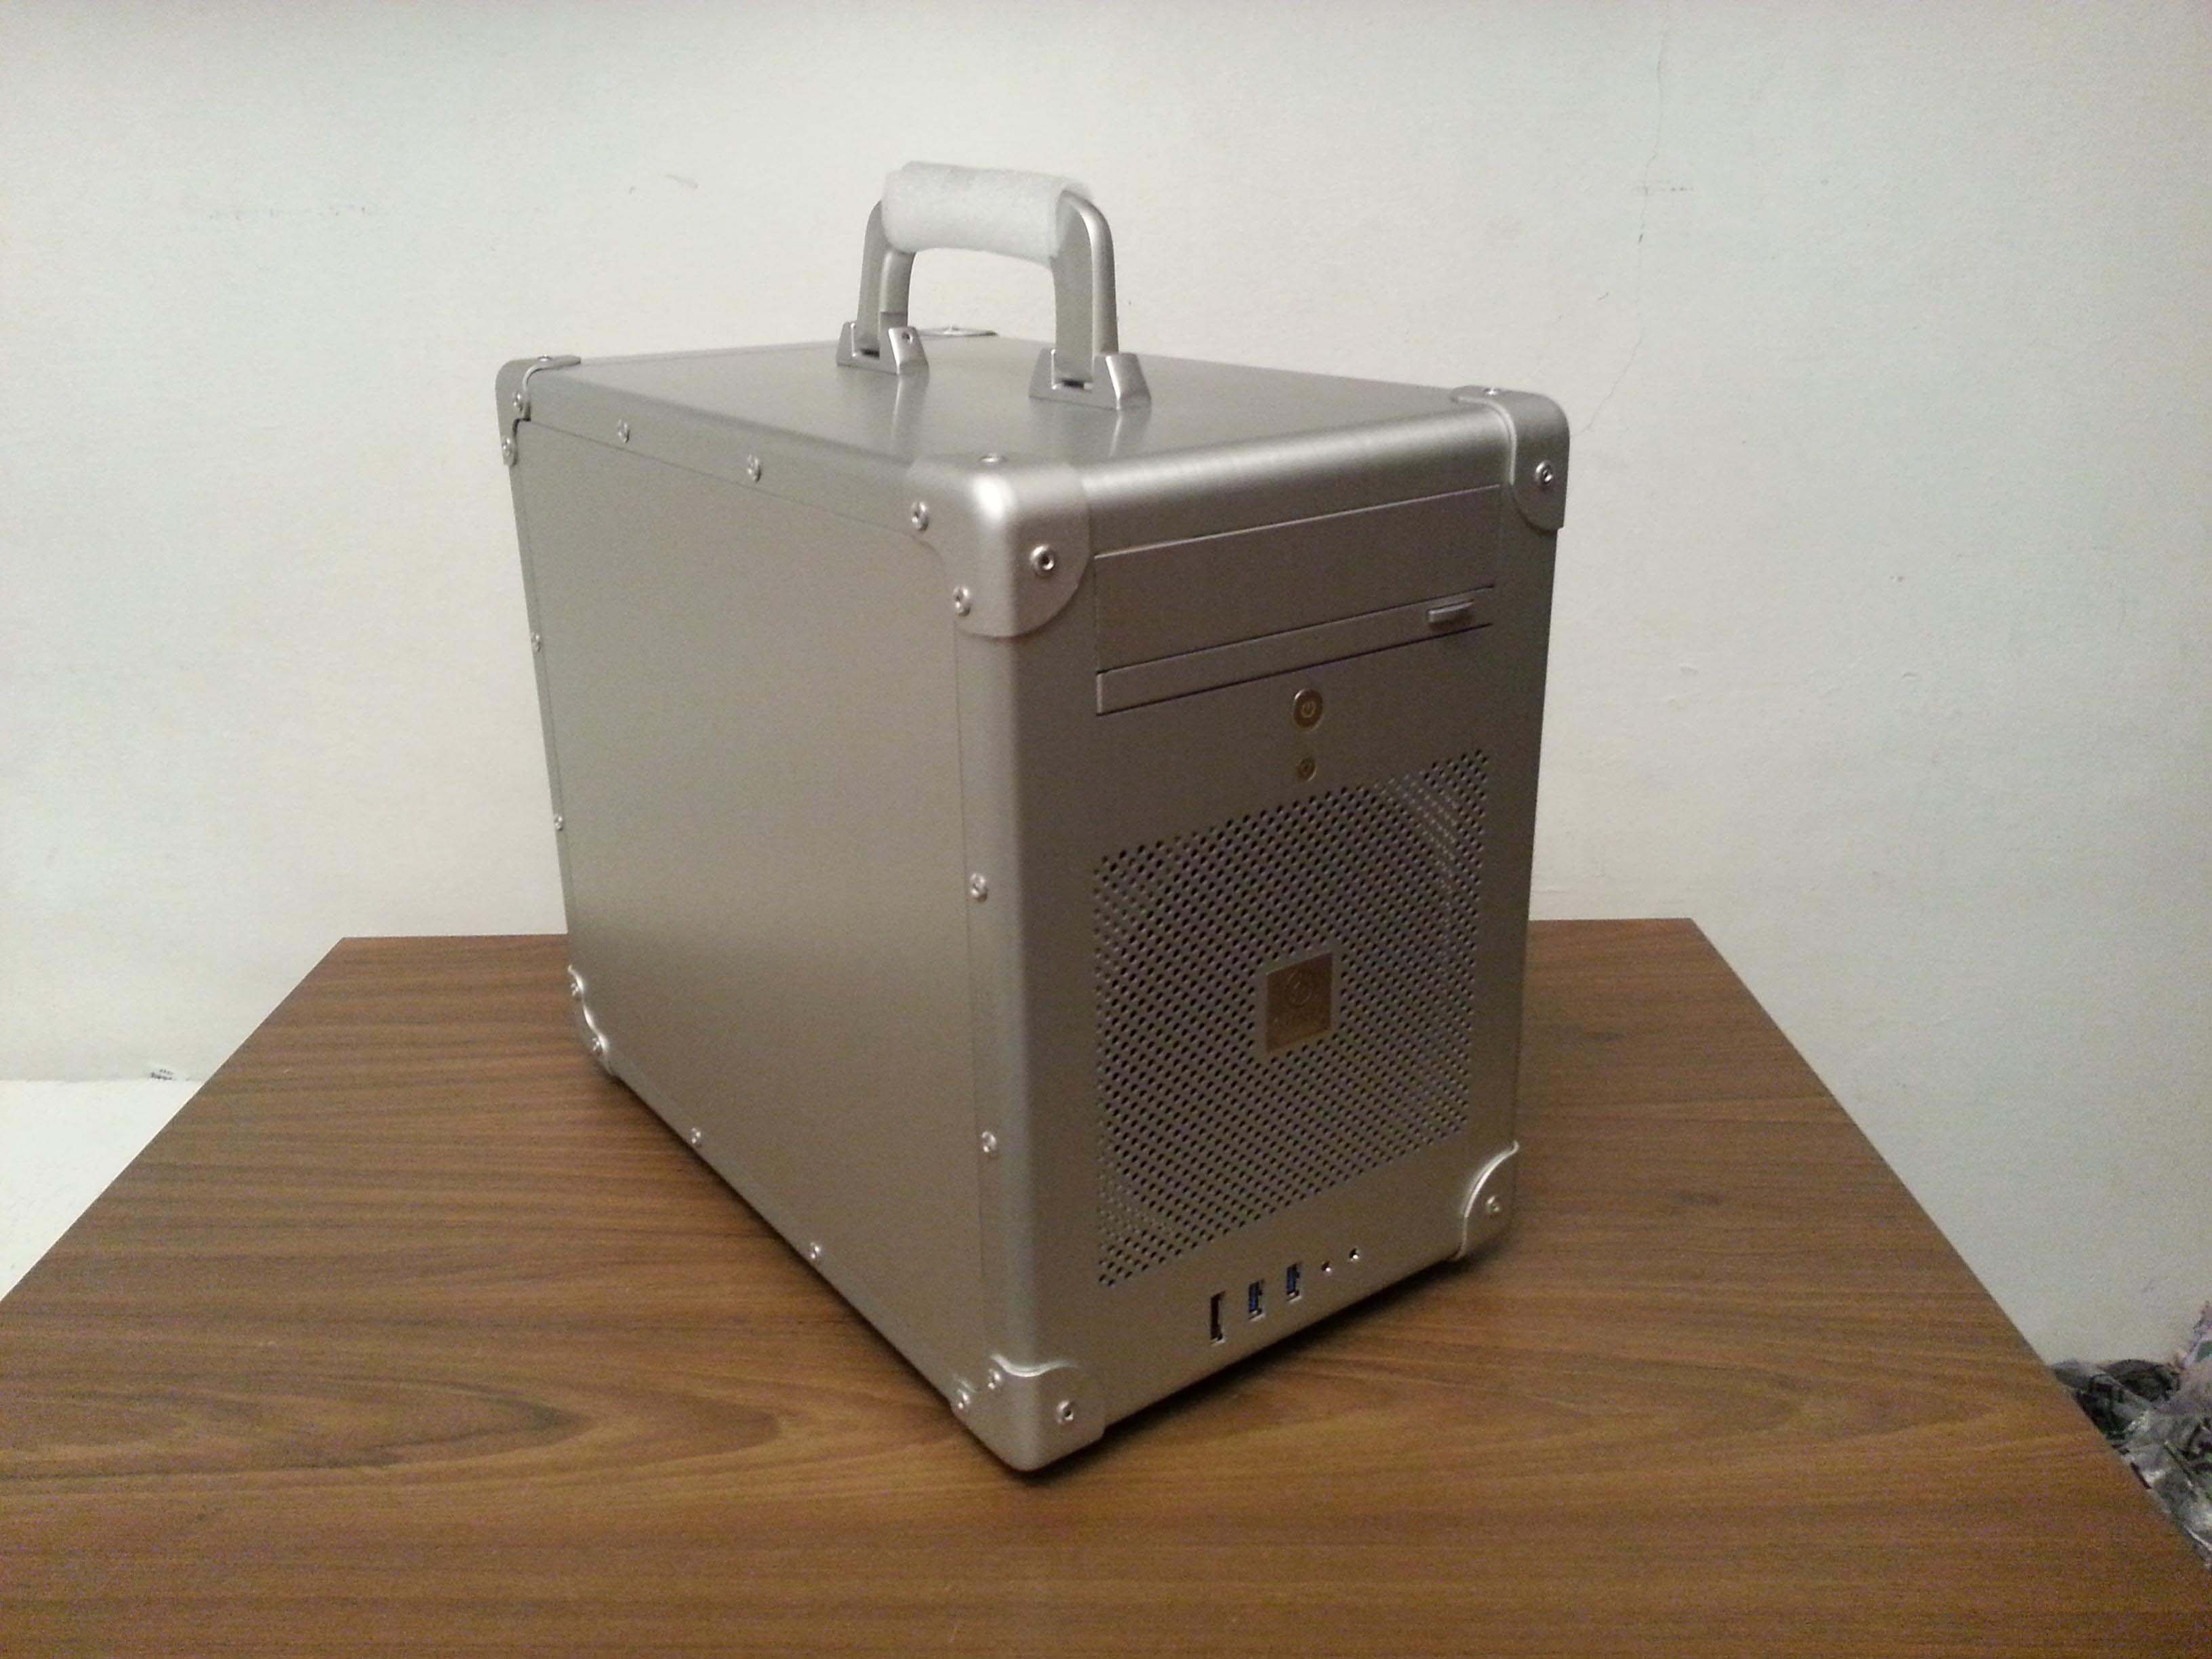
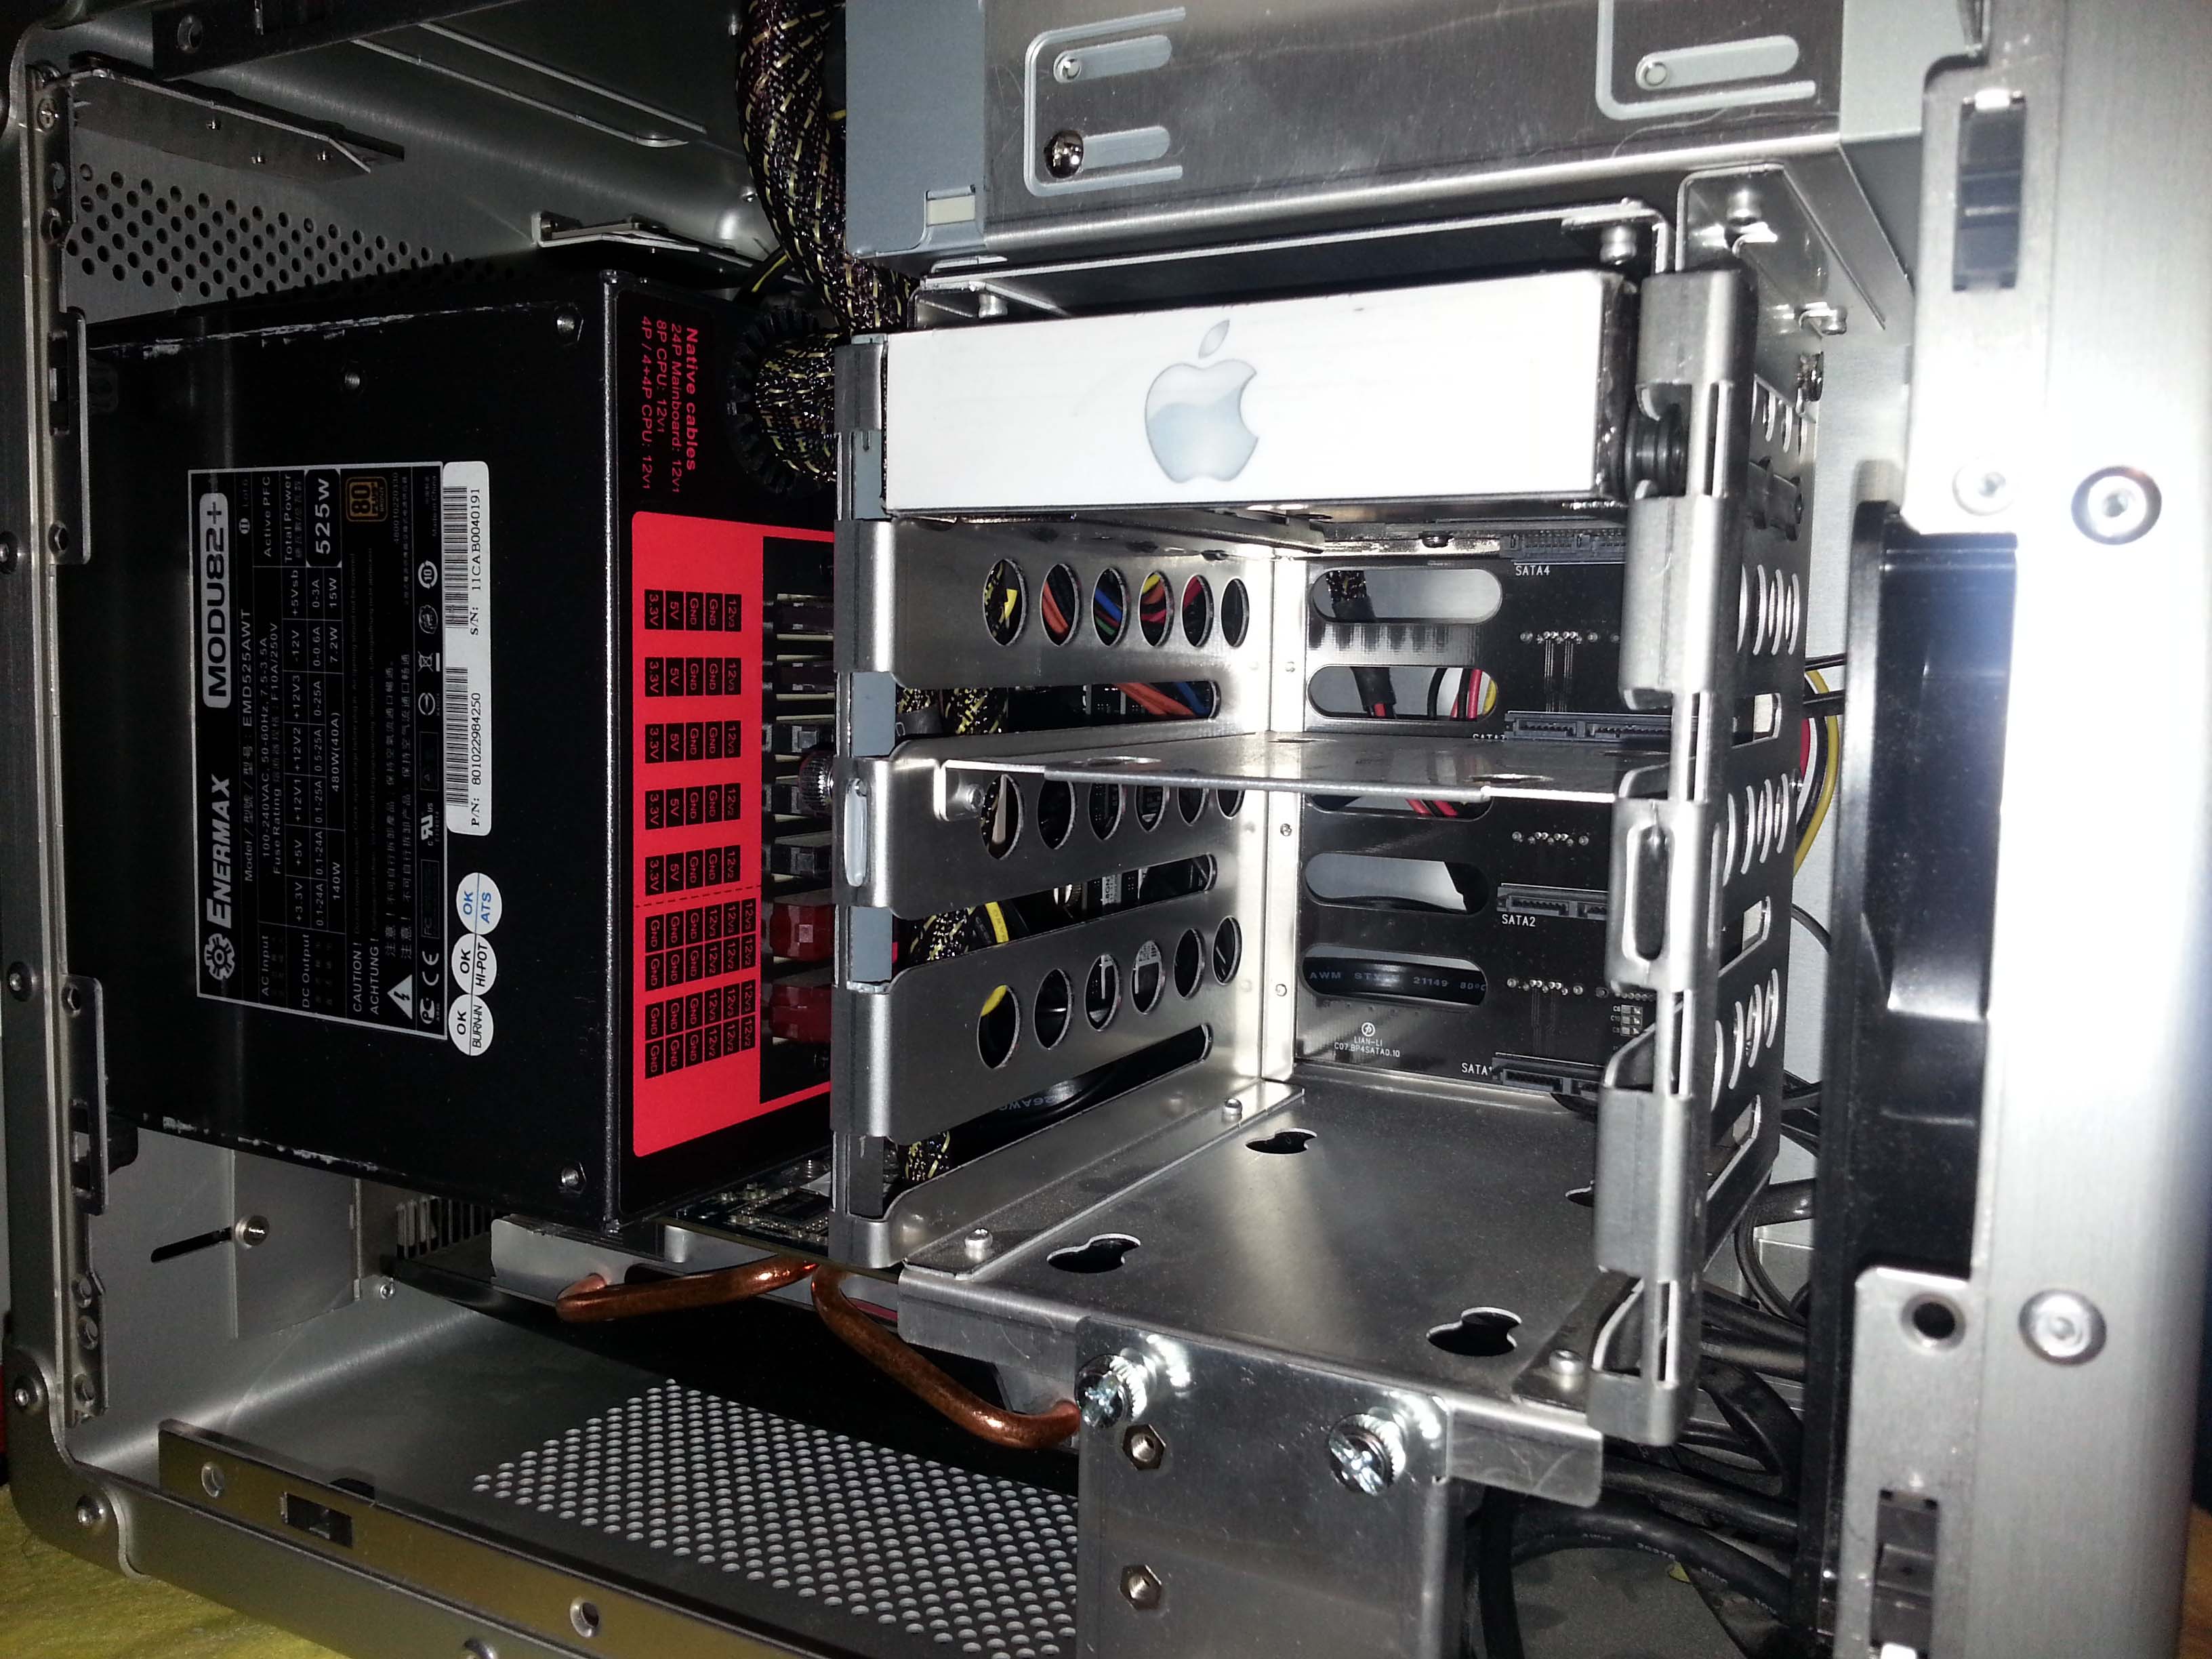
The first thing that I had in mind is the size of my Hackintosh. I wanted to build a Hackintosh powerful enough for video and sound editing, but I didn't want another 'Tower' case in my room to sit aside my PC. I wanted something smaller that won't take too much space, but with convenient way to reach and swap hard drives if I ever need to. Now my main PC is built in a Lian-Li case model PC-A17 which I really like with 2 extra SATA hot-swap hard-drive cages that I added to it (EX-H22S & EX-H34), and I wanted something similar. So I start looking in Lian-Li's mini-ITX cases section and came to the PC-TU200A: It's a fantastic case that can hold up to 300mm length dual-slot graphic card, and also has a built-in 4 bay SATA hot-swap cage. Besides, it has a nice shutter that hides the optical drive when closed and a solid handle on top for easy lifting if you ever need to move it. And above all - It's SILVER which matches the good old Mac Pro silver case.
Motherboard
I looked for a 99% Hackintosh compatible motherboard and decided to go with the Gigabyte GA-H97N-WiFi mini-ITX. It has everything you'll ever need for its size, except for Thunderbolt ports which it lacks. But since I don't have any Thunderbolt hardware or desire to purchase any, that motherboard appeared to suit me just fine. The only thing that needed a replacement for it to be a 100% compatible motherboard is the wireless card. The motherboard comes equipped with an Intel® WiFi and Bluetooth adapter which isn't compatible with Mac OS. But a simple changing of this card with a cheap Hackintosh compatible WiFi card adapter that you could find on eBay like the Broadcom BCM94322HM8L do the trick. Though the Bluetooth doesn't work but I don't really need it. And if one day I'll do I can always go and buy a USB Bluetooth adapter that is compatible with OS X.
Processor
As I mentioned above, I wanted a Hackintosh that would be powerful enough for video and sound editing. The i7 are known to be good for rendering and heavy calculations, and the i7-4790 appeared to be the recommended and very common model to pick at the time I built my Hackintosh.
Memory
Basically I wanted to utilize the maximum amount of RAM the motherboard can hosts, and the GA-H97N-WiFi can hosts a maximum of 16GB. So I picked the G.Skill 2x8GB (16GB). It's not too cheap but not too fancy either. Besides, I didn't want to take the risk and to buy any high-sized memory sticks due to the small and limited size of the case. Every piece of hardware should be picked in mind when you're building a small factor computer.
Hard Drive
The Samsung SSD 850 EVO 2.5" 250GB. Another recommended piece of hardware by many. I could go with 120GB to save some cash, but I know myself and usually I partition my hard drive into 2 partitions: one for the OS volume, and second for my data which I prefer to be separated from the OS volume. And if I was about to divide a 120GB disk into 2 partitions, I'd probably find myself with not enough free space in the close future. So 250GB seemed to be the right way to go.
PSU
This is the most important piece of hardware of your build. Some people don't give it the proper respect but the PSU is the energy of your machine.
Now I'm a very neat guy and in my computer cases you'll never see any unnecessary power cables lying around. And that's because I always use modular PSUs. Modular PSUs has the benefit of detachable cables where you can connect only the power cables you need, and to disconnect all the power cables you don't. This is another thing to take in mind when building a small factor computer, and having a modular PSU would eventually give your case a better air-flow. As no unusable cables are blocking the air-flow inside your case. The Enermax Modu82+ 525W is a great and powerful beast to run your Hackintosh or PC.
Optical Drive
Nothing special really. You can pick a DVD or a Blu-ray if you really need to. I picked a simple DVD drive. Nowadays you'd barely use it, but it's good to have one just in case you'll ever need it.
Graphic Card
I read in many places that the ATI 5770 is compatible with Mac OS X right out of the box. Fortunately, I happen to have one lying around after I upgraded my PC with a newer graphic card. It has 2 DVI ports, 1 Display port, and 1 HDMI port, and equipped with 1GB of DDR5 RAM.
2.5" to 3.5" SSD/HDD Adapter
Since the Lian-Li's hot-swap cage is compatible only with 3.5" drives, I had to use an adapter in order to hook the 2.5" SSD drive to it. And since I already know of a very good and solid 2.5" to 3.5" SSD adapter (the Silverstone SDP09) as I'm using one in my main PC, I went on eBay and purchased another one to fit in my build.
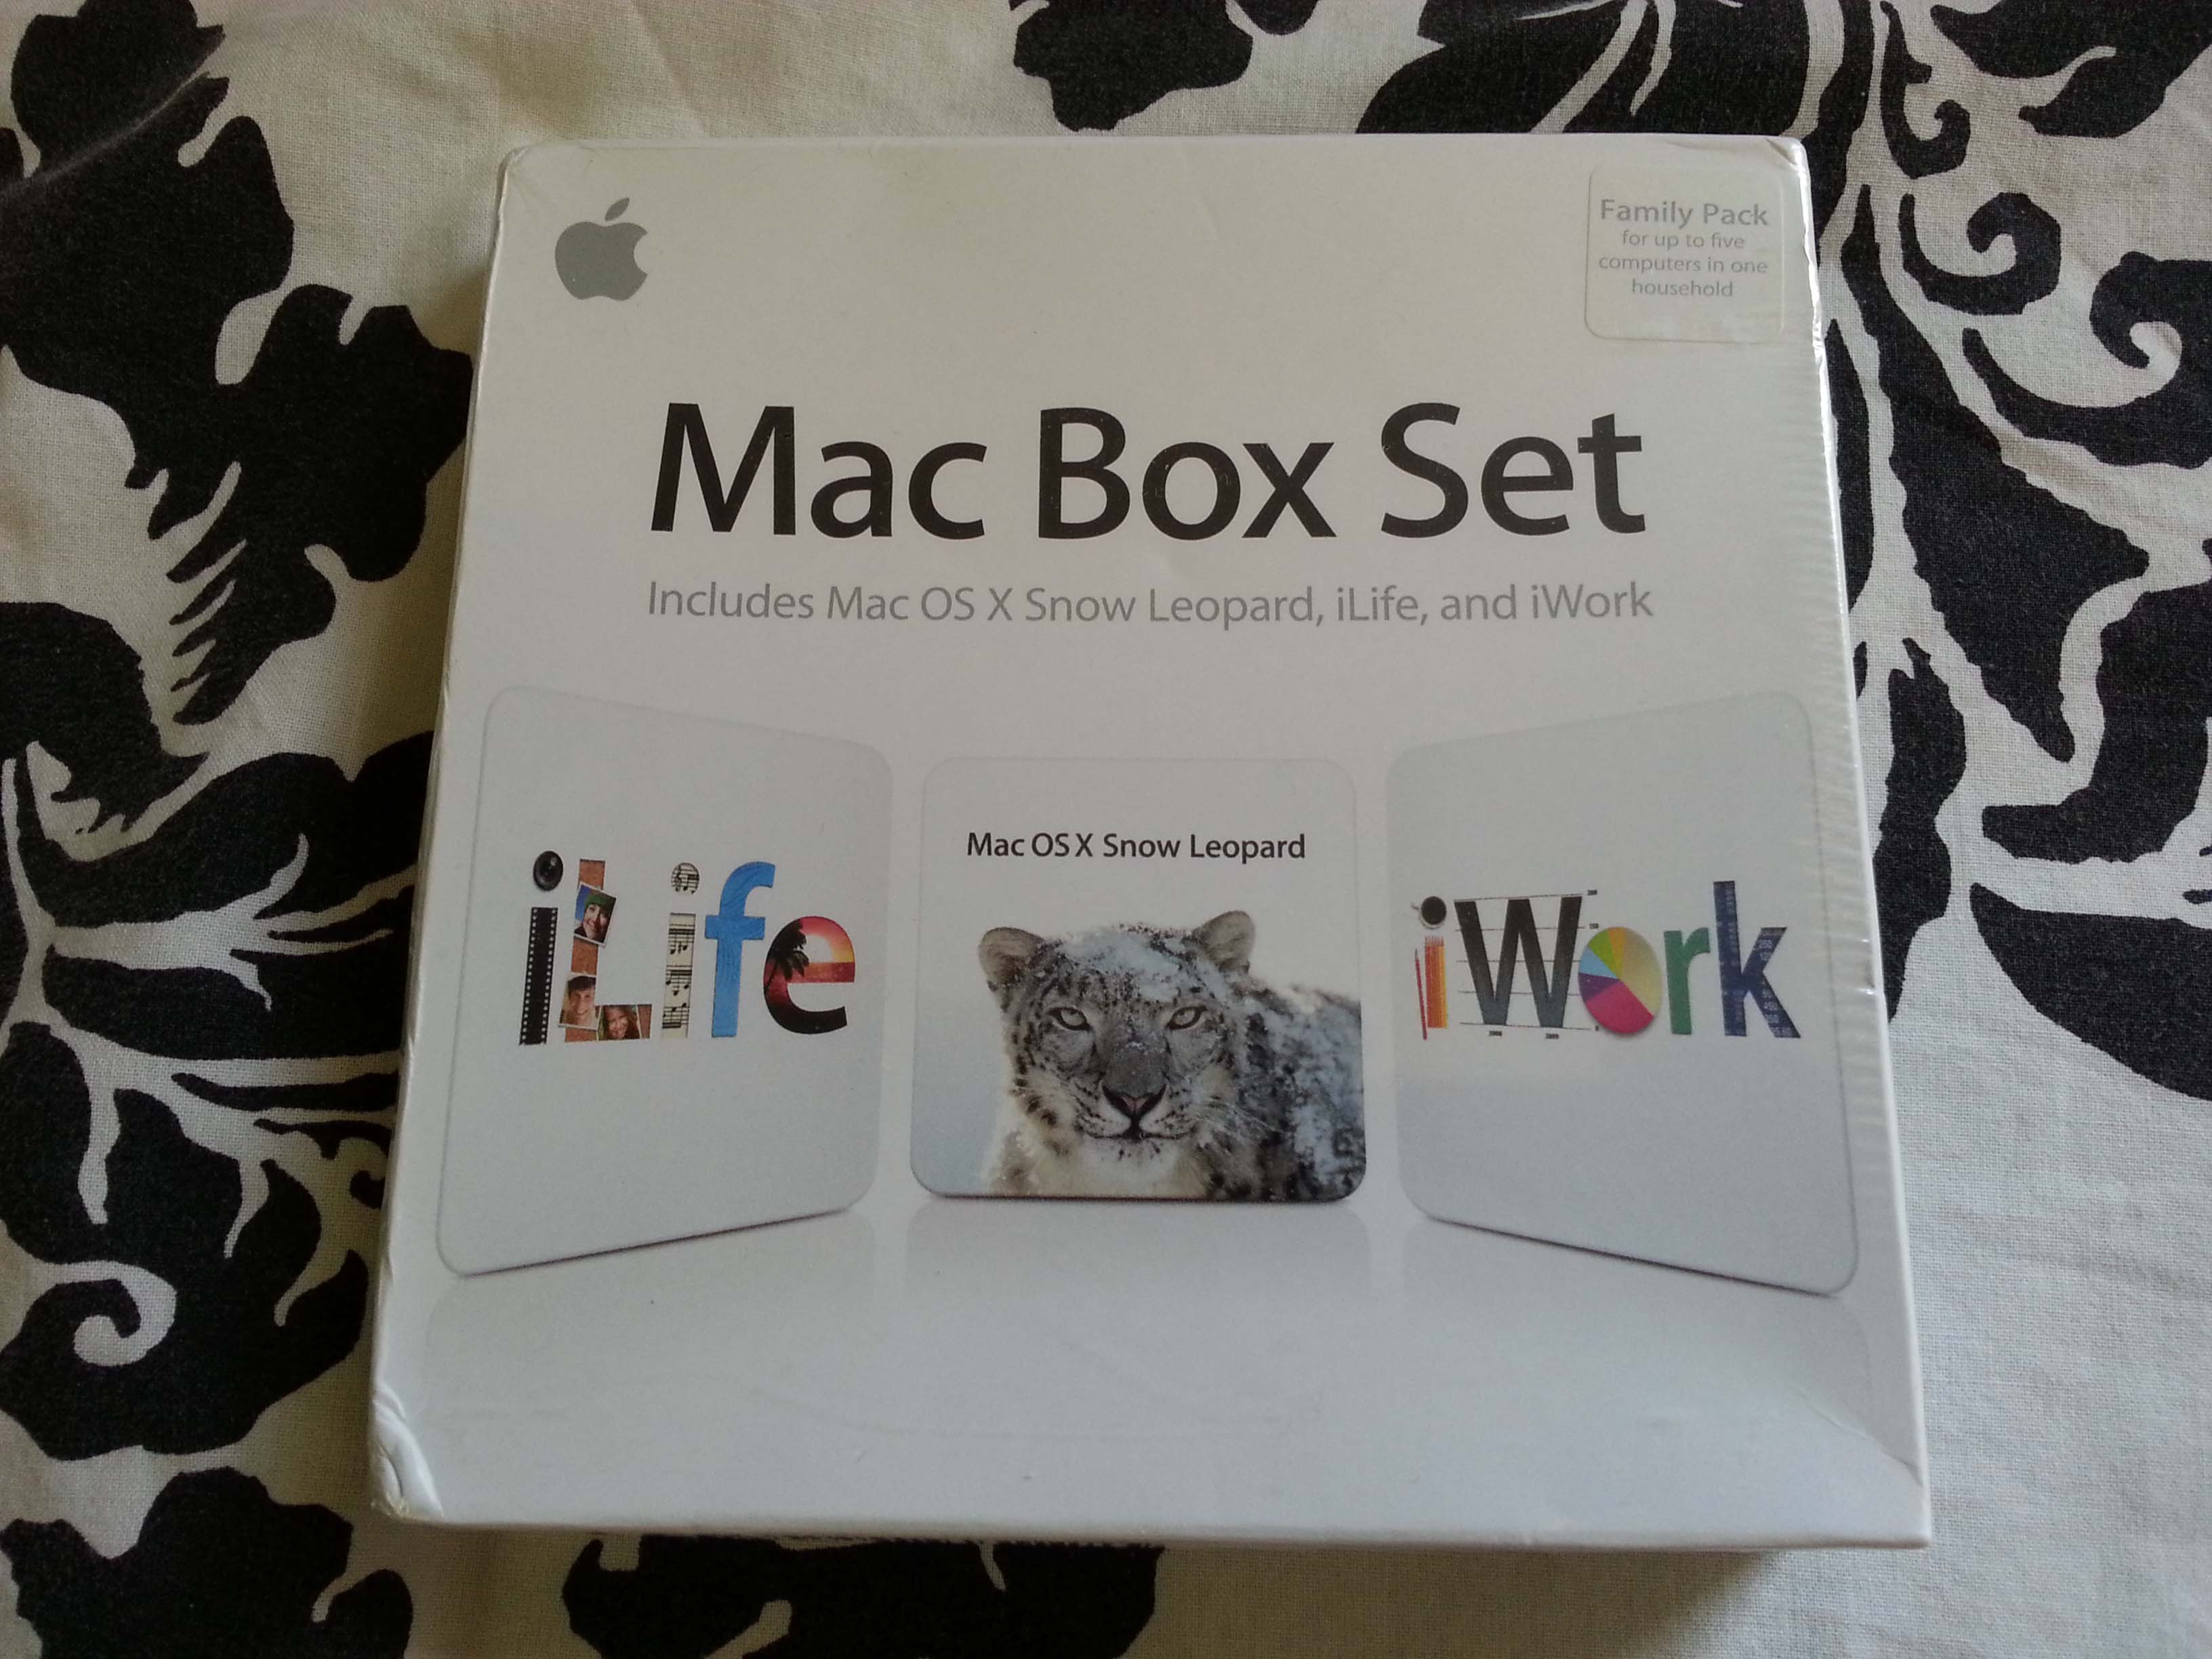
Mac Box Set (OS X Snow Leopard, iLife, and iWork) Family Pack
As I usually do, I believe in purchasing the OS I'm using. And since I don't have a real Mac to purchase the newest OS from Apple, I first had to have an installation media of the OS, that both work on my Hackintosh and be eligible for upgrading to the latest version for free. And as long as I know the latest OS that was shipped on a physical media DVD was OS X Snow Leopard. So I went looking for it on eBay for a decent price, and I decided to go with the Mac Box Set Family Pack (up to 5 computers) in case I'd want to build another Hackintosh or more. And besides it includes Apple's iLife and iWork in it which is nice to have. Now, most people might say that as long as I didn't purchase a REAL mac, running Apple's OS on a non-mac hardware is against Apple's EULA and therefore illegal. Well, that's probably true, but I feel better knowing that I paid for the OS media.
Summary
What Works:
Almost everything.
What Doesn't Work:
WiFi & Bluetooth (requires a replacement with Hackintosh compatible card / USB dongle.
Installation
There are a lot of installation guides out there and I read many (trust me). But from all I found (as long as you have El Capitan installation on a thumb-drive - if you don't, keep reading for further instructions). I really recommend the El Capitan installation guide by tonymacx86 from Oct 1, 2015. There's no need for me to duplicate the instructions over here so here's the direct link to the thread: http://www.tonymacx86.com/threads/u...apitan-on-any-supported-intel-based-pc.172672
It's a great guide written very clearly with screenshots and whatever you could only ask. If you follow it step-by-step you'd be just fine.
That said, and, although I mentioned that there's no need for me to duplicate the instructions, before proceeding to the guide above I'd highly recommend that you'd read the 'Troubleshooting' section I wrote below. It contains major things to take in mind before and throughout the installation process to prevent a possibility that you'd encounter the same problems I encountered with during this project, and steps to workaround them.
Read this section only if you don't have El Capitan installation on a thumb-drive:
Please note that to acquire the El Capitan installation files you'll need to have access to the App Store from a working Mac/Hackintosh. In my case I didn't had the media in hand, nor a working Mac/Hackintosh to download it from. So I had to install a previous version of OS X just in order to have access to the App Store and to download El Capitan. For that I used the following guide (also posted by tonymacx86 on April, 2010) to installing Snow Leopard from the retail DVD: http://tonymacx86.blogspot.co.il/2010/04/iboot-multibeast-install-mac-os-x-on.html.
The reason I choose the Snow Leopard installation guide over the newer ones of OS X Lion and above is because I already had the installation DVD of Snow Leopard, and all the others required access to the App Store (again) from a working Mac/Hackintosh which I didn't have.
So if you're installing Snow Leopard, once installation is finished and you're at the desktop, you should use MultiBeast ONLY if you need to install network drivers in order to access the App Store. But if network drivers work out-of-the-box then you don't need MultiBeast anymore, and don't try patching the system to fix the boot. As Snow Leopard can't be booted from hard drive for Haswell processors. We just need Snow Leopard to access the App Store. What needs to be done from here is to sign-in to App Store, download El Capitan installation and to prepare the thumb-drive with UniBeast. Then you start everything from scratch again but this time with the first guide I mentioned above to installing El Capitan.
El Capitan installation time:
Setup time may vary between different hardware builds. But I took stop-watch instances of each of the installation steps for this particular hardware of mine. So you could estimate more or less whether the installation time in your build is normal or not. Here are the results:
- First boot time from thumb-drive and until first setup screen appears: 2 minutes and 12 seconds.
- Actual installing time: 11 Minutes
- Second boot time (when booting from the thumb-drive again and then selecting the OS X partition): 11 seconds.
- Third and final boot time after applying MultiBeast patches (if everything went fine): 11 seconds.
Troubleshooting; According to my experience with the guide along with my Hackintosh hardware
Multi-Monitor users - static/noisy/snowy lines on the second monitor:
I encountered a very frustrating issue when I tried to install the system while a second-monitor was hooked to my Hackintosh. I found that no matter what I tried I couldn't fix an irritating issue of 'static/noisy/snowy' problem on the secondary monitor after patching the system with MultiBeast to boot from the hard drive. To better understand what I mean, observe the left screen in the following image that looks like a mess:
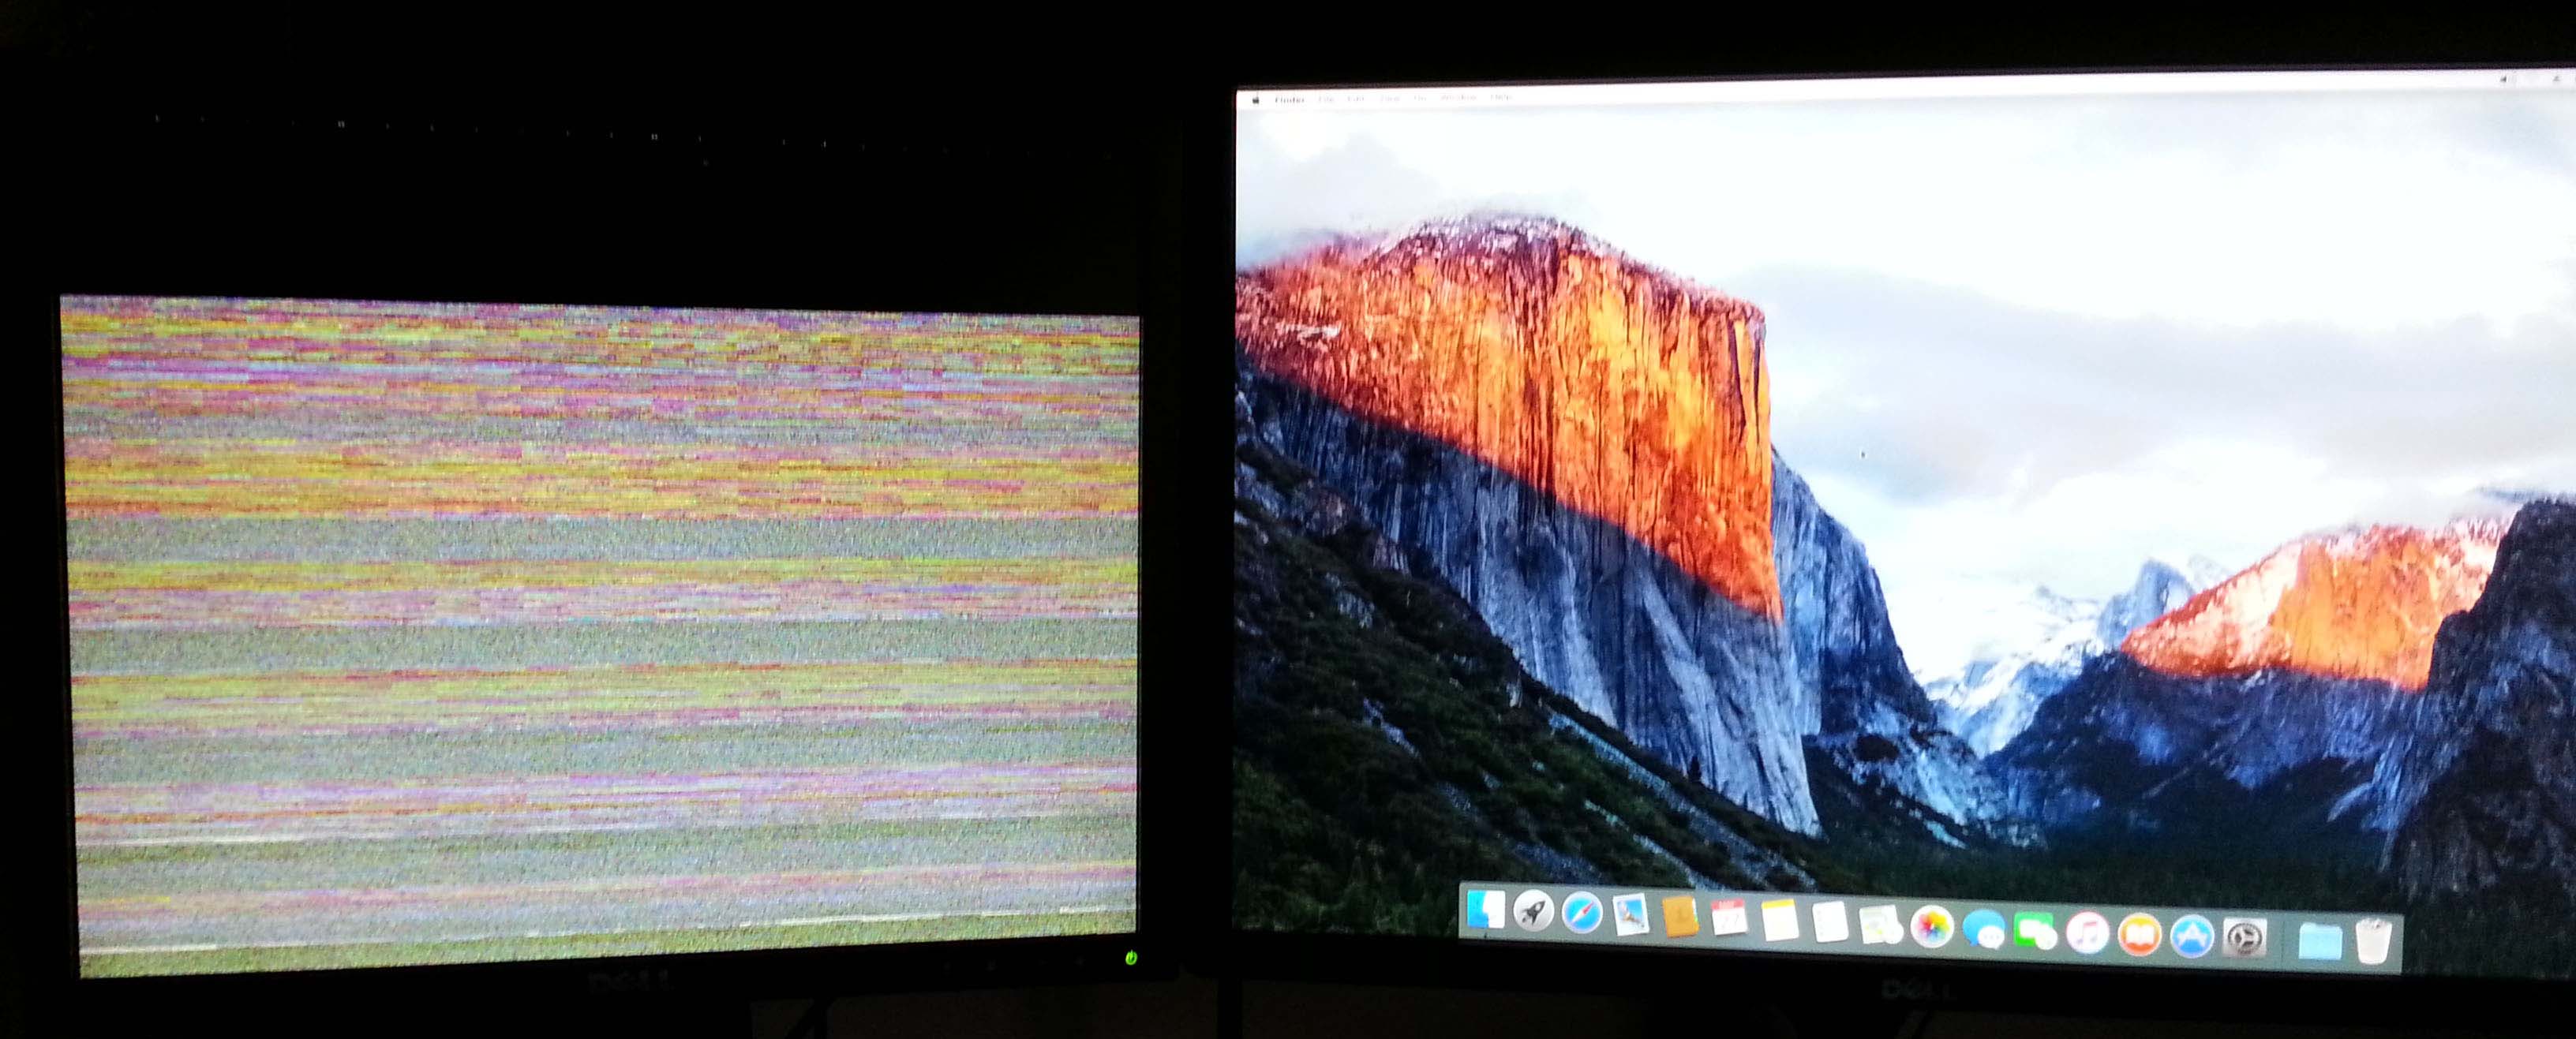
To solve this problem, do as follows:
- Reinstall El Capitan where only 1 monitor is hooked to the system.
- When the first step of the setup has completed, restart the system and boot again (F12) from the thumb-drive - as our OS is not yet bootable from the hard drive.
On the Clover screen (the screen with the green leaf), the selection by default would be on the External HDD icon which says 'Boot Mac OS X from USB'. Now since we already installed the system we don't need to boot the setup again. So use the arrow keys to move and select the HFS HDD icon that says 'Boot Mac OS X from [your HDD partition name]' and hit 'Enter'. If you weren't quick enough the invisible counter would probably end and your computer will boot into the El Capitan setup from the USB again. No worries - push the Reset button to reboot the system and try again.
- You should be prompt with the OOBE (out of the box experience) of Mac OS X El Capitan. Complete the configuration of your first Mac **ahem*** Hack
") . You'd be asked to fill a few details and to create a profile. You may disregard either signing in to the App Store or to supply any information to Apple at the moment. The only thing that's important is to create a profile and to set a password for your account. Once you done so you'd should reach the El Capitan desktop! Yey!!!
. You'd be asked to fill a few details and to create a profile. You may disregard either signing in to the App Store or to supply any information to Apple at the moment. The only thing that's important is to create a profile and to set a password for your account. Once you done so you'd should reach the El Capitan desktop! Yey!!!
- Once you reach the desktop I suggest you to backup the entire 'Libraries -> Extensions' folder to your thumb-drive, or to a second partition if you made one during setup. Should anything go wrong after you apply MultiBeast kexts, you can always delete the content from the 'Extensions' folder and re-copy it from your backup to start the patching again.
- Patching the system: When you boot El Capitan from the thumb-drive that was created with UniBeast you should have a working internet connection from both your wired LAN or WiFi adapters (if the Realtek LAN port doesn't work for you try using the Intel one). So if you haven't copied MultiBeast to the thumb-drive in advanced as tonymacx86's guide suggests, go to the 'Downloads' section here on tonymacx86 and download it. Older versions of MultiBeast could be found under the 'Archive' link at the bottom of the 'Downloads' page.
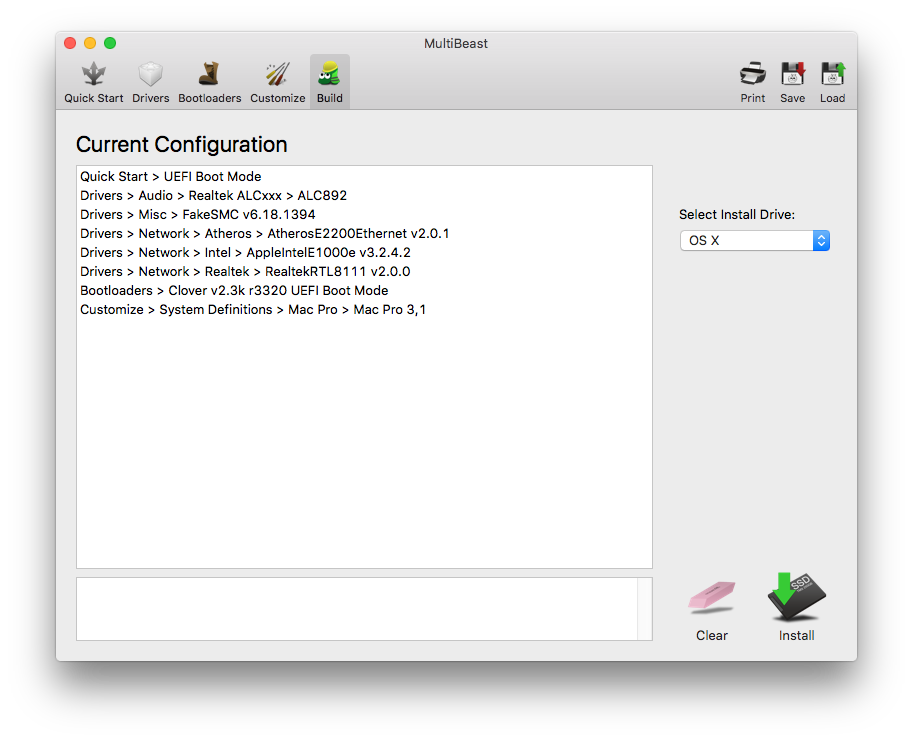
- Copy and run MultiBeast 8.0.1 from the desktop and select the following:
View the summary (save it to a file if you like for quick use in the future) and hit 'Install'.
- Once the patch installation has completed, reboot your system and remove the El Capitan installation/rescue thumb-drive from the USB port. The system should boot normally from the hard drive by now. Boot time with this exact hardware should be about 11 seconds. If it reaches 37 seconds to over 1 minute then you probably did something wrong. For me when I had a second monitor hooked to the system during setup, the first boot time after patching the system was between 37 seconds to 1 minute. So take the boot time in mind in order to tell if it's normal or not.
- If all went well after patching the system, and right before the apple logo screen on boot disappears you don't see any moment of 'static/noisy/snowy' line effect, it means that all went as it should and you can hook now the second monitor if you have one. If the display on the second monitor looks fine, do another reboot to the system while it's still connected and check that it remains fine when the system boots again.
- After you confirmed that the system boots correctly with 2 monitors (or more), it's time to make another backup to your 'Extensions' folder, which now contains your working kexts in it that were installed from 'MultiBeast'. You can replace any duplicated files if you're copying to the same backup folder. I for one prefer to keep a backup of the fresh 'Extensions' folder before the patching, and a modified version of it in another name (fresh and modified if you like). Should anything go wrong if you try applying more kexts in the future or if the system doesn't boot, you could always boot from the rescue thumb-drive, delete the entire kexts content of the 'Extensions' folder when you get to the desktop, and to copy all the working ones from the 'Extensions' backup folder you made.
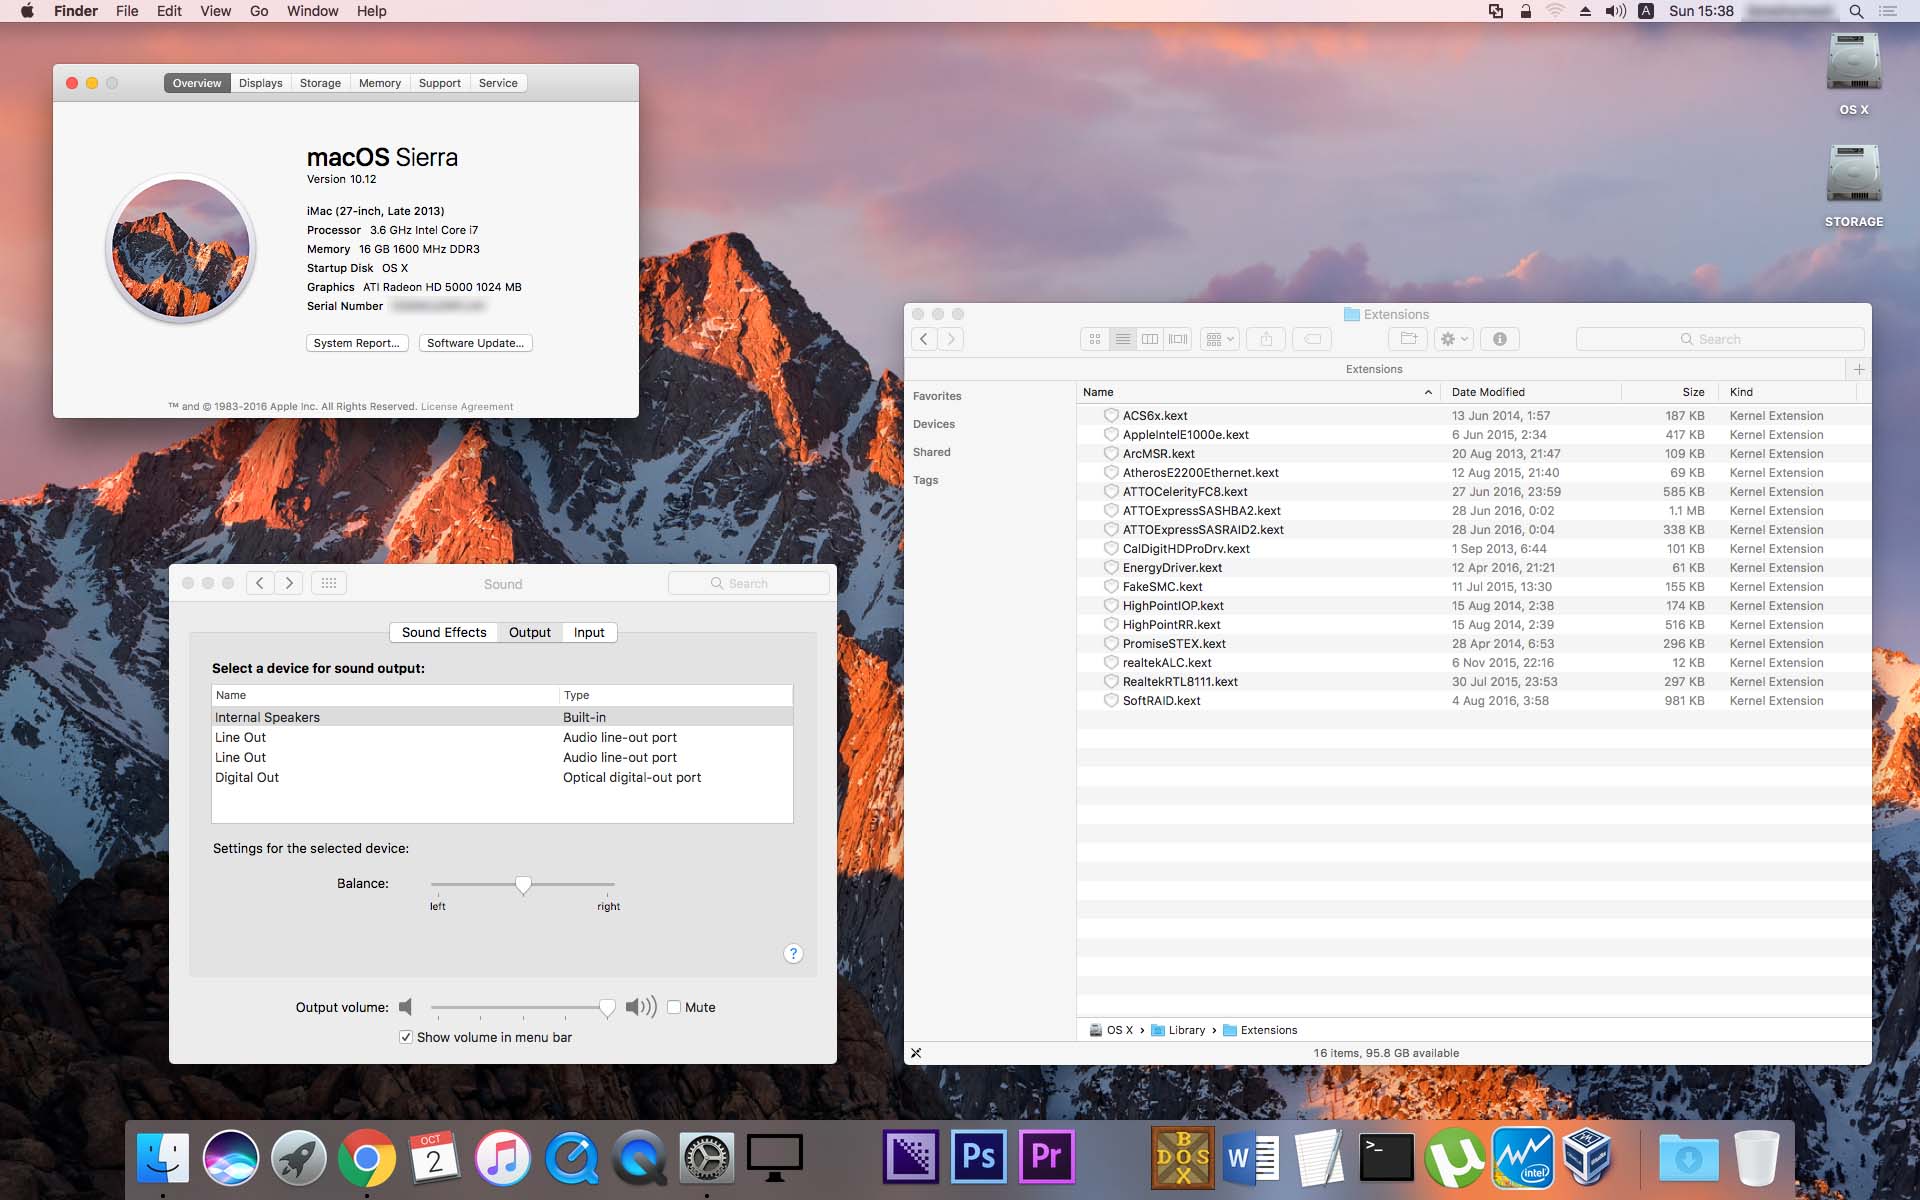
No sound after applying the ALC892 driver from MultiBeast:
After applying the ALC892 driver, El Capitan might not pick the analog output jack port in the 'System Preferences'. And so you won't hear any sound coming out of your speakers. To fix this, go to 'System Preferences -> Sound -> Output' tab and select the 'Internal Speakers'. If you don't see any entries in the 'Output' tab then verify which ALCxxx codec your motherboard has. As I already mentioned above, even though the newer MultiBeast appears to have the same ALC892 driver in it, only the one from MultiBeast 8.0.1 worked for me. But if the one from version 8.0.1 doesn't work for you, go ahead and try applying the same driver for a newer MultiBeast package. Remember, Hackintosh is not yet 100% working right out of the box. So if something doesn't work for you don't give up! Try again and if needed seek for answers in the forum.
Triple monitor on the ATI 5770:
Triple monitor, or as ATI/AMD calls it Eyefinity™ does work on Mac OS X. Now since newer graphic cards do support 2-to-4 monitors setup, old cards like the ATI 5770 might support only up to 2 monitors connected to your system at the same time. However, the ATI 5770 has 2 DVI ports, and also 1 Display Port and 1 HDMI port. So theoretical 4 monitors could be used with it at the same time. But technically that doesn't work. You can connect 4 monitors to it, yes. But the 5770 GPU supports output to only 2 of the ports at the same time. That said, the ATI 5770 is also known to support Eyefinity™, or in other words to support 3 monitors setup. That's true, and it requires a special Display Port to DVI adapter. But unfortunately ATI never supplied the required accessory to doing so with the ATI 5770. While a DP-to-DVI adapater can be used with the 5770, there are 2 types of adapters out there: Passive adapter and Active adapter. As you may guess, the Active DP-to-DVI adapter is more expensive and it's the only one that actually supports Eyefinity™. A passive adapter on the other hand can be connected to the 5770, but it won't be able to project a 3rd monitor signal while 2 ports (for instance both DVI ports) already in used. And the HDMI port is not an option for Eyefinity™.
I purchased an official ATI Active DP-to-DVI adapter a few years ago and I had it lying around. So I could test a triple-monitor-setup in order to show you that it actually works on Hackintosh.
If anyone of you is looking for such an adapter, search on eBay or similar. Back then it was expensive compared to the time it was first launched. But today you might find an Active DP-to-DVI adapter for a decent price. Mine looks like this and came in the exact packaging: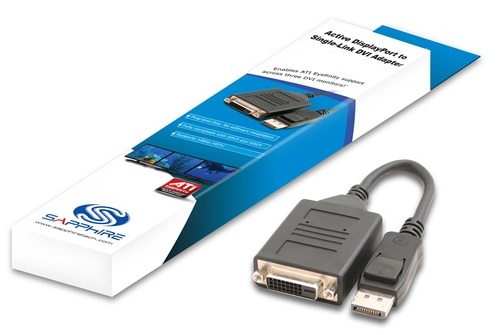
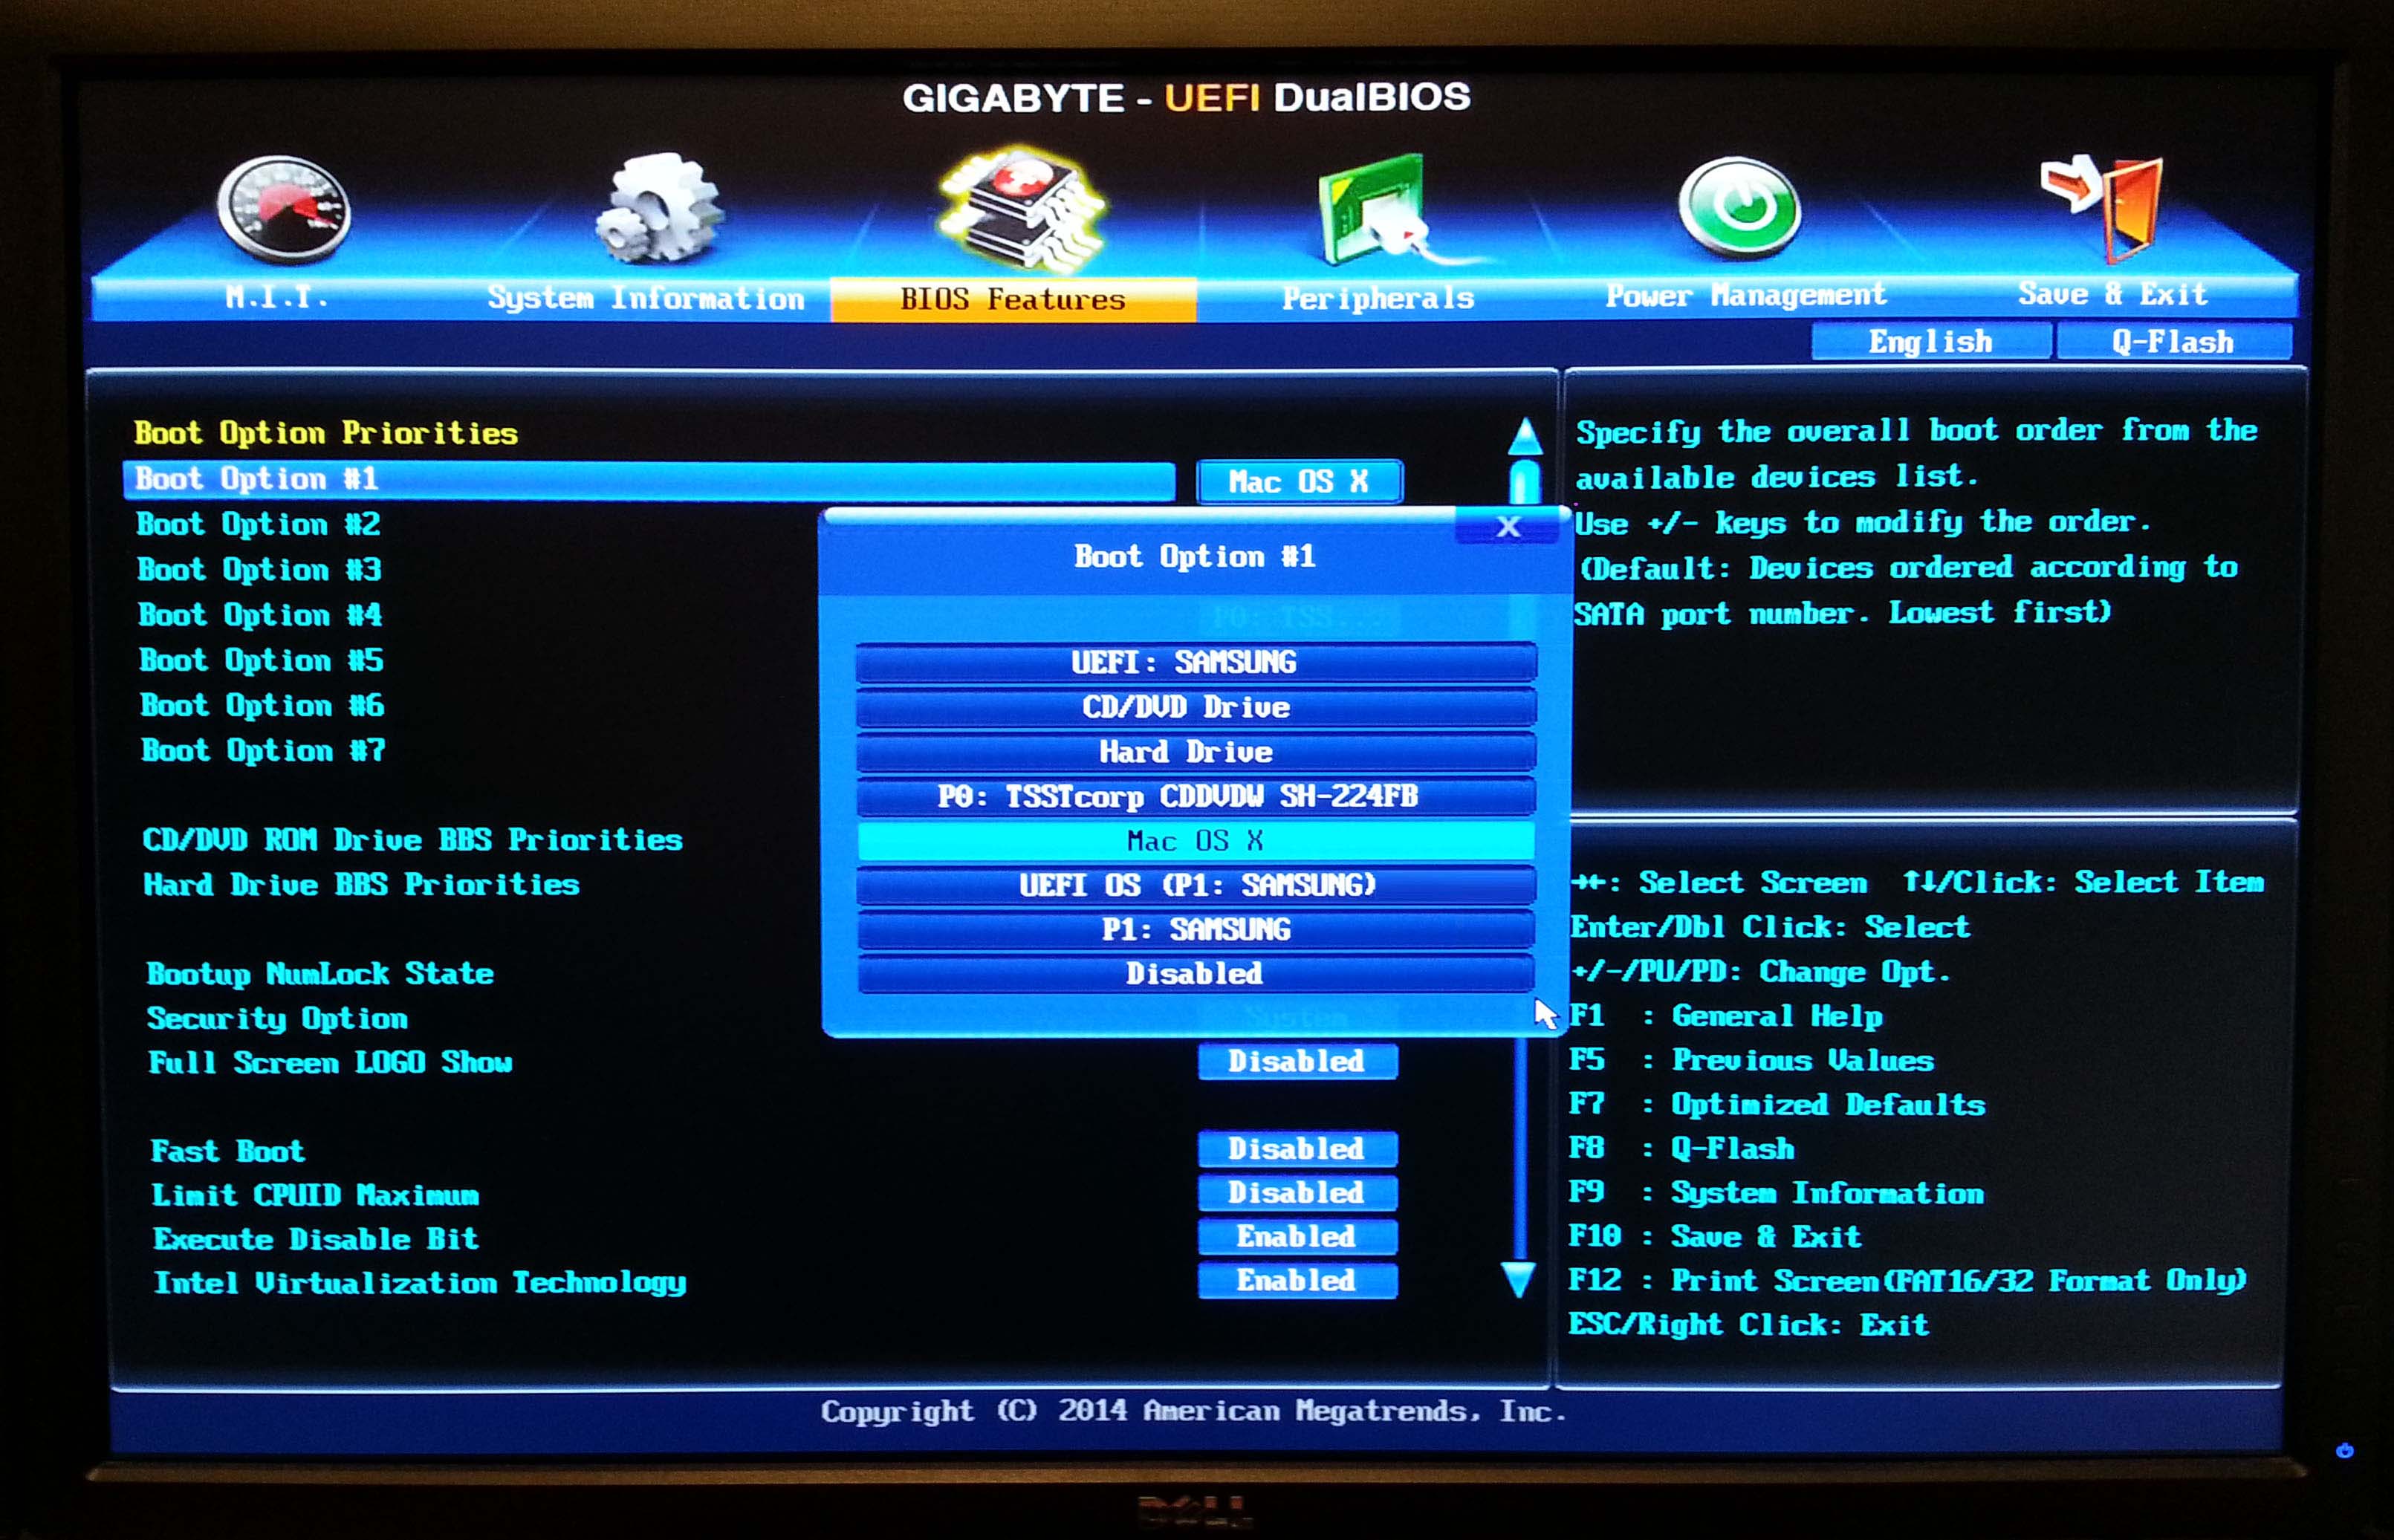
The FakeSMC patch that makes your Hackintosh to boot without the rescue thumb drive, adds the required kext to boot the system from the hard drive - or actually from the UEFI partition directly into your UEFI/BIOS. In my UEFI/BIOS screenshot you can see 2 different UEFI OS entries: One is 'Mac OS X' which is the 'Boot Option #1' in my case that boots the system correctly. And another named 'UEFI OS (P1: SAMSUNG)'. I think that it happen when I accidentally selected the 'Legacy UEFI Boot Mode' in MultiBeast instead of the regular UEFI Boot Mode. The 'Legacy UEFI' adds a hidden UEFI partition to the hard drive in order to boot the system, opposed to the regular UEFI mode which adds the entry directly in your UEFI/BIOS - which in my case is the 'Mac OS X' entry. If you wish to delete unnecessary entries in your UEFI/BIOS look in this guide: http://www.tonymacx86.com/threads/g...-boot-entries-prevent-further-problems.175274
In my experience I managed to delete unnecessary entries with this method only when they were in the UEFI/BIOS. But it didn't work for me when I tried to remove the UEFI entry on the hard drive - For that I had to re-partition the hard drive and to delete this hidden UEFI partition. It's not that necessary but some might not like the idea of having unnecessary boot entries in their UEFI/BIOS.
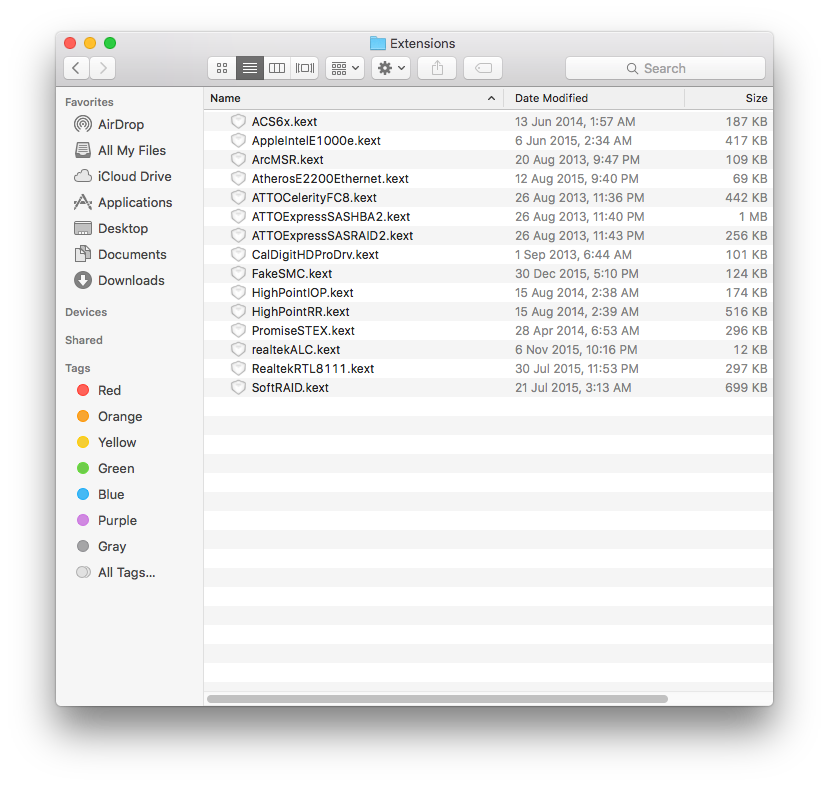
I'm attaching some more screenshots from my UEFI/BIOS boot priority, the 'About This Mac' and from my working 'Extensions' folder for you to see which kexts worked for me.
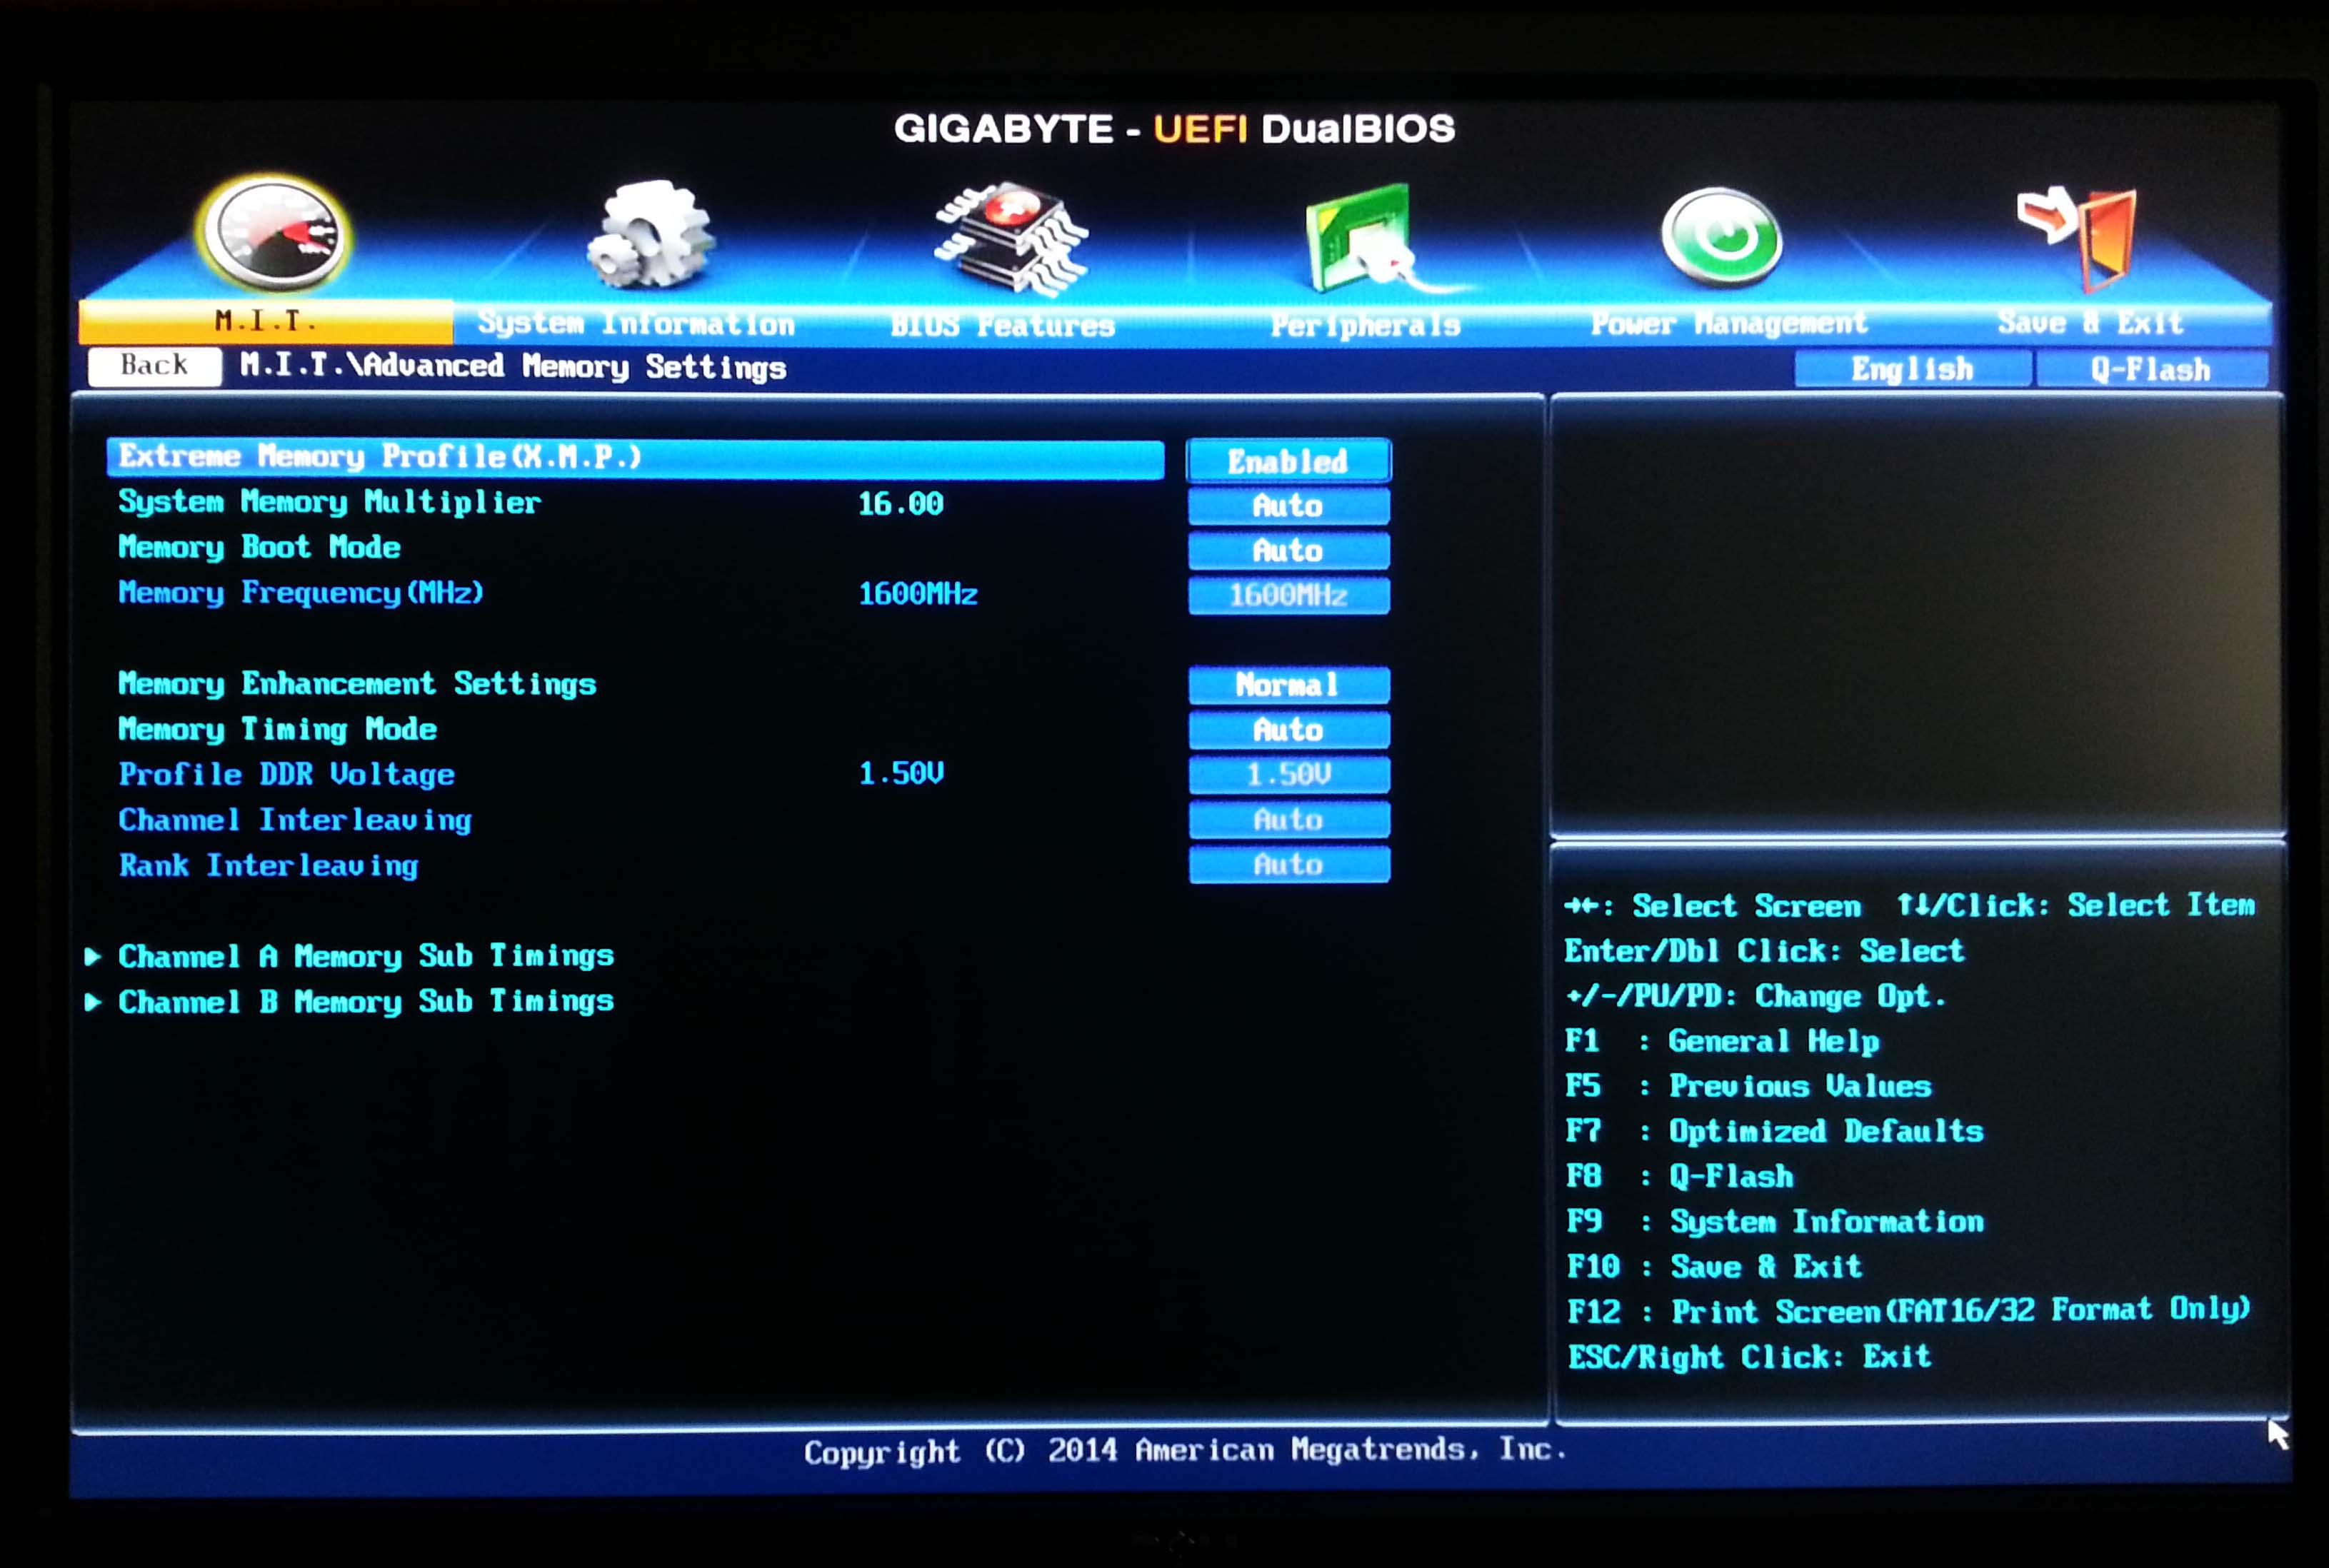
UEFI Settings: M.I.T\Advanced Memory Settings
UEFI Settings: BIOS Features\Boot Priority
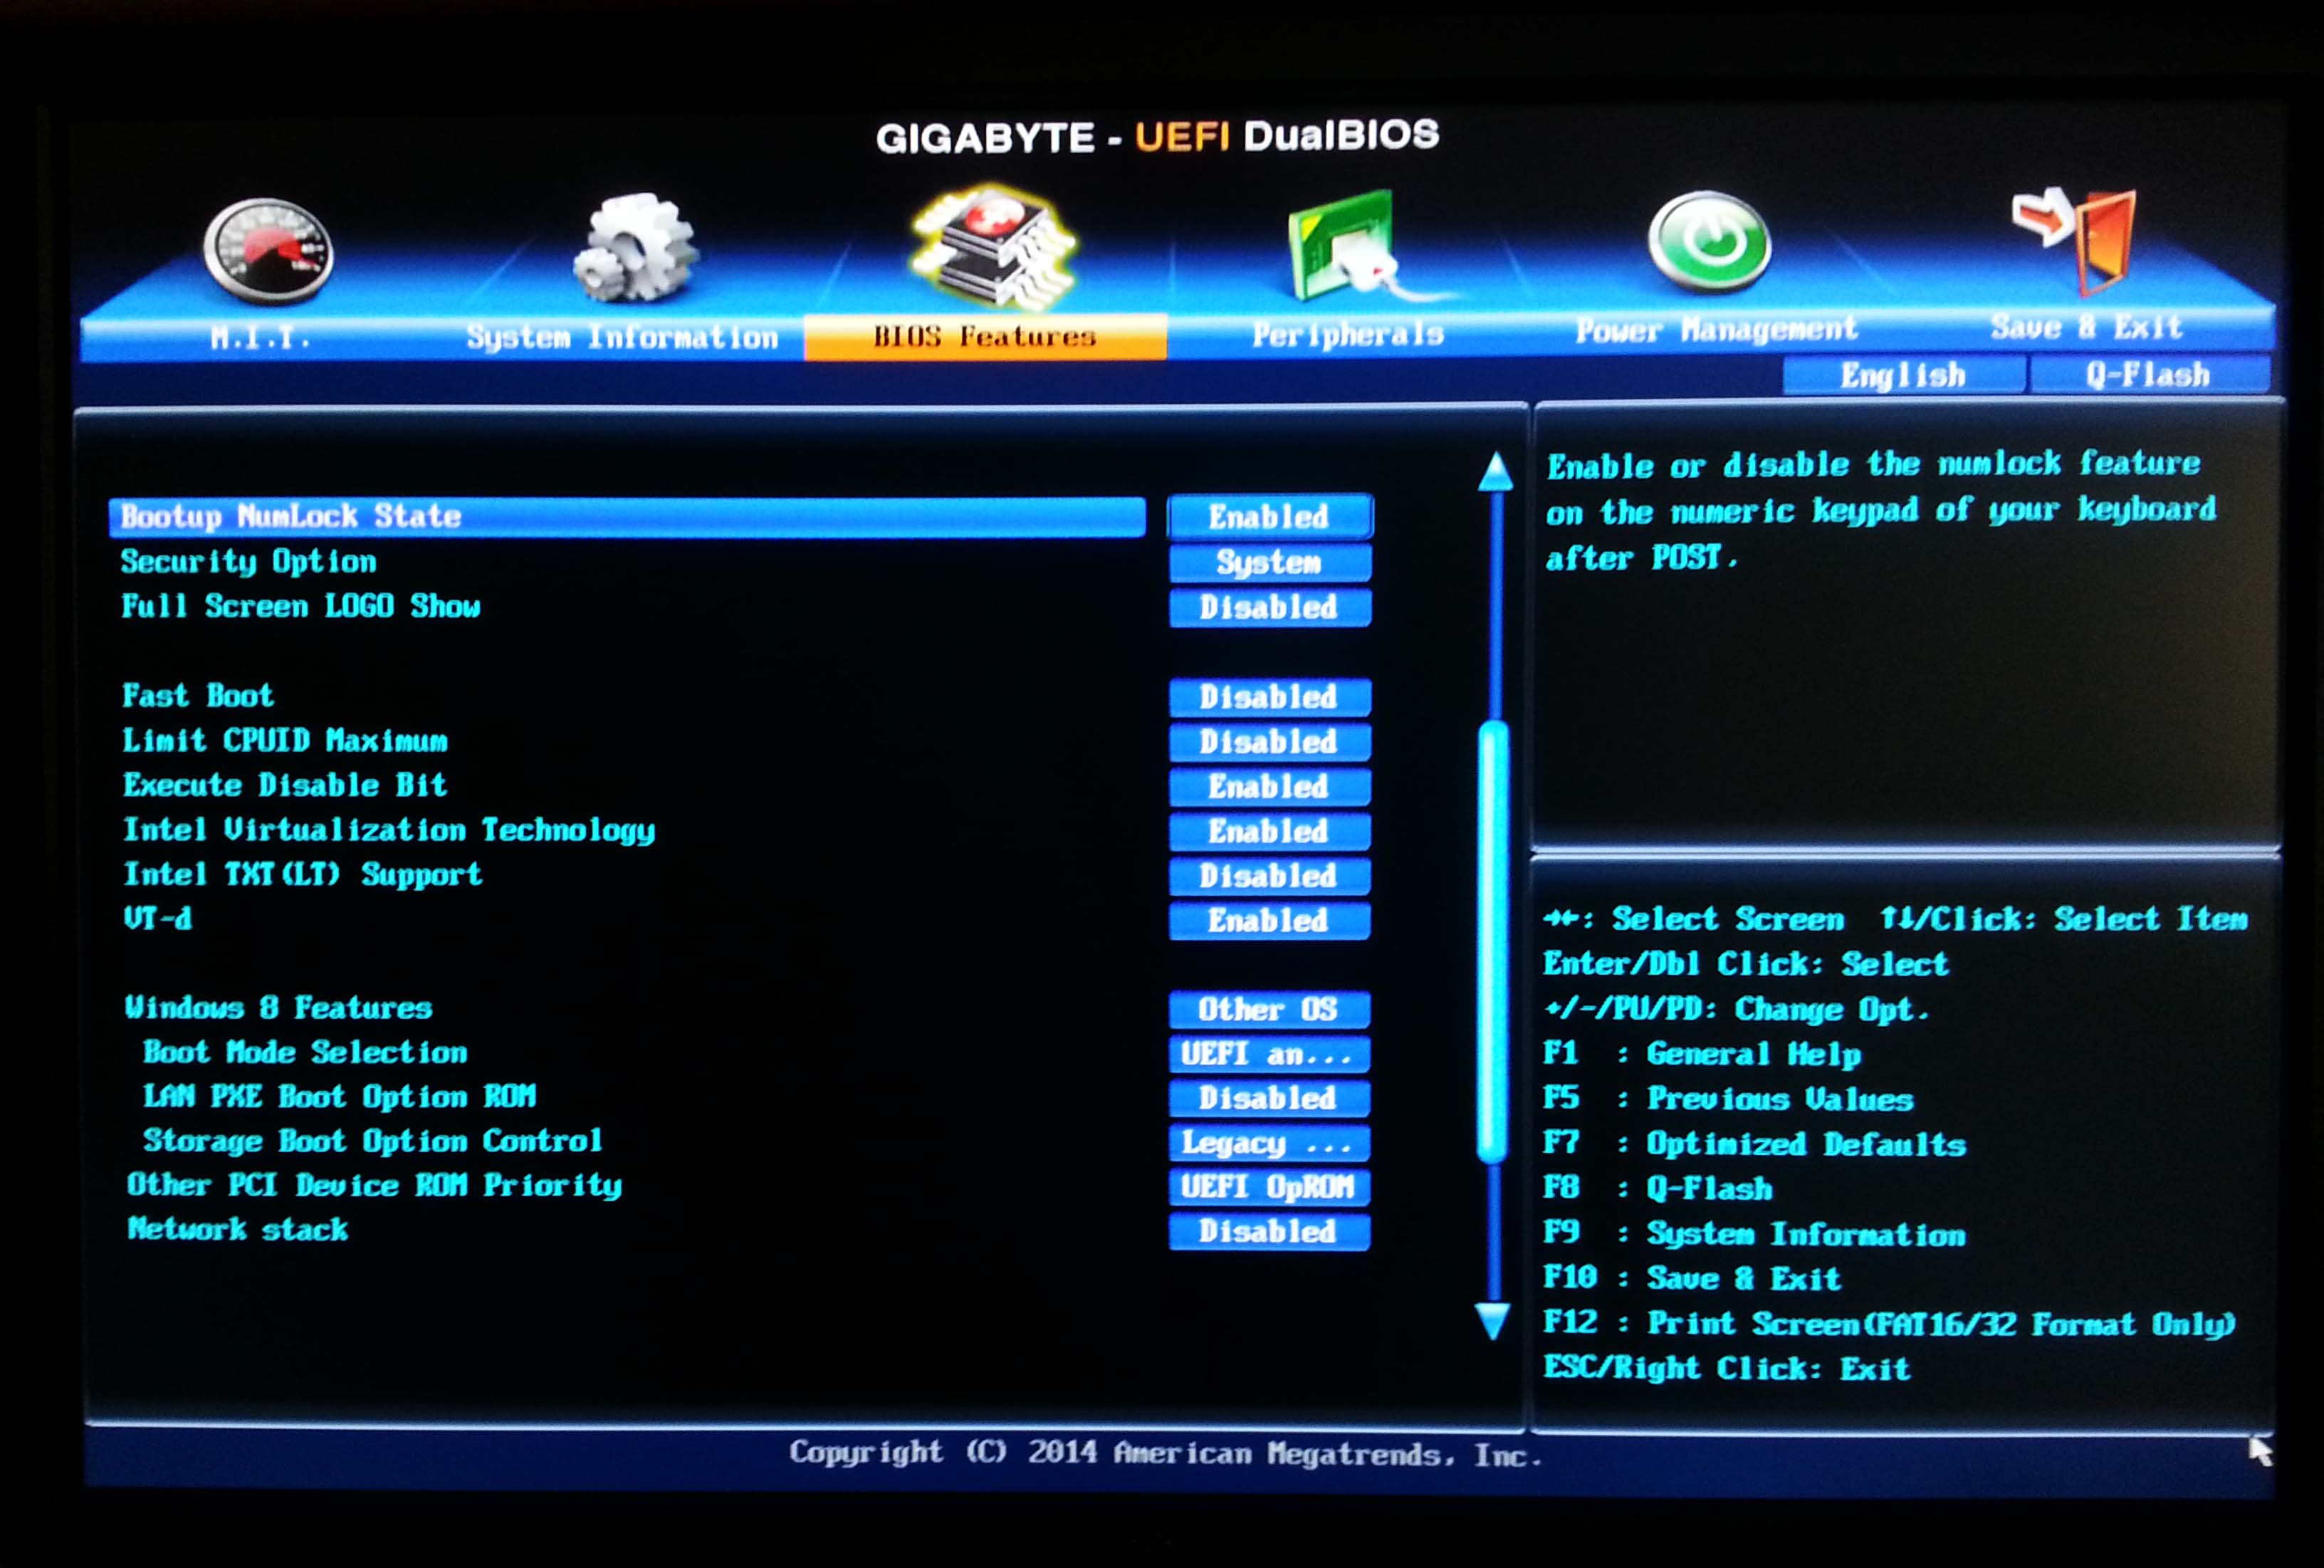
UEFI Settings: more of BIOS Features
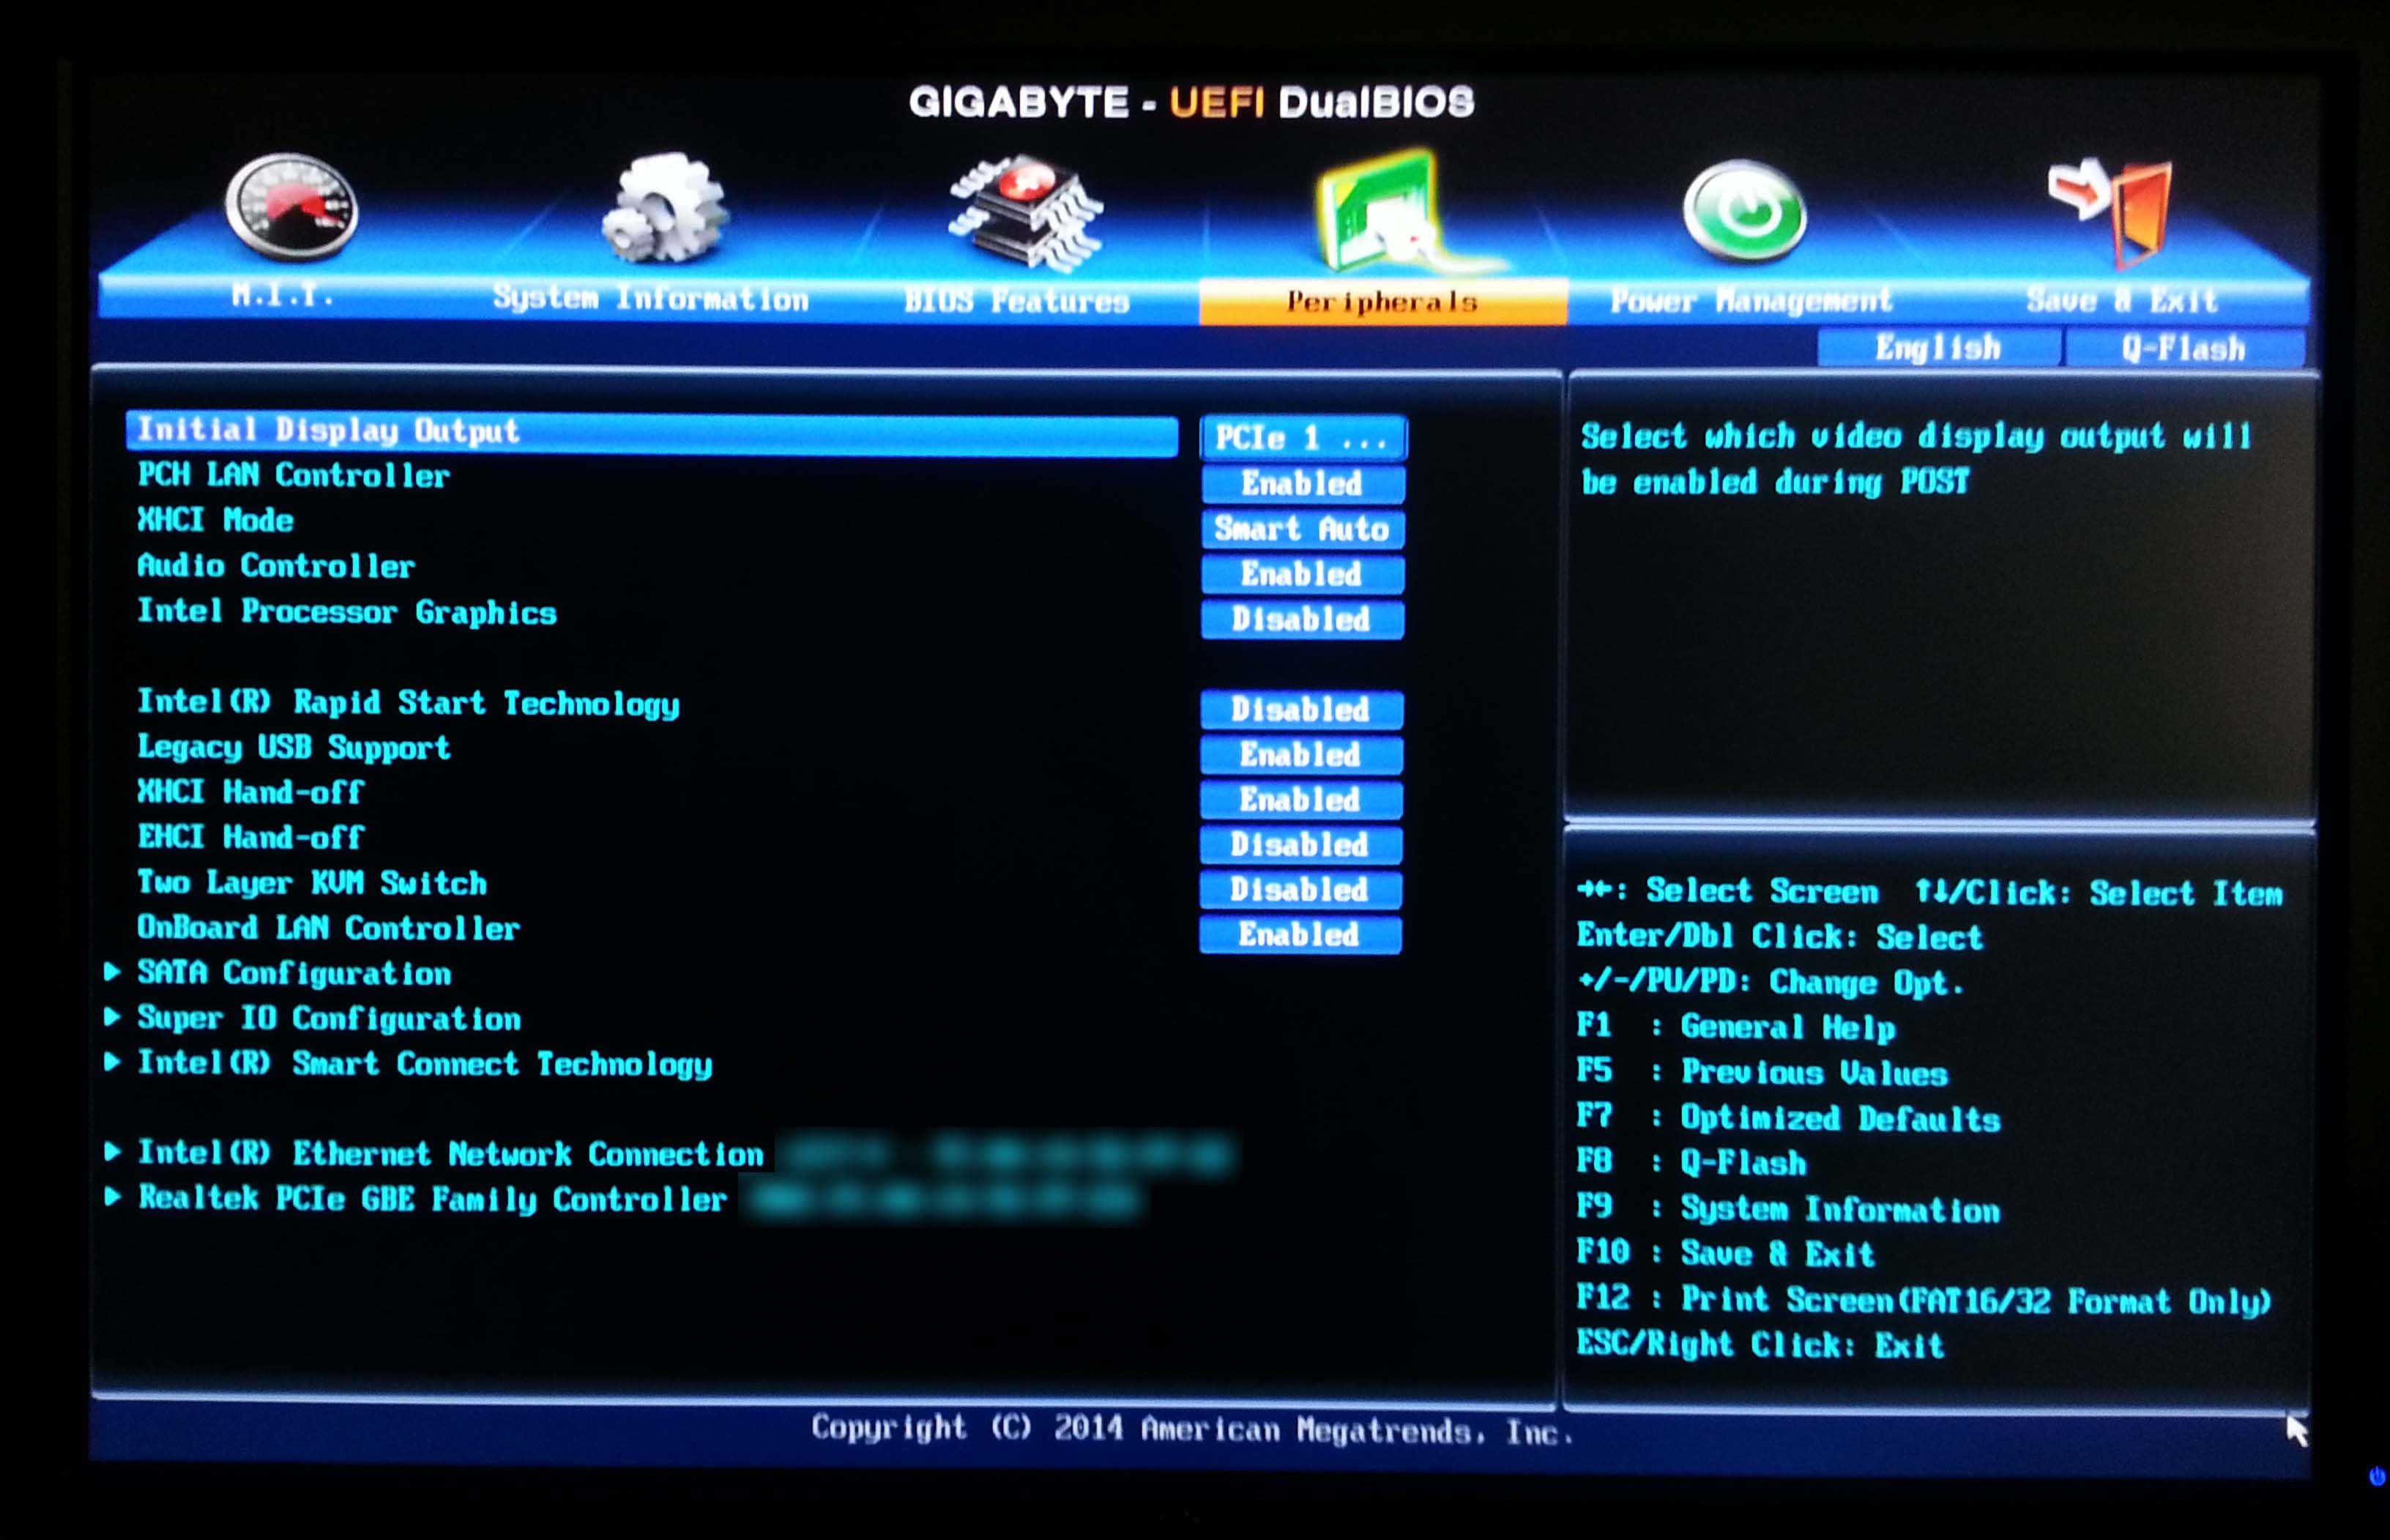
UEFI Settings: Peripherals
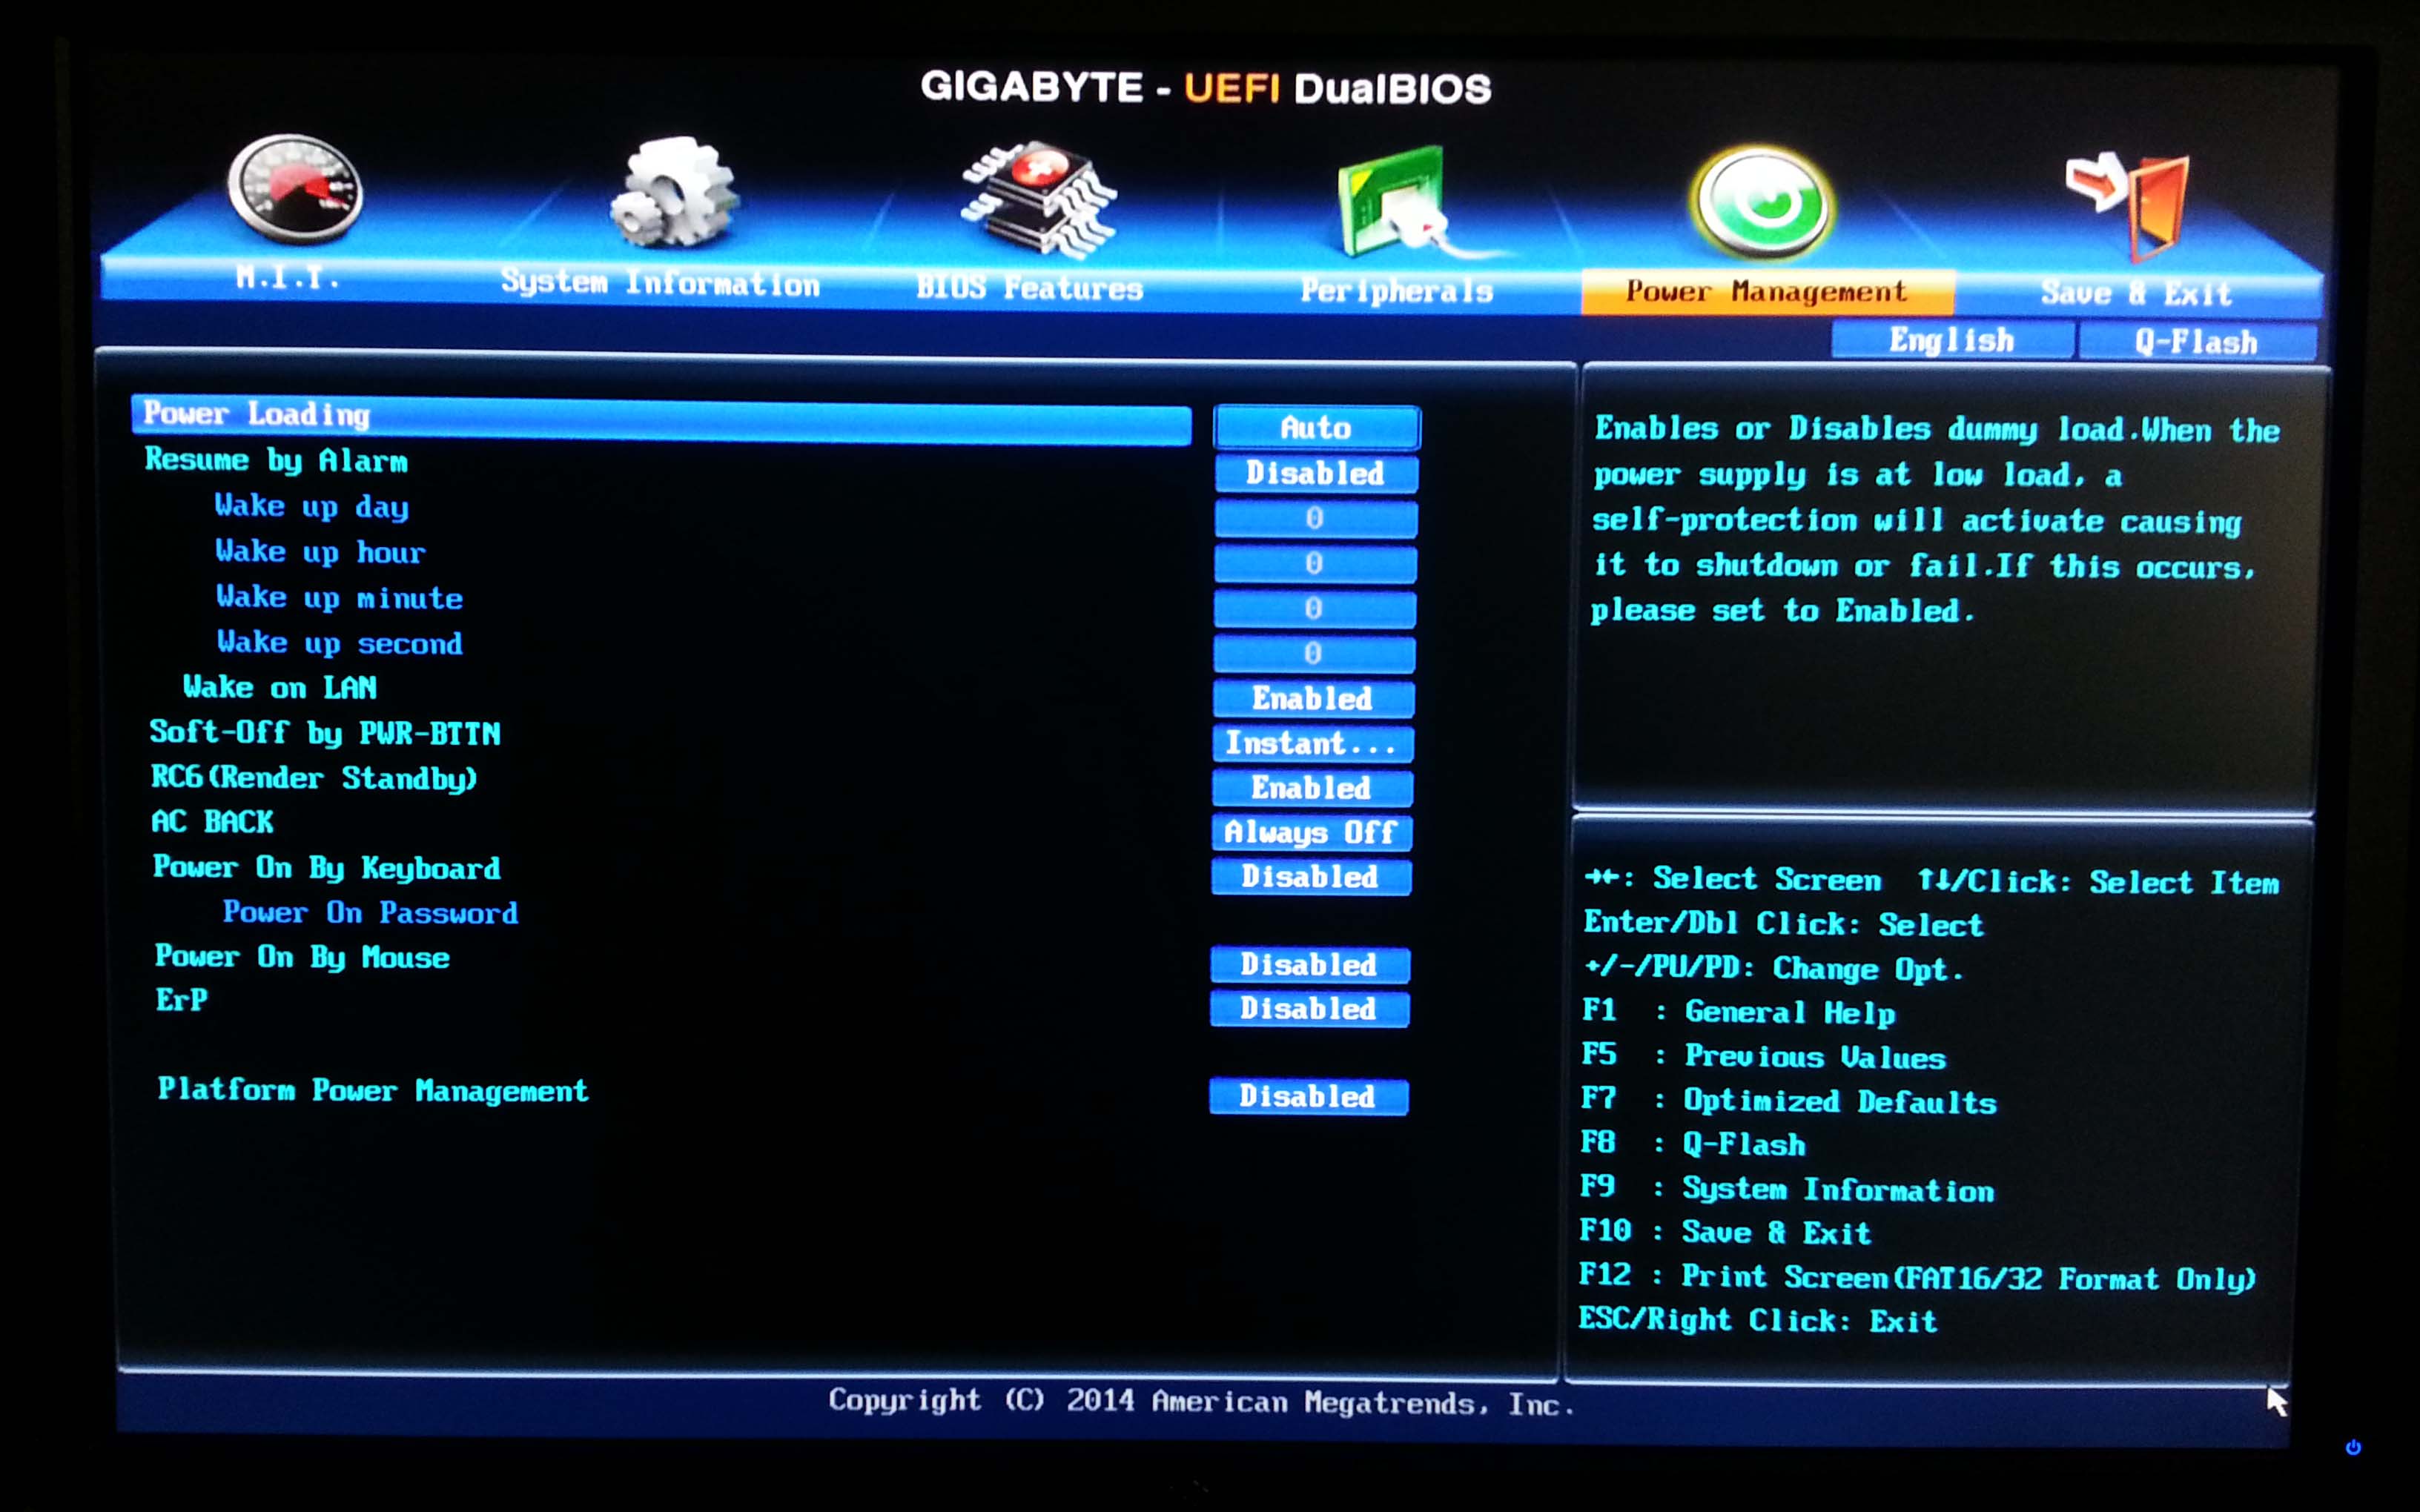
UEFI Settings: Power Management
About This Mac

Extensions Folder
Some more pics of the system

Replacing of the Intel® wireless card with a Hackintosh compatible one


Optical drive front bezel removed
- Like in the old Mac Pro where you didn't know what brand your drive is -

Mac OS X Snow Leopard installation media
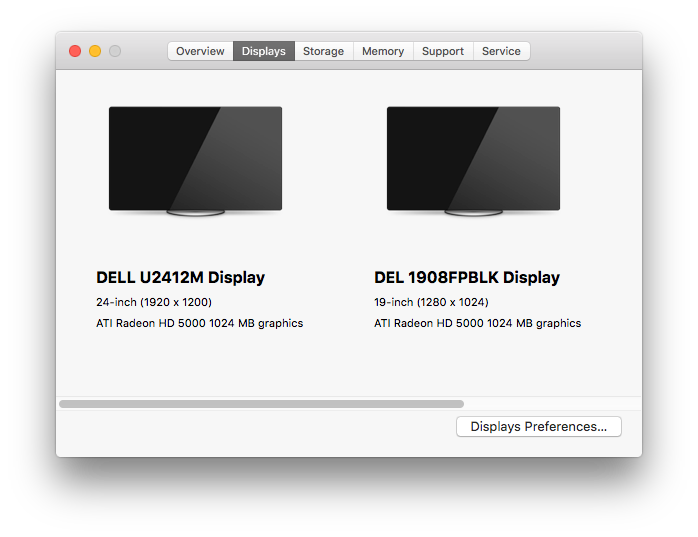
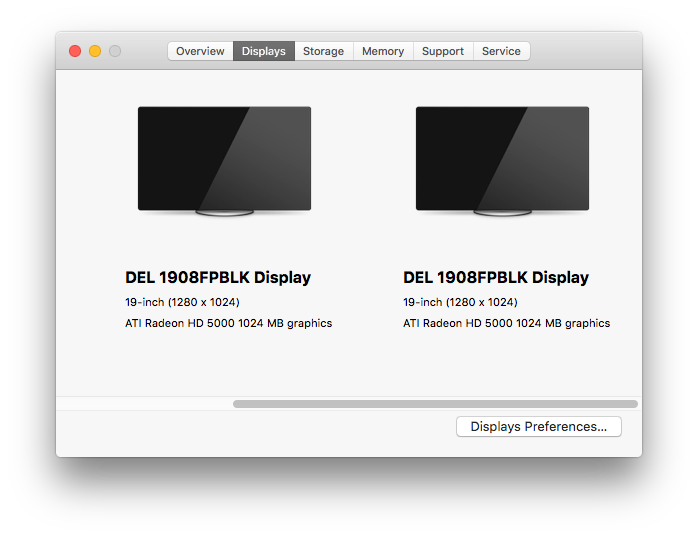
Triple-Monitor Setup
UEFI Settings: BIOS Features\Boot Priority
UEFI Settings: more of BIOS Features
UEFI Settings: Peripherals
UEFI Settings: Power Management
About This Mac
Extensions Folder
Some more pics of the system
Replacing of the Intel® wireless card with a Hackintosh compatible one
Optical drive front bezel removed
- Like in the old Mac Pro where you didn't know what brand your drive is -
Mac OS X Snow Leopard installation media
Triple-Monitor Setup
I'm using ATEN 2/4-Port USB Peripheral Sharing Device (model US424) to switch the mouse and keyboard input between the PC and the Hackintosh. It's similar to this US224 model (newegg) but I purchased the US424 that can be hooked to up to 4 computers, if I'll ever need to add any other computer to this setup.
To switch between the displays, I'm using the screen's built-in input device selection buttons. I find it much convenient that way in opposed to a traditional KVM switch which changes both the input and the display to the focused system it is set on. That way I'm not obligated to see only the output of the system I'm currently controlling. I can set for example an installation procedure or something else on one system to be shown on one monitor, while viewing and using the other system on the second and third monitors. Besides, I'm not sure if there is any triple monitor KVM switch out there that supports dual DVI and a DP ports, that could also let you choose whatever peripheral inputs and display outputs you wish to switch. And if there is I assume that it won't be cheap either.
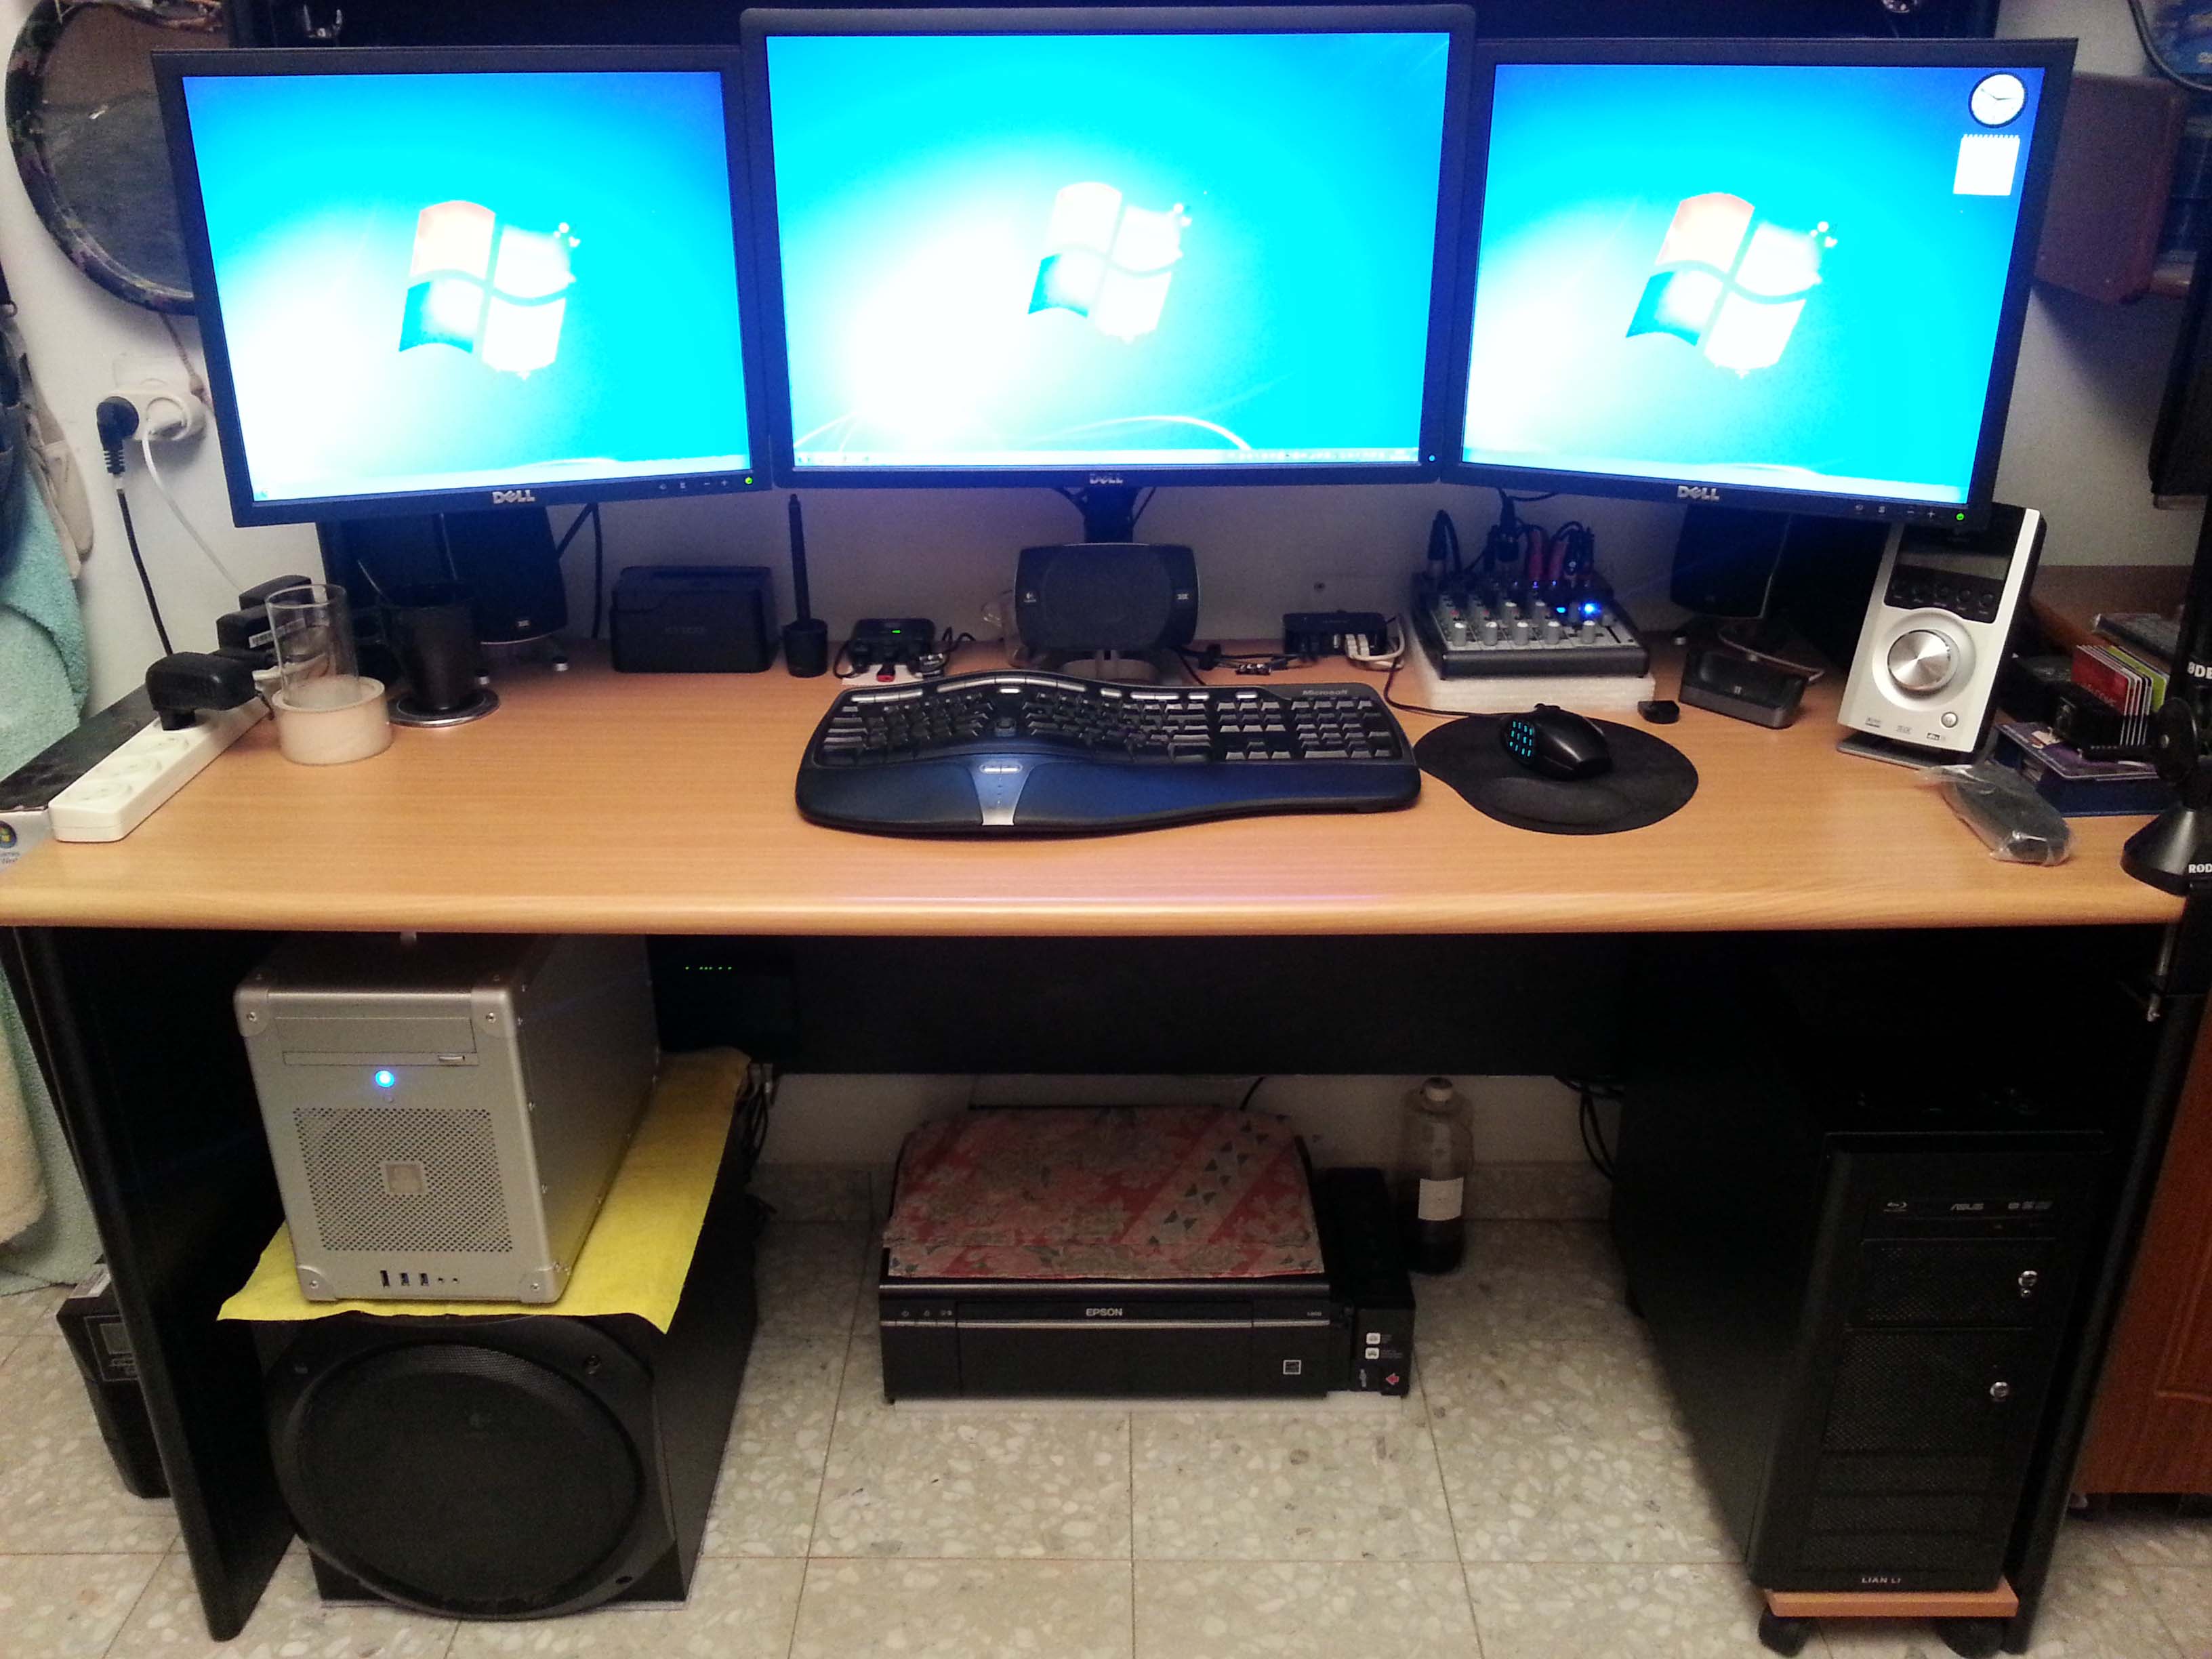
Here's my Triple-Monitor Setup of the PC
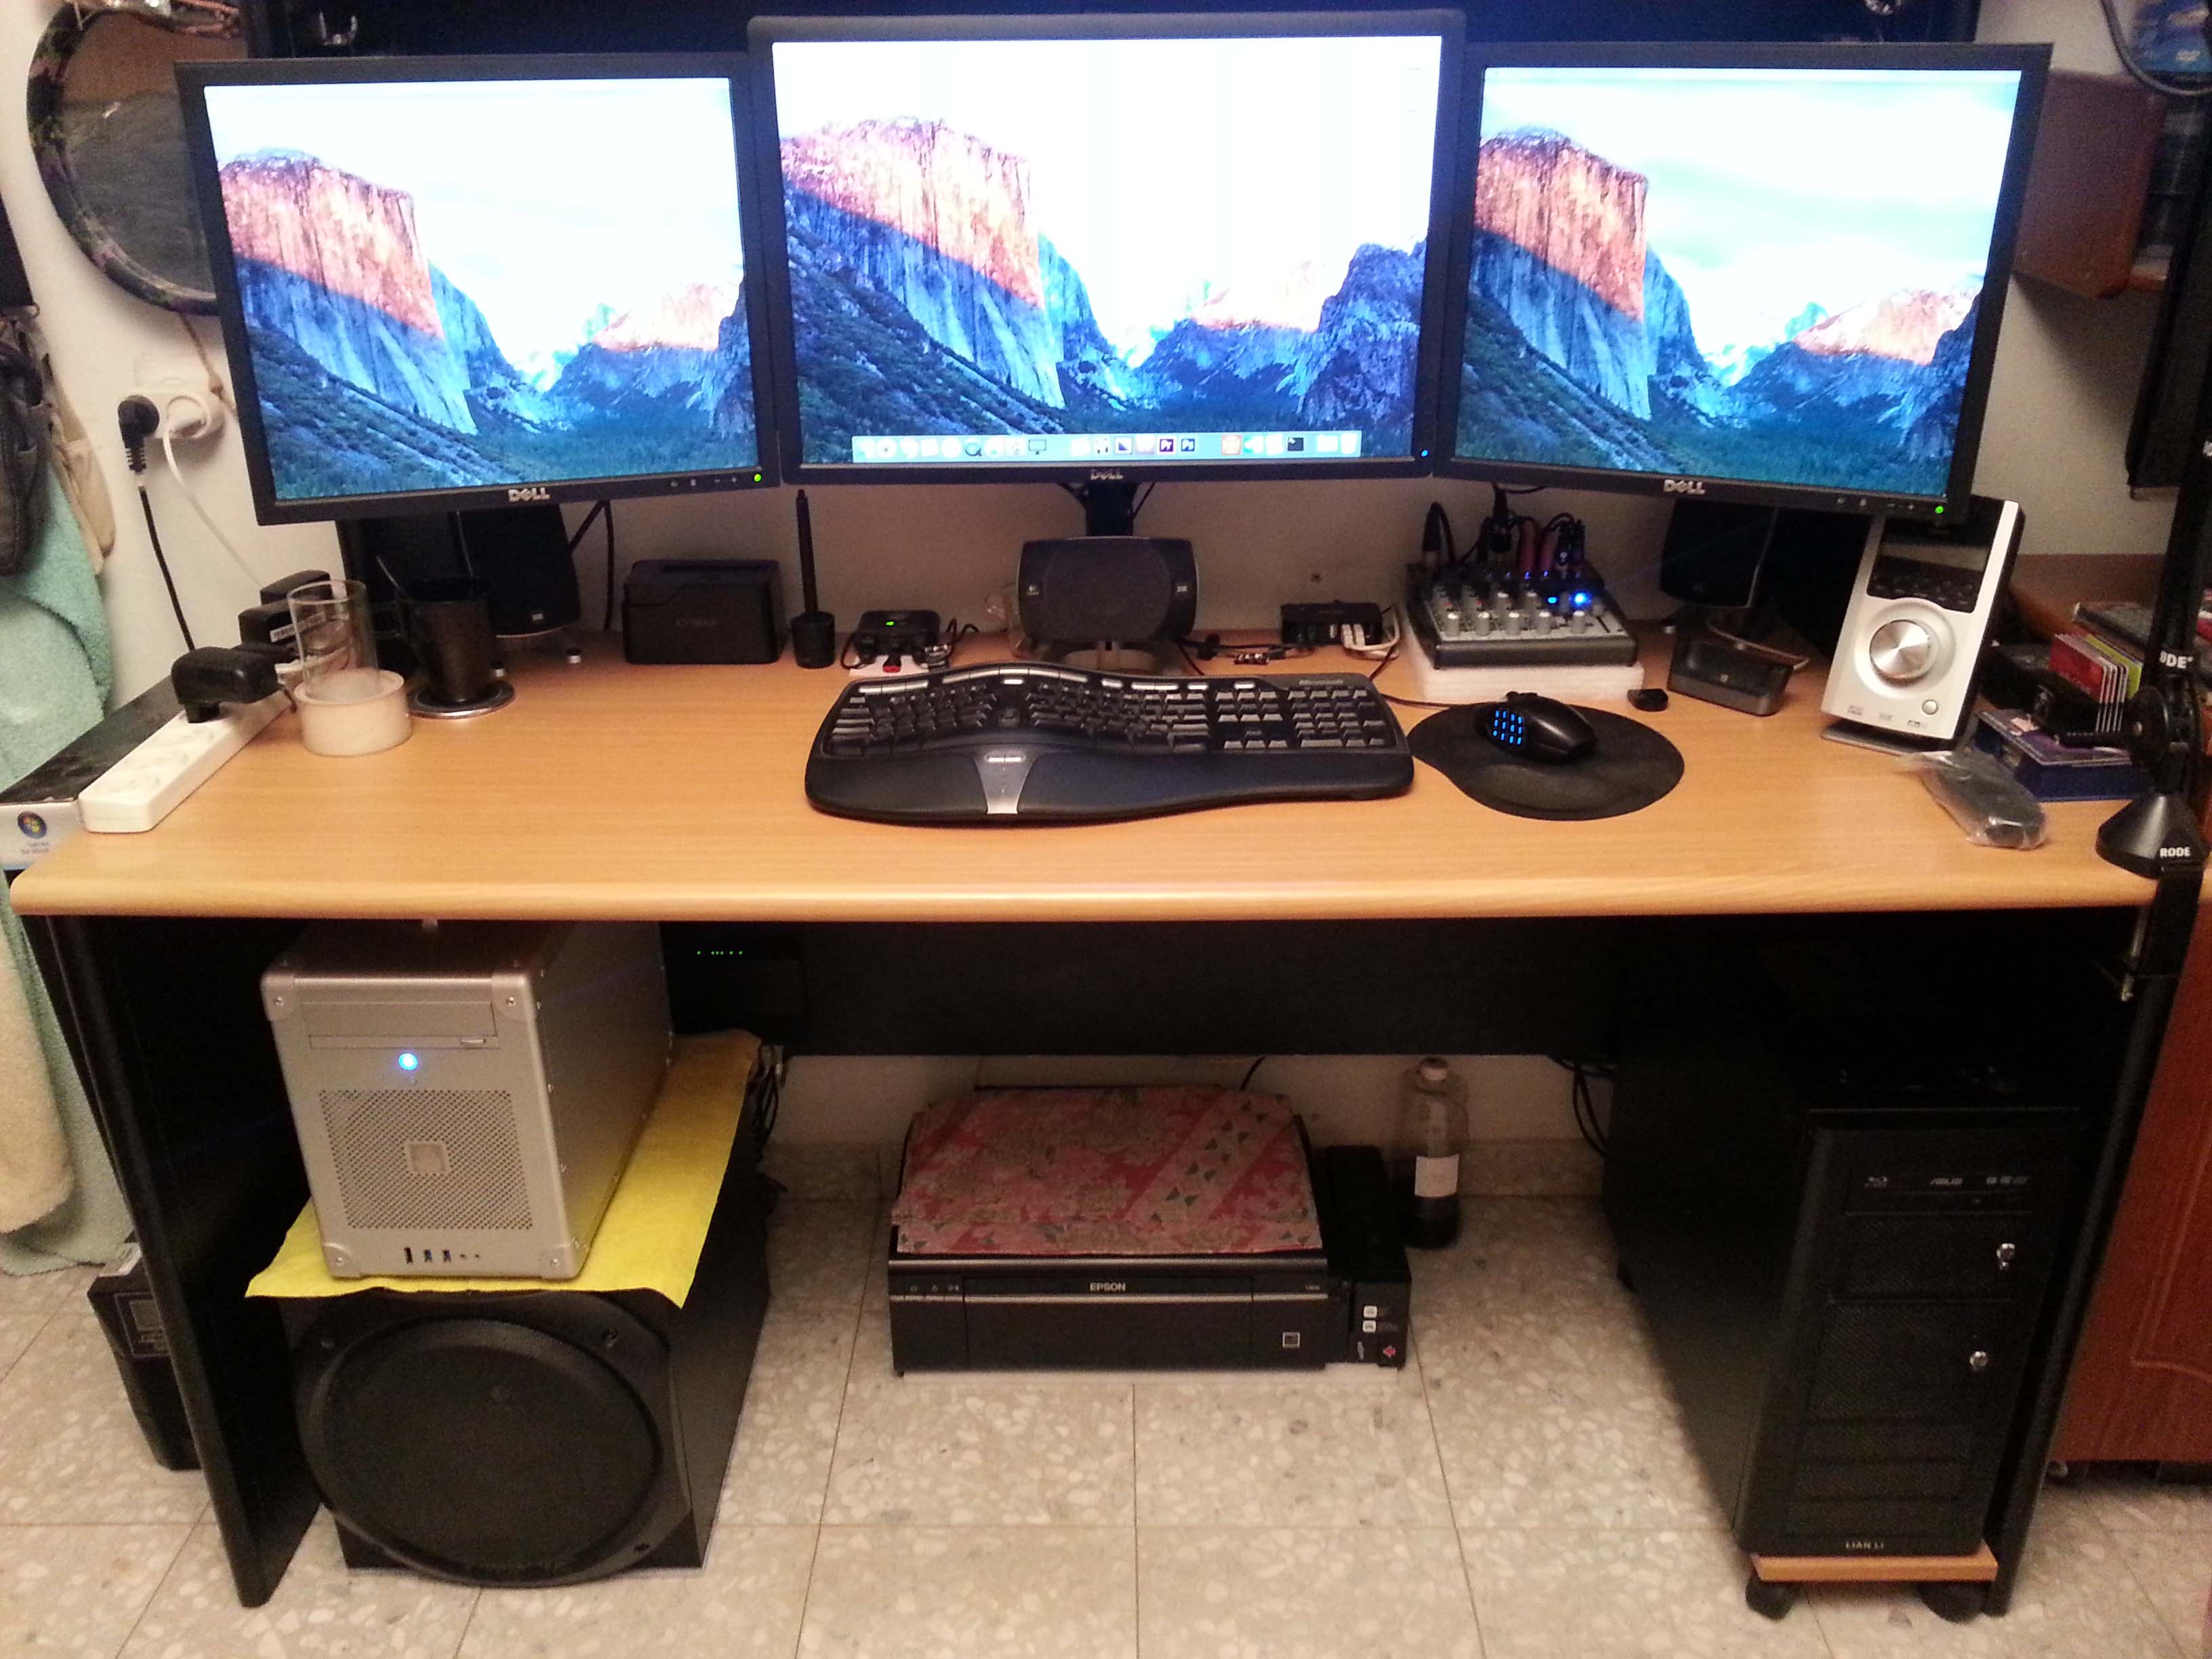
And here's the Triple-Monitor Setup of the Hackintosh
Benchmarks
And here's the Triple-Monitor Setup of the Hackintosh
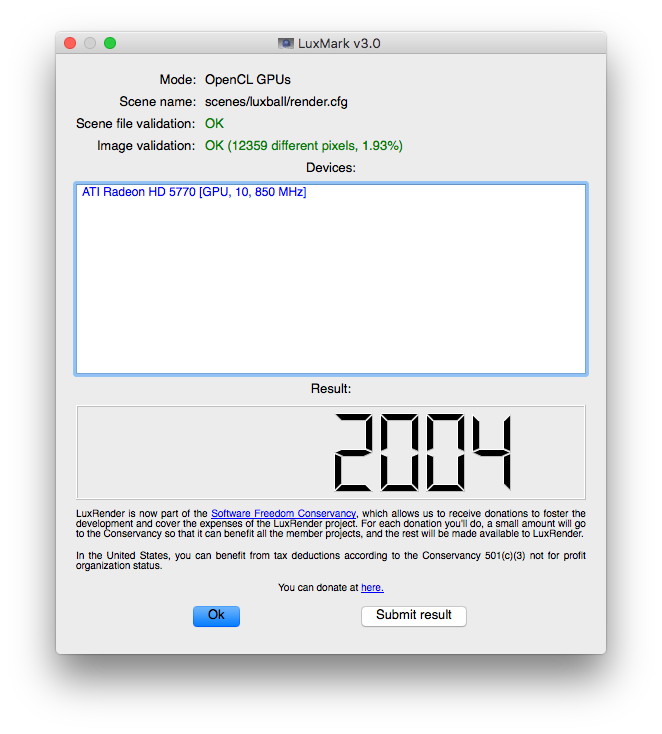
LuxMark (GPU)
Greekbench 3
I made an image from the web page results so it's a bit long one...
- Note that the Tryout version can only do testing for the 32bit architecture -

Cinebench R15 (CPU)
Greekbench 3
I made an image from the web page results so it's a bit long one...
- Note that the Tryout version can only do testing for the 32bit architecture -
Cinebench R15 (CPU)

Cinebench R15 (GPU)

And finally I also did the BruceX Test for Final Cut Pro X and exported a 5K sequence according to the test steps here: https://blog.alex4d.com/2013/10/30/brucex-a-new-fcpx-benchmark
The result was 52 seconds to export the sequence.
Well, that's that basically. If anyone needs any assistance or have any question I'd be happy to help, just as many of you helped me! And besides, comments and feedbacks on my build are more than welcome.
-goldeng
UPDATESThe result was 52 seconds to export the sequence.
Well, that's that basically. If anyone needs any assistance or have any question I'd be happy to help, just as many of you helped me!
And besides, comments and feedbacks on my build are more than welcome.-goldeng
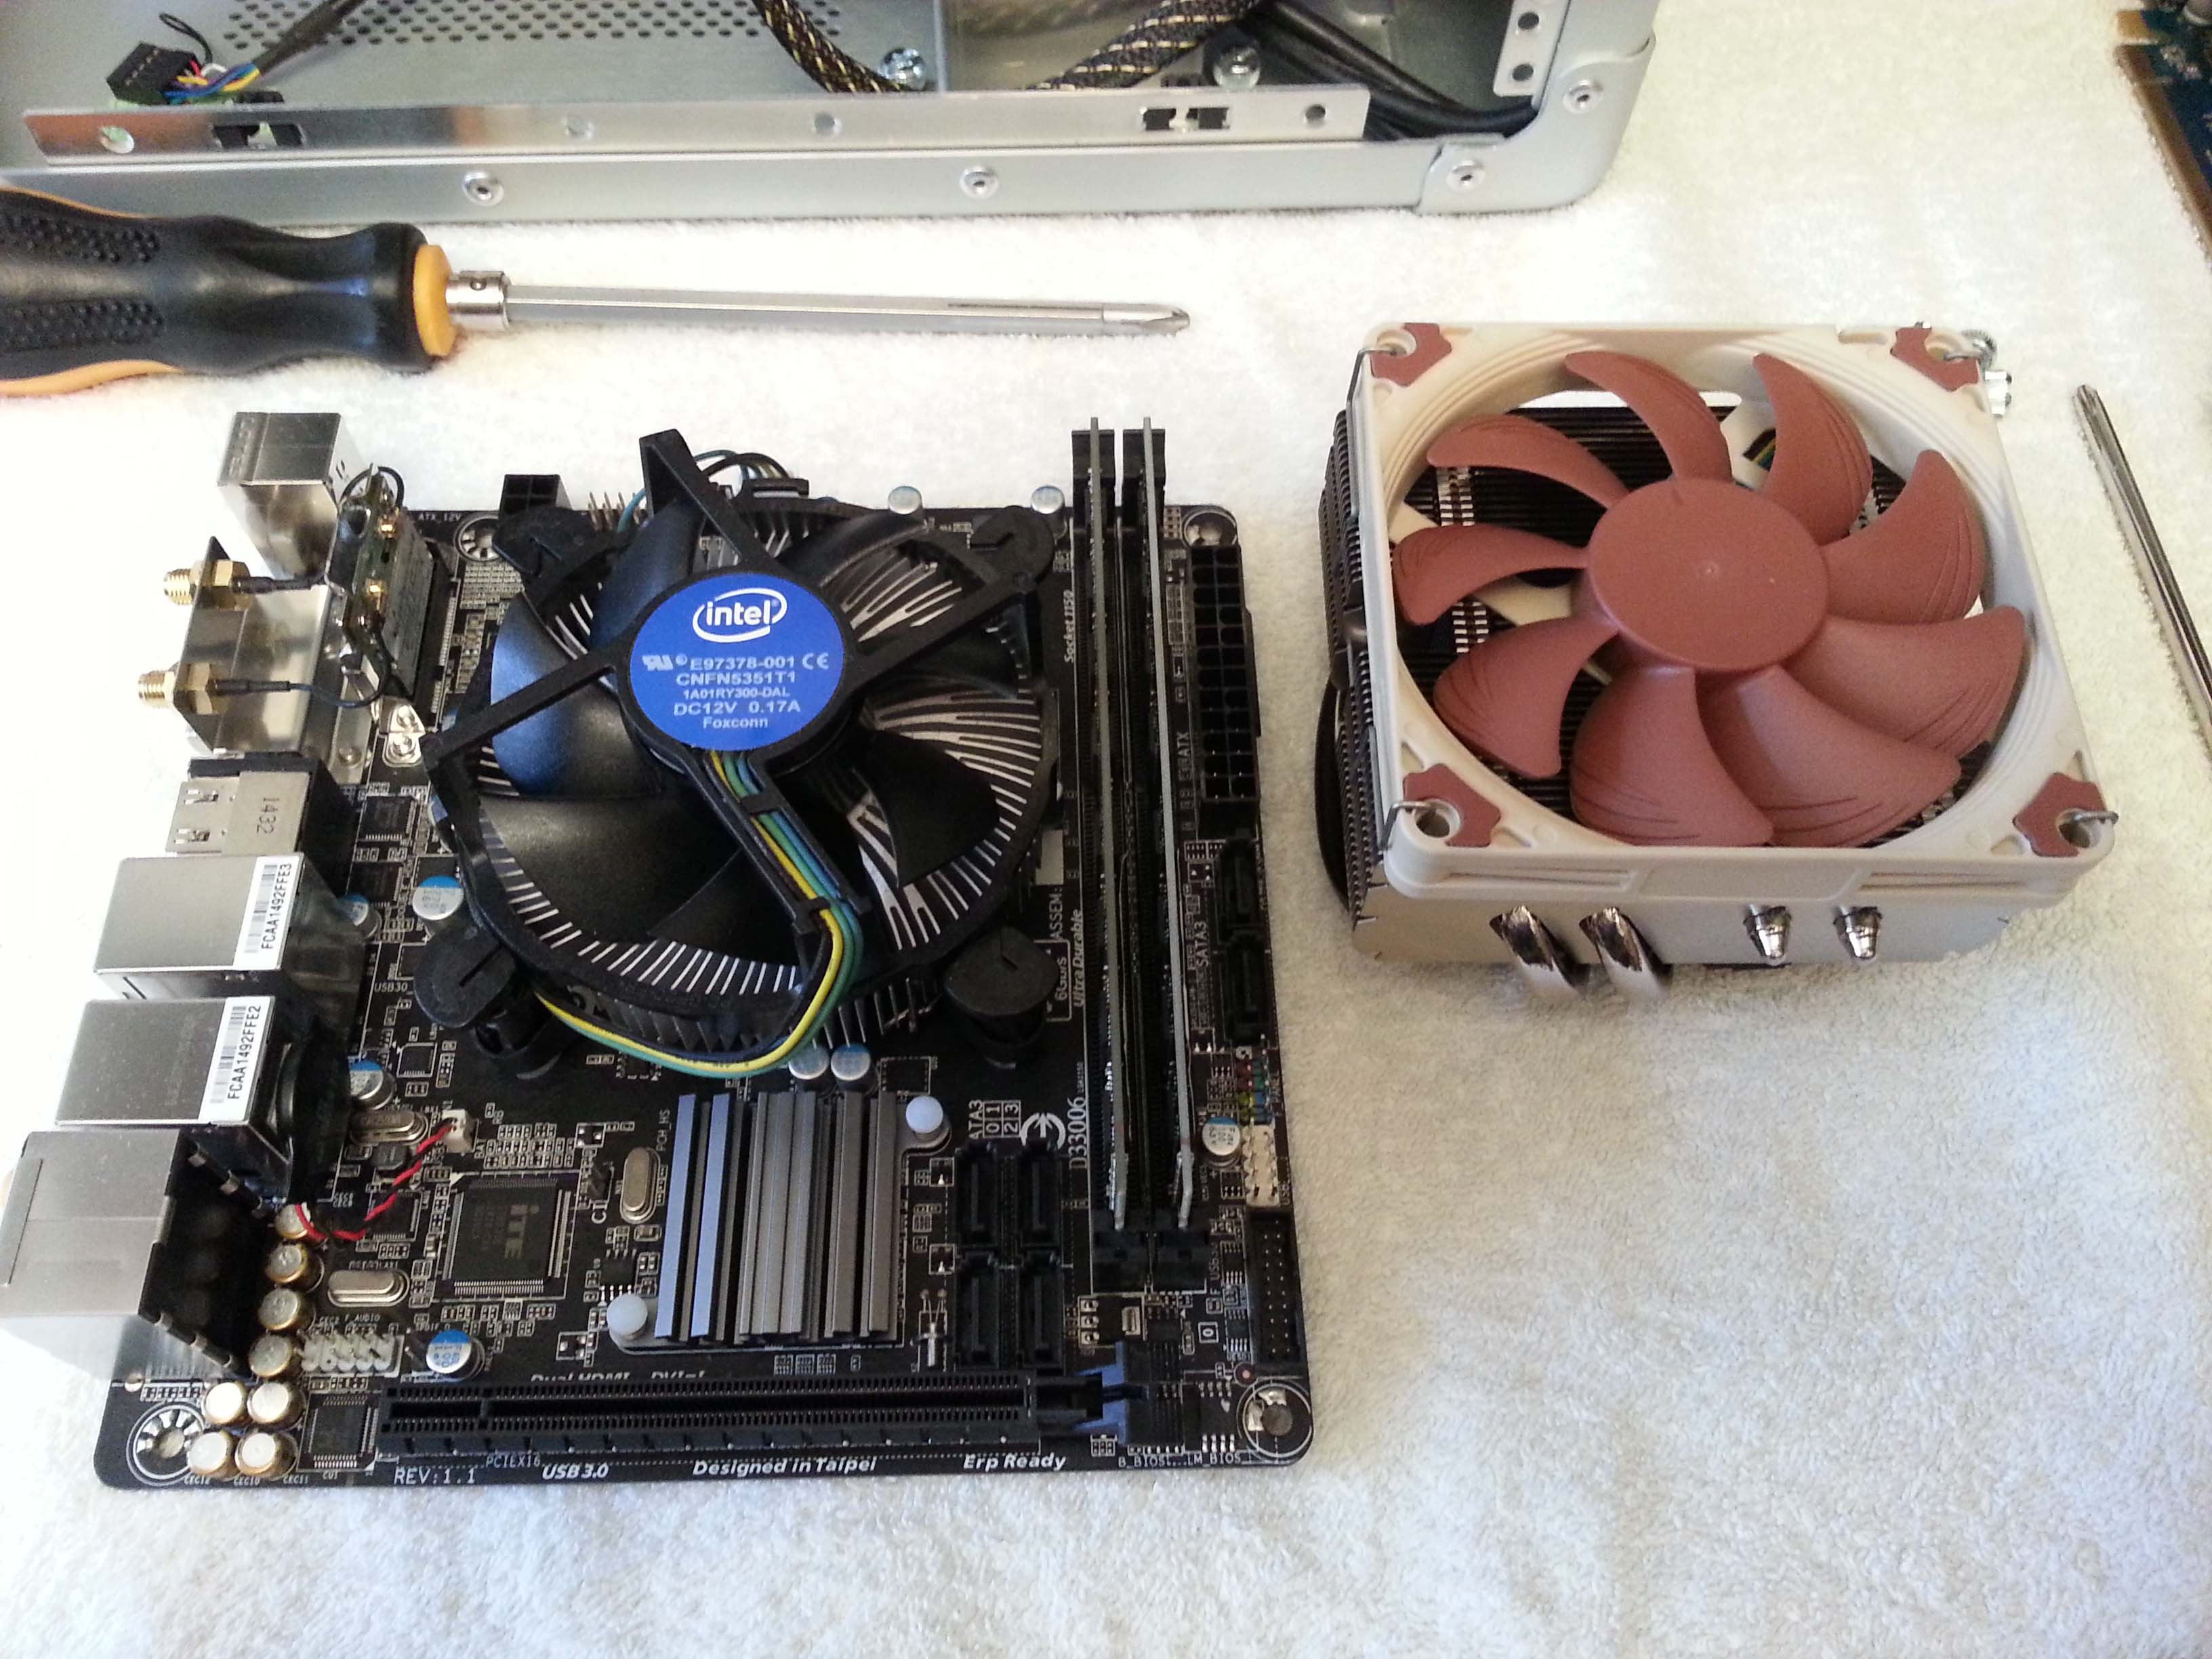
UPDATE 1: Upgrading the stock cooler with Noctua NH-L9x65I upgraded the CPU cooler (thanks to @wstrohm suggestion) and decided to go with the Noctua NH-L9x65. Attached some pictures:

Noctua and Intel coolers side by side
Applying the wings

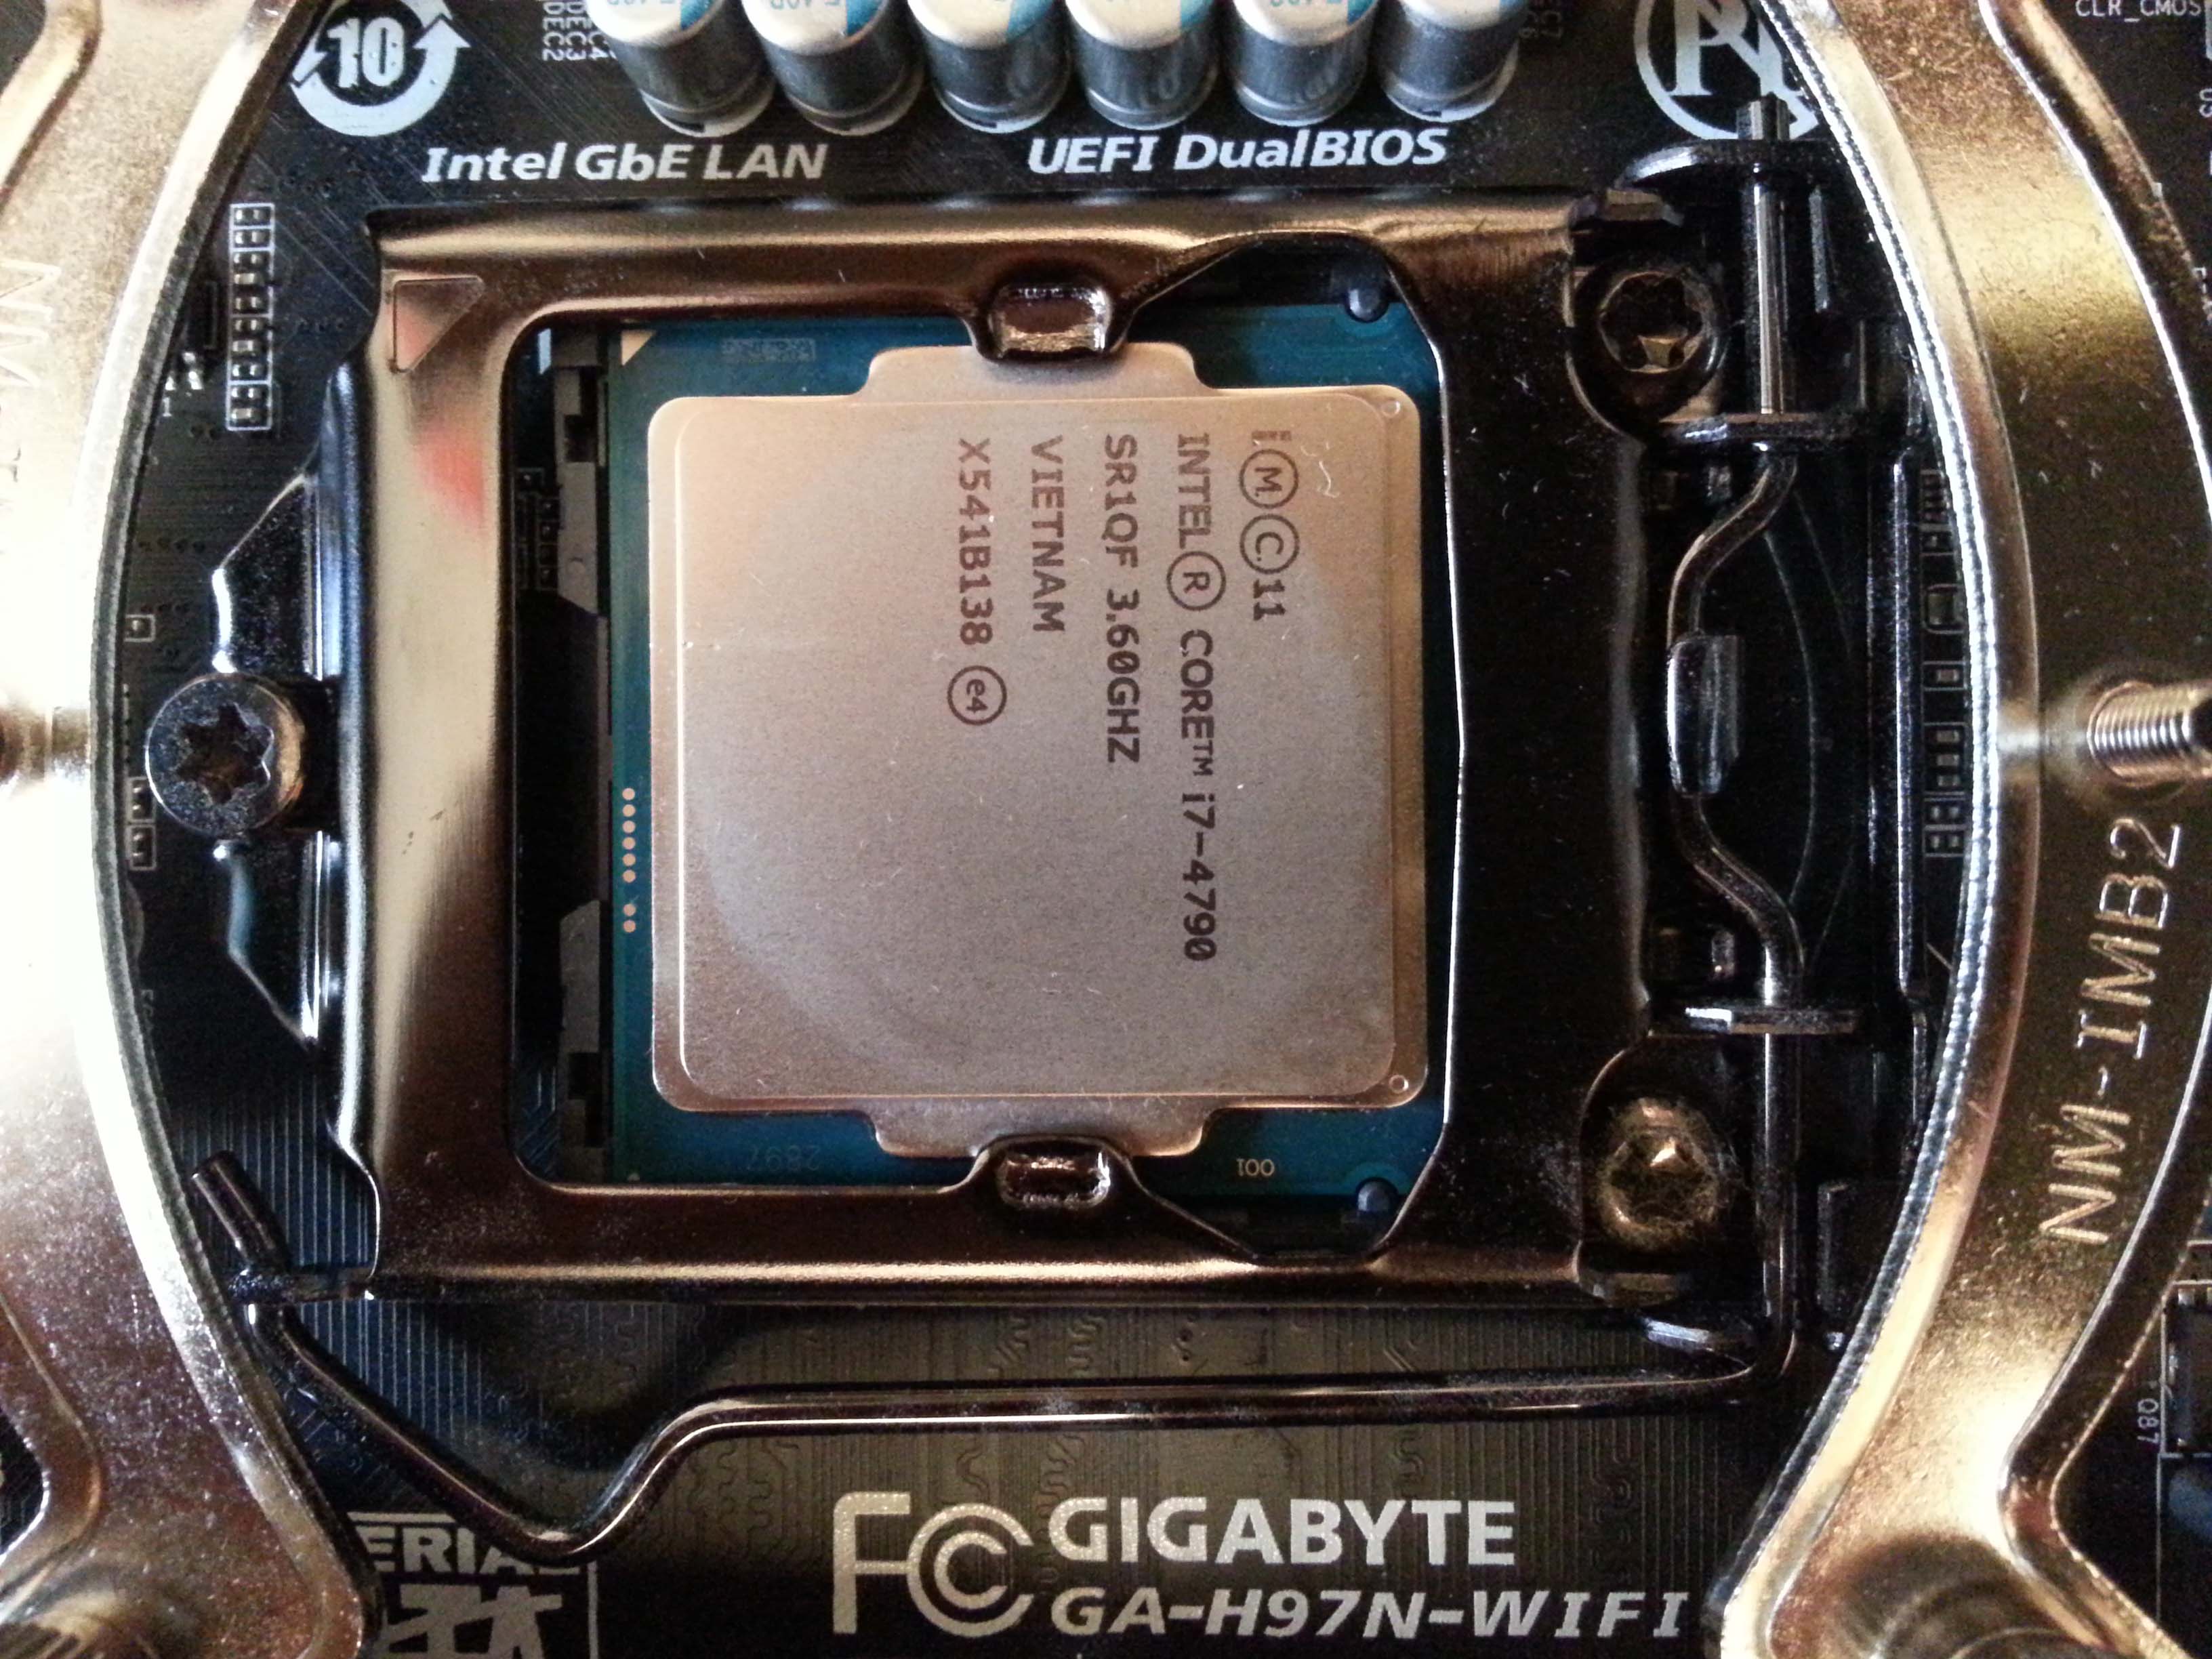
Cleaning any remaining paste from the CPU to applying new one
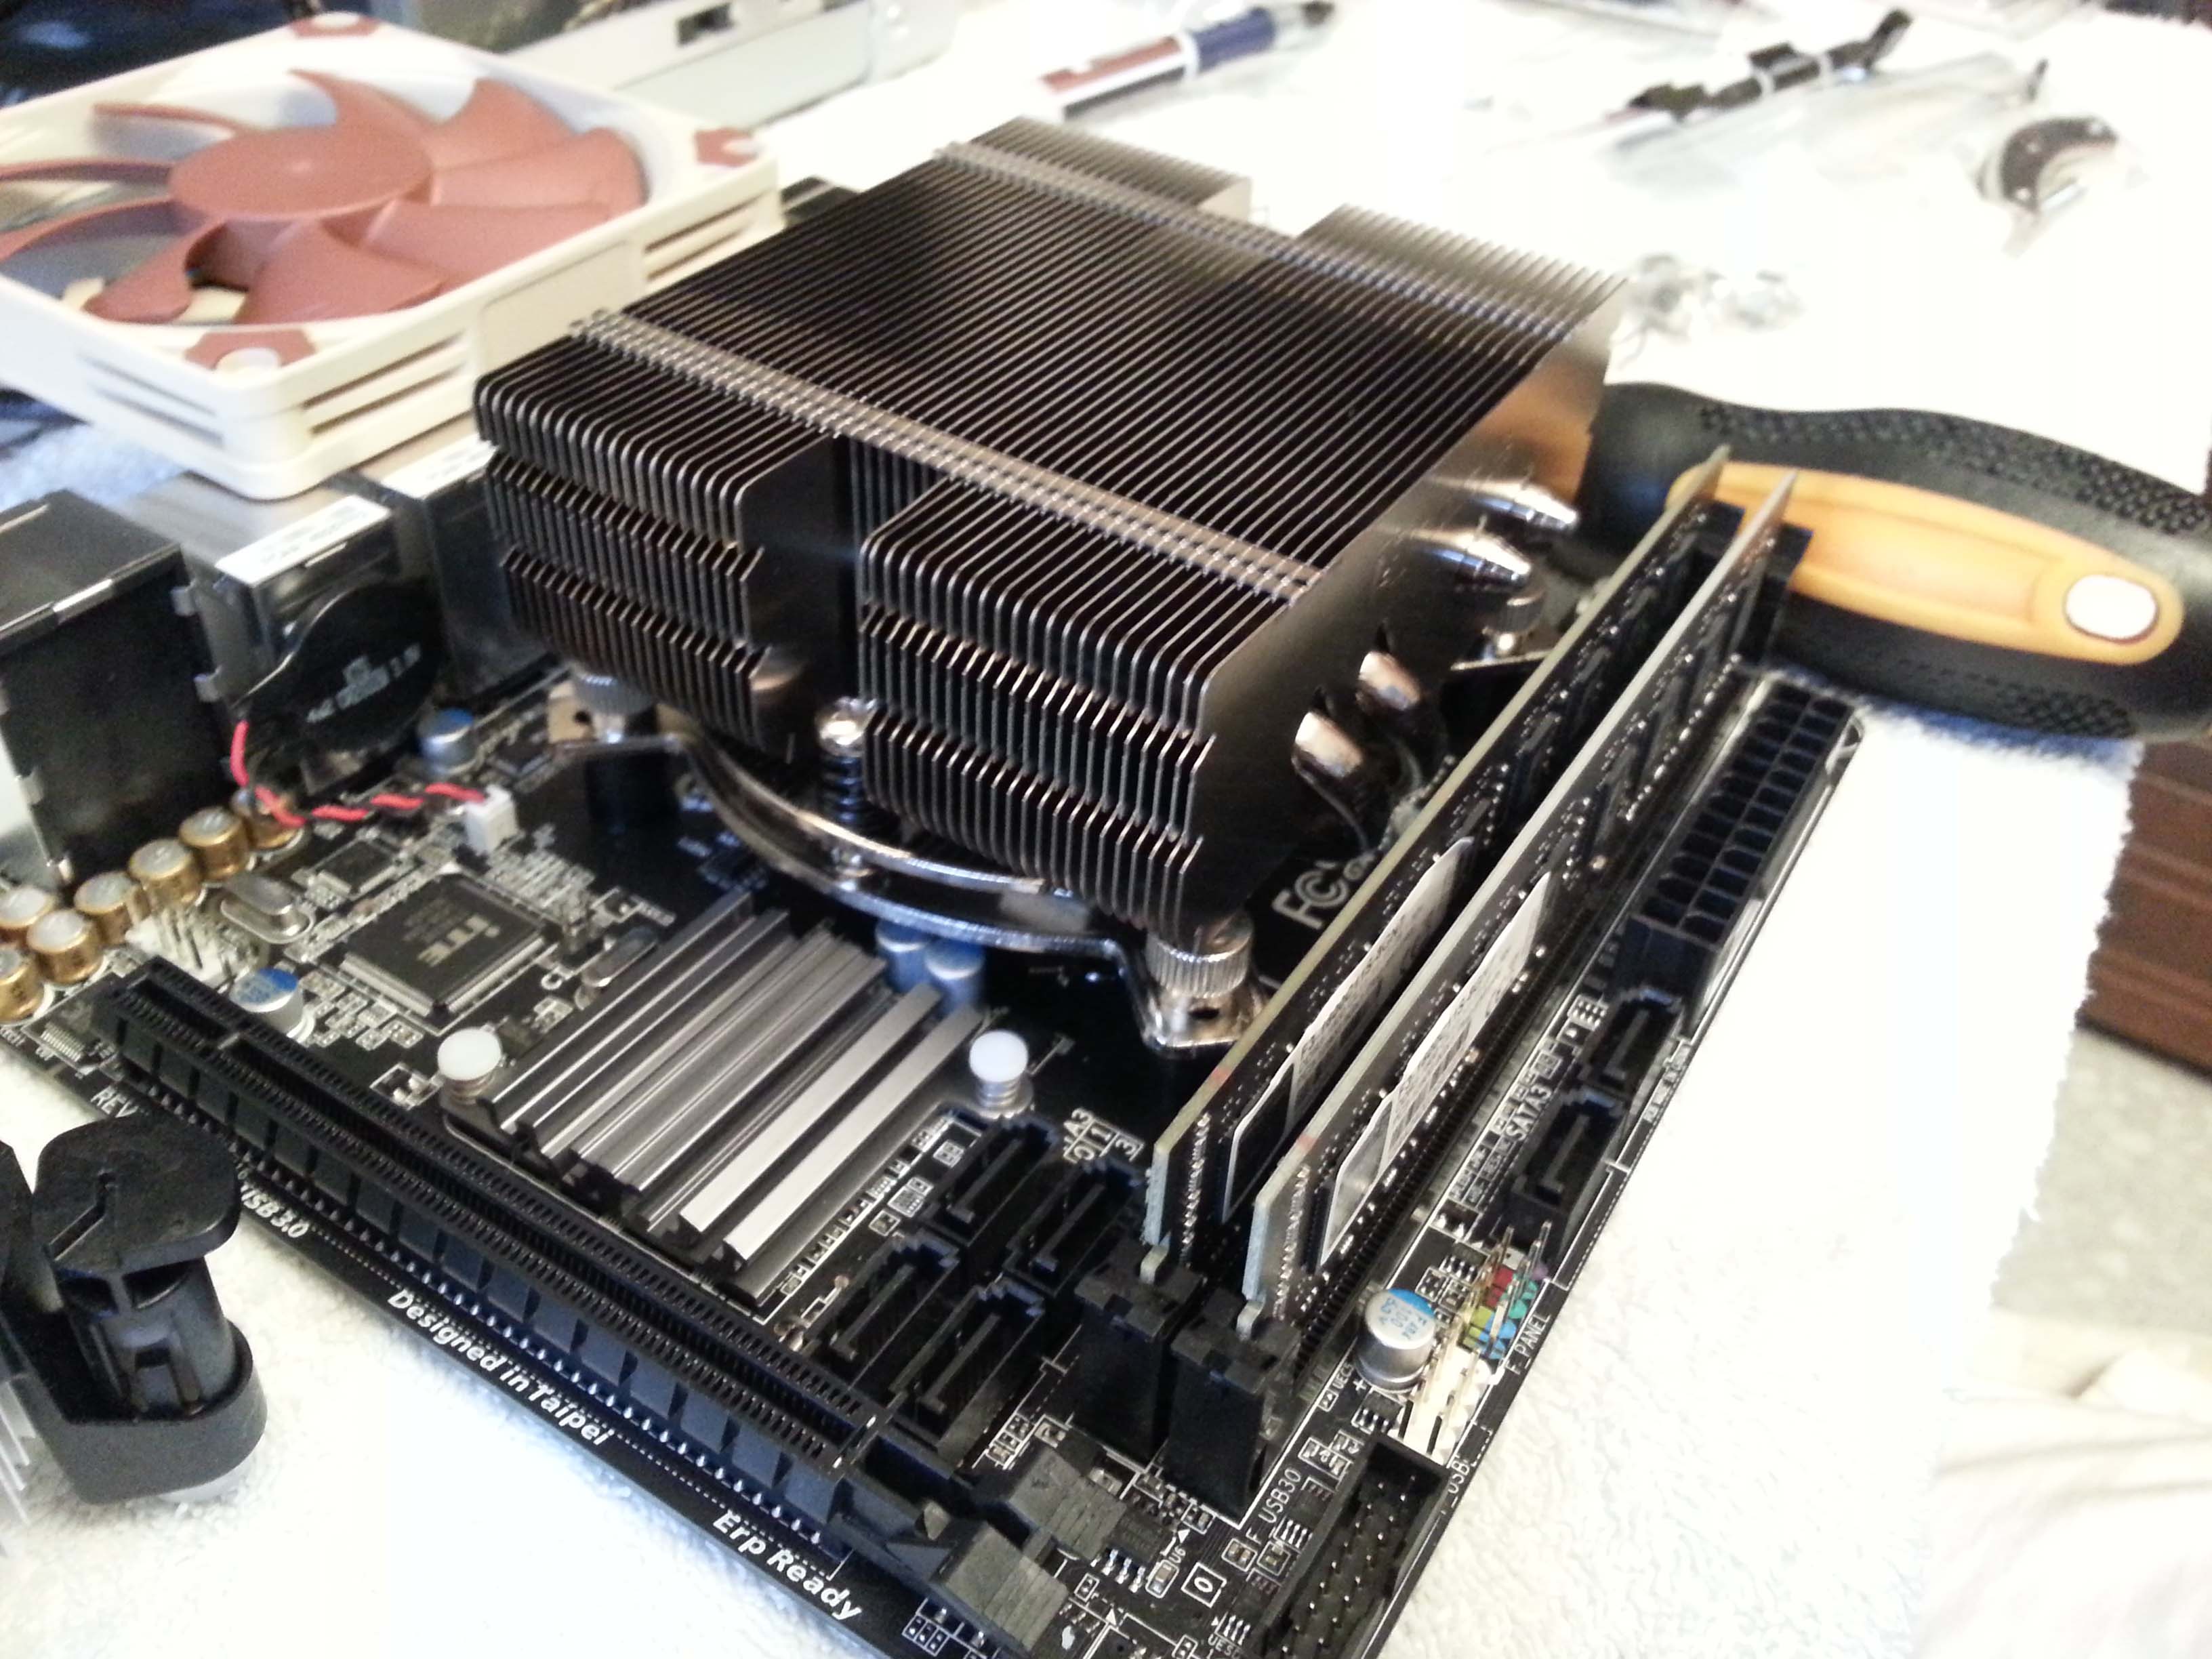
Applying the Heatpipes
Applying the Fan
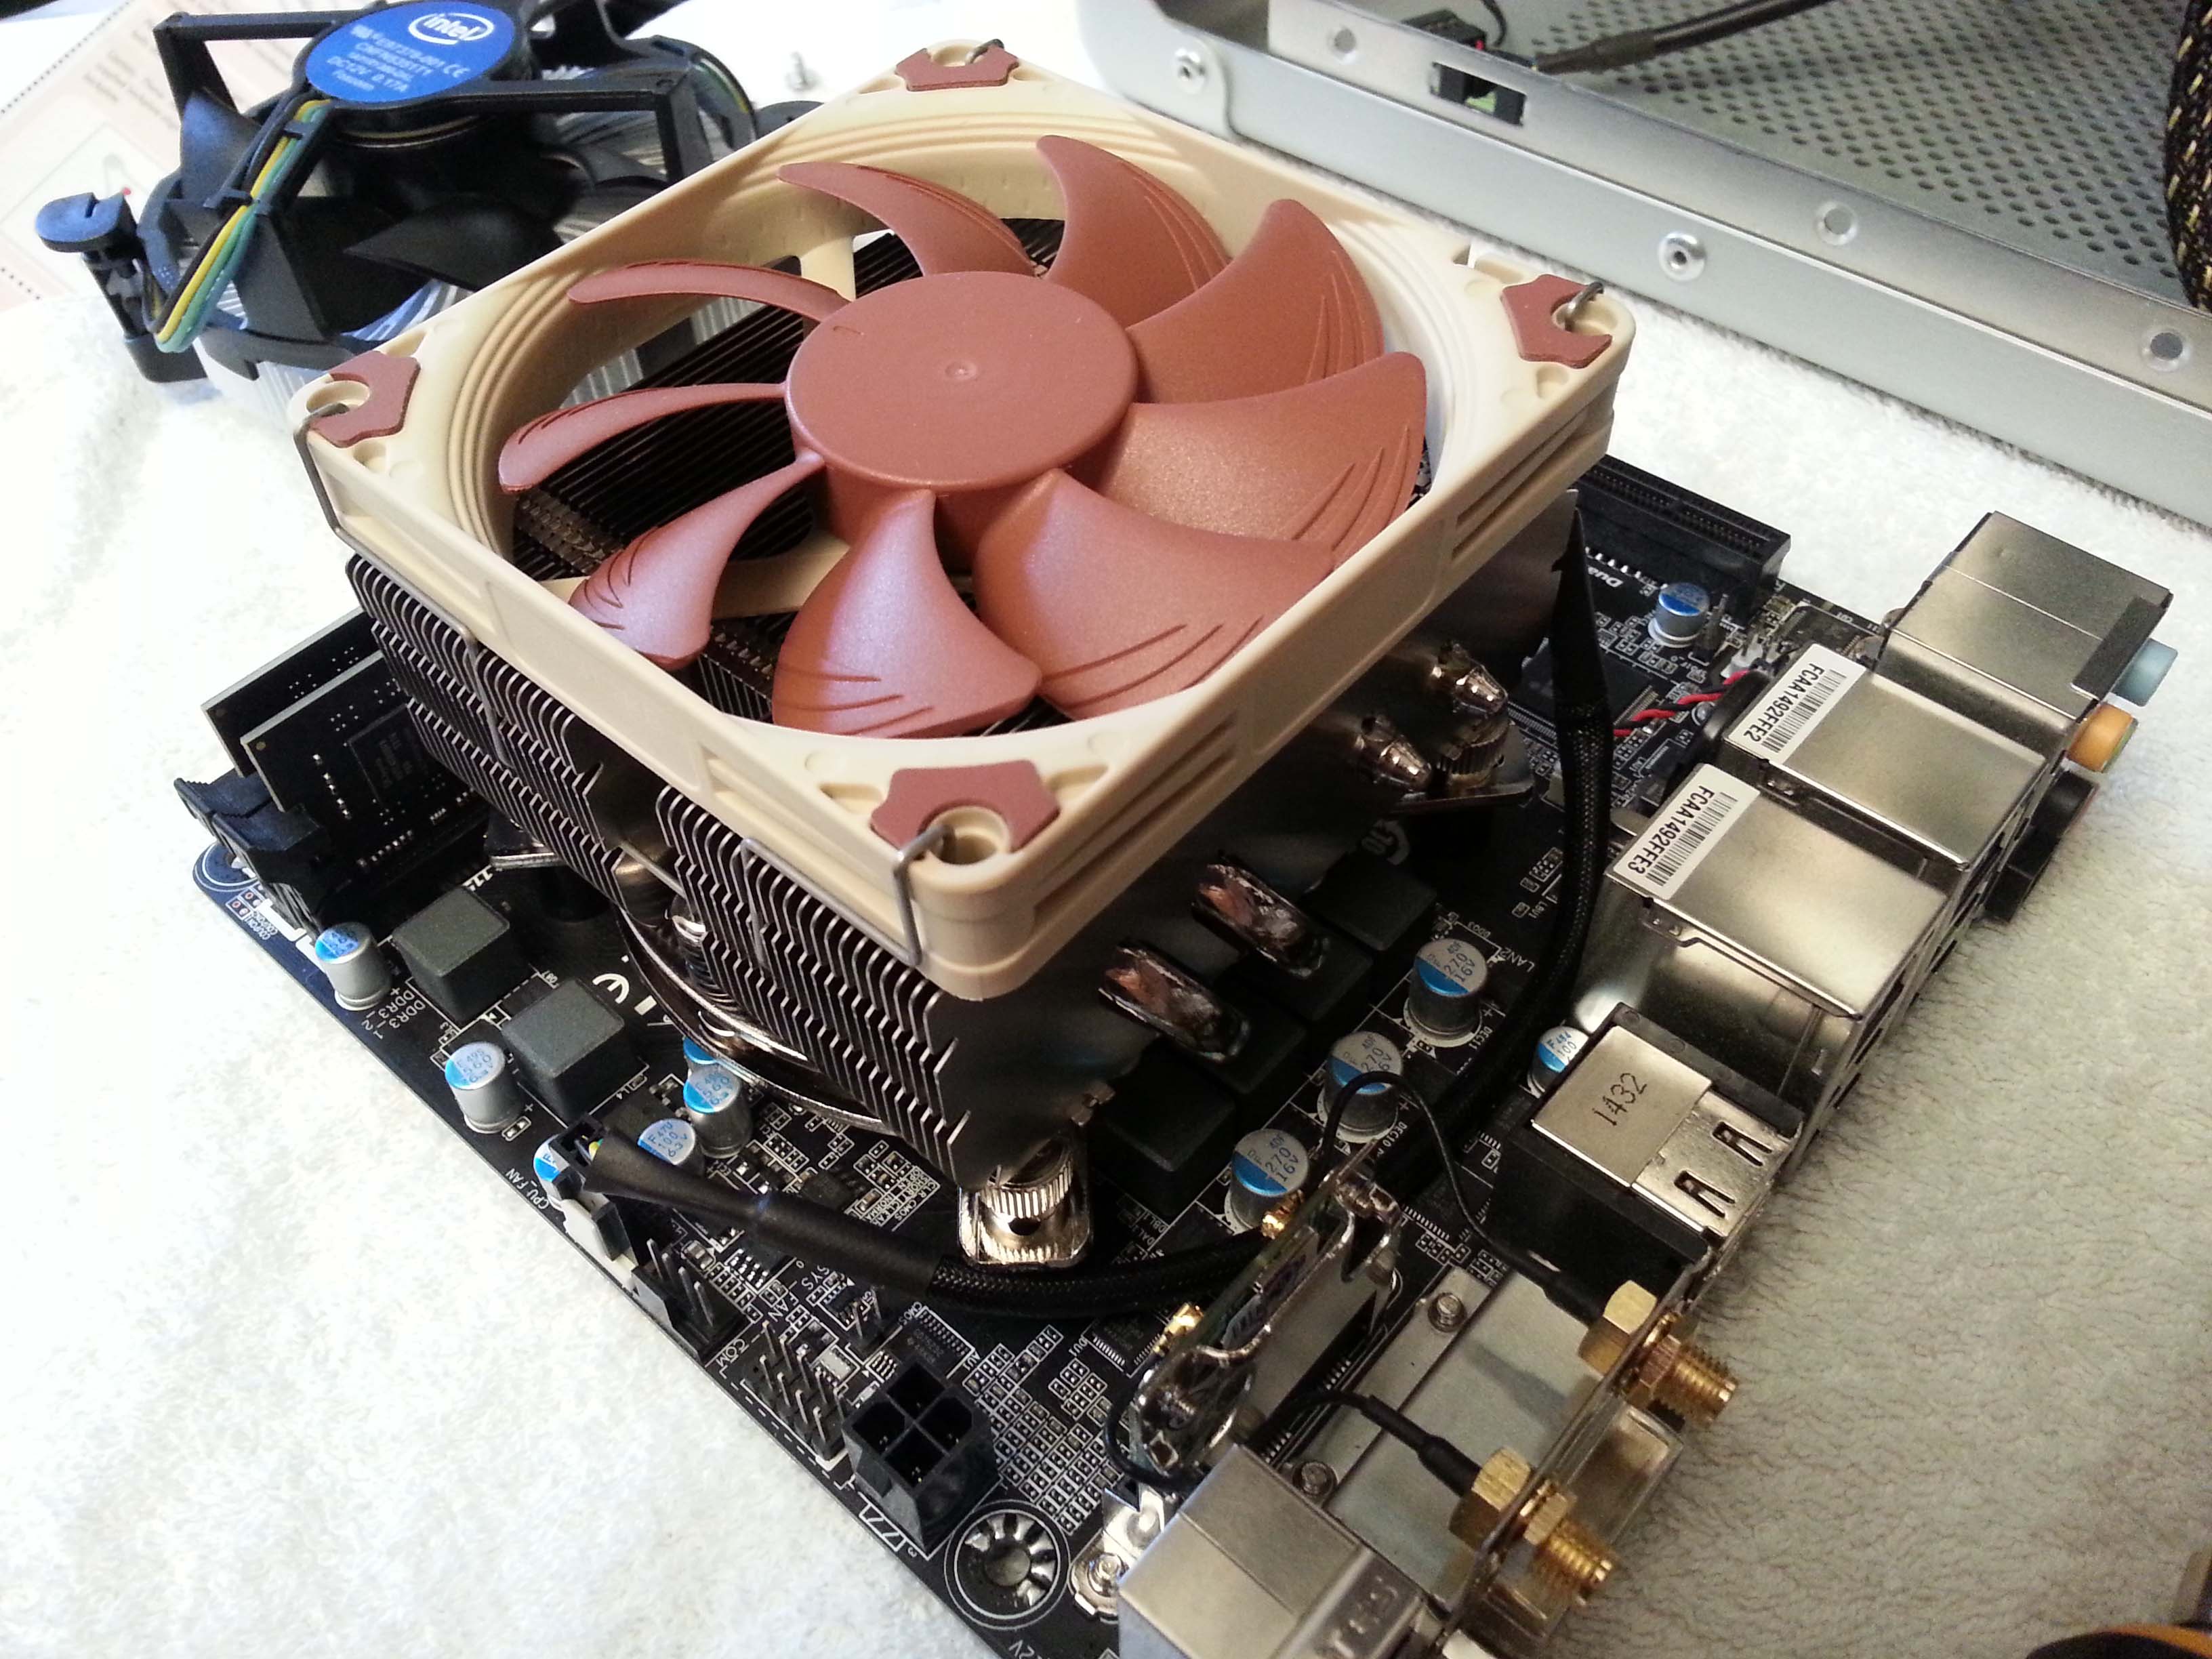
Noctua NH-L9x65 Height from outside
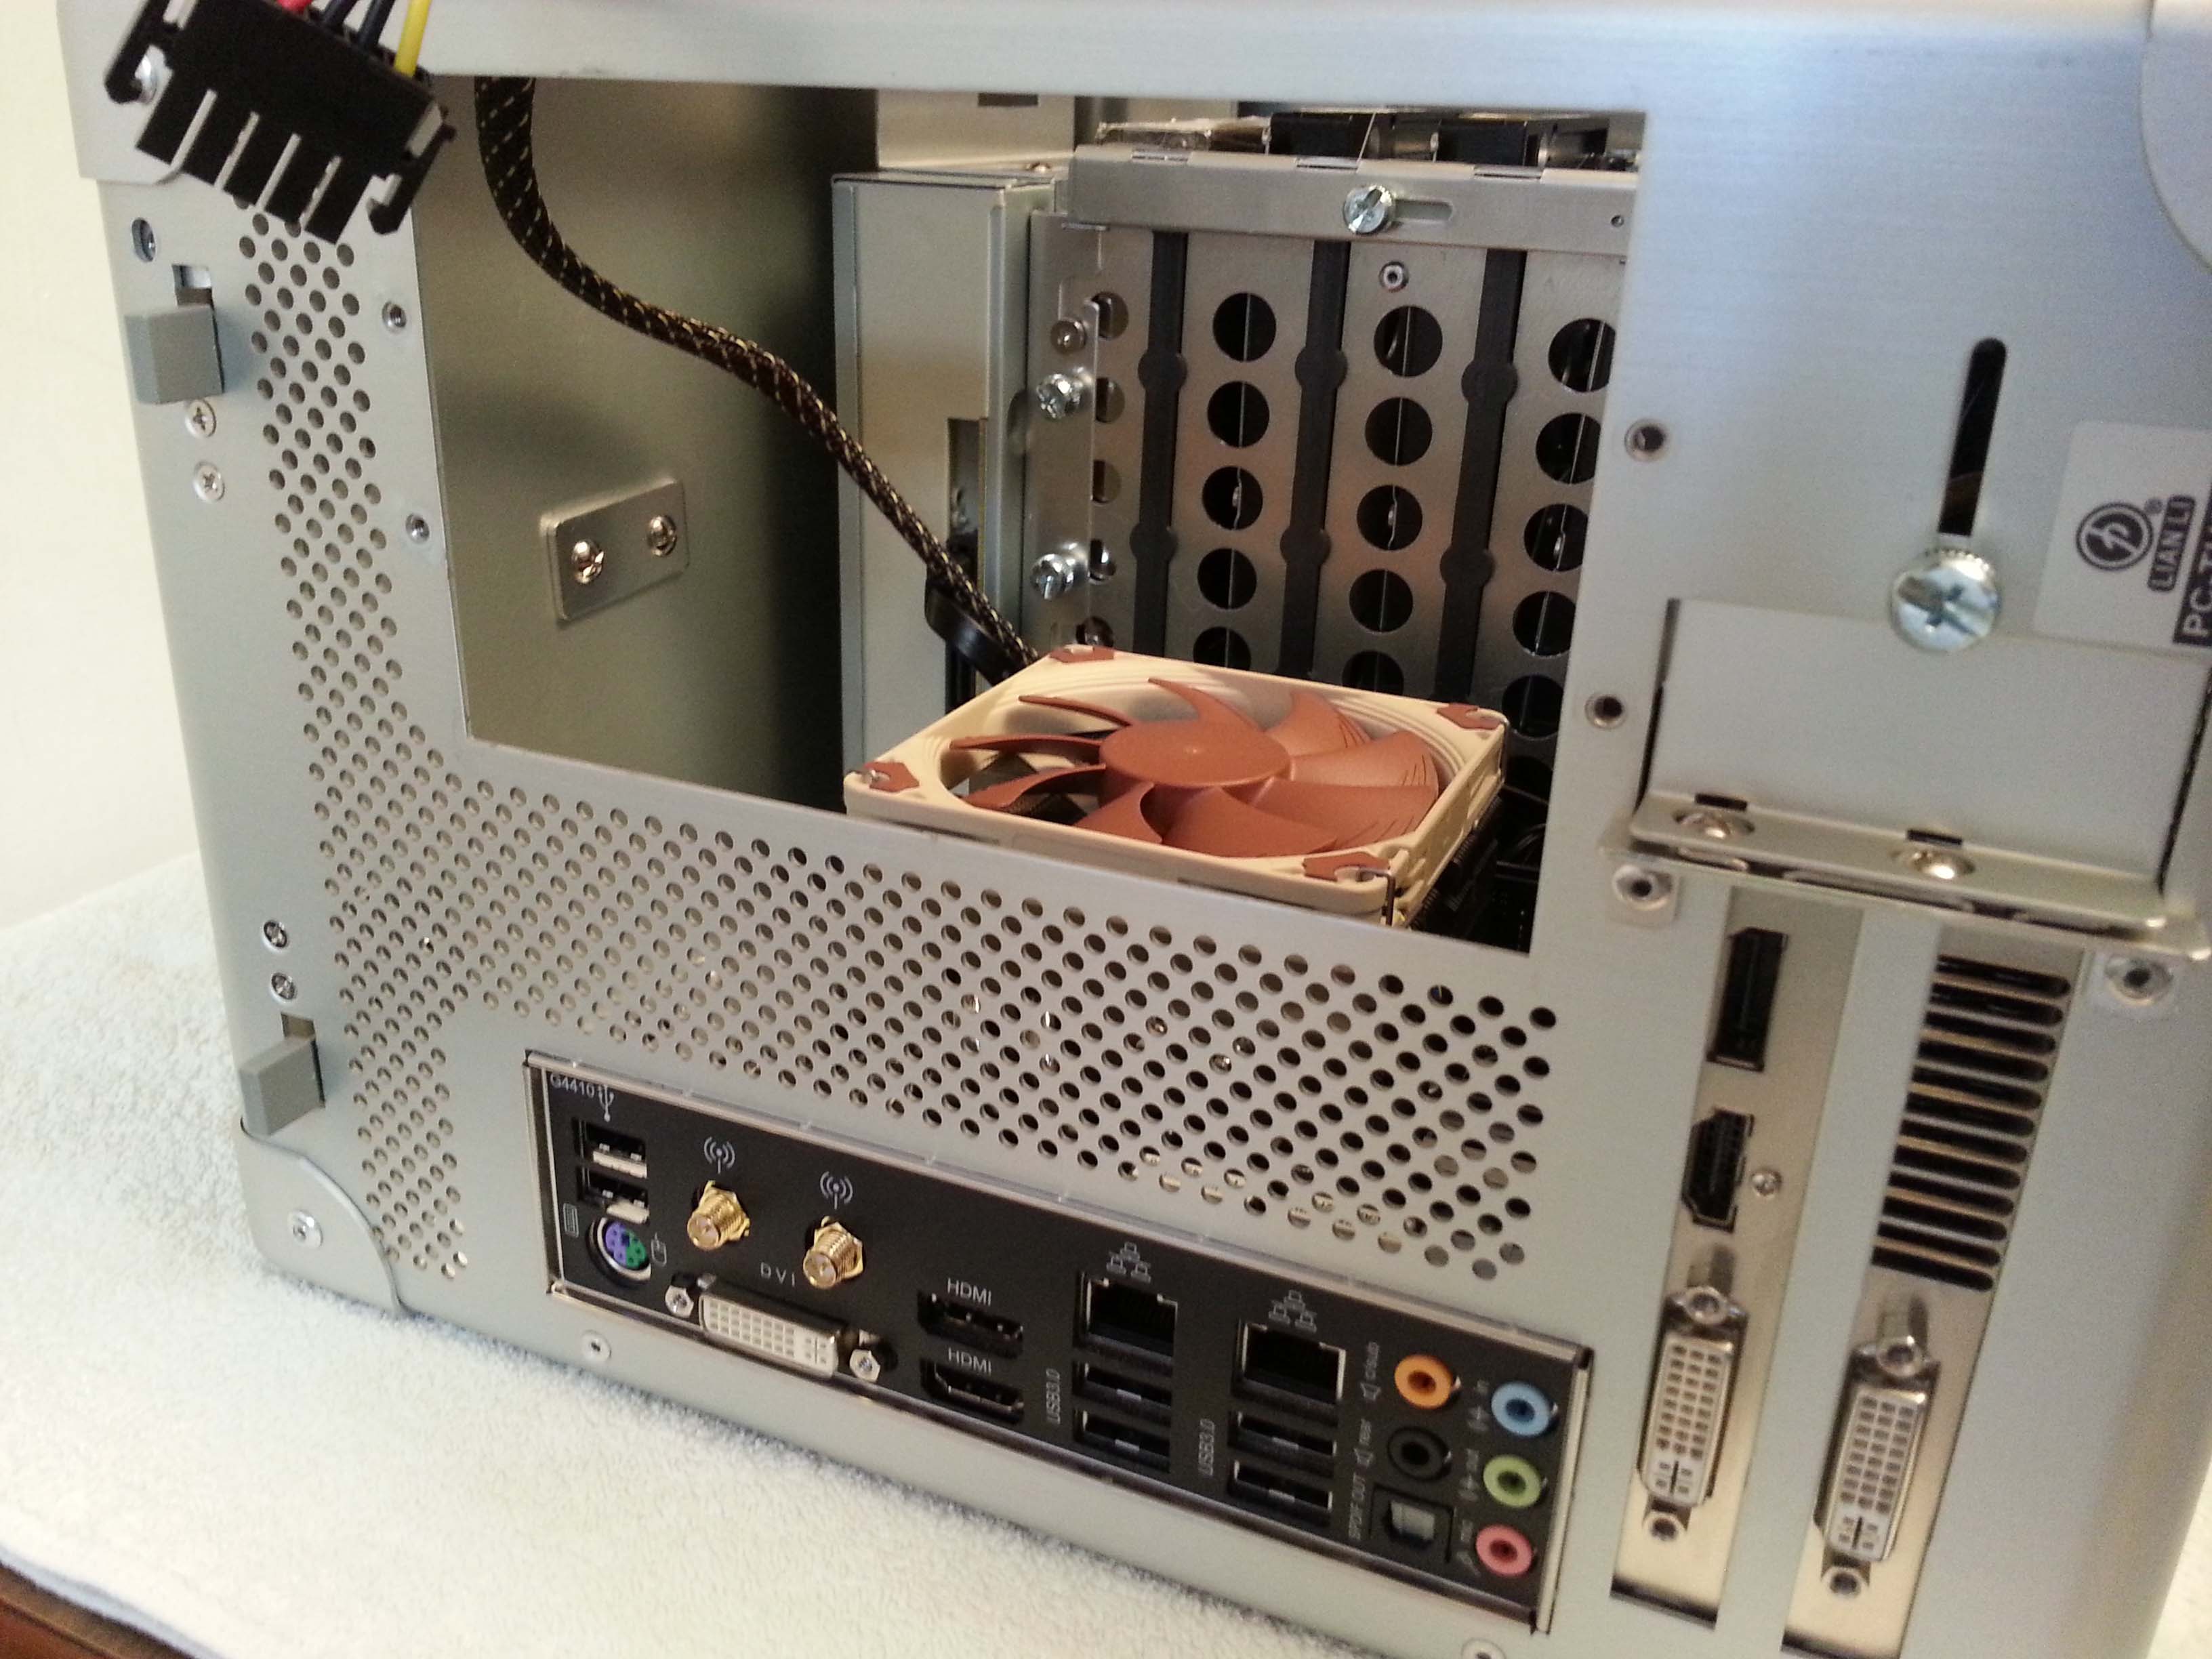
Space between CPU and PSU Fans
I slided my phone to take this one.
The PSU cables at the back worried me from risking the Noctua's fan though... See further picture of cable management.

Pushing cables away
I found that the narrow area above the optical drive is a perfect place to push the PSU cables away from the CPU. It also helps for better air-flow and therefore recommended.
In previous pictures you might have seen other hard drives in the HDD cage. I'd say don't 'chock' a mini-ITX case with too many hard drives. They produce too much heat and there are no many places for fans here to cool them down. For instance, the front 120mm fan can now cool the case much better than when blocked by 3 additional hard drives. But if you still need one I'd suggest to go with a 4TB drive in the lowest HDD rail - Leave the middle two free for ventilation.
CPU temperature comparison between the Intel and the Noctua coolers:
With the Intel stock cooler on idle mode, the temp was about 42 °C.
- Intel cooler on benchmark test: with Cinebench about 79 °C, and with Greekbench about 73 °C.
With the Noctua cooler on idle mode, the temp is about 38 °C.
- Noctua cooler on benchmark test: With Cinebench & Greekbench about 70 °C.
I followed the instructions to installing the Noctua cooling and applied thermal paste as instructed. But at first I didn't apply enough thermal paste and that caused higher temp values during idle and benchmark tests. So I disassembled the system again and applied a bit more thermal paste on the CPU. The results above are the final ones.
I for one think that it's not the CPU cooler that matters. Well actually it is, but it goes with the overall build of your case. In mini-ITX case you don't have much room for customization and you're very limited. So at least try to push any cable to the corners as possible and secure them for better air flow. At the current state I pushed most of the power supply cables as I already mentioned above through the narrow area above the optical drive. But please be aware that this kind of case still gets hot. But I ensured that it's normal for this kind of build by leaving the Intel Power Gadget open in the background while I tested the machine and kept an eye on the CPU temperature most of the time.
UPDATE 2: Updating to 10.11.5
I just installed the OS X 10.11.5 combo update and it seems to be working quite well - I didn't even had to reinstall any kexts. Everything works right out of the box.
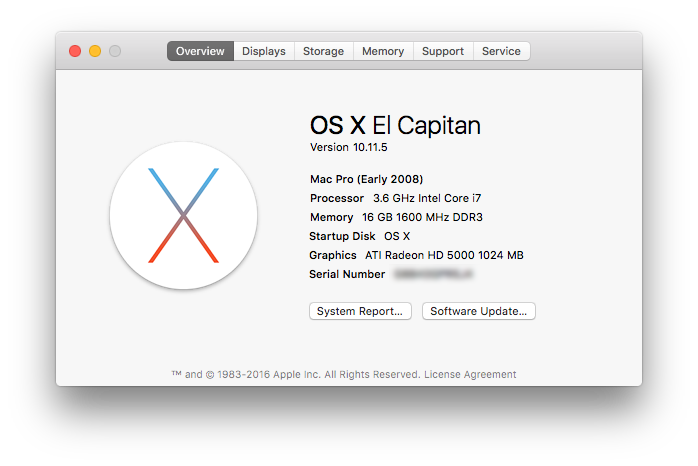
Although there is an option to Direct Update to macOS Sierra using Clover, I preferred to update my Hackintosh directly from the rescue thumb-drive, and when the OS booted up I then used the Realtek ALC892 kext from the latest MultiBeast to fix the audio driver, which worked right away. In addition, I didn't had to fix the boot from hard drive and all my settings, files and apps remained untouched!
So overall I'm very pleased with this update.*I'm not sure if it's relevant to the smooth update success but I did download the latest version of Clover from sourceforge though as described in the Direct Update to macOS Sierra using Clover guide and updated my existing Clover version while in El Capitan, and only then installed the system from the rescue thumb-drive. I did this because I thought maybe to go with the direct update guide, but eventually after installing the latest version of Clover I decided to go with the regular installation procedure and updated my system through the rescue thumb drive instead. Here are the steps and more info:
1. As I prefer offline updates better than online ones, I've followed the guide to create a bootable thumb-drive of macOS Sierra (selected UEFI Boot Mode and didn't check any of the ATI/NVIDIA injects), and once it was ready I then copied to it the latest MultiBeast - Sierra 9.0.0.
*If you get the "This version of mac OS 10.12 cannot be installed on this computer" message while trying to download macOS Sierra from the AppStore, you'll have to change your system definition to iMac14,2 by using MultiBeast. Then reboot your system and try downloading again.
2. Download the latest Clover version from sourceforge as described in the Direct Update to macOS Sierra using Clover guide and install it on your current El Capitan to update your Clover.
*Although things went smooth to me, I highly recommend to make a backup of your important files before proceeding to the next step, in case anything go wrong.
3. Boot your Hackintosh from the macOS Sierra rescue thumb-drive.
4. Accept all the dialog boxes and select the current OS X drive which your El Capitan is installed on. All your settings, files and apps should remain untouched.
5. When the first phase of the installation is done your system will reboot. Gladly I didn't had to boot it from the rescue thumb-drive nor to install any additional fake kexts to make it bootable from the hard drive - probably because I updated to the latest Clover version prior installing the macOS Sierra update, or maybe because the fake kexts were already installed back when I run the Post Installation with MultiBeast when I first configuring El Capitan.
Anyway the second phase of the installation should appear after first boot asking you to fill some settings to finalize the installation. Eventually you should see your Desktop! - I knew that all my settings, files and apps have been preserved because I saw the prompt to provide my login password, along with my account picture.
6. Everything seems to be working fine, apart from audio. So all you need to do is to run the latest MultiBeast you copied to your rescue thumb-drive and under Drivers to pick Audio -> Realtek ALCxxx -> ALC892. Then go to the Build section, hit Install and reboot your system when done. Audio should be working fine right afterwards. But if you don't hear anything, go to your Sound Preferences and make sure that the Internal Speakers (Built-in) device is selected.
Here's a screenshot of the booted system with the Extensions folder, Sound settings and all my apps and customization (such as the spaces in the Dock) remained as they did in El Capitan:
UPDATE 4: Multibooting macOS Sierra & Windows 7
I also hooked a secondary SSD with Windows 7 on it, and I'm using F12 during post to pick from which disk I wish to boot.


In this particular system which only has 2 disks I didn't really needed to change the name of the 'UEFI OS' partition. I just know that it's MacOS. The Windows 7 disk loads by default if I don't hit F12 in post. Fortunately on this system, when I found that Clover adds more and more boot entries for the EFI partition, I followed the instructions by @Anachronaut about how to remove the extra Clover BIOS boot entries & Prevent further problems and they didn't come back.
On my second Hackintosh build which also has more physical hard drives, the entries kept coming back even after deleting them according to the guide above. So I followed other instructions by @tbjem0013 about how to remove the extra Clover BIOS boot entries. The tools you're going to need on this case are MacMan's version of Koen2X's EFI Mounter v2 for MacOS, and EasyUEFI for Windows (Windows must be installed in UEFI mode for this). There I also renamed the MacOS partition in the BIOS boot menu for convenience using EasyUEFI in Windows.
Cheers
Last edited: