- Joined
- Jul 25, 2012
- Messages
- 6,663
- Motherboard
- Gigabyte GA-Z77X-UP5 TH
- CPU
- i7-3770K
- Graphics
- HD 4000+GT 710
- Mac
- Mobile Phone
This was surprisingly the easiest macOS Mojave Installation I have had. I have been following a lot of forum posts on Intel 300 Series Chipset Motherboards and Intel CoffeeLake Processors with Intel HD 630 having numerous problems requiring hours and days of troubleshoot to install and fix post install problems.
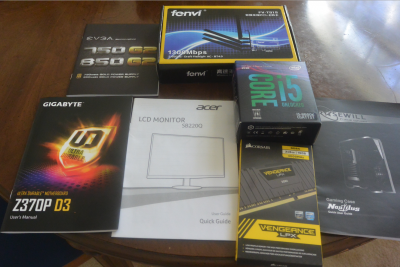
Over the holidays , I got the following Hardware as a gift and decided Yesterday to assemble the System in a Rosewill Nautilus ATX Mid Tower case.
MoBo: GA-Z370P D3
CPU: Intel i5-8600K LGA1151 with Integrated Intel HD 630 [ONLY VGA|DVI|HDMI ports , NO DP]
Graphics: Intel HD 630 (Intend to add a PCIE Graphics later. Not decided about Make and Model)
RAM: Corsair Vengeance LPX DDR4 3000 MHz 2x8GB =16GB
WiFi+BT: fenvi FV-T919 1300Mbps 2.4/5GHz BT.4.0 PCIE
PSU: EVGA 850 G2
Monitor: Acer SB220Q (has only VGA and HDMI no DVI or DP ports)
Keyboard and Mouse: Logitech MK270 Wireless Keyboard and Mouse Combo
USB Flash disk for Mojave Installer: Silicon Power USB 2.0 16GB.
Hard disk for Mojave: Western Digital WD 5000AUDX SATA Spin disk
- I have previously downloaded and saved macOS Mojave 10.14.2 (18C54) in another Hack .
- I created a new Installer Specifically customized for my chosen hardware on the Flash disk Partitioned in GUID and Formatted in HFS+J in my Hackintosh.
- I used install media command :
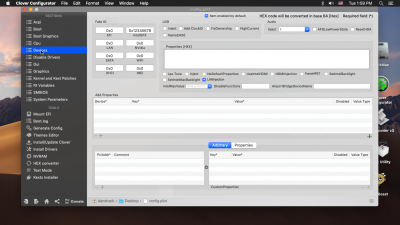
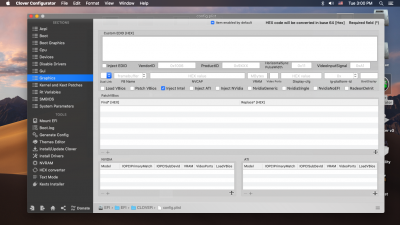
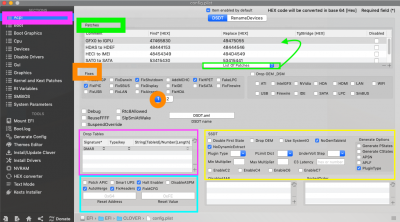
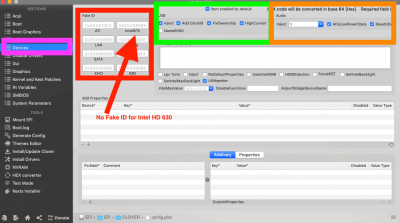
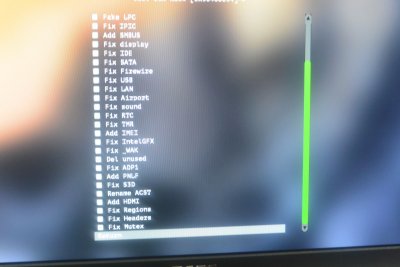
sudo /Applications/Install\ macOS\ Mojave.app/Contents/Resources/createinstallmedia --volume /Volumes/Untitled && echo Mojave Drive Created - I manually installed Clover EFI and edited its contents as shown in the uploaded EFI_Clover Tree and config.plist Screen Captures.
- My BIOS Options are shown in the uploaded images.
- NOTE: This board DOES NOT have the option to choose "Other OS" under BIOS Tab. The default Windows 8/10 works OK.
- CSM Support must be DISABLED for INTEL HD 630 Graphics and ENABLED for MSI RX560 PCIE Graphics
- After Saving (F10) chosen BIOS options including Mojave UEFI USB Installer as First boot device, F12 Screen showed USB installer as the only device and booted to Clover Boot Manager without any KP
- I checked Options and Sub-menu including Boot, PCI and Graphics Injector to make sure my edited config.plist options are duplicated there, for a smooth boot.[See images.]
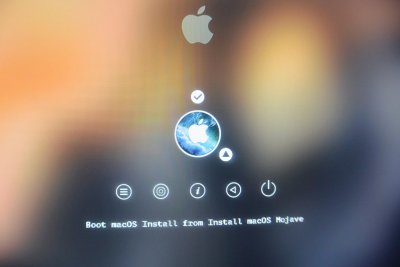
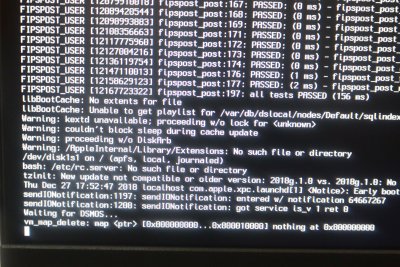
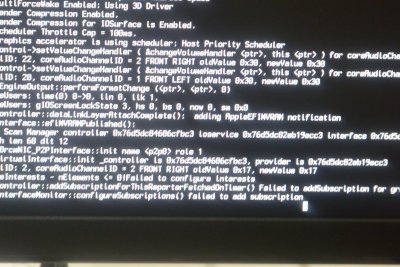
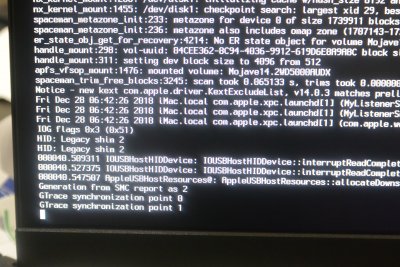
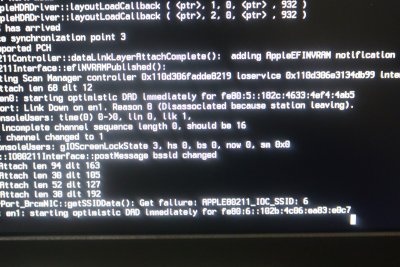
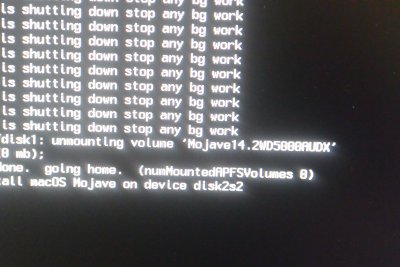
- The Verbose boot was watched with Camera ready to capture well-known land marks for smooth boot and to capture any fatal errors . [Sample Normal verbose screens are uploaded.]
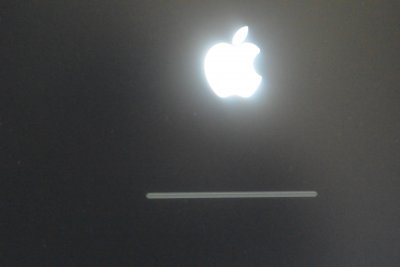
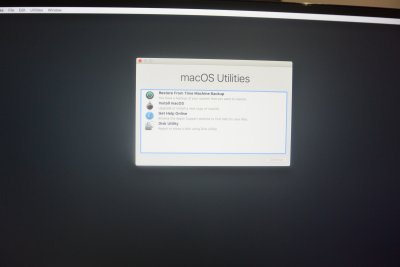
- After Verbose boot ended the Gui boot with Apple logo began and without any untoward event, opened the macOS Utilities screen
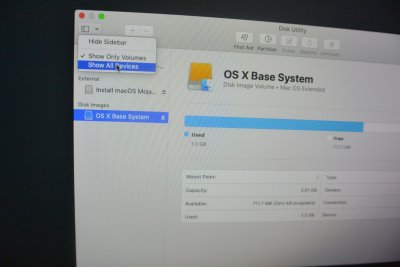
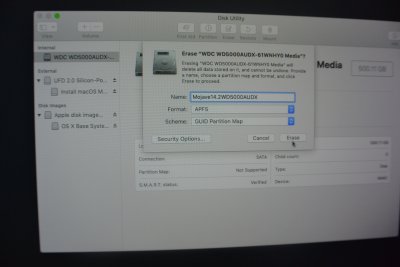
- Using Disk Utility >View >Show All Devices located the target WD 500AUDX and Erased it choosing APFS in GUID Partition Map
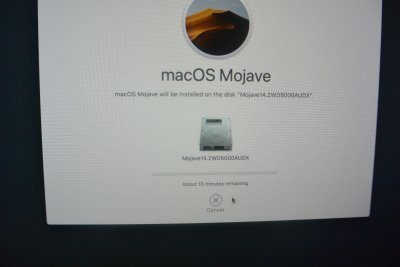
- Erase was uneventful and the Install MacOS was chosen with License agreement to start installation on target WD disk.
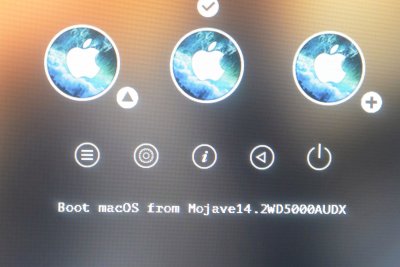
- For the first time in a long time, it took only 8 minutes to reach the remaining 2 Minutes mark and in 30-40 seconds later the expected sudden boot to CBM occurred.
- Since I had edited my config.plist _Gui to hide "Preboot" my CBM screen was 'lean and clean looking" to select the System disk to continue with second stage of booting.
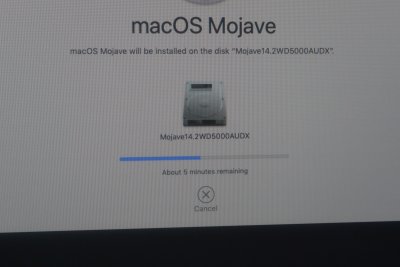
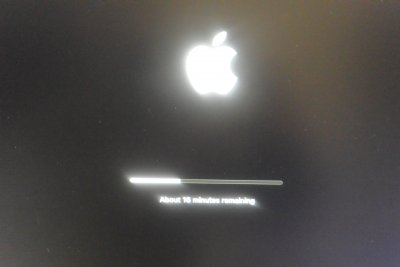
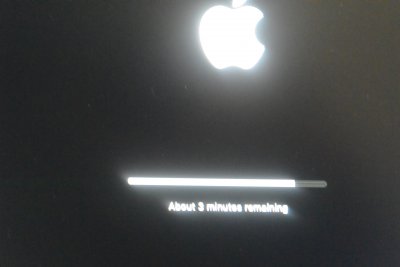
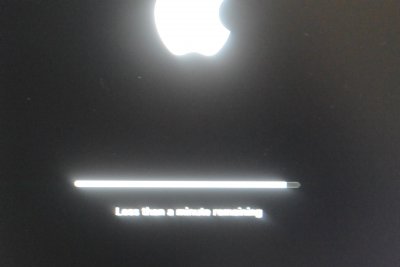
- The second stage lasted for about 16 minutes and then rebooted at "less than a few seconds remaining" to CBM
- At CBM, the expected 3 icons : The USB installer, the System Disk and Recovery Disk icons showed up.
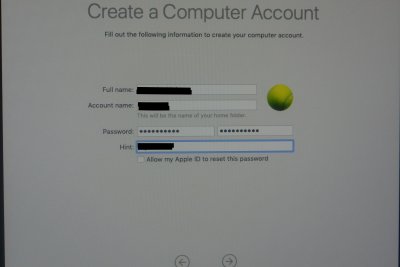
- Final boot of System Disk after verbose phase went to Apple logo and quickly to Welcome >Country Selection and other usual screens in sequence.
- After a smooth sail, the new Desktop was entered and Keyboard Assistant prompted to select the language KB of choice.
- Surprisingly this time I dint have to Reset the Time Zone and TIME.
- I set up the Finder >Preferences for easy navigation of connected disks and brought needed Apps icon to Dock while removing the ones I don't frequently use
- I launched the Terminal to run sudo spctl command to Enable downloading of non-mac Apps I need by setting the Security to (o) Anywhere (See image)
- Since the EFI of my USB installer is customized for this hardware, all I had to make the system disk bootable was to remove its Dummy EFI and copy and paste the one from USB installer's EFI folder after mounting the EFI partition on the desktop.
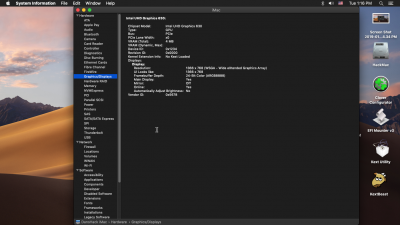
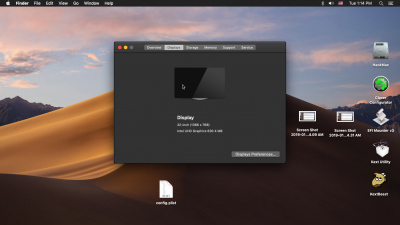
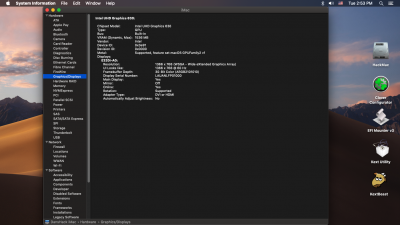
- On reboot everything worked OK including, Video, Audio, Ethernet, WiFi and BT.
Attachments
-
 Hardware for Mojave 10.14.2.png2.1 MB · Views: 1,413
 -
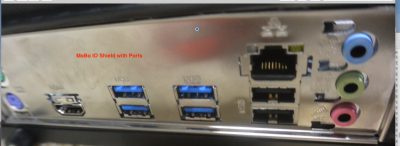 MoBo IO Shield and back Ports.png1.1 MB · Views: 1,549
 -
 MoBo Mounted inside case.JPG3.9 MB · Views: 1,947
 -
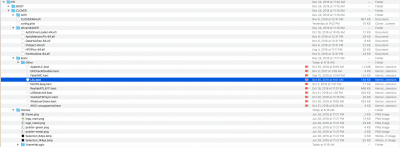 1.EFI_CLOVER_Filetree.png215.5 KB · Views: 2,656
 -
 1.config.plist _ACPI_Ptaches and Fixes.png301.6 KB · Views: 2,528
 -
 2.config.plist _ACPI_Ptaches and Fixes-2.png325.3 KB · Views: 2,310
 -
 3.config.plist_Boot.png283.4 KB · Views: 2,177
 -
 4.config.plist_Devices.png248.1 KB · Views: 2,083
 -
 5.config.plist_Gui.png243.9 KB · Views: 2,032
 -
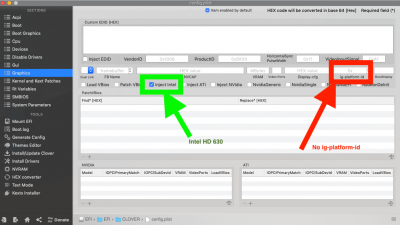 6.config.plist_Graphics.png244 KB · Views: 1,984
 -
 7.config.plist_Kernel and Kext Patches.png256.5 KB · Views: 1,942
 -
 8.config.plist_Rt Variables.png285.8 KB · Views: 1,899
 -
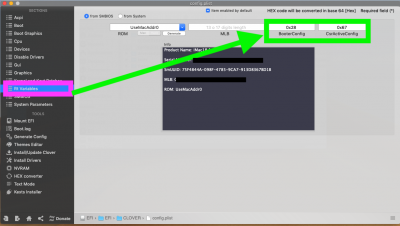
 9.config.plist_SMBIOS.png290.7 KB · Views: 1,842
 -
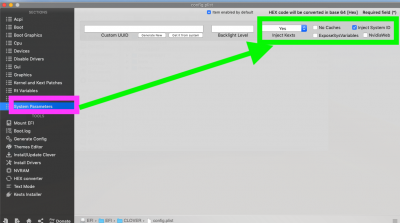 10.config.plist_System Parameters.png263.9 KB · Views: 1,835
 -
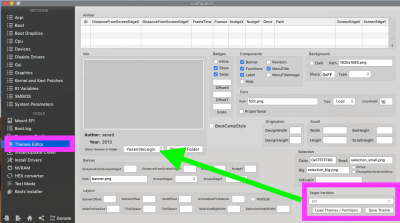 11.Themes Editor.png278.3 KB · Views: 2,314
 -
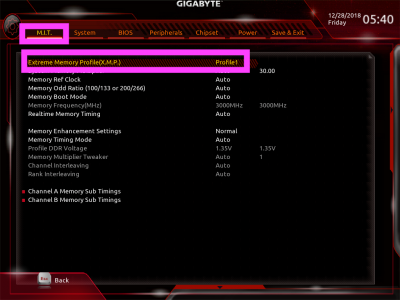 1.M.I.T_XMP_Profile1.png330.6 KB · Views: 2,275
 -
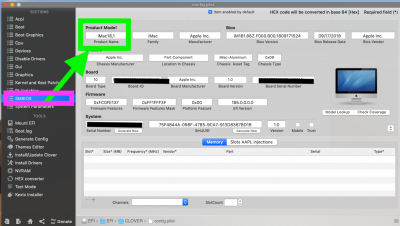
 2.System_MoBo Name_BIOS Version_Date and Time.png305.4 KB · Views: 2,231
 -
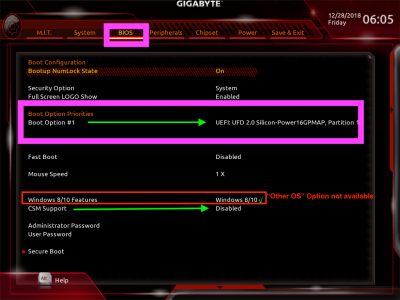 3.BIOS_Boot Option Priorities_Windows8:10Features_CSM Support Disabled.png320.3 KB · Views: 2,059
 -
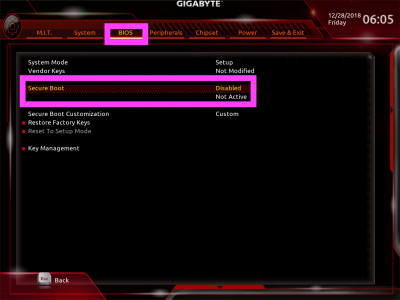 4.BIOS_Secure Boot Disabled.png299.8 KB · Views: 2,018
 -
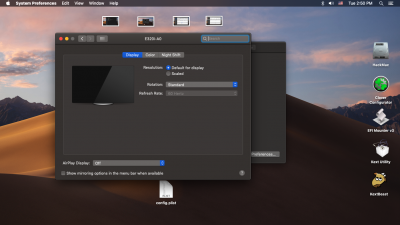
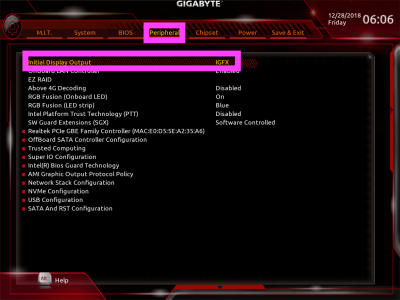 5.Peripherals_Initial Display _IGFX.png335.9 KB · Views: 1,993
 -
 6.Periphearls_SuperIO_Serial Port Disabled.png282.6 KB · Views: 1,900
 -
 7.Peripherals_USB Controllers.png309.1 KB · Views: 1,956
 -
 8.SATA_AHCI.png341 KB · Views: 1,892
 -
 9.Chipset_Graphics_Audio .png297.7 KB · Views: 1,854
 -
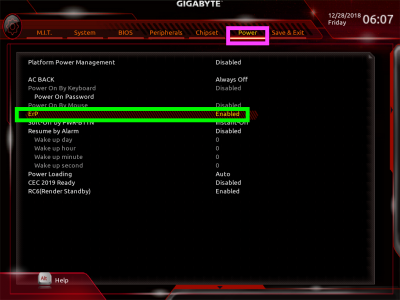 10.Power_ErP _ENABLED.png317 KB · Views: 1,940
 -
 1 Boot Args.JPG3.8 MB · Views: 2,034
 -
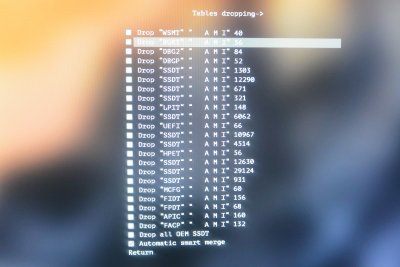 2.Tables dropping.JPG3.8 MB · Views: 1,869
 -
 3.Drop OEM_DSM.JPG3.8 MB · Views: 1,508
 -
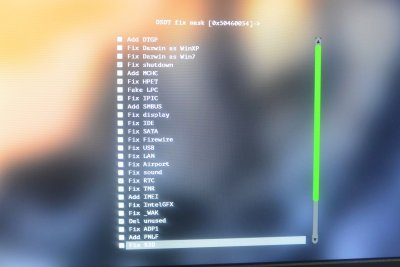 4.DSDT Fix mask.JPG3.7 MB · Views: 1,398
 -
 5.DSDT Fix mask.JPG3.8 MB · Views: 1,319
 -
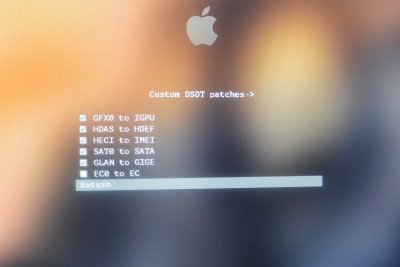 6.Custom DSDT Patches.JPG3.8 MB · Views: 1,236
 -
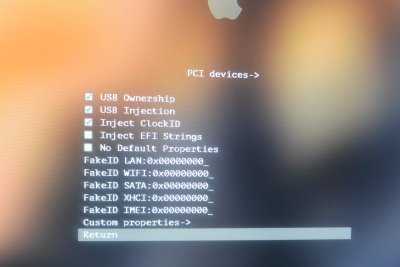 7.PCI Devices.JPG3.7 MB · Views: 1,169
 -
 8.SMBIOS.JPG3.8 MB · Views: 1,135
 -
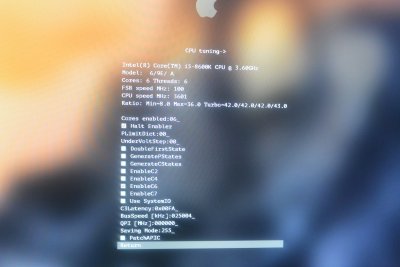 9.CPU Tuning.JPG3.7 MB · Views: 1,083
 -
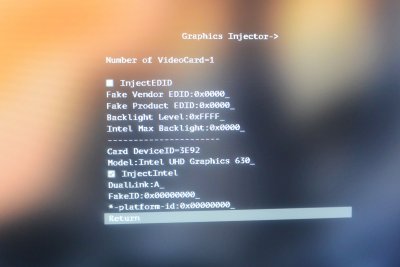 10.Graphics Injector.JPG3.8 MB · Views: 1,041
 -
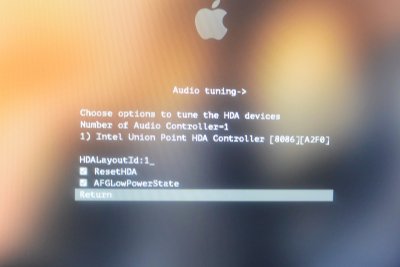 11.Audio Tuning.JPG3.8 MB · Views: 996
 -
 12.Binaries Patching.JPG3.7 MB · Views: 952
 -
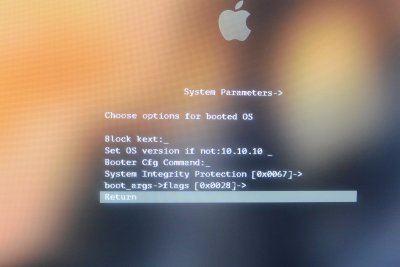 13.System Parameters.JPG3.8 MB · Views: 920
 -
 14.Verbose boot.JPG3.8 MB · Views: 953
 -
 15.CBM Boot USB Installer.JPG3.8 MB · Views: 955
 -
 16.CBM Verbose Boot.JPG3.8 MB · Views: 903
 -
 16.Verbose Boot.JPG3.8 MB · Views: 865
 -
 17.GUI Boot Apple logo.JPG3.9 MB · Views: 820
 -
 18.macOSUtilities.JPG4 MB · Views: 858
 -
 19.DU_View_Show All Devices.JPG3.9 MB · Views: 777
 -
 20.Erase_GUID_ APFS.JPG3.9 MB · Views: 799
 -
 21.Install macOSJPG.JPG3.8 MB · Views: 695
 -
 22.Install macOS License Agree.JPG3.9 MB · Views: 676
 -
 23. Installation started 10 Minutes remaining.JPG3.8 MB · Views: 649
 -
 24. Installation5 Minutes remaining.JPG3.8 MB · Views: 622
 -
 25.Installation2 Mnutes remaining Fisrst stage about to reboot.JPG3.8 MB · Views: 659
 -
 26. CBM after First Reboot.JPG3.8 MB · Views: 668
 -
 27.Verbose boot .JPG3.8 MB · Views: 685
 -
 28.Apple logo Prgressbar.JPG3.9 MB · Views: 643
 -
 28.Verbose boot ending.JPG3.9 MB · Views: 649
 -
 30. 16 Minutes Remaining .JPG3.9 MB · Views: 608
 -
 31.3 Minutes remaing.JPG3.9 MB · Views: 604
 -
 32.Less Than a aMinute .JPG3.9 MB · Views: 595
 -
 33.Rebooting.JPG3.9 MB · Views: 652
 -
 34.CBM screen Recovery Disk createds.JPG3.8 MB · Views: 655
 -
 35.Verbose Boot .JPG3.8 MB · Views: 642
 -
 36.Welcome Screen.JPG3.7 MB · Views: 596
 -
 37.Choose the Look.JPG3.7 MB · Views: 586
 -
 37.Compter Account.JPG3.4 MB · Views: 575
 -
 DSC_8154.JPG3.8 MB · Views: 668
 -
 1.Keyboard Setup Assistant.png324.1 KB · Views: 837
 -
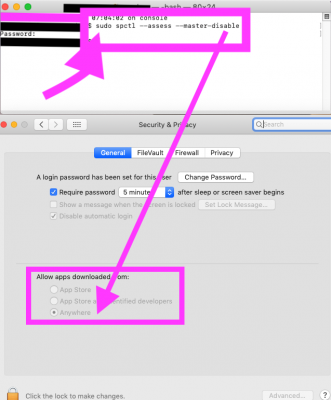 2.sudo spctl cmd.png99.7 KB · Views: 893
 -
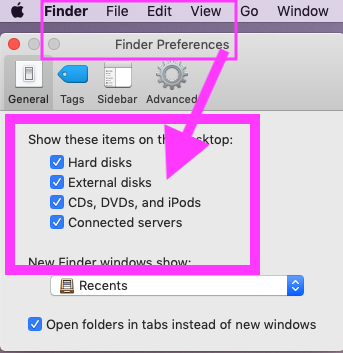 3.Finder Preferences.png62.8 KB · Views: 949
 -
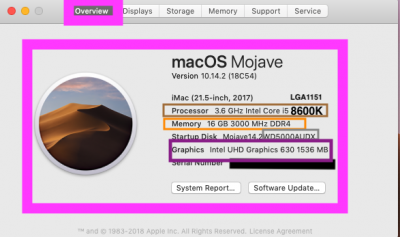 1.AboutThisMac_Overview.png80.1 KB · Views: 1,017
 -
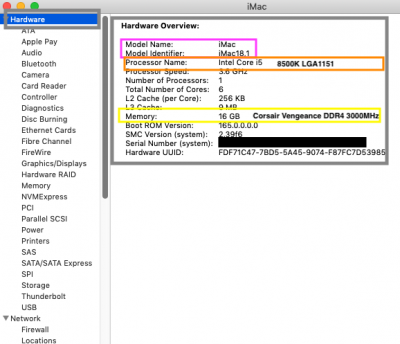 2.System Report_Hardware Overview.png62.7 KB · Views: 988
 -
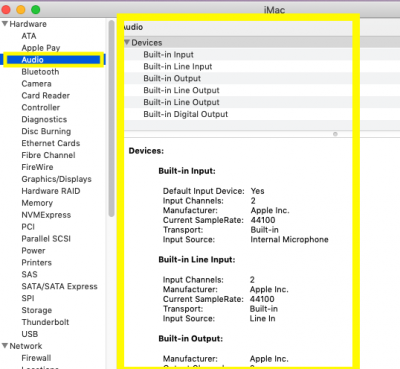 3.System Report_Audio.png65.3 KB · Views: 875
 -
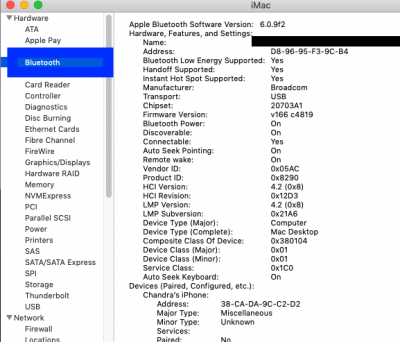 4.System Report_BT.png83.8 KB · Views: 838
 -
 5.System Report_Ethernet Cards.png49 KB · Views: 839
 -
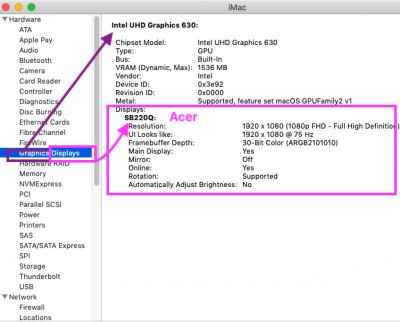 6.System Report_Graphics&Displays.png74.6 KB · Views: 817
 -
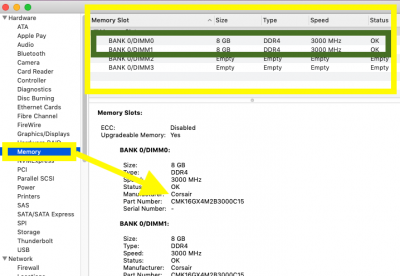 7.System Report_Memory.png76.9 KB · Views: 796
 -
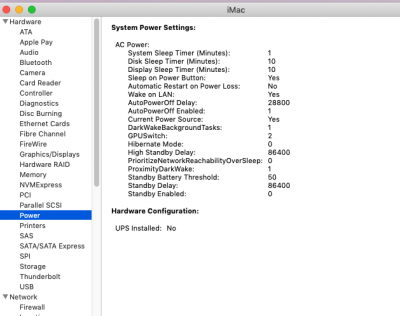 8.System Report_Power.png74.3 KB · Views: 789
 -
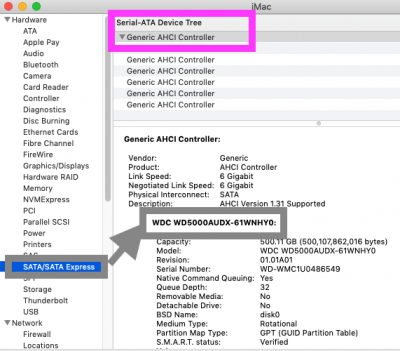 9.SATA:SATA Express.png79.4 KB · Views: 742
 -
 10.System Report_Storage.png123.2 KB · Views: 779
 -
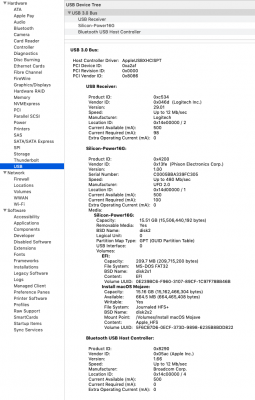 11.System Report_USB.png168 KB · Views: 803
 -
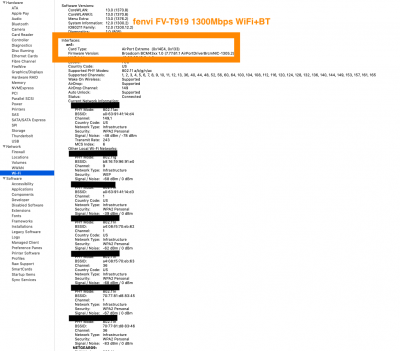 12.System Report_WiFi.png215 KB · Views: 830
Last edited: