Contribute
Register

[SUCCESS] i5-6600K, Gigabyte GA-Z170-HD3, Gigabyte Radeon R9 390

Status
Not open for further replies.
I spent quite a bit of time on this, so I hope this benefits someone...

What's Working/Included:
- Audio
- Proper USB's/Customized SSDT-USB.dsl
- Ethernet
- GPU with full Acceleration
- Memory Recognition

What's Not Working:
I'm not sure... I think everything works. If you find something that does't work I'll fix it.

BIOS Setting:
  • BIOS Features
    • Fast Boot = Disabled
    • Windows 8/10 Features = Other OS
    • Storage Boot Option Control = UEFI Only
    • Other PCI Device ROM Priority = UEFI Only
  • Peripherals
    • Intel Platform Trust Technology (PPT) = Disabled
    • Legacy USB Support = Disabled
    • XHCI Hand-off = Enabled
    • Super IO Configuration
      • Serial Port 1 = Disabled
      • Parallel Port = Disabled
    • SATA Configuration
      • SATA Mode Selection = AHCI
      • Aggressive LPM Support = Disabled
  • Chipset
    • VT-d = Disabled
    • High Precision Timer = Disabled
    • IOAPIC 24-119 Entries = Disabled
  • Power Management
    • ErP = Enabled
    • Soft-Off by PWR-BTTN = Delay 4 Sec.
Note 1, Start with Optimized Defaults (F7)
Note 2, Use the latest BIOS, at the time of writing it is F6e

Installing Mac OS X:
  1. Follow the UniBeast Guide.
  2. Place the latest FakeSMC.kext from here, in the EFI folder of the installer (EFI/CLOVER/kexts/Other).
  3. Place the latest USBInjectAll.kext from here, in the EFI folder of the installer (EFI/CLOVER/kexts/Other).
  4. Place the latest RealtekRTL8111.kext from here, in the EFI folder of the installer (EFI/CLOVER/kexts/Other).
  5. Remove VBoxHfs-64.efi from (EFI/CLOVER/drivers64UEFI), then place HFSPlus.efi from here, in the same folder.
  6. Make sure InjectATI is set to true in the config.plist, this can be done with Clover Configurator or with a Plist Editor.
  7. Make sure FBName is set to "Radeon" without the quotes, in the config.plist, this can be done with Clover Configurator or with a Plist Editor. It will be found under the Graphics Section.
  8. Make sure ATI FakeID is set to 0x67B01002 in the config.plist, this can be done with Clover Configurator or with a Plist Editor. It will be found under the Devices Section.
  9. Install it!
  10. Continue the Guide.
Note 1, When Installing the .kext files, remove all folders except for 10.11 & Other

General:
  1. Boot to your installation using the USB installer.
  2. Install Clover to your installation, then mount the EFI of the USB Installer.
  3. Copy the config.plist from the USB Installer, to your installation.
  4. Use the IOAPIC Patch found here.
  5. Use the SMBIOS found here.
  6. Use your favourite kext installer to Install FakeSMC.kext and RTL8111.kext.
  7. Place USBInjectAll.kext into (EFI/CLOVER/kexts/10.11) on your installation.
  8. Reboot without USB Installer.

Audio:

  1. Use the Clover DSDT patch found here, under the audio section. Then reboot.
  2. Mount your EFI.
  3. Run audio_CloverALC-110.command. Reboot.

*Ran out of time, I'll finish this guide soon*

View attachment 172171View attachment 172173View attachment 172172


Hi nicegamer7,

Your post is very helpful, thanks for that.

I am going to buy a motherboard in which I can install Windows and Mac OS Sierra both the operating systems.

So, shall I buy this motherboard "Gigabyte GA-Z170-HD3"? Mac OS Sierra works perfectly in this motherboard, right?

Please confirm.

Thanks in advance.
 
I'm new: I assume the "installer" is the USB I created with Unibeast, but I don't see an EFI folder on it to insert those kexts into (as instructed on step 2). Sorry for the dumb question.
 
Hey nicegamer7 Great guide!! any chance of attaching your ssdt-usb.aml?? :)
 
I am having trouble with the Ethernet connection. Using the same motherboard (GA-Z170-HD3) and running Sierra 10.12.2. Everthing seems to work fine besides the Ethernet. I have tried RTL8111, IntelMausiEthernet, and more. No dice. Using XCode (https://github.com/Mieze/RTL8111_driver_for_OS_X) and/or Multibeast, making sure I delete the non-working kext as i try them out. Any Suggestions, Thanks in Advanced.
 
Last edited:
Please help, I can't figure out how to make usb work with Z170-HD3 ddr3 and sierra.
I place USBinjectall.kext in EFI/Clover/kext/10.12 and ./other (creating 10.12 folder that didn't exist).
I also tried: https://www.tonymacx86.com/threads/usb-new-raise-port-limit-patch-for-macos-10-12-sierra.202329/
I tried with and without GenericUSBXHCI.kext installed via multibeast

Bios settings are the same of the first post of this guide.

I tried with imac 17.1 definition and 14.2, same result (using KextsToPatch edit for 17.1 definition).
 
Hello.
My system: GA-z170-hd3, cpu g4400, 8 GB ddr4 memory, hd7770.
If ioapic 24-119 disabled, I got a "panic(cpu 0 caller 0xffffff80...)":
View attachment 176116View attachment 176117
Bios: F6f
tried with hd7770 and without.
USB flash (10.11.3) created with unibeast 6.1.1, also tried with terminal - same result.
Used the IOAPIC Patch, also USBInjectAll.kext - same result.
Tried without FakeSMCSensor's.
I spent quite a bit of time on this, so I hope this benefits someone...

What's Working/Included:
- Audio
- Proper USB's/Customized SSDT-USB.dsl
- Ethernet
- GPU with full Acceleration
- Memory Recognition

What's Not Working:
I'm not sure... I think everything works. If you find something that does't work I'll fix it.

BIOS Setting:
  • BIOS Features
    • Fast Boot = Disabled
    • Windows 8/10 Features = Other OS
    • Storage Boot Option Control = UEFI Only
    • Other PCI Device ROM Priority = UEFI Only
  • Peripherals
    • Intel Platform Trust Technology (PPT) = Disabled
    • Legacy USB Support = Disabled
    • XHCI Hand-off = Enabled
    • Super IO Configuration
      • Serial Port 1 = Disabled
      • Parallel Port = Disabled
    • SATA Configuration
      • SATA Mode Selection = AHCI
      • Aggressive LPM Support = Disabled
  • Chipset
    • VT-d = Disabled
    • High Precision Timer = Disabled
    • IOAPIC 24-119 Entries = Disabled
  • Power Management
    • ErP = Enabled
    • Soft-Off by PWR-BTTN = Delay 4 Sec.
Note 1, Start with Optimized Defaults (F7)
Note 2, Use the latest BIOS, at the time of writing it is F6e

Installing Mac OS X:
  1. Follow the UniBeast Guide.
  2. Place the latest FakeSMC.kext from here, in the EFI folder of the installer (EFI/CLOVER/kexts/Other).
  3. Place the latest USBInjectAll.kext from here, in the EFI folder of the installer (EFI/CLOVER/kexts/Other).
  4. Place the latest RealtekRTL8111.kext from here, in the EFI folder of the installer (EFI/CLOVER/kexts/Other).
  5. Remove VBoxHfs-64.efi from (EFI/CLOVER/drivers64UEFI), then place HFSPlus.efi from here, in the same folder.
  6. Make sure InjectATI is set to true in the config.plist, this can be done with Clover Configurator or with a Plist Editor.
  7. Make sure FBName is set to "Radeon" without the quotes, in the config.plist, this can be done with Clover Configurator or with a Plist Editor. It will be found under the Graphics Section.
  8. Make sure ATI FakeID is set to 0x67B01002 in the config.plist, this can be done with Clover Configurator or with a Plist Editor. It will be found under the Devices Section.
  9. Install it!
  10. Continue the Guide.
Note 1, When Installing the .kext files, remove all folders except for 10.11 & Other

General:
  1. Boot to your installation using the USB installer.
  2. Install Clover to your installation, then mount the EFI of the USB Installer.
  3. Copy the config.plist from the USB Installer, to your installation.
  4. Use the IOAPIC Patch found here.
  5. Use the SMBIOS found here.
  6. Use your favourite kext installer to Install FakeSMC.kext and RTL8111.kext.
  7. Place USBInjectAll.kext into (EFI/CLOVER/kexts/10.11) on your installation.
  8. Reboot without USB Installer.

Audio:

  1. Use the Clover DSDT patch found here, under the audio section. Then reboot.
  2. Mount your EFI.
  3. Run audio_CloverALC-110.command. Reboot.

*Ran out of time, I'll finish this guide soon*

View attachment 172171View attachment 172173View attachment 172172


Hello i followed your guide step by step and it has gotten me pretty far but now i am stuck and hoping someone on here can give me some advice, my Hackintosh has:

GA-Z170-HD3(your same motherboard)
Intel I7-6700 3.4GHz (4.0GHz Turbo) 8Mb Cache Socket 1151 CPU Processor SR2L2 (Skylake)
Kingston HyperX FURY Black 32GB Kit (4x8GB) 2133MHz DDR4 Non-ECC CL14 DIMM Desktop Memory (HX421C14FBK4/32)
Cooler Master Hyper 212 EVO - CPU Cooler with 120mm PWM Fan (RR-212E-20PK-R2)
Geforce GTX 660 2gb EVGA nvidia Graphics card

BIOS Setting:
  • BIOS Features
    • Fast Boot = Disabled
    • Windows 8/10 Features = Other OS
    • Storage Boot Option Control = UEFI Only
    • Other PCI Device ROM Priority = UEFI Only
  • Peripherals
    • Intel Platform Trust Technology (PPT) = Disabled
    • Legacy USB Support = Disabled
    • XHCI Hand-off = Enabled
    • Super IO Configuration
      • Serial Port 1 = Disabled
      • Parallel Port = Disabled
    • SATA Configuration
      • SATA Mode Selection = AHCI
      • Aggressive LPM Support = Disabled
  • Chipset
    • VT-d = Disabled
    • High Precision Timer = Disabled
    • IOAPIC 24-119 Entries = Disabled
  • Power Management
    • ErP = Enabled
    • Soft-Off by PWR-BTTN = Delay 4 Sec.


and for boot flags I have been using
PCIRootUID=1
NoKernelCache=No
-v
-x
cpus=1
nv_disable=1

and i also go into the graphics injector menu in the clover boot screen and enable InjectNVidia:[+]

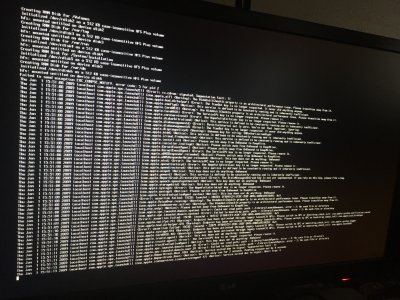
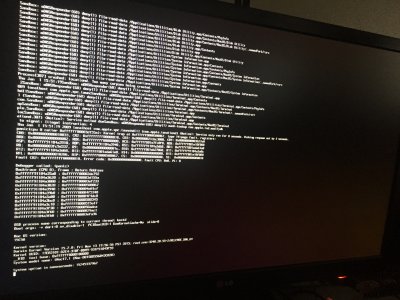
and here is a picture of as far as can get. It goes through alot of scroling and then will stop for a half second and then restart to where i see the Gigabyte logo. please please please any help would be amazing....

The 3rd photo down is right before it restarts.
 

Attachments

  • image.jpeg
    image.jpeg
    3.1 MB · Views: 187
  • image.jpeg
    image.jpeg
    3.1 MB · Views: 192
  • image.jpeg
    image.jpeg
    2.7 MB · Views: 211
Last edited:
Hi,
I have Sierra up and running on my Gigabyte Z170-HD3 everything runs fine except that i have small hickups or call it micro freezes for a microsecond or 2 maybe longer the whole system freezes, mouse, keyboard input sound output stops and the starts working again.
This happens very frequent.
I have a 1080 nvidia card with latest web drivers and acceleration is working. But i am pretty sure I had this problem when using the internal intel cards aswell.

I have added my config.plist

Hardware
Gigabyte Z170-HD3
Intel Core i5 6600K 3.5 GHz 6MB
Kingston HyperX 16GB (2x8GB) DDR4 2133MHz CL14
MSI GeForce GTX 1080 8GB Sea Hawk X
TP-Link TL-WDN4800 N900
ASUS Bluetooth 4.0 Adapter

USB mouse and keyboard and USB headphones

Anyone have any ideas?
 

Attachments

  • config.plist
    6 KB · Views: 327
Hi,
I have Sierra up and running on my Gigabyte Z170-HD3 everything runs fine except that i have small hickups or call it micro freezes for a microsecond or 2 maybe longer the whole system freezes, mouse, keyboard input sound output stops and the starts working again.
This happens very frequent.
I have a 1080 nvidia card with latest web drivers and acceleration is working. But i am pretty sure I had this problem when using the internal intel cards aswell.

I have added my config.plist

Hardware
Gigabyte Z170-HD3
Intel Core i5 6600K 3.5 GHz 6MB
Kingston HyperX 16GB (2x8GB) DDR4 2133MHz CL14
MSI GeForce GTX 1080 8GB Sea Hawk X
TP-Link TL-WDN4800 N900
ASUS Bluetooth 4.0 Adapter

USB mouse and keyboard and USB headphones

Anyone have any ideas?


I have solved it.
I have no idea what caused it but I installed the audio drivers and took out an extra usb3 card i had installed in the computer that i had forgotten about and unplugged everything except keyboard mouse and headphones. After this the stuttering is gone and I am happily enjoying my hackintosh.
 
Hi! I have this Motherboard, anyone else have trouble with the NVRAM? Do I need the EmuVariable to make it works?
 
Status
Not open for further replies.
Back
Top