Contribute
Register

[SUCCESS] Gigabyte Designare Z390 (Thunderbolt 3) + i7-9700K + AMD RX 580

At the top of post #16,393 you'll find the necessary links:


Thanks @CaseySJ for all of the hard work you (and others) have been putting into bringing full TB functionality for the rest of us.

I‘m a Gigabyte x299 Designare EX owner, and it’s unclear to me what my options for hot-swappable TB ports are. I don’t see my board listed in the list above ... could you help clarify?
Here’s what I understand as my options so far:

A. Use the on-board TB with an SSDT patch: functionality of just one port?* (free)​
B. Get a GC-Titan Ridge PCI card, and do an SSDT patch: functionality of two ports.* ** (~$95)​
C. A & B: functionality of one* on-board port + two Titan Ridge ports* ** = three ports.*** (~$95)​
D. On-board chip Firmware flashing for: two fully-functional, cold boot, hot-swappable ports.**** (~ $70 USD)​
E. A & D: two Titan Ridge ports* ** + two fully-functional, flashed, on-board ports**** = four ports. (~ $165 USD)​
* requires a device to be plugged in during boot, unless you jump the TB_C cable (if available)​
** no video pass-through?​
*** is it even possible to do an SSDT patch for both cards?​
**** is flashing even an option for x299 Designare users?​
Sorry if the stars are confusing, I’ve been up all night trying to make sense of all the information. But if you help expand on some details, or correct me where I’m wrong, that would be much appreciated.​
Thanks!​
 
I have not reset using the short method, I have reset CMOS by removing the battery for 15 seconds with PSU switch off and unplugged several times due to after this occurred it would not boot otherwise.

Because of resetting and moving within BIOS versions F6n and F9b I did go thru the process of reunlocking MSR using Grub from mini guide and selecting BIOS configuration again afterwards.

I’ve tried to boot into my backup and main drive both give same result
you said you re-unlocked MSR then selected BIOS configuration. in my experience, re-loading a bios config causes the MSR to be re-locked. don't ask me why!!

so, after CMOS reset, reset your bios settings, THEN re-unlock MSR, and turn the power supply switch off for a few seconds. then turn back on and see if the boot proceeds.

I have found that on my Aorus Pro I need to cycle power for the unlocking to take effect.
 
It seems like a lot of people have trouble resetting BIOS/UEFI settings after either a BIOS update or reset by shorting the 'clear cmos' pins. One or two options are sometimes inadvertently missed.

There is (or used to be) an option within the Gigabyte BIOS to save settings to a file on a USB flash drive, pressing F3 I think it is (my motherboard died the other day so I can't check it at the moment but if memory serves me right it is F3).

This is different from saving/loading a BIOS file, eg F9b.bin, this is for the actual settings (Profiles), eg Enable XMP, Disable CSM etc etc

It may be a good idea to have a collection of the settings for each BIOS version available in the thread (as a MINI Guide?) so that people can download them and load them into their BIOS. At least then you know you are starting from a known good point.

The file produced is specific to the BIOS version, so there would need to be one file per version, eg you can't load an F8 BIOS setup file onto an F9b BIOS motherboard.

I would have done this myself but as some of you may be aware from my posts the other day, I'm awaiting a replacement motherboard from Amazon after a component somehow 'fell off' my old one. Most suppliers are out of stock and I have an estimated delivery date of mid to end June. :(
on my Aorus Pro mobo, and I would assume on the Designare as well, there is an option under the BIOS "Save" tab to save up to 6 sets of bios configurations. then after CMOS reset navigate to the Save tab and go to Load settings to restore the settings profile you want.
 
Last edited:
on my Aorus Pro mobo, and I would assume on the Designare as well, there is an option under the BIOS "Save" tab to save up to 6 sets of bios configurations. then after CMOS reset navigate to the Save tab and go to Load settings to restore the settings profile you want.

That is what I use if I reset the BIOS but it doesn't always follow through after a Bios update, eg going from F4 to F8. Some options are changed, added or removed in Bios updates so they won't necessarily be reloaded. From reading other peoples posts it would also appear that many users don't save their settings to a profile so at least if we had settings in a downloadable file people could still start from a known good setup.
 
what process have you used, and what status are you in right now?

Since Dec 2018, I have been using RehabMan process described on https://www.tonymacx86.com/threads/...g-clover-uefi-nuc7i7bxx-nuc8i7bxx-etc.261711/
and with @Leesureone help, I got a perfect hackintosh using the latest Clover, everything worked, except TB3 hotplug.

Two days ago, I flashed my NUC8 using instructions on post #1 of this thread, and using the advice you gave me on how to connect my raspberry Pi

The status right now is my TB3 doesn't work at all, except if i follow the steps of @CaseySJ in post #20,725

I think if I have a working NUC8 EFI I could trace my mistakes in order to get back functionality and hot plug.

thanks
 
@CaseySJ @losinka @dgsga If it helps, here's the native DSDT for the Z170-UD5 TH. When running it does not have _E2C method. However, the native DSDT has _E23 which seems to become XTBT in the running system DSDT.

(in the image, left is native, right is running)

EDIT: and on a closer look, XTBT is a method called directly before TINI, so maybe it's our target?
Good point -- from the running system we can see that _E23 is the right one. The hot plug event handler is generally surrounded by other Thunderbolt methods under Scope GPE.

@losinka, there is nothing scary about this. You cannot damage the system if you pick the wrong event handler. The only thing that will happen is ... nothing. Specifically, no hot plug.
 
Last edited:
I have not reset using the short method, I have reset CMOS by removing the battery for 15 seconds with PSU switch off and unplugged several times due to after this occurred it would not boot otherwise.

Because of resetting and moving within BIOS versions F6n and F9b I did go thru the process of reunlocking MSR using Grub from mini guide and selecting BIOS configuration again afterwards.

I’ve tried to boot into my backup and main drive both give same result
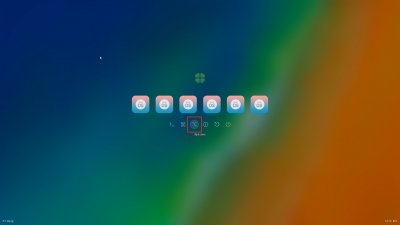
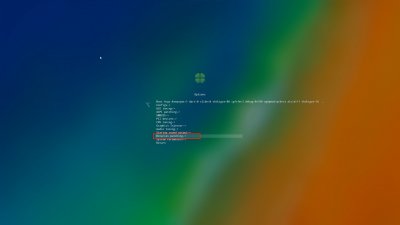
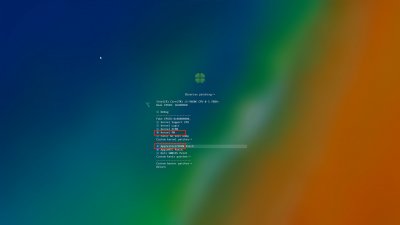
Temporarily, please see if you can boot by checking on these 2 boxes from the Clover Boot Menu:

screenshot1_resize.jpg screenshot2_resize.jpg screenshot3_resize.jpg

If system still fails to boot, please compress and upload the CLOVER folder from any drive that you can access (even USB install disk). Remove serial numbers from SMBIOS section of config.plist. I would like to check (a) EFI memory driver and (b) Boot Arguments (namely, system won't boot if you use shikigva=32).
 
Since Dec 2018, I have been using RehabMan process described on https://www.tonymacx86.com/threads/...g-clover-uefi-nuc7i7bxx-nuc8i7bxx-etc.261711/
and with @Leesureone help, I got a perfect hackintosh using the latest Clover, everything worked, except TB3 hotplug.

Two days ago, I flashed my NUC8 using instructions on post #1 of this thread, and using the advice you gave me on how to connect my raspberry Pi

The status right now is my TB3 doesn't work at all, except if i follow the steps of @CaseySJ in post #20,725

I think if I have a working NUC8 EFI I could trace my mistakes in order to get back functionality and hot plug.

thanks
Can you post the following so we can verify some basic things?
  • Run IORegistryExplorer and scroll the device tree on left side until you get to the Thunderbolt tree. Capture a screenshot of that. (Do not use the search bar.)
  • Post your Thunderbolt SSDT. Do you also have SSDT-DTPG.aml in your CLOVER/ACPI/patched folder?
 
Thanks @CaseySJ for all of the hard work you (and others) have been putting into bringing full TB functionality for the rest of us.

I‘m a Gigabyte x299 Designare EX owner, and it’s unclear to me what my options for hot-swappable TB ports are. I don’t see my board listed in the list above ... could you help clarify?
Here’s what I understand as my options so far:

A. Use the on-board TB with an SSDT patch: functionality of just one port?* (free)​
B. Get a GC-Titan Ridge PCI card, and do an SSDT patch: functionality of two ports.* ** (~$95)​
C. A & B: functionality of one* on-board port + two Titan Ridge ports* ** = three ports.*** (~$95)​
D. On-board chip Firmware flashing for: two fully-functional, cold boot, hot-swappable ports.**** (~ $70 USD)​
E. A & D: two Titan Ridge ports* ** + two fully-functional, flashed, on-board ports**** = four ports. (~ $165 USD)​
* requires a device to be plugged in during boot, unless you jump the TB_C cable (if available)​
** no video pass-through?​
*** is it even possible to do an SSDT patch for both cards?​
**** is flashing even an option for x299 Designare users?​
Sorry if the stars are confusing, I’ve been up all night trying to make sense of all the information. But if you help expand on some details, or correct me where I’m wrong, that would be much appreciated.​
Thanks!​
Your Gigabyte X299 Designare EX is a great board! It contains two DisplayPort-Inputs and two Thunderbolt ports. Because it uses an Alpine Ridge controller, it should be possible to activate Thunderbolt Bus and Local Node with SSDT alone. That should enable both ports with hot plug capability.
  • Are you using KGP's Thunderbolt hot plug SSDT right now? If so, does hot plug work?
Also feel free to post the following:
  • Your board's DSDT by running MaciASL and selecting File --> New from ACPI --> DSDT.
  • Your IOReg (run IORegistryExplorer and select File --> Save As...)
 
Hi! I'm really interested in this procedure. I have Alpine Ridge flashed and it's working perfect with my devices. But I'd like to use it also in other OS's. It's hard for me to follow points 4 and 5 from your guide. If you are so kind and give me a hand........ Thank you!
@StefanAM In the SSDT you need to change RP05 to RP21, _E2C to _E17, XE2C to XE17. For DSB4 duplicate device DSB1, rename it to DSB4 and change the _ADR to 0x00040000
 

Attachments

  • SSDT-TbtOnPch.zip
    4.7 KB · Views: 72
Back
Top