- Joined
- Dec 29, 2015
- Messages
- 44
- Motherboard
- GA-Z97X-Gaming 7
- CPU
- i7-4790K
- Graphics
- GTX 750 Ti | GTX 1060
- Mac
- Mobile Phone
[SUCCESS] El Capitan 10.11.3 Clover | GA-Z97X-Gaming 7 | i7-4790K | GTX 750 Ti | Overclocked
Guides, References, Help, Credit:
Some, part, all, or none of these were used to get my install working:
Hardware:
Bootloader:
OS:
Working:
Not Working:
Updates:
BIOS Settings:
Note 1: BIOS revision F8
Note 2: Load Optimized Defaults
Note 3: If you don’t see a setting, assume it is set to default
I did not change many settings from default. You can set VT-d to disabled if you wish, but the Clover bootloader issues the boot arg “dart=0” which does the same thing.



Overclocking:
WARNING: Overclocking comes with inherent risk you must be willing to take
WARNING: DO NOT overclock to install. Overclock after the system is setup and stable at stock speeds. I repeat, DO NOT overclock to install.
WARNING: These are my settings and may not work for your hardware
Note 1: Only these settings were changed. If you don’t see a setting, assume it is set to default
Note 2: The BIOS settings are updated, but the photos are not


Installing Mac OS X:
Note: Use reference 1 (Unibeast)
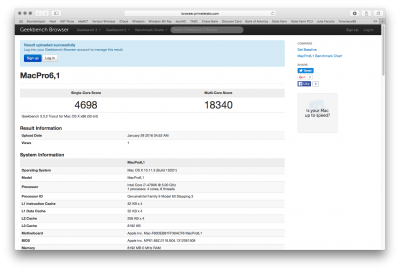
Fix Sleep/Wake:
The Corsair H100i Cooler is not compatible with Mac OS X. You can use the cooler, but having it plugged into a USB port or header on the board will cause the computer to wake immediately after sleep. Only option is to unplug the USB for it. USB is not required for it to function as the fan profiles live on the microcontroller for the cooler, but it is required to use Corsair Link in Windows. Otherwise, sleep/wake works normally.
CPU/Memory Detection and Speed Stepping:
Note: I have not verified SSDT or even touched it in Clover so I cannot verify if PM and speed stepping is actually functioning correctly, however it appears as if it is working
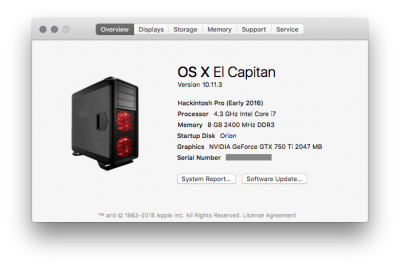
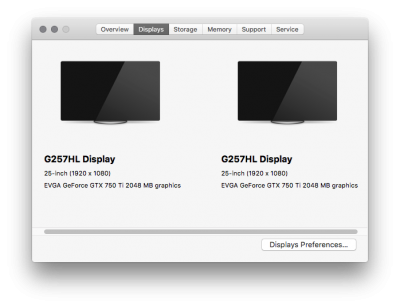
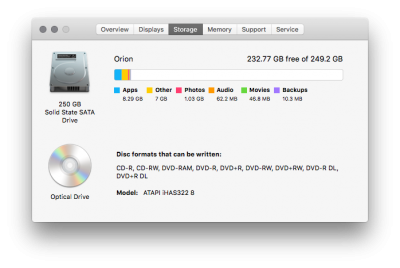
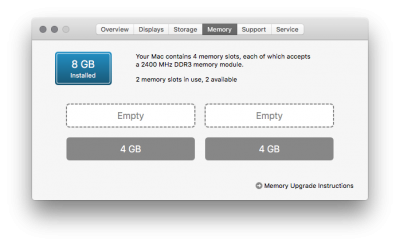
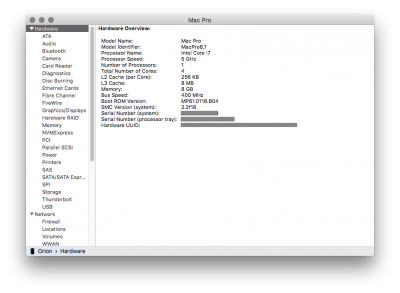
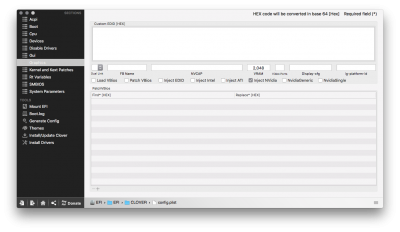
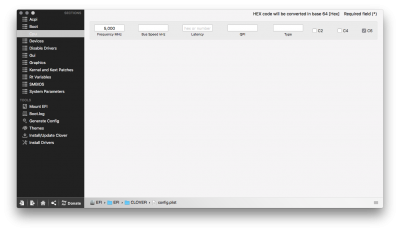
This worked right away for me. About This Mac was able to read the base speed of the processor and memory and installed amount. However it did not detect my overclock settings. For this I had to edit my Clover config.plist using Clover Configurator to properly enter the values. System Information (System Report button on About This Mac) reports the correct speed, but the About This Mac is showing a slightly slower CPU with no effect on performance. Additionally iStat Menus and HWMonitor are not reporting correct voltages compared to my BIOS overclock settings, but again I don’t see any issues in performance. At idle they show Vcore ~0.084V but I believe this is off by a factor of 10 and at full load it does not show 1.26V which is my Vcore + offset. EIST, C1E, C3/C6 and any other Turbo/Speed Stepping is “Auto” and working for me with no intervention as HWMonitor and Intel Power Gadget show x8-x48 multipliers. I also had to edit my VRAM size in my config.plist otherwise About This Mac couldn’t read the amount of memory on my graphics card.

Fix No Audio After Sleep/Wake:
Note: This took a little bit to figure out because there are so many potential fixes listed in reference 6. I ended up using Fix 1.4 (reference 5) which provides the downloads I used
Fix HDMI Audio:
Note: Use Reference 9
Fix Time Synchronization/Offset:
Note 1: This only applies if dual booting Windows and Mac OS X
Note 2: Use Reference 7
Fix Black Screen/No Graphics After Boot:
Note: Use Reference 10
Note 2: Only do this fix if you plan to use definitions MacPro6,1 or iMac15,1
Fix iMessage/FaceTime:
WARNING: This process has to be followed precisely. Failure to do so can result in anything including but not limited to a non-booting machine, a blacklisted machine that’s prevented from contacting any services from Apple, a blacklisted WAN IP address for your location, or a blacklisted Apple ID
Note: It might be safer to disconnect from the internet temporarily while you do this fix and verify it to avoid blacklisting the computer, your WAN IP, or your Apple ID
WiFi and Bluetooth:
Note: See Post 1617 and 1619 in Reference 16
Note 2: My solution is because of the bluetooth card I have, it may not work for you, but you should follow the reference guide
Note 3: The WiFi card must be in the first 1x PCIe slot or else it will not appear in System Profiler
Guides, References, Help, Credit:
Some, part, all, or none of these were used to get my install working:
- http://www.tonymacx86.com/el-capita...-el-capitan-any-supported-intel-based-pc.html
- http://www.tonymacx86.com/downloads.php?do=cat&id=11
- https://github.com/JrCs/CloverGrowerPro/blob/master/Files/HFSPlus/X64/HFSPlus.efi
- http://sourceforge.net/projects/cloverefiboot/
- http://www.tonymacx86.com/audio/151504-no-audio-after-sleep-wake-realtek-alc-applehda-fixes.html
- http://www.tonymacx86.com/audio/170063-fix-no-sound-after-sleep-1150-possibly-other-realteks.html
- http://www.insanelymac.com/forum/topic/298027-guide-aio-guides-for-hackintosh/
- Post 14
- https://selfsolve.apple.com/
- http://www.tonymacx86.com/hdmi-audio/145399-clover-hdmi-audio-nvidia-amd-cards-easy-way.html
- http://www.tonymacx86.com/graphics/...-after-nvidia-346-01-02f01-2.html#post1018420
- https://www.******.com/r/hackintosh/comments/3iad00/success_gigabyte_ga_z97x_gaming_7_4790k_gtx_970/
- https://www.******.com/r/hackintosh/comments/2wohwn/getting_imessage_working_on_10102_generating/
- http://www.insanelymac.com/forum/topic/302347-clover-imessagefacetime-fix-for-yosemite/
- http://www.insanelymac.com/forum/topic/303073-pattern-of-mlb-main-logic-board/
- http://www.insanelymac.com/forum/topic/298027-guide-aio-guides-for-hackintosh/?st=0
- http://www.tonymacx86.com/network/104850-guide-airport-pcie-half-mini-v2.html
Hardware:
- Gigabyte GA-Z97X-Gaming 7
- Intel i7-4790K
- Corsair Vengeance 8Gb (2x4Gb) 1333MHz DDR3 (2400MHz XMP)
- Corsair H100i Cooler
- Corsair HX750i Power Supply
- EVGA Nvidia GTX 750 Ti SC 2Gb
- 2 x Acer G257HL 25” monitors
- Samsung 850 EVO 250Gb SSD
- Corsair Graphite 760T (Red) Case
- Other hard drives that are disabled under my Hackintosh profile in the BIOS and enabled when I load my Windows profile
Bootloader:
- Clover v2.3K r3330
- MacPro6,1
OS:
- Mac OS X El Capitan (10.11.3) only (No Other OS)
- Windows 10 (separate hard drive disabled by BIOS profile)
Working:
- Audio with port detection and switching
- Ethernet
- USB 2.0/3.0
- GPU with full Acceleration
- iMessage/FaceTime/iCloud
- Sleep/Wake
- CPU Speed Stepping/Power Management
- CPU/Memory Detection
- Mac OS X/Windows Time Synchronization
- Wifi and Bluetooth
Not Working:
- Audio over HDMI - I have dedicated speakers in the Line Out and headphones in the front, so I don’t really care about HDMI Audio, but it’d be nice to have
Updates:
- 1/28 - Overclock updates
- 3/13 - Added WiFi and Bluetooth working, Updated for Multibeast 8.1
- IMAGES NOT UPDATED
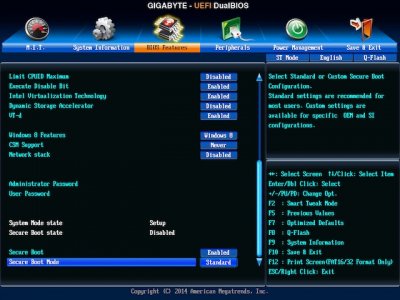
BIOS Settings:
Note 1: BIOS revision F8
Note 2: Load Optimized Defaults
Note 3: If you don’t see a setting, assume it is set to default
I did not change many settings from default. You can set VT-d to disabled if you wish, but the Clover bootloader issues the boot arg “dart=0” which does the same thing.
- BIOS Features
- Fast Boot = Disabled
- VT-d = Enabled
- Windows 8 Features = Windows 8
- CSM Support = Disabled
- Network Stack = Disabled
- Secure Boot = Enabled
- Secure Boot Mode = Standard
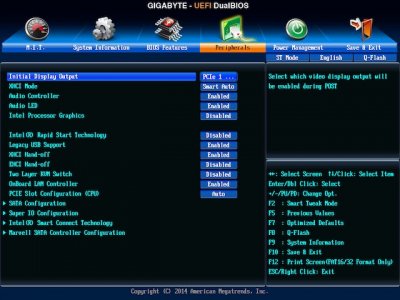
- Peripherals
- Initial Display Output = PCIe 1 Slot
- XHCI Mode = Smart Auto
- Intel Processor Graphics = Disabled
- Intel Rapid Start Technology = Disabled
- Legacy USB Support = Enabled
- XHCI Hand-off = Enabled
- EHCI Hand-off = Disabled
- Super IO Configuration
- COMA = Disabled
- Marvell SATA Controller Configuration
- GSATA Controller = Disabled
- Power Management
- Soft-Off by PWR-BTTN = Instant Off
- ErP = Disabled
- Platform Power Management = Disabled


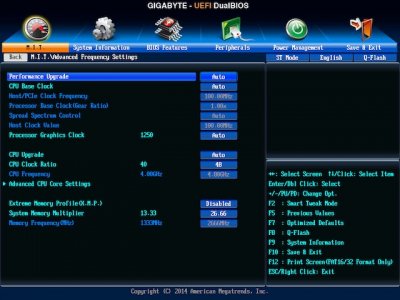
Overclocking:
WARNING: Overclocking comes with inherent risk you must be willing to take
WARNING: DO NOT overclock to install. Overclock after the system is setup and stable at stock speeds. I repeat, DO NOT overclock to install.
WARNING: These are my settings and may not work for your hardware
Note 1: Only these settings were changed. If you don’t see a setting, assume it is set to default
Note 2: The BIOS settings are updated, but the photos are not
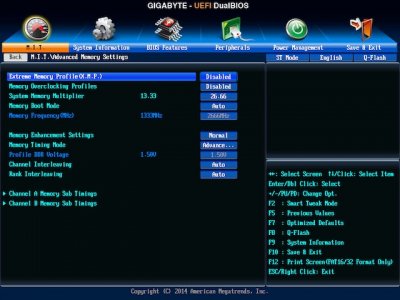
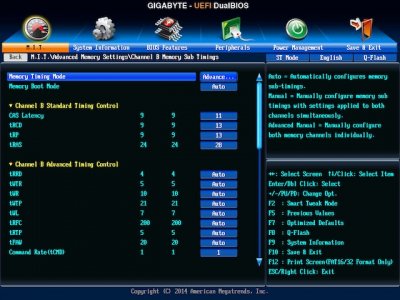
- CPU
- Multiplier: x48
- Cache Multiplier: x40
- Memory
- Multiplier: x24
- Timings: 11-13-13-30-1T
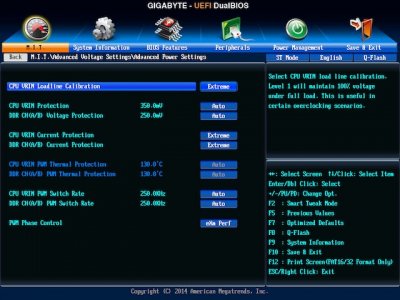
- Voltages
- LLC and other calibrations set to “Extreme”
- Vrin = 1.70V
- Vcore = +0.05V offset
- Vsa = Auto
- Vddr = 1.65V


Installing Mac OS X:
Note: Use reference 1 (Unibeast)
- Step 2.15 – Select UEFI Boot Mode
- Step 2.16 – I did not select anything here
- Step 2.18 (after) – Mount the EFI partition on the USB drive if not mounted already
- Browse to ”/EFI/CLOVER/drivers64UEFI” then place HFSPlus.efi from reference 3 in there
- Browse to “/EFI/CLOVER/kexts/10.11” then place “FakeSMC.kext” and “AtherosE2200Ethernet.kext” from reference 2 in there
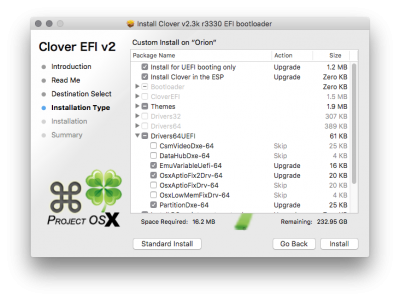
- Run the latest Clover installer from reference 4 and select the same EFI partition that was mounted in my step 3 with the following options:
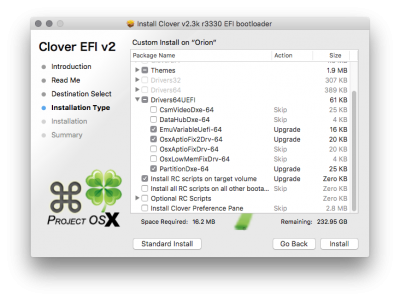
- Step 3.x – See my BIOS config above, DO NOT overclock yet
- Step 4.4 – At Clover boot screen, arrow over to boot options and under boot args enter “nv_disable=1”
- Step 4.8 – Upon reboot, repeat Step 4.4 with “nv_disable=1” in boot args but select the new boot entry that appears instead of the USB installer
- Repeat my step 3.1 but this time mounting the system EFI partition, not the USB EFI partition (May not be necessary, but also doesn’t hurt)
- Step 5.7 – Select UEFI Boot Mode
- Step 5.8 – Do NOT select audio drivers as they will fail installation. Select FakeSMC and HWMonitor and Plugins. Select the Atheros e2200 network kext. Select the Intel 7/8/9 Series USB.
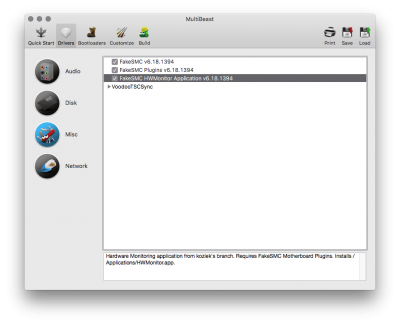
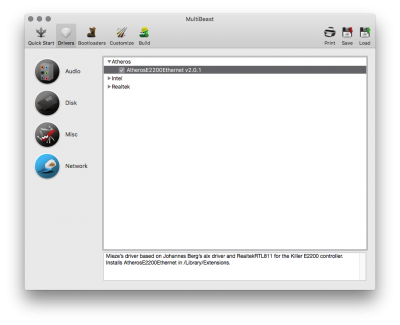
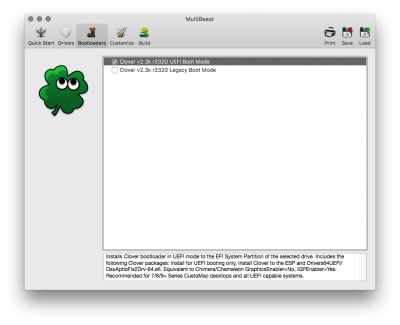
- Step 5.9 – Select “Inject Nvidia”. Under System Definitions select “MacPro 3,1”
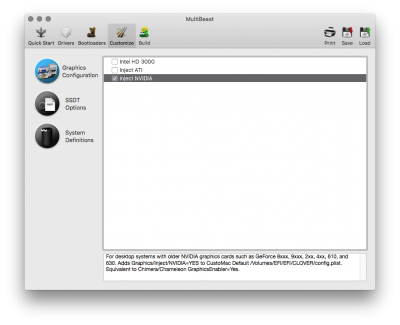


- Step 5.12 – Install this package
- Step 5.13 – After reboot, do NOT modify boot args, just let the system boot normally
- Step 5.14 – Run Multibeast again but this time ignore steps 5.7, 5.9 and 5.10, only select “ALC1150” for Audio in step 5.8 and NOTHING else, then skip to step 5.11
- Reboot
- Repeat my step 4 but this time select the system EFI partition to update the system bootloader to the latest
- Reboot


Fix Sleep/Wake:
The Corsair H100i Cooler is not compatible with Mac OS X. You can use the cooler, but having it plugged into a USB port or header on the board will cause the computer to wake immediately after sleep. Only option is to unplug the USB for it. USB is not required for it to function as the fan profiles live on the microcontroller for the cooler, but it is required to use Corsair Link in Windows. Otherwise, sleep/wake works normally.
CPU/Memory Detection and Speed Stepping:
Note: I have not verified SSDT or even touched it in Clover so I cannot verify if PM and speed stepping is actually functioning correctly, however it appears as if it is working
This worked right away for me. About This Mac was able to read the base speed of the processor and memory and installed amount. However it did not detect my overclock settings. For this I had to edit my Clover config.plist using Clover Configurator to properly enter the values. System Information (System Report button on About This Mac) reports the correct speed, but the About This Mac is showing a slightly slower CPU with no effect on performance. Additionally iStat Menus and HWMonitor are not reporting correct voltages compared to my BIOS overclock settings, but again I don’t see any issues in performance. At idle they show Vcore ~0.084V but I believe this is off by a factor of 10 and at full load it does not show 1.26V which is my Vcore + offset. EIST, C1E, C3/C6 and any other Turbo/Speed Stepping is “Auto” and working for me with no intervention as HWMonitor and Intel Power Gadget show x8-x48 multipliers. I also had to edit my VRAM size in my config.plist otherwise About This Mac couldn’t read the amount of memory on my graphics card.


Fix No Audio After Sleep/Wake:
Note: This took a little bit to figure out because there are so many potential fixes listed in reference 6. I ended up using Fix 1.4 (reference 5) which provides the downloads I used
- Download the codeccommander.kext that @tigersoul925 precompiled for the ALC1150
- Download KextBeast and install the above kext
- Make sure Internal Speakers and Internal Microphone are selected in System Preferences > Sound > Output/Input
- Reboot
Fix HDMI Audio:
Note: Use Reference 9
- Need to test this. I don’t use the speakers on my monitors as I have a 2.1 setup plugged into the Line Out in the back and Headphones in the front, but it’d be nice to get it working
Fix Time Synchronization/Offset:
Note 1: This only applies if dual booting Windows and Mac OS X
Note 2: Use Reference 7
- This guide worked and was really easy to follow. Change a registry setting in Windows and reboot.
Fix Black Screen/No Graphics After Boot:
Note: Use Reference 10
Note 2: Only do this fix if you plan to use definitions MacPro6,1 or iMac15,1
- This has to do with the fact the new MacPro6,1/iMac15,1 handle video and GPU slightly different. The Mac Pro unloads the first GPU which disables the ports. The iMac uses a different EDID for the 5K display.
- Just modify the kext in the reference and rebuild the cache or reinstall the kext and reboot
Fix iMessage/FaceTime:
WARNING: This process has to be followed precisely. Failure to do so can result in anything including but not limited to a non-booting machine, a blacklisted machine that’s prevented from contacting any services from Apple, a blacklisted WAN IP address for your location, or a blacklisted Apple ID
Note: It might be safer to disconnect from the internet temporarily while you do this fix and verify it to avoid blacklisting the computer, your WAN IP, or your Apple ID
- Open Clover Configurator
- Mount EFI
- Open /EFI/config.plist
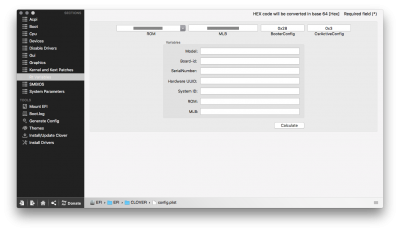
- SMBIOS
- Click on the magic wand and select a Mac Pro. Select “MacPro6,1” in the upper left. On the two sections that say shake, click a few times to generate a Serial Number. Click ok
- Go to reference 8 and search for the Serial Number that was generated. If you get the following error message, that is good. It means you aren't using a Serial Number assigned to a real Mac. If you don't get the error, repeat step 4.a
- “We're sorry, the number you have provided cannot be found in our records. Please verify the number and try again, or contact us.”
- In the "Board Serial Number" field, paste in your Serial Number that was generated above and add the required additional characters at the end
- A machine with an 11 character S/N has a 13 character Board S/N (MLB)
- For a MacPro3,1 system, you will generate an 11 character S/N therefore you will only need to append 2 additional characters for your Board S/N (MLB)
- A machine with a 12 character S/N has a 17 character Board S/N (MLB)
- For a MacPro6,1 system, you will generate a 12 character S/N therefore you will only need to append 5 additional characters for your Board S/N (MLB)
- A machine with an 11 character S/N has a 13 character Board S/N (MLB)
- Open Terminal and run "uuidgen"
- Copy the UUID and paste it in the "SmUUID" field

- Rt Variables
- Export config.plist
- Disconnect from the internet and reboot a couple times each time verifying the S/N, ROM, MLB, and SmUUID values do not change
- Enter this command string into Terminal to clear any previous iMessage databases and account connection info. If it doesn't work, put sudo in front of the command and it will ask for your password:
- cd ~/Library/Caches/ && rm -R com.apple.Messages* && rm -R com.apple.imfoundation* && cd ~/Library/Preferences/ && rm com.apple.iChat* && rm com.apple.imagent* && rm com.apple.imessage* && rm com.apple.imservice* && rm -R ~/Library/Messages/
- Connect to the internet and sign into iMessage/FaceTime/iCloud
WiFi and Bluetooth:
Note: See Post 1617 and 1619 in Reference 16
Note 2: My solution is because of the bluetooth card I have, it may not work for you, but you should follow the reference guide
Note 3: The WiFi card must be in the first 1x PCIe slot or else it will not appear in System Profiler
- Used the reference guide. Step 2 for 10.11. I also had to install the BrcmBroadcomInjector.kext provided by RehabMan because my bluetooth is not supported by the BrcmPatchRAM.kext
Last edited:

