
- Joined
- Feb 27, 2014
- Messages
- 12
- Motherboard
- Z97X-Gaming 5
- CPU
- i5 Haswell 3.40GHZ
- Graphics
- NVIDIA GeForce GTX 980sc acx2.0
- Mac
- Classic Mac
- Mobile Phone
Ok, so I decided to build another system (My main build is an older Haswell unit with High Sierra and a very Hackintosh-unfriendly motherboard (ASRock), which is a pain to get anything working and I kinda gave up on it My system doesn't match what's in my avatar anymore, because that MoBo has died.) is basically one of the cheapest Mojave build you can make by getting one of these. (Dell Optiplex 7010).

They are literally a steal, even if refurbished, the CPU still goes for like $200 alone if you manage to catch one with the i7 intel, but the i5 is sufficient.
I basically got myself one for free, someone wanted to get rid of it and passed it down to me. I got the i7 CPU in it, which is still nice, if you ask me and I happened to have some extra DDR3 memory laying around, so I packed it up to 16GB.
This computer was just laying around my garage for months now, I was planning to keep the CPU out of it and get a new motherboard (LG1155) and pack it into a mini ITX case for my daughter. That didn't happen, since my daughter got a laptop and she doesn't want 100s of cables and wires and monitor so this slightly aged desktop got passed back to me.
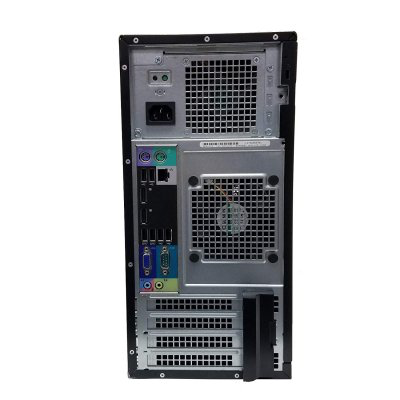
So I decided to throw Mojave at it. It (currently) has no graphics card and my monitor has DisplayPort connection, which is what these desktops have (2) beside a VGA. They don't have HDMI, which is fine, although I'm sure some other versions of them maybe do.

BTW, I'm planning to put it into a different case, but these motherboards have Dell- propriety unique power switch connections and front IO and USB connections so you can't just switch cases without tinkering. This is what I'm gonna do: already purchased a tiny mini ITX motherboard and I'm gonna get a mini ITX case and I only spent about $80 for both. Basically I'm only keeping the CPU /memory and I got an 250GB SSD standing by for the new build and I'll get a gfx card sometime later, whatever works with Mojave (AMD).
So, here is what you gotta do, if you want to get one of the easiest Hackintoshes, that won't give you trouble.
This is for the stock motherboard /cpu you get, when you buy this desktop.
1. So go into its BIOS and make sure you turn off security features and whatever admin passwords and so on and make sure your system will be set for UEFI only settings, turn off everything regarding legacy compatibility and so on. Turn off VT as usual. These systems have really cool BIOS if you ask me, maybe I'm just getting old, but I appreciate the clean interface with no gimmicks, but plenty of options. If anyone gonna try this build, let me know if you need some snapshots of my BIOS for exact settings.
2. Apply/Save all settings, shut down the PC, plug in your USB stick
3. Restart, F12 for boot options or go back to BIOS and see if your MoBo sees your empty SSD and your USB stick (this is what I do) and arrange the boot options so your USB stick on top.
Reboot, boot into Clover. Don't change anything but go into the Clover options, add the -dart=0 -V flag in case of trouble you see you aren't sitting pointlessly at front of the loading screen. If you get kernel panics, make sure you aren't checking some Nvidia driver flags or something.
4. Go through the install process, boot into MacOS, copy Multibeast to your desktop or wherever you want it and have the usual settings about Clover UEFI to be installed, For sound, I used VooDooHDA 2.8.6- which gave me sound. For Internet, these Dells have Intel based ethernet adapters, so I used IntelMousiEthernet vs 2.4.0 - Internet worked right away.
I haven't added any other kexts or anything it's just sorta "works right out of the box" after installation. Add whatever you want, I plugged in a USB stick Bluetooth. I haven't set up anything else, since I will be rebuilding this system with a different MoBo in the near future so I won't go too far adding anything else.
I mean, even though it's a bit aged, but you can't go wrong having a Mojave build with a $200 system.

They are literally a steal, even if refurbished, the CPU still goes for like $200 alone if you manage to catch one with the i7 intel, but the i5 is sufficient.
I basically got myself one for free, someone wanted to get rid of it and passed it down to me. I got the i7 CPU in it, which is still nice, if you ask me and I happened to have some extra DDR3 memory laying around, so I packed it up to 16GB.
This computer was just laying around my garage for months now, I was planning to keep the CPU out of it and get a new motherboard (LG1155) and pack it into a mini ITX case for my daughter. That didn't happen, since my daughter got a laptop and she doesn't want 100s of cables and wires and monitor so this slightly aged desktop got passed back to me.
So I decided to throw Mojave at it. It (currently) has no graphics card and my monitor has DisplayPort connection, which is what these desktops have (2) beside a VGA. They don't have HDMI, which is fine, although I'm sure some other versions of them maybe do.
BTW, I'm planning to put it into a different case, but these motherboards have Dell- propriety unique power switch connections and front IO and USB connections so you can't just switch cases without tinkering. This is what I'm gonna do: already purchased a tiny mini ITX motherboard and I'm gonna get a mini ITX case and I only spent about $80 for both. Basically I'm only keeping the CPU /memory and I got an 250GB SSD standing by for the new build and I'll get a gfx card sometime later, whatever works with Mojave (AMD).
So, here is what you gotta do, if you want to get one of the easiest Hackintoshes, that won't give you trouble.
This is for the stock motherboard /cpu you get, when you buy this desktop.
1. So go into its BIOS and make sure you turn off security features and whatever admin passwords and so on and make sure your system will be set for UEFI only settings, turn off everything regarding legacy compatibility and so on. Turn off VT as usual. These systems have really cool BIOS if you ask me, maybe I'm just getting old, but I appreciate the clean interface with no gimmicks, but plenty of options. If anyone gonna try this build, let me know if you need some snapshots of my BIOS for exact settings.
2. Apply/Save all settings, shut down the PC, plug in your USB stick
3. Restart, F12 for boot options or go back to BIOS and see if your MoBo sees your empty SSD and your USB stick (this is what I do) and arrange the boot options so your USB stick on top.
Reboot, boot into Clover. Don't change anything but go into the Clover options, add the -dart=0 -V flag in case of trouble you see you aren't sitting pointlessly at front of the loading screen. If you get kernel panics, make sure you aren't checking some Nvidia driver flags or something.
4. Go through the install process, boot into MacOS, copy Multibeast to your desktop or wherever you want it and have the usual settings about Clover UEFI to be installed, For sound, I used VooDooHDA 2.8.6- which gave me sound. For Internet, these Dells have Intel based ethernet adapters, so I used IntelMousiEthernet vs 2.4.0 - Internet worked right away.
I haven't added any other kexts or anything it's just sorta "works right out of the box" after installation. Add whatever you want, I plugged in a USB stick Bluetooth. I haven't set up anything else, since I will be rebuilding this system with a different MoBo in the near future so I won't go too far adding anything else.
I mean, even though it's a bit aged, but you can't go wrong having a Mojave build with a $200 system.
Attachments
Last edited: