
You are using an out of date browser. It may not display this or other websites correctly.
You should upgrade or use an alternative browser.
You should upgrade or use an alternative browser.
[Success] b1's "Mac Mini Killer" with macOS Mojave: i7-8700 | Gigabyte Z370N | RX560 | 16GB RAM
- Thread starter b166ar
- Start date
- Joined
- Dec 18, 2018
- Messages
- 32
- Motherboard
- Gigabyte Z370N WiFi
- CPU
- i9-9900K
- Graphics
- RX 6800 XT
- Mac
- Mobile Phone
Hello, everyone! Hope you are having a good time.
First of all I wanted to thank you all for keeping this thread alive and constantly posting/refining his EFI.
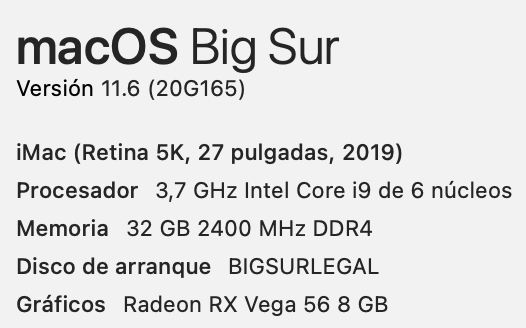
I've been able to update my Catalina 10.15.7 with the last EFI from @b166ar that he made while being active(I did some minor changes, but overall it was mostly his EFI) , to Big Sur 11.6 with the latest (please, keep them coming) EFI. Before I was using iMac 18,3 now finally switched to 19,1.
And...It went surprisingly smooth, worked well almost everything from the very first try. Actually, I didn't really updated, I did a clean install on an external Samsung t5 ssd, then copied all the user files, and now system works pretty snappy.
I used this to generate new serial number, and added "agdpmod=pikera" since now I'm using not rx580, but 5700xt. And that's basically it.
I am a filmmaker, so using this mostly for editing in FCP, Adobe After Effects and other content creation related software. Hence, I only update once a year, but still trying to follow this thread to check what it going on, consider myself as a pretty advanced user, yet for many things guess need a bit deeper understanding, and now I have a few questions, that i haven't been able to find a solution.
1. I am still with BIOS F10 version, is there a really big need to update to F13? I have read the update notes, it is mostly like a security update, and will be also beneficial if I'm going to switch my CPU for 9th gen. But i think since it works, just leave it this way.
2. USB ports mapping, yeah, I know RTFM, I actually only need the backside ones, so I thought just to download the EFI for Hack Mini and take its "USBPorts.kext" then replace the same one in clover folder of Hack Pro's EFI, but after replacing - none of usb port works, which is weird, but I guess there's no need to do it from scratch since we have the same Motherboard and all need is this:
3.My iMessage works and all other apple services also(I don't watch any DRM content though), but my CustomUUID is empty, I tried to search what it for , but haven't found anything. Does it matter or just leave it like this?
4.First I was booting from a thumb drive with Big Sur install, to an external SSD, once I realized that system is stable I have cloned(via Carbon Copy Cloner) this fresh Big Sur install to an internal NVME drive, then I copied EFI folder from thumb drive into NVME's EFI partition... and BIOS doesn't see Clover on it. I can still boot from thumb drive, but that means I have to keep it connected - which is not ideal. Now I think what can I do to make internal NVME have bootable EFI again.
Once more thanks to you all, even in this condition it is perfectly working editing machine, if you'll be passing by Shanghai I owe you a beer!
First of all I wanted to thank you all for keeping this thread alive and constantly posting/refining his EFI.
I've been able to update my Catalina 10.15.7 with the last EFI from @b166ar that he made while being active(I did some minor changes, but overall it was mostly his EFI) , to Big Sur 11.6 with the latest (please, keep them coming) EFI. Before I was using iMac 18,3 now finally switched to 19,1.
And...It went surprisingly smooth, worked well almost everything from the very first try. Actually, I didn't really updated, I did a clean install on an external Samsung t5 ssd, then copied all the user files, and now system works pretty snappy.
I used this to generate new serial number, and added "agdpmod=pikera" since now I'm using not rx580, but 5700xt. And that's basically it.
I am a filmmaker, so using this mostly for editing in FCP, Adobe After Effects and other content creation related software. Hence, I only update once a year, but still trying to follow this thread to check what it going on, consider myself as a pretty advanced user, yet for many things guess need a bit deeper understanding, and now I have a few questions, that i haven't been able to find a solution.
1. I am still with BIOS F10 version, is there a really big need to update to F13? I have read the update notes, it is mostly like a security update, and will be also beneficial if I'm going to switch my CPU for 9th gen. But i think since it works, just leave it this way.
2. USB ports mapping, yeah, I know RTFM, I actually only need the backside ones, so I thought just to download the EFI for Hack Mini and take its "USBPorts.kext" then replace the same one in clover folder of Hack Pro's EFI, but after replacing - none of usb port works, which is weird, but I guess there's no need to do it from scratch since we have the same Motherboard and all need is this:
Am I missing something?Enabled: 15 ports consisting of all backside ports including USB-C and internal BRCM20702 Hub for WiFi/BT functionality
3.My iMessage works and all other apple services also(I don't watch any DRM content though), but my CustomUUID is empty, I tried to search what it for , but haven't found anything. Does it matter or just leave it like this?
4.First I was booting from a thumb drive with Big Sur install, to an external SSD, once I realized that system is stable I have cloned(via Carbon Copy Cloner) this fresh Big Sur install to an internal NVME drive, then I copied EFI folder from thumb drive into NVME's EFI partition... and BIOS doesn't see Clover on it. I can still boot from thumb drive, but that means I have to keep it connected - which is not ideal. Now I think what can I do to make internal NVME have bootable EFI again.
Once more thanks to you all, even in this condition it is perfectly working editing machine, if you'll be passing by Shanghai I owe you a beer!
- Joined
- Sep 28, 2018
- Messages
- 93
- Motherboard
- z370n
- CPU
- i9-9900k
- Graphics
- VEGA RX 56
- Mac
- Mobile Phone
update to mac os 12.0.1
open core 0.7.4
Z370N Wifi
F10BIOS
DW1560
MSI AIRBOOS RX VEGA 56
Ramon, you broke my heart;
I was using your dsdt and it worked perfectly, but I understand that being custom is not the right thing to do.1. My EFI contains a DSDT which was patched on F13 for the specific dGPU/IGPU unit and therefore is tied to all sorts of dependencies.
Therefore using a different BIOS version is not a good idea.
I have simplified the efi folder.
Everything works.
Paste in MLB, Serial Number, Board Serial Number, SmUUID.
I'm sure you know it, but I don't know English and I use a translator.
Attachments
- Joined
- Jul 30, 2018
- Messages
- 227
- Motherboard
- GA-Z370N wifi
- CPU
- i7-8700K
- Graphics
- HD 630 - RX 570
- Mac
- Mobile Phone
I had bad experience upgrading to MontereyView attachment 532746
update to mac os 12.0.1
open core 0.7.4
Z370N Wifi
F10BIOS
DW1560
MSI AIRBOOS RX VEGA 56
Ramon, you broke my heart;
I was using your dsdt and it worked perfectly, but I understand that being custom is not the right thing to do.
I have simplified the efi folder.
Everything works.
Paste in MLB, Serial Number, Board Serial Number, SmUUID.
I'm sure you know it, but I don't know English and I use a translator.
- I have Samsung 970 EVO NVME boot drive and there is some serious issues with its controller and trim in Monterey so it takes >2/3+ minutes to boot. As of now there is no solution
- Disk access was slow overall
- Airplay screen mirror to Mac not working (airplay 3 to LF TV doesn't work)
- My DW1560 was not working and my hackintosh was not able to see any Intrnal/external drives. I found that there is a special BluetoolFixup.kext to use and disable the Bluetoothinjector.kext
- Some of my programs were not working under Monterey.
- Sleep was not working properly, the machine would randomly wakeup with monitor on. Normally the monitor will not wakeup without second keypress.
Please share your experience.
- Joined
- Dec 18, 2018
- Messages
- 32
- Motherboard
- Gigabyte Z370N WiFi
- CPU
- i9-9900K
- Graphics
- RX 6800 XT
- Mac
- Mobile Phone
This is what a wrote previously and was banned, but for another reason. Well, I had time and now kinda managed to resolve everything. Anyway let's go along historical perspective.
My EFI contains a DSDT which was patched on F13 for the specific dGPU/IGPU unit and therefore is tied to all sorts of dependencies.
Therefore using a different BIOS version is not a good idea.
Because of this message I've decided to update BIOS to F13, it went well the system boots normally, although I realized that it did reset BIOS settings after the update, I turned back on the XMP profile 1 and "Internal Graphics - Enabled" ,and like in @b166ar 's initial guide set DVMT Pre-Allocated 128mb, DVMT Total Gfx Mem 256.
I guess that's for Intel UHD graphics to work alongside with 5700xt.
Although before iStatmenus would show Intel UHD graphics, now it doesn’t , but Geekbench 5 still has it, I’m not sure whether QuickSync is working or not, the method how to check whether it’s enabled that @b166ar proposed shows, that it doesn’t .
It takes about 15mins and isn't hard at all, just follow the posted link(s).
I followed the guide you mentioned a hundred times already and everything before Port Removal Patch was good - I have deleted the USBport.kext with your mapping and put USBInjectAll.kext instead.
Then I started to read about Port Removal Patch - the guide shows how it works in the previous versions of OS
There are the patches you have used before and they disabled of course, I tried a few combinations, but none of them allowed me to see all the ports in Hackintool afterwards, so I kinda gave up.
And it seems like there are hundreds guides for OC' but not for Clover, so Youtube wasn't really helpful either - not a single guide about Port Mapping in Big Sur with Clover.
Apparently, It isn’t possible yet with Clover and Big Sur after 11.3(which I think could be mentioned in the original guide,), what I did - since I still have a backup drive with Catalina 15.7, I booted it with new EFI , followed all the instructions and yeah, now everything works with USB3 speed.
This is something I can definitely do.Scratch that, just using SMUUID should be fine.
Cloning your drive using CCC doesn't clone your EFI partition properly which is why you need your thumb drive to boot.
Using kobaltcore's EFIClone script solves this issue, follow the readme carefully.
Installing Clover on your internal drive and copying my EFI folder to your EFI partition afterwards might solve your problem as well, try.
It wasn’t easy actually. Let me explain:
First of all installing Clover into already installed MacOS always returns with an error, the EFI clone script actually does the job, but it still can’t be detected by BIOS(it also has to do something with updating the BIOS to F13),I found the solution here .
It wasn’t really straightforward, I had to actually guess on which partition my EFI is, luckily if it doesn’t find it there it just returns with error(I didn’t know that, so it was a bit scary), "diskutil list" doesn’t have any visual correlation with the results from “map” command in Clover Shell, but yeah now I boot from internal NVME.
Did you create your own custom boot entries as advised in the installation notes?
I made a custom entry for Windows Partition and set to hide “Recovery, Microsoft EFI”, now I only have three options - Gamestation (Windows 10),MacOs Clone(Catalina 10.15.7) and Big Sur Preboot.
I tried to do a custom one for Big Sur, but guess didn’t dig too deep so it never worked, but I guess it’s more like cosmetic issue - can live with that.
I'm assuming that your internal drive is first on the list of boot drives in BIOS, right?
I still can choose the internal NVME to boot first in BIOS and it has EFI with Clover on it, but it just reboots a few times and then boots to Windows by itself.
Resolved this issue, but once again, it isn't only about not properly cloned EFI, also can be after BIOS update.
Would love to work in Shanghai so if you hear something about open vacancies in the field of Product/UX Design I'd be more than happy to have an after work drink from time to time.")
Sadly, China is closed for 99% of the foreigners now, I can leave and go to my country, but won't be able to come back, people say that at least one more year it's going to be this way.
But I know some IT guys who has a really high salary, and if you a really high level expert you can even be in that 1% that enters.
And here was the text I actually got banned for, I guess I deserved that, won’t do it second time for sure.
My advice to check LinkedIn and other platforms for vacancies.If the company will be really interested in your services they can arrange your arrival here.
Alright, as a conclusion I can say that during past week or so, I've finished few projects with an intense GPU usage for video editing and visual effects, the computer works much faster due the clean instal I guess, so it still worth doing it once a year and have an ability to upgrade all the internal SSDs, CPU and GPU anytime I want.
Long live the Hackintosh!
Thanks!
P.S.My port mapping for all backside ports (six USB type A and one USB type C) and internal (HS10 if I recall correctly for wifi/Bluetooth module) that works with the Hack Pro EFI you can find in the attachments section.
Attachments
- Joined
- Jul 30, 2018
- Messages
- 227
- Motherboard
- GA-Z370N wifi
- CPU
- i7-8700K
- Graphics
- HD 630 - RX 570
- Mac
- Mobile Phone
In this guide I will show you how to make your own USB port mapping by simply editing USBPorts.kext with a pList editor.
Some Background
In our Z370N board there are following USB ports
Port 1 to 8 USB 3 (Port 1 & 2 in front rest back)
Port 9 USB C
Port 10 Internal for WiFi & Bluetooth
Port 11 USB 2 (Front)
Remember that to define a USB 3/C you have to define both HS and SS Ports, that is the reason USB3/C are counted as 2 Ports for Apple's 15 port limit.
Download the attached USBPorts.kext
Right click on it
Show Package Contents
Click on Contents folder to find info.plist file
Open this file in a plist editor
Now as shown in my screenshot I will discuss the different coloured sections.
Blue
This you have to edit in both the places as per the SMBIOS definition you have put in your config.plist file. If not put correctly the kext will NOT work
Red
This value We ARE NOT CHANGING for our Mother Board as it will be the same for all Z370N WiFi, but for other users with different Boards will have to change. This value is available by
Click on apple logo in menu bar -> About This Mac -> System Report -> USB
PCI Device ID: + PCI Vendor ID:
Ports Section
You will notice that there are 15 ports defined as per Apple Limit
HS01,HS02,HS05 to HS011 - USB 2 definition
SS01,SS05 to SS08 - USB 3 definition
SS09 - USB C definition
The thing to remember is that USB 3 & C are defined as a pair of HS and SS ports while you define only the HS part for USB 2
Green
UsbConnector value defines the port type
0 = USB 2
3 = USB 3
9 = USB C
255 = Internal
See definition of HS01 & HS02. Both this ports are USB 3 type but for HS01 we have put the value = 3 and for HS02 we have put the value = 0 Because we are defining Port 2 as USB 2 and that is why there is no definition for SS02.
Cyan
The lowest port no 01000000 for USB 2 Port HS01 and this increase sequentially to 0B000000 for HS11.
For SS01 it is 11000000 and for SS09 it is 19000000.
Orange
The value of port-count depend on the last value of SS port definition. In our example it is 19000000. Now suppose if we have not defined USB Ports C which is Port SS09 and the last definition is port SS08 then the port count value will be 18000000
How to Edit and Map
Let us take one example. We are not going to use any of the front side ports and want to define all the back side ports
Rename HS01 to HS03 -> Change port value to 03000000 -> name to HS03
Rename HS02 to HS04 -> Change port value to 04000000 -> UsbConnector to 3 -> name to HS04
Delete HS11 (Frontside USB 2)
Rename SS01 to SS03 -> Change port value to 13000000 -> name to SS03
Copy SS03 definition and paste it before SS05 definition
Rename it to SS04 -> Change port value to 14000000 -> name to SS04
Save the file
DONE!
Attachments
- Joined
- Jul 30, 2018
- Messages
- 227
- Motherboard
- GA-Z370N wifi
- CPU
- i7-8700K
- Graphics
- HD 630 - RX 570
- Mac
- Mobile Phone
For Opencore update and maintenance please see my post
https://www.tonymacx86.com/threads/...to-install-macos-monterey.316578/post-2286342
https://www.tonymacx86.com/threads/...to-install-macos-monterey.316578/post-2286342
- Joined
- Dec 18, 2018
- Messages
- 32
- Motherboard
- Gigabyte Z370N WiFi
- CPU
- i9-9900K
- Graphics
- RX 6800 XT
- Mac
- Mobile Phone
Hi! No worries, I've resolved all the issues, the hack was working flawlessly ever since.@serg1892 Sorry for not replying to your post, I was working non-stop since my last post (and went through a nasty breakup). Hope to find the time after Christmas. Sorry again.
The only thing that didn't work as I found just recently(didn't need that before) - is the second Ethernet port, but it was fixed by simply adding SmallTree-Intel-211-AT-PCIe-GBE.kext into /Other folder.
Don't plan to do any updates anytime soon, especially since I've placed the order for 16" MacBook pro M1 max, guess later on it might completely replace my hackintosh.
Copyright © 2010 - 2024 tonymacx86 LLC