
- Joined
- Jan 11, 2014
- Messages
- 116
- Motherboard
- ASUS Z170 Pro Gaming
- CPU
- Intel i5-6500
- Graphics
- ASUS GTX970 Strix
- Mac
- Mobile Phone
Some general forewords:
- I prefer to use Clover and not MultiBeast/UniBeast for both the installation drive as well as the running OSX
- I have tried choosing hardware that is most compatible with OSX
- Everything works 100% unless specifically stated")
- I always try to modify (etc BIOS) and edit as little as possible to make sure my runs as good as possible
Some thanks are in order: Stork for the ASUS support, tonymacx86 for the Clover guide, and everyone else on this site for creating an incredible community!
So, to start:
Pre-work:
a/ Download Clover
b/ Download the attachments to this post
0. My system
Motherboard: ASUS Z170 Pro Gaming, BIOS v1904
Processor: Intel Core i5-6500
Memory: Crucial 3000MHz 4x8Gb
GPU: ASUS GTX970 4Gb Strix
Monitor: LG 4k monitor, displayport
Keyboard: Apple Wired Keyboard - fully works at boot
Mouse: Logitech M510 - fully works in BIOS and Clover
1. BIOS settings
First load all optimal settings!
Then change these 4 settings:
Advanced Items
- USB Configuration > XHCI Hand Off > Enabled
- System > Serial > Disable serial port
Boot Menu
- Fast Boot > Disabled
- Secure Boot > OS Type > Other OS
2. Create Clover install USB
I personally recommend any USB 3 speed drive, at least 16Gb!
To install, use the attached files. Please note I have crossed out my serial number and MLB, so please take the time and create your own unique version to have iMessage running fine.
Do not forget to put the apfs.efi file in the Drivers64UEFI folder!
You should be able to reach the install screen with the new USB drive - if you have "Unrecognized CPU" error, just drop NullCPUPowerManagement.kext in with the other kexts. You can create a CPU-specific SSDT after you have OSX running.
3. Post-install
If you use a dedicated GPU (like me), then for you I have also attached another config_nv.plist file which you can use instead (rename it to config.plist). Use only after a successful bootup with the original config.plist.
For working audio, I use the VoodooHDA kext. This way I can leave SIP fully enabled (0x0) and all drivers install perfectly under High Sierra... In the output, just select the Green Line.
After reboot, audio works fine for me.
To have iMessage working, create your own serial number and MLB with Clover Configurator.
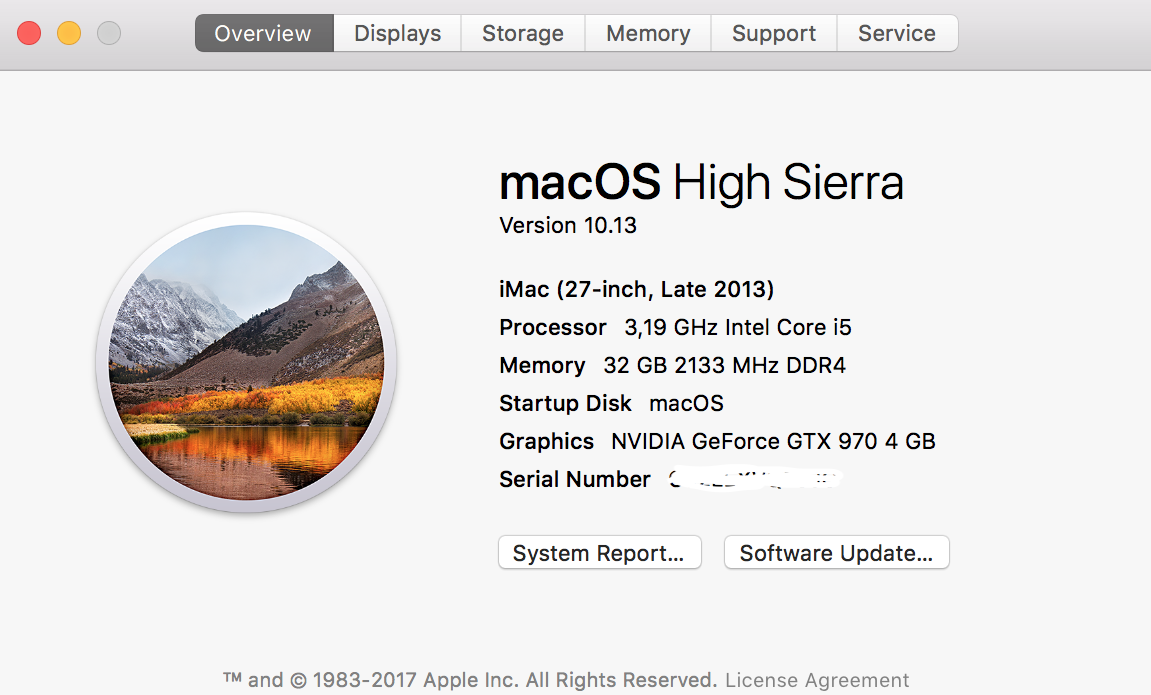
And with the 14,2 SMBIOS first and second stage boot logos are 100% OK.
Please let me know I can help any further!
- I prefer to use Clover and not MultiBeast/UniBeast for both the installation drive as well as the running OSX
- I have tried choosing hardware that is most compatible with OSX
- Everything works 100% unless specifically stated
- I always try to modify (etc BIOS) and edit as little as possible to make sure my runs as good as possible
Some thanks are in order: Stork for the ASUS support, tonymacx86 for the Clover guide, and everyone else on this site for creating an incredible community!
So, to start:
Pre-work:
a/ Download Clover
b/ Download the attachments to this post
- config.plist file
- I use SMBIOS 14,2 since I find it the most stable - I have been trying other SMBIOS'es, but none work as fast and stable as the iMAC14,2, so I would highly recommend this.
- Please note I have disabled some USB ports according to THIS guide by ammulder to make sure I can fit inside the 15 port limitation. If you use some of the motherboard integrated USB ports, please see THIS resource file to determine what ports should be reenabled. HUGE kudos to ammulder for the excellent guide on this!
- Kexts.zip - all the kexts you will need for this build - place these kext files into the EFI/Clover/Other folder and delete all the numbered ones
- 2 SSDT files - one for the USB config, the other for the Realtek sound
0. My system
Motherboard: ASUS Z170 Pro Gaming, BIOS v1904
Processor: Intel Core i5-6500
Memory: Crucial 3000MHz 4x8Gb
GPU: ASUS GTX970 4Gb Strix
Monitor: LG 4k monitor, displayport
Keyboard: Apple Wired Keyboard - fully works at boot
Mouse: Logitech M510 - fully works in BIOS and Clover
1. BIOS settings
First load all optimal settings!
Then change these 4 settings:
Advanced Items
- USB Configuration > XHCI Hand Off > Enabled
- System > Serial > Disable serial port
Boot Menu
- Fast Boot > Disabled
- Secure Boot > OS Type > Other OS
2. Create Clover install USB
I personally recommend any USB 3 speed drive, at least 16Gb!
To install, use the attached files. Please note I have crossed out my serial number and MLB, so please take the time and create your own unique version to have iMessage running fine.
Do not forget to put the apfs.efi file in the Drivers64UEFI folder!
You should be able to reach the install screen with the new USB drive - if you have "Unrecognized CPU" error, just drop NullCPUPowerManagement.kext in with the other kexts. You can create a CPU-specific SSDT after you have OSX running.
3. Post-install
If you use a dedicated GPU (like me), then for you I have also attached another config_nv.plist file which you can use instead (rename it to config.plist). Use only after a successful bootup with the original config.plist.
For working audio, I use the VoodooHDA kext. This way I can leave SIP fully enabled (0x0) and all drivers install perfectly under High Sierra... In the output, just select the Green Line.
After reboot, audio works fine for me.
To have iMessage working, create your own serial number and MLB with Clover Configurator.
And with the 14,2 SMBIOS first and second stage boot logos are 100% OK.
Please let me know I can help any further!

