Contribute
Register

[SUCCESS] Asus Rampage V Extreme x99 5960x Yosemite 10.10.5 - how to get past the dreaded PCI Config

Status
Not open for further replies.
Hi everyone,


I thought I should share my success getting my system up and running. Many thanks to those who kindly provided the stepping stones to this process. The critical step that got me past the dreaded PCI Configuration Begin was a kext called 'AppleUSBXHCI.kext' which I have provided in the zip bundle (called 'kexts.zip').

I will attempt to help anyone I can, but I'm honestly just a trial and error hacker - I don't really fully understand most of this stuff!

My System Specs

Asus Rampage V Extreme
5960x
Titan X


NOTE: I used a Macbook Pro for some of the steps as I have one available to me so this guide assumes you have access to a working Mac/Hackintosh. I also used an SSD drive in a USB3.0 case as the install drive for Yosemite so I could quickly swap the drive between my PC and to my Macbook Pro where necessary.

Method:

1. Using your Mac, download 10.10.5 from Apple App Store. Make a bootable USB using UniBeast method. Name the USB as “USB”

2. Open Terminal. Write
Code:

defaults write com.apple.finder AppleShowAllFiles YES

killall Finder

3. Navigate to /USB/Extra/Extensions and delete all the kexts

4. Navigate to /USB/System/Library/Extensions and delete AppleACPIPlatform.kext and IOPCIFamily.kext

5. The folder titled “5960x test number one” contains some kexts. Using Kext Wizard, install these kexts to /USB/System/Library/Extensions.

6.. Patch the kernel: Open Terminal and enter:

sudo perl -pi -e 's|\x74\x11\x83\xF8\x3C|\x74\x11\x83\xF8\x3F|g' /Volumes/USB/System/Library/Kernels/kernel

8. In Terminal, type:

defaults write com.apple.finder AppleShowAllFiles NO

killall Finder

9. Using Kext Wizard, repair permissions and rebuild system cache. Also Repair Disk Permissions on ‘USB’ using Disk Utility. Also Repair Disk Permissions on ‘USB’ using Disk Utility.

Once completed, connect the USB and Yosemite Drives to your PC.

10. Use the USB drive to boot the system. Use the following boot flags:

-v -f npci=0x2000 kext-dev-mode=1 nv_disable=1 debug=0x14e

11. Install Yosemite. On completion of installation, DO NOT boot into Yosemite. Boot your PC to the BIOS and hard shut down from there. When PC is off, remove your YOSEMITE drive and plug it into your Mac.

12. Patch the kernel on the Yosemite drive: Open Terminal and enter:

sudo perl -pi -e 's|\x74\x11\x83\xF8\x3C|\x74\x11\x83\xF8\x3F|g' /Volumes/Yosemite/System/Library/Kernels/kernel

13. Using Kext Wizard, install the kexts from folder “5960x test number one” AND the kext called ‘AppleUSBXHCI.kext’ into /Yosemite/System/Library/Extensions

THE ‘AppleUSBXHCI.kext’ IS WHAT GOT ME PAST THE PCI CONFIGURATION BEGIN

14. Using Kext Wizard, repair permissions and rebuild system cache. Also Repair Disk Permissions on ‘Yosemite’ using Disk Utility.

15. Connect ‘Yosemite’ to your PC. Boot the system from USB using the same kernel flags as in step 10, but boot into Yosemite. It’s time to install boot loader onto Yosemite SSD.

18. Post installation: Download nVidia’s laters web drivers. (apparently, from here you can use Clover bootloader and Clover Configurator but I just stuck with Chimera as I’m a bit too lazy to figure out Clover at the moment).

19. Install nVidia’s web drivers and reboot in your Yosemite drive. This time, use the following kernel flags:

npci=0x2000 kext-dev-mode=1 PCIRootUID=1 nvda_drv=1 debug=0x14e

20. Use MultiBeast for post-installation. Edit the boot.plist to enter the relevant boot flags etc.


That’s it - you should have a working 10.10.5 Yosemite installation.


Good luck!


Jezza.
Uncle Jezza

What's your bios settings? because i am using almost the same specs as you (except mine is 980TI SLI) and i am unable to get into the Chimera bootloader using your guide or any others that is similar to this.
 
Hi jbambrough,

I havent yet attempted El Capitan installation. I think when I do, I will get another smaller SSD and clone it then attempt to update and see what happens.

You dont have /Extra/Extensions folder after installing from a Unibeast USB drive?

That's odd?

Can you give me any more info?

Jezza.

Thanks for the reply, other than that the drive that Unibeast copies the files to has no /Extra/Extensions folder I have no idea what to tell you, anything specific you're looking for?

I also tried adding the kexts to the /System/Library/Extensions folder too, although then when I try "sudo perl -pi -e 's|\x74\x11\x83\xF8\x3C|\x74\x11\x83\xF8\x3F|g' /Volumes/USB/System/Library/Kernels/kernel" I get "
Can't open /Volumes/USB/System/Library/Kernels/kernel: No such file or directory.
"

Screen Shot 2016-05-04 at 22.47.05.png


Jamie
 
Last edited:
Hi everyone,


I thought I should share my success getting my system up and running. Many thanks to those who kindly provided the stepping stones to this process. The critical step that got me past the dreaded PCI Configuration Begin was a kext called 'AppleUSBXHCI.kext' which I have provided in the zip bundle (called 'kexts.zip')...

Thanks so much, I was close to buying another computer but your guide is what really helped.

Cheers

Andrew
 
Ok I decided to have another go when I had Sierra on my MacBook (I am installing Yosemite on my PC).
Here's what I have:
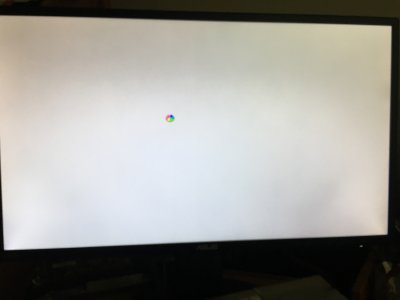
IMG_4442.JPG

Just a constant spinning wheel. This was when I plugged the USB into my computer after the first patch.
I did use verbose mode.

Any ideas?

[UPDATE]
I got it working I just needed the flag "dart=0".
 
Last edited:
I have the same system and I am stuck at pci configuration begin trying to install sierra. I messed up with a lot of kexts, patches and flags and the best I have done so far is to either stuck at pci configuration begin or instant reboot when it reaches there. Any suggestions??
 
Hi everyone,


I thought I should share my success getting my system up and running. Many thanks to those who kindly provided the stepping stones to this process. The critical step that got me past the dreaded PCI Configuration Begin was a kext called 'AppleUSBXHCI.kext' which I have provided in the zip bundle (called 'kexts.zip').

I will attempt to help anyone I can, but I'm honestly just a trial and error hacker - I don't really fully understand most of this stuff!

My System Specs

Asus Rampage V Extreme
5960x
Titan X


NOTE: I used a Macbook Pro for some of the steps as I have one available to me so this guide assumes you have access to a working Mac/Hackintosh. I also used an SSD drive in a USB3.0 case as the install drive for Yosemite so I could quickly swap the drive between my PC and to my Macbook Pro where necessary.

Method:

1. Using your Mac, download 10.10.5 from Apple App Store. Make a bootable USB using UniBeast method. Name the USB as “USB”

2. Open Terminal. Write
Code:

defaults write com.apple.finder AppleShowAllFiles YES

killall Finder

3. Navigate to /USB/Extra/Extensions and delete all the kexts

4. Navigate to /USB/System/Library/Extensions and delete AppleACPIPlatform.kext and IOPCIFamily.kext

5. The folder titled “5960x test number one” contains some kexts. Using Kext Wizard, install these kexts to /USB/System/Library/Extensions.

6.. Patch the kernel: Open Terminal and enter:

sudo perl -pi -e 's|\x74\x11\x83\xF8\x3C|\x74\x11\x83\xF8\x3F|g' /Volumes/USB/System/Library/Kernels/kernel

8. In Terminal, type:

defaults write com.apple.finder AppleShowAllFiles NO

killall Finder

9. Using Kext Wizard, repair permissions and rebuild system cache. Also Repair Disk Permissions on ‘USB’ using Disk Utility. Also Repair Disk Permissions on ‘USB’ using Disk Utility.

Once completed, connect the USB and Yosemite Drives to your PC.

10. Use the USB drive to boot the system. Use the following boot flags:

-v -f npci=0x2000 kext-dev-mode=1 nv_disable=1 debug=0x14e

11. Install Yosemite. On completion of installation, DO NOT boot into Yosemite. Boot your PC to the BIOS and hard shut down from there. When PC is off, remove your YOSEMITE drive and plug it into your Mac.

12. Patch the kernel on the Yosemite drive: Open Terminal and enter:

sudo perl -pi -e 's|\x74\x11\x83\xF8\x3C|\x74\x11\x83\xF8\x3F|g' /Volumes/Yosemite/System/Library/Kernels/kernel

13. Using Kext Wizard, install the kexts from folder “5960x test number one” AND the kext called ‘AppleUSBXHCI.kext’ into /Yosemite/System/Library/Extensions

THE ‘AppleUSBXHCI.kext’ IS WHAT GOT ME PAST THE PCI CONFIGURATION BEGIN

14. Using Kext Wizard, repair permissions and rebuild system cache. Also Repair Disk Permissions on ‘Yosemite’ using Disk Utility.

15. Connect ‘Yosemite’ to your PC. Boot the system from USB using the same kernel flags as in step 10, but boot into Yosemite. It’s time to install boot loader onto Yosemite SSD.

18. Post installation: Download nVidia’s laters web drivers. (apparently, from here you can use Clover bootloader and Clover Configurator but I just stuck with Chimera as I’m a bit too lazy to figure out Clover at the moment).

19. Install nVidia’s web drivers and reboot in your Yosemite drive. This time, use the following kernel flags:

npci=0x2000 kext-dev-mode=1 PCIRootUID=1 nvda_drv=1 debug=0x14e

20. Use MultiBeast for post-installation. Edit the boot.plist to enter the relevant boot flags etc.


That’s it - you should have a working 10.10.5 Yosemite installation.


Good luck!


Jezza.
Hi there for some reason when I am trying to copy and paste in terminal, even using USB name as USB I get this error:
Can't do inplace edit: /Volumes/USB/System/Library/Kernels/kernel is not a regular file. SO I am unable to alter kernel, but also I do not have a Kernels/kernel folder either in unibeast or EFI mount. Any advice?
Thank you
 
unclejezza Have you installed a newer version of OSX at all? I'm looking at 10.14.
 
Status
Not open for further replies.
Back
Top