Contribute
Register

[SUCCESS] Asus Maximus VII Hero NVidia GTX970- Install guide - High Sierra 10.13.6

Status
Not open for further replies.
Joined
Feb 3, 2017
Messages
183
Motherboard
Dell XPS 13 9350 - BIOS 1.7
CPU
i7-6500U
Graphics
HD 520, 3200 x 1800
Mac
  1. iMac
  2. MacBook Air
  3. Mac mini
Mobile Phone
  1. iOS
screensplashgeekbenchhwmonitorfinishedinstall.jpg


===
Update 28/5/20

upgraded to 10.15.5
no issues

however sleep does not work yet - getting restart on wake.

=======
Update 21/5/20

Installed Catalina 10.15.4 as an upgrade from High Sierra 10.13.5
Removed my beloved GTX970 - and installed a Radeon MSI RX5700 XT MECH OC

had to upgrade clover to 5117
had to upgrade Lilu WEG appleALC
had to add a fake EC.aml
installed Virtual SMC (has a lot less sensors than FakeSMC ...which I hope will be addressed at some point)


======
Update 14/5/2020

I have installed security update 2 / 2020 of Highsierra and had to update Nvidia drivers as well of course
but all good.

you can see my latest config files here
post 14 may 2020


====
Update 14 Jan 2019

updated clover to
Clover build by rehabman r4701
remove apfs.efi (now autoloader by clover)
updated and installed to L/E and rebuilt cache (sudo Kextcache -i /)
  1. Lilu V1.3.1
  2. Codec Commander V2.7.1
  3. Whatevergreen V1.2.6 (this Lilu plugin replaces Nvidiafixup. - Intelfixup kexts)
  4. USB Inject All V7.1
  5. AppleALC V1.3.4
Upgraded OS to 10.13.6
reboot to Installer twice and reboot again to finish.

Update Nvidia CUDA to new drivers using Nvidia control panel

All good! :)

==========
Prologue

I had already installed High Sierra on this pcgaming-rig before. Got it to work great but had some problems along the way. So decided to restart from scratch, based on what I learnt the first time around, and document it properly so it might help others with similar hardware.

This is my second hackintosh build. I built the pcgaming-rig in 2015 and is now running win10. I wanted to able to dual boot with macOS High Sierra.

Websites Used:
Main Guide:
https://www.tonymacx86.com/threads/...ierra-on-any-supported-intel-based-pc.235474/

Hardware
  • Maximus Hero VII Asus Z97
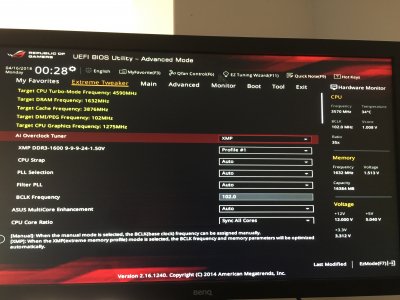
  • CPU i5 4690K Haswell Intel - Turbo normal 3.9Ghz overclocked to 4.59Ghz -Note (you can overclock in BIOS without any config changes needed to your clover/os install - see before and after overclock in pictures below )
  • 2 x 8GB Avenir Blitz Dragon DDR3
  • SSD Samsung 860 1TB (solely for Hackintosh install - windows 10 installed on other SSD)
  • ASUS Strix GTX970 - 4GB (I removed my GTX970 until High Sierra was completely installed and booting from the EFI of SSD - then installed Nvidia drivers and installed card (see step 5.))
  • Corsair H100i liquid cooler
  • Corsair AX760i PSU
  • NZXT H440
IMG_7211.jpg IMG_7303.jpg


Step 1: Download macOS High Sierra

See main guide: link above

Step 2: Create Bootable USB drive with Unibeast 8.3.2

See main guide: link above
I used a 16GB USB3 flashdrive
(in my original install I had quite a few problems with my USB3 flash drive and ended up going to a USB2 flash drive I had with a Sierra installer, anyway decided to try again with USB3, it ended up working but not without hiccups see later)
Choose UEFI Bootmode for this mobo.

A couple of notes regarding the Unibeast 8.3.2 bootable USB installer.
(the notes are valid for 8.3.2, if you are using an other version of Unibeast this may or may not be applicable)
Unibeast Drivers
Let's have a look at some of the files and configuration that were setup on the EFI partition of the USB Installer.​
load your EFI partition on the USB drive-installer and see under EFI/drivers64UEFI​
unibeastinstallerdriversfiles.jpg
APFS.EFI
So apfs.efi is installed: you can always find the apfs.efi file (this is apple's own driver) inside the Install macOS High Sierra.app​
just right click on app show package contents > contents > SharedSupport>Basesystem.dmg)​
open dmg and then go to /usr/standalone/i386/apfs.efi​
installhighsierrabasesystemdmg.jpeg
So just in case the apfs.efi file is more recent than the one on your cloverEFI, just update with this one.​
VboxHFS.efi
VboxHFS.efi is a open source driver for HFS+ formatted drivers.​
On this particular install I had some problems having the installer drives (which is HFS+ formatted) being readable.​
So do yourself a favour and install apple's own driver for HFS+ volume, it is supposedly also faster than the open source .​
Download HFSPlus.efi from​
Delete VboxHFS.efi and replace with HFSPlus.efi​
OsxAptioFix2Drv-64.efi
OsxAptioFix2Drv-64.efi is installed by Unibeast on your USB drive to manage memory allocation.
There are other drivers you can use for this, and some might work better or worse.
I decided to stick with the OsxAptioFix2Drv-64.efi and see what happened. Everything seems to working ok for this Asus mobo.
There is a writeup on the other drivers you can use here:
You may want to try AptioMemoryFix.efi. In any case only use one of these!
Let me know if you have an Asus Maximus VII Hero and decided to use one of the others and if it makes any difference.

You end up with these drivers on your installer-drive​
unibeastfinaldriversefi.jpeg
Unibeast Config.plist - Kexts
Let's now have a look at something in the config.plist​
the config.plist has these patches in Kernel and Kext Patches.​
External icon Patch and also the remove USB port limit in XHCi.​
kexttopatchunibeast.jpg
Now as of Unibeast 8.3.2 , USBInjectallKext has been removed for the installer. The reasoning being that the Remove USB portlimit patch would be enough to allow USB ports to work properly.​
See post below​
I gave this a go with my install. However with this particular hardware the patch alone just did not make the ports work properly so if you are having problems during install with the USB installer
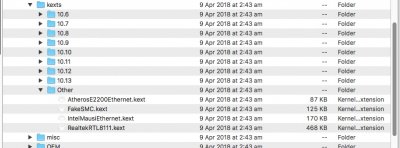
I would still copy USBInjectall.kext to the EFI/EFI/Clover/kexts/Other
you can download latest version of USBInjectall.kext from here
Before copy​
unibeastkext.jpeg
After copy​
unibeastkextsusbinjectall.jpeg
note: Post installation we can configure and install a custom SSDT for USBInjectAll.kext and copy the kext to S/L/E/ on your main drive. see later in this guide

Your installer USB is now ready to go.

next up: bios/install/post install. see next posts
 
Last edited:
Step 3: Bios Settings

Upgraded my Bios to 3201

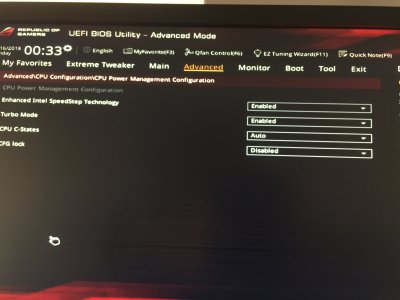
CFG-Lock disabled
IMG_7305.jpg
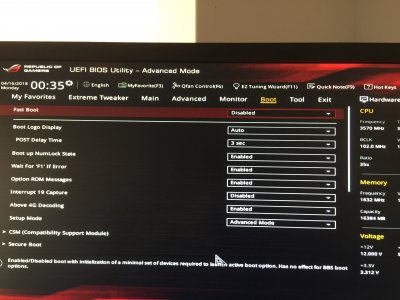
Fastboot disabled
IMG_7305.jpg
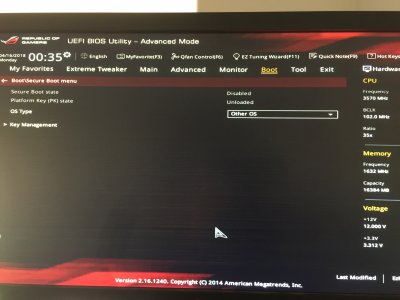
Secureboot disabled
OS type: other
update *:if secure boot is enabled and greyed out you may need to <clear secure keys> under Boot >Secure Boot > Key Management
IMG_7307.jpg

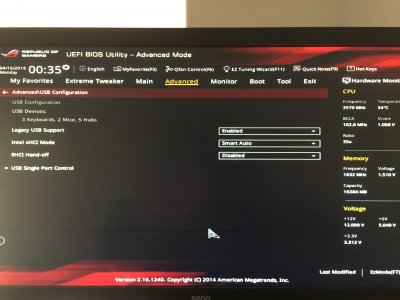
XHCI: Smart Auto
Legacy: enabled (had to because otherwise my keyboard would not be recognised in the clover boot many)
EHCI: disabled

IMG_7308.jpg
(normally I would enable but wanted to try out and see what happens. There was a comment made that if I switch off EHCI, USB ports would work only by applying “remove USB port limits in XHCI” patch.
https://www.tonymacx86.com/threads/...kext-from-unibeast-8-3-1.250167/#post-1729722

As it turned out this did not work for me. USB ports were still unreliable, so I had to use UsbInjectAll.kext and custom SSDT which I had created previously see later)

bootsettings
IMG_7310.jpg
 

Attachments

  • IMG_7306.jpg
    IMG_7306.jpg
    1.6 MB · Views: 1,028
Last edited:
Step 4: Install macOS High Sierra

1. Turn on the computer
2. Press the hotkey to choose boot device (F8 for ASUS motherboards)
3. Choose USB external- USB installer
4. At Clover boot screen, choose Boot OS X Install from Install macOS High Sierra
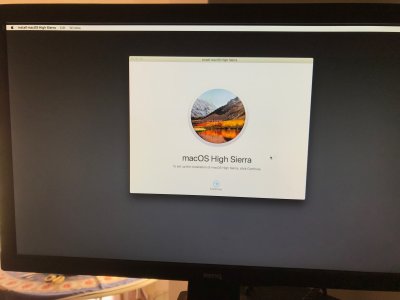
5. When you arrive at the Installer, choose language.
IMG_0163.jpg

If you have issues reaching the installer, you can use spacebar on boot screen to enter alternate boot modes such as verbose and safe mode. For more instructions on entering boot flags see Clover Basics and Switching Advice.

6. For a new installation of macOS, you MUST erase and format the destination drive according to the following steps before continuing.

a. In the top menu bar choose Utilities, and open Disk Utility
IMG_0164.jpg
b. Highlight your target drive for the High Sierra installation in left column.
c. Click Erase button
d. For Name: type High Sierra (You can rename it later)
e. For Format: choose Mac OS Extended (Journaled)
f. Click Erase
g. Close Disk Utility
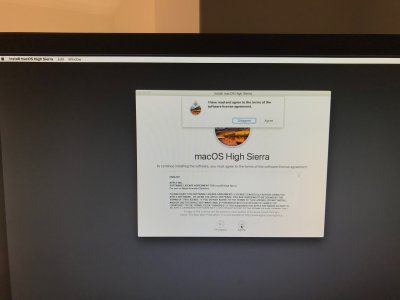
7. Start installer
IMG_0166.jpg

8. Press the hotkey to choose boot device ( F8 for ASUS motherboards)
9. Choose USB installer
12. At the Boot Screen, choose High Sierra (the SSD you just formatted)

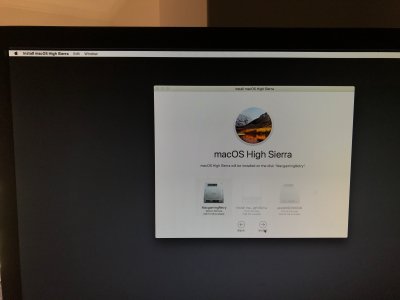
then you will arrive at High Sierra Installation
when asked select your drive for installation
IMG_0167.jpg
IMG_0168.jpg
IMG_0169.jpg

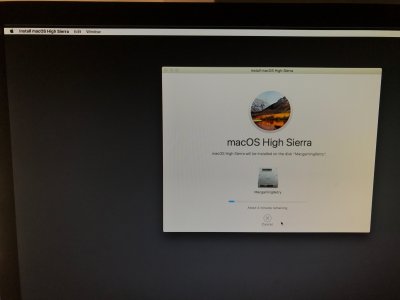
I choose to allow High Sierra to convert my SSD drive to APFS file format.
My install rebooted a couple of times during install.
Once without warning and without any countdown timer and once with a countdown timer.
When this happens make sure you press <f8> to select your USBdrive
Then at clover boot screen choose your SSD drive.

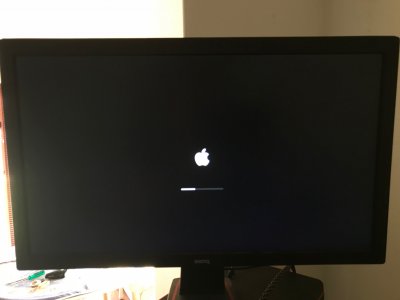
Here are a few more screenshots from that process in chronologically order.
(your can see that at one stage the screen turned to black with a white progress bar)
IMG_0170.jpg
IMG_0173.jpg
IMG_0174.jpg

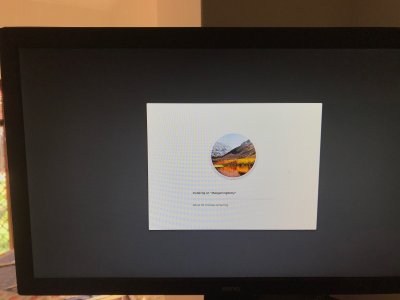
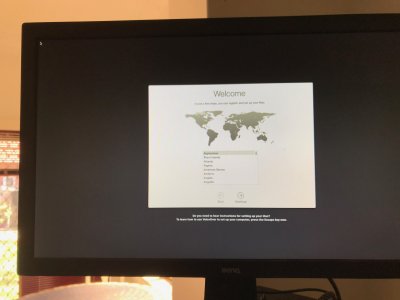
Until finally you come to this screen where you get to choose your country
(note: i had a spinning ball cursor for a minute at this screen - just wait if this happens it will past).

IMG_0182.jpg

After that you have keyboard selection - migration assistant - apple-id - software license agreement - create computer account and then you get to your High Sierra Desktop
IMG_0192.jpg
 
Last edited:
Step 5: Post Installation

At this stage quite a lot is already working
just need to fix up a few things

EFI copy to your SSD/EFI

Downloaded clover configurator 4.60.3.4​
using clover configurator
Mounted the EFI partition of High Sierra on SSD.
Mounted the EFI partition of USB installer
copied the EFI folder from USB installer EFI to High Sierra EFI.


Fix up USB ports
make a custom SSDT for usbinjectall.kext and copy the custom SSDT-UIAC.aml file to EFI/EFI/CLOVER/ACPI/patched
to do this use my guide at following link
https://www.tonymacx86.com/threads/...3-4-custom-ssdt-for-usbinjectall-kext.249486/
this will copy USBinjectAll to S/L/E
and so you can remove USBInjectall from your SDD EFI/EFI/CLOVER/KEXTS/other
reboot and check if all working

Fix up built in sound
at the moment no sound device working

  • copy Lilu.kext to EFI/EFI/Clover/Kexts/other
(An open source kernel extension bringing a platform for arbitrary kext, library, and program patching throughout the system for macOS. it has a number of plugins that need Lilu to work. AppleALC.Kext needs Lilu.kext to work)
you can find lilu.kext here
https://github.com/vit9696/Lilu/releases
  • copy AppleALC.Kext (at the time of writing this is version 1.2.6) to EFI/EFI/Clover/Kexts/other
you can find AppleALC.kext releases here
https://github.com/vit9696/AppleALC/releases
  • add Patch HDAS to HDEF (you can use clover configurator to edit your config.plist for this patch)
HDAS to HDEF patch in cloverconfigurator.png
  • reboot
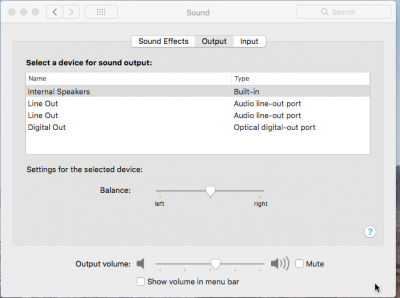
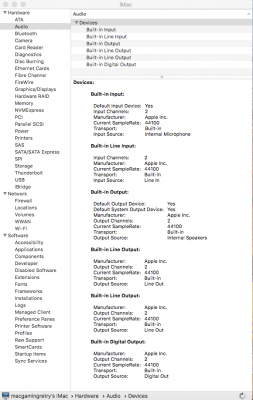
  • sound devices added and working
soundpreference inbuilt working.png aboutthismacsound.png
Update: Nvidia Sound (after installing GTX970 see post below)

Nvidia sound over HDMI and Displayport should work using NvidiaGraphicsFixup.kext (Lilu plugin)
however in 10.13.4 this does not work anymore
there is a workaround

https://www.tonymacx86.com/threads/applehda-hdmi-audio-guide.234735/#post-1606787

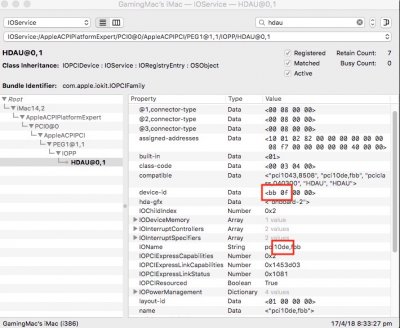
find your device in IORegistryExplore search for hdau.
in my case
device id: bb 0f
IOname : 10de

so replace hex DE100B0E with hex DE10BB0F in AppleHDAController.kext
use either plisteditorPro or Clover Configurator to add a line to KextstoPatch in Kernel and Kext Patches in your config.plist

ioregistryhdmiaudio deviceid for 10.13.4 - bb 0f copy.jpg Nvidia hdacontroller patch 10.13.4.jpg


Last edited:
Step 5: Post Installation (Continued)


Fix up Intel Graphics
(note 24/1/19 intel graphics fixup has been superseded by whatevergreen)
So at this stage I only had Intel internal graphics working.​
We can make that work a little better with​
  • copy Intel graphicsFixup Kext to EFI/EFI/Clover/Kexts/other
Intel graphicsFixup Kext is another plugin for Lilu.kext. So Lilu.kext needs to be installed but we already did for AppleAlc.kext​
you can find Intel graphicsFixup Kext releases here​

Fix up Nvidia Graphics

Remember that I removed my Nvida GTX970 to install High Sierra.​
Now it is time to prepare for installation of GTX970​
  • copy EmuVariableUefi-64.efi to EFI/EFI/CLOVER/drivers64UEFI
you can download here:​
or use multibeast to copy it in see​
Emulated NVRAM is required for support of NVIDIA Web Drivers on many desktop systems. Use MultiBeast to install Bootloaders > Clover UEFI Boot Mode + Emulated NVRAM. This allows for menu bar switch between NVIDIA Web Drivers and OS X Default Graphics Drivers
.​
emuvariablesuefi64 added to drivers on efi.png


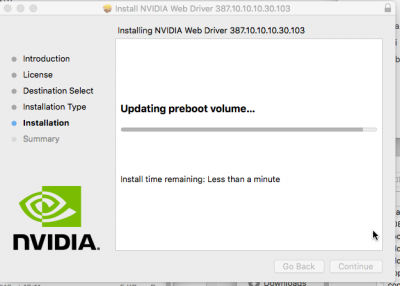
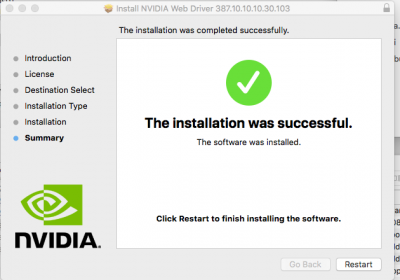
  • Install web driver
Download latest package for 10.13.4​
Installed package​
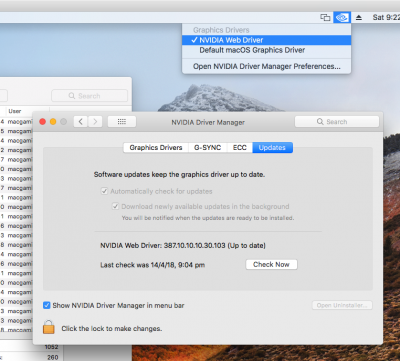
nvidiawebpackageinstall.png nvidia updating preboot.png nvidia succesfull.png


  • System Parameters Nvidiaweb
use Clover Configurator or PlistEditorPro to change config.plist​
in CloverConfigurator just tick the NvidiaWeb box and save​
cloverconfigurator ticknvidiaweb.png

  • in Clover Configurator or use PlistEditorPro to remove the nv_disable=1 bootflag
nvidia - unclicked nvdisable  clover configurator .png

NvidiaGraphicsFixUp.Kext is another plugin for Lilu.kext.​
(note 24/1/19 nvidia graphics fixup has been superseded by whatevergreen)
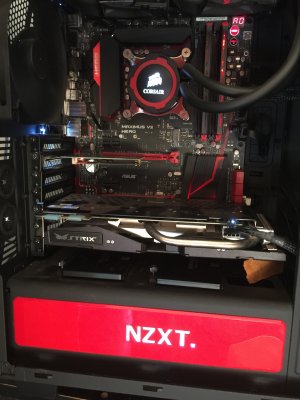
  • time to physically install my card and reboot the system, and see if it all works. -- it does
graphicscard install.jpg nvidiawebpreference and selectionpane.png
END NOTES
This is where I leave the comprehensive guide at the moment,​
just briefly an overview of what also works:​
  • iMessage working properly
  • HWmonitor and HWsensor kext installed
  • dual booting with Windows 10
  • custom logo for About This Mac
Still needs to be done​
  • I am waiting for my Broadcom BT/Wifi card to arrive the get airdrop and handover to work
  • maybe camera/face time
 
Last edited:
Hello,

Would you know how to make the secure boot option in bios editable? Mine , on a maximus viii ranger, is currently set at Enabled, but it is grayed out, not Editable. I am currently not able to install High Sierra, but El Capitan is working correctly on this hack.
Thanks.
 
Hello,

Would you know how to make the secure boot option in bios editable? Mine , on a maximus viii ranger, is currently set at Enabled, but it is grayed out, not Editable. I am currently not able to install High Sierra, but El Capitan is working correctly on this hack.
Thanks.
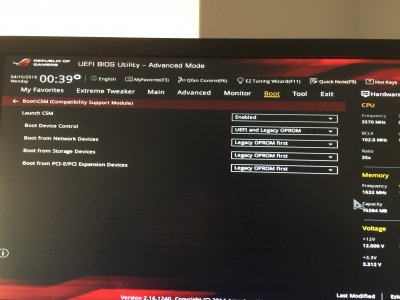
most likely you have not enabled CSM (compatibility support module)
goto BOOT
arrow down to CSM
press enter
Launch CSM
Enabled

not sure if you have this option under Maximus vii ranger

IMG_7306.jpg


IMG_7310 copy.jpg
 
Thanks. I have checked , there are these menu options on the maximus viii ranger bios, and the Launch CSM is already Enabled.
Trying to google this currently , but to no avail yet.

My current issue is that I am getting the Stop sign in the initial installation stages. In verbose mode, I get the Still waiting for boot device , before getting the Prohibited logo and the screen gets garbled.
 
Just found it out :first set OS type to windows UEFI , then clear keys, then secure boot becomes disabled. The set back OS type to others.
However still getting the Prohibited issue. Trying other solutions right now. Thanks anyway.
 
Just found it out :first set OS type to windows UEFI , then clear keys, then secure boot becomes disabled. The set back OS type to others.
However still getting the Prohibited issue. Trying other solutions right now. Thanks anyway.
was just going to post as well - regarding clear secure keys - you beat me to it.:)

Open a new thread on Forum with your problem under High Sierra Desktop Support. and add as much info as possible to the post.
That way we can see if we can help and keep all info on the one thread.
 
Status
Not open for further replies.
Back
Top