- Joined
- May 10, 2011
- Messages
- 2,923
- Motherboard
- Gigabyte B550 Vision D
- CPU
- Ryzen 5900X
- Graphics
- RX 6800
- Mac
- Classic Mac
- Mobile Phone
This is a guide for installing OSX Sierra 10.12.6 onto the Asus Z270 Prime A boot using a Samsung 1TB 960 EVO PCIE NVME and a Nvidia GTX 1070 Ti card. If you don't have a NVME card or a Nvidia card this guide can still work for you - simply bypass those steps.


COMPONENTS
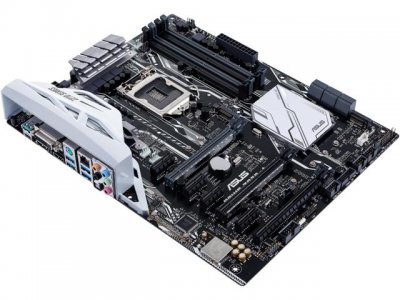
- Asus Z270 Prime A board
- 32GB 2400MHz DDR4 RAM
- Intel Core i7 7700 3.4GHz Chip
- Inno3D GTX 1070 Graphics
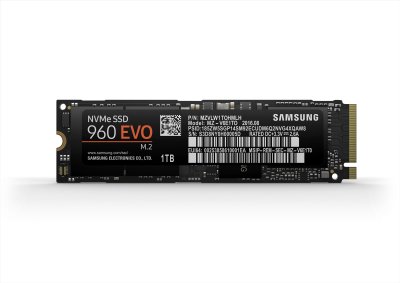
- Samsung 1TB 960 EVO PCIE NVME
- ADATA SP900 256GB SSD
- 650W Kaby Lake-compatible Cooling Fan
- Coolermaster PC Case
- 16GB USB Key (for Unibeast)
- Spare Hackintosh/Mac (for editing if necessary)
- USB 3.0 external slot drive (for copying/editing files and data)
- Superduper or Carbon Copy Cloner (for cloning drives)
- Windows 10 installation on spare SSD/HD or NVMe drive
What works
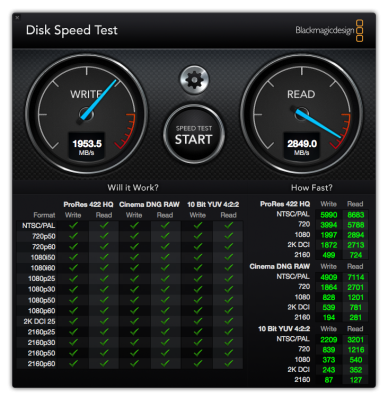
NVME detection and bootup
Nvidia Web Graphics Driver
USB 3.1, 3.0 & 2.0 (hot-plugging and eject on USB 3.1 works)
Thunderbolt 1, 2 & 3
Full sound with volume adjustment
Full screen 1040P
Video playback (updated 13/12/17 works - to enable you need to install Nvidia driver for relevant OSX update at least 2-3 times)
Ethernet
What doesn't
Bluetooth
SETUP
1) For preparations beforehand, make sure the BIOS settings are Hackintosh-compatible ie.
set to UEFI OS Booting mode on, AHCI on, VT-d disabled etc. You can follow Margate's guide
for the Asus Z270 Prime A here
2) Download the latest Unibeast and Multibeast for Sierra from Tonymacx86.
Connect system via Intel HDMI port to monitor.
3) Make a bootable Unibeast USB Key and install Sierra 10.12.6 following the site's guide.
To simplify the installation I used an ADATA 256GB SSD to perform the install before
later cloning it to the NVME via Superduper.
4) Hold DEL to go into Boot. Set in BIOS:
Advanced Settings > CPU Configuration > Intel Virtualisation Technology - Enabled
Advanced Settings > Onboard Devices Configuration > RGB LED Lighting - Off
Advanced Settings > Onboard Devices Configuration > Serial Port Configuration > Serial Port - Off
Advanced Settings > CPU Configurations > VT-d - Disabled
Advanced Settings > USB Configuration > XHCI Hand-off=Enabled
Advanced Settings > Boot > Secure Boot - Secure boot state disabled (How to Disable or Enable Secure Boot for ASUS Motherboard)
OS Type=Other OS
Advanced Settings > Boot > CSM Compatibility Support Module > Launch CSM - Enable
Advanced Settings > Boot > CSM Compatibility Support Module > Boot Device Control - UEFI and Legacy OPROM
Advanced Settings > Boot > CSM Compatibility Support Module > Boot from Storage Devices - UEFI
Advanced Settings > Boot > Above 4G Decoding - Enabled
(This is crucial to getting past the plus signs on boot up)
Advanced Settings > System Agent (SA) Configuration > Graphics > Primary Display > Auto
(Auto setting should work in most situations until first set of Nvidia alternate drivers is installed where you should then use PEG).
5) Boot into Sierra using Safe Mode ie. spacebar at prompt, then select Verbose, Safe Mode & Debug 0x100 (Don't reboot at panic)
6) Install and run Multibeast with the following settings:
UEFI Boot Mode
FakeSMC
IntelMausiEthernet 2.30
USB Increase Port Limit 200 Series
Clover v2.4K r4334 UEFI Boot Mode
iMac 18,3 Definition
If setting up the Nvidia card, proceed below (do not reboot).
Otherwise reboot.
Intel Card Setup
1) After reboot, set card to IGFX in Bios under Advanced Settings > System Agent (SA) Configuration > Graphics > Primary Display > IGFX
2) Safe boot into OSX ie. verbose, safe boot, slide=0, nv_disable=1
3) Set and mount boot drive EFI folder using Clover Configurator:
ACPI > Fix Shutdown
Boot > darkwake=0, dart=0, kext-dev-mode-1
Devices > Fake ID > 0x0 (fill this in all fields)
Devices > Add Properties > Device - IntelIGFX
Devices > Add Properties > Key - AAPL,GfxYTile
Devices > Add Properties > Value - 00AAAAA00
Devices > Add Properties > Value Type - Data
Graphics > Inject Intel & add ig-platform-id 0x5912000
RT Variables > Change CSRActiveConfig to 0x67 and BooterConfig to 0x28
SMBIOS > Add serial number (use An iDiot’s Guide to iMessage)
System Parameters > Check Inject System ID. Also add system UUID.
Drivers > Add Emuvariableuefi
NVRAM > Check NVRAM emulation and select Boot Volume
Kernel and Kext Patches >
4) Install latest Lilu.kext and IntelGraphicsFixup.kext using Clover Configurator.
5) Reboot
6) Set IGFX as primary display in BIOS.
Nvidia (Pascal) Card Setup
Setup for Pascal cards in Sierra 10.12.6 is rather tricky. Because it is a fairly lengthy process it is advised you leave your PC case open with the SSD drive accessible in case you need to remove it and modify the EFI folder of the boot drive on another computer using the external USB slot drive.
1) Advanced Settings > System Agent (SA) Configuration > Graphics > Primary Display > PEG
2) Set and mount boot drive EFI folder using Clover Configurator:
ACPI > Fix Shutdown
Boot > darkwake=0, dart=0, kext-dev-mode-1
Devices > Fake ID > 0x0 (fill this in all fields)
Devices > Add Properties > Device - IntelIGFX
Devices > Add Properties > Key - AAPL,GfxYTile
Devices > Add Properties > Value - 00AAAAA00
Devices > Add Properties > Value Type - Data
Graphics > Inject Intel & add ig-platform-id 0x5912000 (if you have difficult booting, remove after installing Nvidia driver. Also make sure all fields are unchecked under Graphics once first set of Nvidia drivers are installed)
RT Variables > Change CSRActiveConfig to 0x67 and BooterConfig to 0x28
System Parameters > Check Nvidiaweb and Inject System ID. Also add system UUID.
Drivers > Add Emuvariableuefi
NVRAM > Check NVRAM emulation and select Boot Volume
Kernel and Kext Patches >
Install procedure:
1) After installing Sierra and/or Clover and Multibeast onto the boot drive, with the Nvidia card removed boot using Unibeast 10.12.6 stick into your drive using the following arguments > verbose, safe mode slide=0, nv_disable=1, debug=0x100 (Don't panic at reboot) using Intel HDMI port. You should be able to boot into Sierra and then install the first set of Nvidia alternate drivers (WebDriver-378.05.05.25f01 to WebDriver-378.05.05.25f04) and the latest Lilu.kext, Nvidiagraphicsfixup.kext and Intelgraphicsfixup.kext into /S/L/E using Kext Beast or Kext Utility. Also install clover v.2.4_ r4318, and under select Customize and select to install the EmuVariableUefi-4 and the optional RC script to the boot drive. After the installs, shut down the system, and physically install the Nvidia card with power cable.
2) Boot using Nvidia card on HDMI port on your drive. If necessary boot using PEG option in BIOS. Using normal boot option it should boot straight into the system. If it doesn't, select Verbose, slide=0, darkwake=0 or verbose, slide=0, nv_disable=1 and darkwake=0. Add debug=0x100 if further boot problems occur. Another option to use if boot fails is verbose, slide=0, darkwake=0 and/or with safe mode.
3) Boot into OSX and update OSX to the next update and install corresponding Nvidia alternate driver update. Install Nvidiagraphicsfixup.kext into /S/L/E. Select Nvidia to boot with Web Driver in the taskbar. Restart system.
4) Repeat step 2 until WebDriver-378.05.05.25f03 and WebDriver-378.05.05.25f04 are installed. Also install Nvidia CUDA drivers. Just make sure SIPs is disabled. When it is all done, simply select your drive at Clover bootup (which should only have darkwake=0, kext-dev-mode=1 and dart=0) and it should boot straight in without any issues. If you have installed the latest Nvidiagraphicsfixup.kext and shiki.kext into EFI/Clover/kexts/Other add shikigva=4 as a boot argument to enable hardware encoding/decoding.

Audio Setup
To setup audio on the Asus board which uses a Realtek ALC1220A, you need to download Toleda's CloverALC audio package and add Rehabman's CodecCommander.kext into /S/L/E. Unzip it and install using KextBeast or Kext Utility. With Toleda's config-audio_cloverALC-130.plist, copy the relevant strings to add to ACPI and KextsToPatch in Clover:
ACPI
Code:
            <key>Name</key>
            <string>dsdt.aml</string>
            <key>Patches</key>
            <array>
                <dict>
                    <key>Comment</key>
                    <string>100/200series-Rename HDAS to HDEF</string>
                    <key>Disabled</key>
                    <false/>
                    <key>Find</key>
                    <data>
                    SERBUw==
                    </data>
                    <key>Replace</key>
                    <data>
                    SERFRg==
                    </data>
                </dict>
                <dict>
                    <key>Comment</key>
                    <string>Azalia - Rename AZAL to HDEF</string>
                    <key>Disabled</key>
                    <false/>
                    <key>Find</key>
                    <data>
                    QVpBTA==
                    </data>
                    <key>Replace</key>
                    <data>
                    SERFRg==
                    </data>
                </dict>
            </array>
KextsToPatch
Code:
        <key>KextsToPatch</key>
        <array>
            <dict>
                <key>Comment</key>
                <string>10.12-AppleHDA/Realtek ALC1220A</string>
                <key>Disabled</key>
                <false/>
                <key>Find</key>
                <data>
                ixnUEQ==
                </data>
                <key>Name</key>
                <string>AppleHDA</string>
                <key>Replace</key>
                <data>
                aBHsEA==
                </data>
            </dict>
            <dict>
                <key>Comment</key>
                <string>200_Series-X299_ Audio_Controller</string>
                <key>Disabled</key>
                <false/>
                <key>Find</key>
                <data>
                PXCh
                </data>
                <key>Name</key>
                <string>AppleHDAController</string>
                <key>Replace</key>
                <data>
                PfCi
                </data>
            </dict>
        </array>
    </dict>
In Clover Configurator under Devices, select Audio Inject ID 1 and check Reset HDA. On reboot the system should detect the card.
NVME Setup
1) Install NVMe into case. Make sure it is enabled in the BIOS.
2) Boot into system. Go to Go in Finder desktop and select Go > Go To Folder. Type in '/System/Library/Extensions' and press Enter. Copy IONVMEFamily.kext from /S/L/E. Save file to Desktop.
3) Download RehabMan's NVMe script for OSX Sierra from here. cd to the extracted location and run patch for 10.12.6 in Terminal with argument that corresponds to the plist you wish to patch with eg.:
Code:
./patch_nvme.sh 10_12_6_16G1114Once that is done, a file will be produced ie. HackNVMeFamily-10_12_6_16G1114.kext. Using Clover Configurator, mount into the EFI partition and save it into EFI/Clover/kexts/10.12/
5) Open Textedit and open the corresponding KextsToPatch content for Sierra in the patch-nvme-master folder you need to add to the Clover config.plist file found in EFI/Clover/ in your EFI partition as well as the config.plist in your EFI partition. Copy the content from the relative patches file ie. NVMe_patches_10_12_6_16G1114.plist (starting from and including the two dicts in angled brackets) and paste them into your config.plist under the KextsToPatch section. If it is done correctly, opening the config.plist under Clover should reveal a list of items listed under IONVMEFamily in the KextsToPatch section.
6) Add NVMEExpress driver in Clover Configurator under Driver. Also add Enable TRIM for SSD patch under Kernel and Kexts Patches.
7) Save the updated config.plist file and reboot system. Upon reboot you should see the NVMe ready.
8) Clone SSD to the NVMe using Superduper or Carbon Copy Cloner.
Thunderbolt 3 & USB 3.1 Setup
I have enabled TB on my Asus Z270 Prime A. For the Asus boards it is a three step process of installing the hardware and software, upgrading the firmware in Windows and then activating the setup in Sierra which I am only outlining here. If you want the full detailed process from the original posters (which includes instructions on pulling the plug and powering the system off to let the capacitors die out) I suggest you google 'How to install Asus Thunderbolt 3 card on an Asus X99 MB'.
USB 3.1 Setup
1) Make sure latest USBInjectAll.kext is in EFI/Clover/kexts/Others
2) Make sure XHCI-200-series-injector.kext is in EFI/Clover/kexts/Others
3) Add AppleUSBXHCIPCI as patch in Clover Configurator as below. :
(note add these other patches as they are also required)
Thunderbolt 3 Setup
1) Save the current system BIOS profile by going to Advanced > Tool Load/Save Profile. Stick the Unibeast USB into the port and save the profile as 1 and a name for the file e.g. ASUS-PRIME-TBOFF.
2) Uninstall any existing Asus Thunderbolt apps on the Windows system. Make sure Windows 10 is fully updated.
3) Update the latest Windows Intel chipset drivers for the Asus motherboard.
4) Reboot to the OS. Wait for it to fully come up.
5) Reboot to the BIOS and turn off Thunderbolt under Advanced > Thunderbolt Configuration.
6) Shutdown. Note: Remove the power cord from the PSU. Press the power button a few times and/or just wait a bit until all the capacitors have been discharged.
7) Set to default bios or Load optimal default settings. NOTE: If you are using any type of RAID make sure to change the Advanced \ PCH Storage Configuration \ SATA Controller 1 Mode Selection back to RAID. If you do not change it and you boot to windows, you will lose your RAID and have to rebuild it, or fix it separately.
8) Google and download a file called Intel_Thunderbolt_Win7-81-10_V15339250.zip online. This is the firmware for the
Asus Thunderbolt EX3 card.
9) Using Windows, unzip the files and right-click install the series of .INF files in sequence, a total of 6 files. ie. tb70i.inf, tb70x.inf, tb81x.inf
10) Install the Asus TB tool from the CD, reboot to the OS and wait for it to come up.
11) Pull power cable and shutdown for over 30 secs.
12) Install card into lowest slot near bottom header (PCIE EX16_3) as well as header, and then restart back into Windows.
13) Shutdown Windows and restart into system BIOS. Enable all the TB options in the BIOS (switch to either Enabled or On) and connect to the bottom PCIE slot with the header cable. Make sure 3rd PCIE slot PCI-EX16_3 is selected in BIOS under Advanced Settings > Thunderbolt (TM) Configuration. Save the profile as no.2 ASUS-PRIME-TB-ON.
14) Boot into Windows and run the Asus TB tool. It should see the TB card. Once that is confirmed running with the card detected, install the firmware update software Intel_Thunderbolt_Win7-81-10_V15339250.zip (decompress it first into a folder). Once that is completed you need to reboot (perhaps a few times) and that should allow your system to see the drives, but the TB support for oprom and some other settings must be disable for OSX to see the drive (and it must be connected at boot time).
15) Exit and shutdown Windows. Install TB drives onto end of the EX3 card and boot with OSX. If your drives or peripherals are Mac formatted or compatible they should be visible on Sierra.
Thunderbolt on other systems
For users with other Z170 or Z270 boards including Gigabyte you could perhaps try the methods listed here > https://www.tonymacx86.com/threads/...3-test-build-ga-z170x-ud5-th-i5-6600k.199242/
Last edited:
