- Joined
- Mar 8, 2017
- Messages
- 20
- Motherboard
- Gigabyte Z170X Designaire
- CPU
- Intel i7 6600K
- Graphics
- GTX 1070
- Mac
- Mobile Phone
I recently installed 10.13.6 and everything was fine except my USB ports--external drives didn't seem to work.
Read here to install “Remove XHCI USD Port Limit” and “USB Inject All” with Multibeast, did that, and now my PC restarts during boot.
Things I've tried:
- Can get in with safe mode, unsure how to troubleshoot from there without access to EFI.
- Tried going back to 10.13.4 via internal time machine backup.
- Wiped and reinstalled 10.13.6 from external CCC backup.
- Tried connecting directly via thunderbolt.
- Tried connecting the SSD via usb to macbook, nothing showed up.
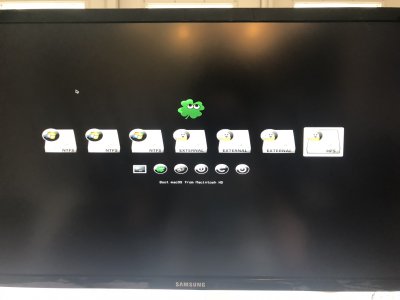
- Created new USB bootable drive. Install was successful, but stuck on loading bar.
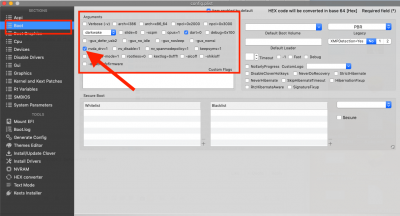
I have access to my current and old config.plist, EFI backups, but I'm not sure what to fix or where to go from here.
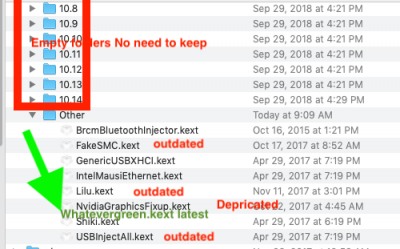
Also, I have the ability to delete kexts from the EFI with my windows 10 drive (dual boot), but I'm not sure which kexts to delete. Viewing it from Windows, the "Other" folder seems to be full of kexts matching my 10.13.4 build, while the "10.13" folder is blank and the "10.14" folder has a bunch of new kexts. I'm sure that has something to do with it.
Any help or links I should try?
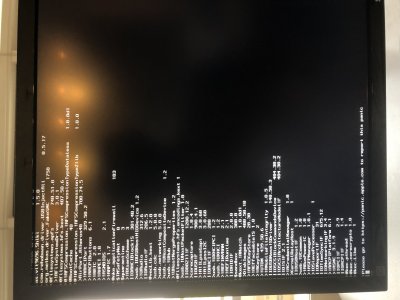
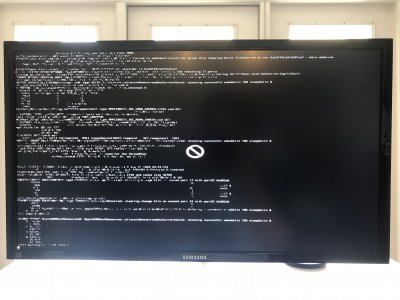
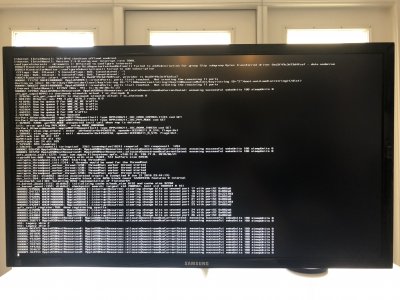
Please see config.plist and verbose mode screenshot attached.
Read here to install “Remove XHCI USD Port Limit” and “USB Inject All” with Multibeast, did that, and now my PC restarts during boot.
Things I've tried:
- Can get in with safe mode, unsure how to troubleshoot from there without access to EFI.
- Tried going back to 10.13.4 via internal time machine backup.
- Wiped and reinstalled 10.13.6 from external CCC backup.
- Tried connecting directly via thunderbolt.
- Tried connecting the SSD via usb to macbook, nothing showed up.
- Created new USB bootable drive. Install was successful, but stuck on loading bar.
I have access to my current and old config.plist, EFI backups, but I'm not sure what to fix or where to go from here.
Also, I have the ability to delete kexts from the EFI with my windows 10 drive (dual boot), but I'm not sure which kexts to delete. Viewing it from Windows, the "Other" folder seems to be full of kexts matching my 10.13.4 build, while the "10.13" folder is blank and the "10.14" folder has a bunch of new kexts. I'm sure that has something to do with it.
Any help or links I should try?
Please see config.plist and verbose mode screenshot attached.