- Joined
- Aug 18, 2010
- Messages
- 83
- Motherboard
- GA-Z87X-UD5 TH
- CPU
- Core i7-4790K @4.6Ghz
- Graphics
- MSI GTX 760 2GB 1084Mhz
- Mac
- Classic Mac
- Mobile Phone
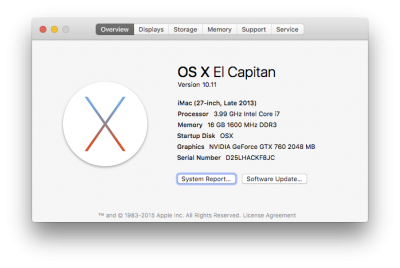
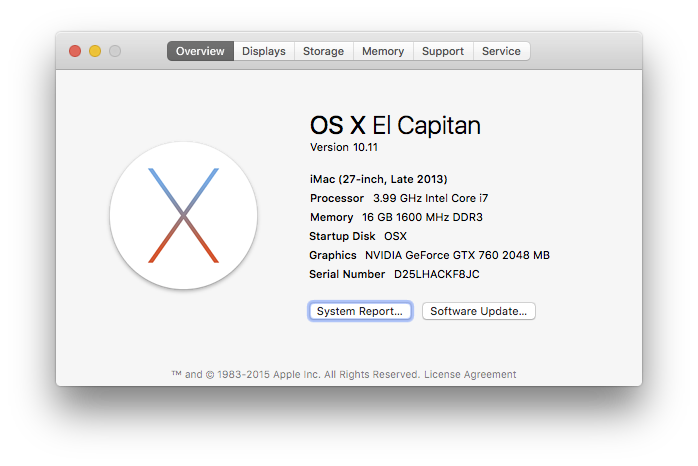
Shinew’s El Capitan Build: GA-Z87X-UD5 TH / i7-4790K OCd 4.6Ghz / 16GB RAM / GTX 760 / 10.11
|COMPONENTS|
Intel Core i7-4790K Processor
http://www.amazon.com/gp/product/B00KPRWAX8
Gigabyte GA-Z87X-UD5 TH LGA 1150 Intel Z87 Dual Thunderbolt Ports Wi-Fi/BT4.0 ATX DDR3 2600 Motherboard
http://www.amazon.com/gp/product/B00GEUX9SU
Crucial Ballistix Sport 16GB Kit (8GBx2) DDR3 1600
http://www.amazon.com/gp/product/B006YG9EEW
MSI NVIDIA GeForce GTX 760 OC 2GB GDDR5 2DVI/HDMI/DisplayPort PCI-Express Video Card
http://www.amazon.com/gp/product/B00DIH8OW8
CORSAIR Enthusiast Series TX650 650W Power Supply
http://www.amazon.com/CORSAIR-Enthusiast-Series-TX650-Supply/dp/B00EZ7Q1FC
Noctua NH-D14 CPU Cooler
http://www.amazon.com/Noctua-NH-D14-Cooler-140x140x25mm-Corei7/dp/B008J49H4E
Apple Wireless Keyboard
http://www.amazon.com/Apple-Wireless-Keyboard-MC184LL-B/dp/B005DLDO4U
Seagate 600 SSD 240 GB SATA 6 Gb/s SSD
http://www.amazon.com/CORSAIR-Enthusiast-Series-TX650-Supply/dp/B00EZ7Q1FC
SAMSUNG 830 Series 2.5-Inch 128GB SSD
http://www.amazon.com/SAMSUNG-2-5-Inch-Internal-MZ-7PC128B-WW/dp/B0077CR60Q
4x more HDs for Windows 7, storage & backup
|COMMENTS|
This is pretty much a software upgrade from my previous Maverick Built here: http://www.tonymacx86.com/user-buil...-6ghz-16gb-ram-gtx-760-maverick-10-9-5-a.html
All the hardware(1 year old) and BIOS settings are identical. I skipped Yosemite all together and yesterday saw El Capitan came out and decided that it's time to upgrade. I've never used Clover install before and last night Unibeast wasn't available, so my method might not be the best or the quickest, I'm just posting what has worked for me and hope it'll be some help to people.
|PREPARATION|
Pretty straight forward, have the following ready:
only the ones I’ve changed are listed, the rest are left to default. For overclocking , check out the Overclocking section further down
Preparing Bootable USB Drive
1. Insert USB Drive then open Disk Utility
2. Select the USB Drive -> Partition -> choose 1 Partition
3. Click on Options -> choose GUID Partition Table
4. Set the format to Mac OS Extended ( Journaled) & under name type "USB"
5. Click Apply then Partition
6. Open the Terminal app, copy & paste the following
7. Hit Enter and wait for it to finish
8. Open Clover Package Installer, at Installation Type, click on Change Install Location and set it to the USB Drive you've just created then click on Continue
9. Click on Customize and check the following then click Install

 10. Open Finder and navigate to your EFI drive's /CLOVER directory and replace default config.plist with attached config.plist
11. Go to the Download Kexts section of this site to download AppleIntelE1000, FakeSMC & NullCPUPowerManagement and copy them to the /Volumes/EFI/EFI/CLOVER/kexts/10.11/ folder
12. Download & copy the HFSPlus.efi to /Volumes//EFI/EFI/CLOVER/drivers64UEFI/, then remove VBoxHfs-64.efi
|INSTALLATION|
Reboot using the USB drive you've just created and follow the on screen instruction for installation.
Note: if you're stuck on "about a second remaining", as long as the mouse is still moving, WAIT! it took me ~15-20min to get past that screen, it'll reboot when it's done.
|POST INSTALLATION|
1. Open Clover Package Installer again, choose Customize at Installation Type and Check the Following

 2. Click Install and then you should be able to boot from the internal HD/SSD
Sound
1. Download audio_cloverALC-100.command.zip, Click on Raw to download
2. Unzip then double click Downloads/audio_cloverALC-110_v1.0b to apply the patch
3. Restart and your sound should be working now
Power Management
PM should be working as is, use Intel Power Gadget to check

Wifi & Bluetooth
For the onboard AzureWave AW-CB123H card, install the Following Kexts:
USB 3.0
Working out of the box
iMessage/iCloud/Facetime
It's working out of the box for me. If it's not working for you, give the following instruction a try, as it has fixed my Facetime problem in my previous Maverick Installation
Sleep & Wake
You'll need to disable both WoL in the BIOs and in Energy Saver. In system preference's Energy Saver, I only have the first one checked

OVERCLOCKING
I actually have no need to overclock but if it's "free" boost, why not...") So my approach to this is to see how fast I can push the i7-4790K without any additional hardware with minimum vcore voltage added(under 1.2v). I won't go into detail to explain the overclocking process since it's beyond the scope of this post. But I'll list my settings:
So my approach to this is to see how fast I can push the i7-4790K without any additional hardware with minimum vcore voltage added(under 1.2v). I won't go into detail to explain the overclocking process since it's beyond the scope of this post. But I'll list my settings:
|BENCHMARK|


|PHOTOS|
.jpg")
.jpg")
.jpg")
|CREDITS|
All the credits go to Tonymacx86.com and all the posters from other sites for their hardwork and sharing of their findings. Without them I would not be able to have a successful build as I merely just gathered all the info.
shinew's El Capitan Build:
GA-Z87X-UD5 TH / i7-4790K OCd 4.6Ghz / 16GB RAM / GTX 760 / El Capitan 10.11

GA-Z87X-UD5 TH / i7-4790K OCd 4.6Ghz / 16GB RAM / GTX 760 / El Capitan 10.11
|COMPONENTS|
Intel Core i7-4790K Processor
http://www.amazon.com/gp/product/B00KPRWAX8
Gigabyte GA-Z87X-UD5 TH LGA 1150 Intel Z87 Dual Thunderbolt Ports Wi-Fi/BT4.0 ATX DDR3 2600 Motherboard
http://www.amazon.com/gp/product/B00GEUX9SU
Crucial Ballistix Sport 16GB Kit (8GBx2) DDR3 1600
http://www.amazon.com/gp/product/B006YG9EEW
MSI NVIDIA GeForce GTX 760 OC 2GB GDDR5 2DVI/HDMI/DisplayPort PCI-Express Video Card
http://www.amazon.com/gp/product/B00DIH8OW8
CORSAIR Enthusiast Series TX650 650W Power Supply
http://www.amazon.com/CORSAIR-Enthusiast-Series-TX650-Supply/dp/B00EZ7Q1FC
Noctua NH-D14 CPU Cooler
http://www.amazon.com/Noctua-NH-D14-Cooler-140x140x25mm-Corei7/dp/B008J49H4E
Apple Wireless Keyboard
http://www.amazon.com/Apple-Wireless-Keyboard-MC184LL-B/dp/B005DLDO4U
Seagate 600 SSD 240 GB SATA 6 Gb/s SSD
http://www.amazon.com/CORSAIR-Enthusiast-Series-TX650-Supply/dp/B00EZ7Q1FC
SAMSUNG 830 Series 2.5-Inch 128GB SSD
http://www.amazon.com/SAMSUNG-2-5-Inch-Internal-MZ-7PC128B-WW/dp/B0077CR60Q
4x more HDs for Windows 7, storage & backup
|COMMENTS|
This is pretty much a software upgrade from my previous Maverick Built here: http://www.tonymacx86.com/user-buil...-6ghz-16gb-ram-gtx-760-maverick-10-9-5-a.html
All the hardware(1 year old) and BIOS settings are identical. I skipped Yosemite all together and yesterday saw El Capitan came out and decided that it's time to upgrade. I've never used Clover install before and last night Unibeast wasn't available, so my method might not be the best or the quickest, I'm just posting what has worked for me and hope it'll be some help to people.
|PREPARATION|
Pretty straight forward, have the following ready:
- Download El Capitan Installation from the App Store, then get the latest Clover from Sourceforge http://sourceforge.net/projects/cloverefiboot/?source=typ_redirect
- A USB flash drive: one 8GB or larger USB stick for installation and one for flashing to the latest (beta)BIOS
- Download the latest BIOS F5d(as of 10/9/14) from Gigabyte Here http://www.gigabyte.com/products/product-page.aspx?pid=4593#bios, flash to the latest using Q-Flash in the BIOS.
only the ones I’ve changed are listed, the rest are left to default. For overclocking , check out the Overclocking section further down
- Load optimized default
- Advanced CPU Core Settings -> Turbot Boost: Disabled
- Advanced CPU Core Settings -> C1E: Disabled
- Advanced CPU Core Settings -> XMP: Profile 1
- BIOS Features -> VT-d: Disabled
- Peripherals -> XHCI Hand-off: Enabled
- Peripherals -> EHCI Hand-off: Enabled
- Peripherals -> Thunderbolt -> Security Level: Legacy Mode
Preparing Bootable USB Drive
1. Insert USB Drive then open Disk Utility
2. Select the USB Drive -> Partition -> choose 1 Partition
3. Click on Options -> choose GUID Partition Table
4. Set the format to Mac OS Extended ( Journaled) & under name type "USB"
5. Click Apply then Partition
6. Open the Terminal app, copy & paste the following
Code:
sudo /Applications/Install\ OS\ X\ El\ Capitan.app/Contents/Resources/createinstallmedia --volume /Volumes/USB --applicationpath /Applications/Install\ OS\ X\ El\ Capitan.app --nointeraction8. Open Clover Package Installer, at Installation Type, click on Change Install Location and set it to the USB Drive you've just created then click on Continue
9. Click on Customize and check the following then click Install
11. Go to the Download Kexts section of this site to download AppleIntelE1000, FakeSMC & NullCPUPowerManagement and copy them to the /Volumes/EFI/EFI/CLOVER/kexts/10.11/ folder
12. Download & copy the HFSPlus.efi to /Volumes//EFI/EFI/CLOVER/drivers64UEFI/, then remove VBoxHfs-64.efi
|INSTALLATION|
Reboot using the USB drive you've just created and follow the on screen instruction for installation.
Note: if you're stuck on "about a second remaining", as long as the mouse is still moving, WAIT! it took me ~15-20min to get past that screen, it'll reboot when it's done.
|POST INSTALLATION|
1. Open Clover Package Installer again, choose Customize at Installation Type and Check the Following
Sound
1. Download audio_cloverALC-100.command.zip, Click on Raw to download
2. Unzip then double click Downloads/audio_cloverALC-110_v1.0b to apply the patch
3. Restart and your sound should be working now
Power Management
PM should be working as is, use Intel Power Gadget to check
Wifi & Bluetooth
For the onboard AzureWave AW-CB123H card, install the Following Kexts:
- FakePCIID.kext
- FakePCIID_BCM94352Z_as_BCM94360CS2.kext
- FakePCIID_XHCIMux.kext(not sure if this is needed)
- BrcmPatchRAM2.kext
- BrcmFirmwareRepo.kext
USB 3.0
Working out of the box
iMessage/iCloud/Facetime
It's working out of the box for me. If it's not working for you, give the following instruction a try, as it has fixed my Facetime problem in my previous Maverick Installation
"My Facetime & Message weren't working after installation" section from insanelymac.com for troubleshooting.
http://www.insanelymac.com/forum/topic/298027-guide-aio-guides-for-hackintosh/#entry2020598
Sleep & Wake
You'll need to disable both WoL in the BIOs and in Energy Saver. In system preference's Energy Saver, I only have the first one checked
OVERCLOCKING
I actually have no need to overclock but if it's "free" boost, why not...
So my approach to this is to see how fast I can push the i7-4790K without any additional hardware with minimum vcore voltage added(under 1.2v). I won't go into detail to explain the overclocking process since it's beyond the scope of this post. But I'll list my settings:- BIOS - Multipler changed to 46
- BIOS - vcore: 1.195v
- BIOS - CPU VRIN Loadline Calibration: Medium
|BENCHMARK|
|PHOTOS|
|CREDITS|
All the credits go to Tonymacx86.com and all the posters from other sites for their hardwork and sharing of their findings. Without them I would not be able to have a successful build as I merely just gathered all the info.