- Joined
- Jul 25, 2013
- Messages
- 448
- Motherboard
- Asus X99 Deluxe
- CPU
- E5-2697v3
- Graphics
- RX 580
- Mac
- Classic Mac
- Mobile Phone
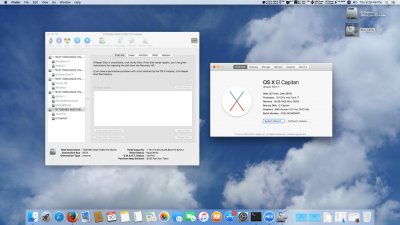
The following guide is a culmination of various sources across the internet and results in a way to run the classic, Yosemite Disk Utility app under El Capitan. I did not come up with this method, but I figured I would share it here, as it has done wonders for me. You can read the original article HERE, and I will post an abridged version below for everyone. Thanks to Justus Beyer who posted this fix initially.
There are two ways to do this:
The Easy Way - [Original]
Use the "Disk Utility (10.10).sh" script provided by "geoff-codes" on GitHub. This script downloads the 10.10 Recovery Update and copies the Disk Utility app from the update, patches it on the fly, and replaces the existing Disk Utility app.
Please note - this will leave you without an official El Capitan Disk Utility app, something not recommended. There is no reason to believe that the "old" app will stop working, but if you do not want to replace the app, please use the below method to patch the app manually.
The Manual Way - [Original]
(Note - It is recommended you follow the "Original" instructions. The below instructions are a shorter, summarized version.)
You will need:
- A Time Machine back up of your system from OS X Yosemite 10.10.5.
- The App "Hex Fiend" which can be found HERE.
- Confidence and patience.
1. Recover a copy of the Yosemite Disk Utility from a Time Machine backup and copy it to your Desktop. The Disk Utility app will be in the /Applications/Utilities folder. Enter your password when asked.
2. Right click your restored 10.10 Disk Utility app and select "Show Package Contents." Navigate into "Contents" and then "MacOS." You will see a binary file called "Disk Utility." Right click the file and open it with Hex Editor.
3. Scroll down to line 25056 and find the block that reads, "D584C00F 85440100" and change the "85" in the second line to read "84". Save the file.
4. Grant "root:wheel" control over the app. You can do this with a terminal command:
5. (optional) Copy your new Disk Utility app to your Applications folder.
No Time Machine Backup?
Method posted below by Flyinace2000:
Please note that in the "Manual Way," my instructions here are a very short, abridged version. I recommend reading the source article and following those instructions if you have any questions. The steps outlined in the original article are thorough and well-written.
Again, I did not come up with these solutions or write any of the code cited here. These instructions were posted by Justis Beyer at http://justis.berlin and geoff-codes's GitHub. If these instructions were useful to you, please let them know on their respective sites. They have certainly helped me.
There are two ways to do this:
The Easy Way - [Original]
Use the "Disk Utility (10.10).sh" script provided by "geoff-codes" on GitHub. This script downloads the 10.10 Recovery Update and copies the Disk Utility app from the update, patches it on the fly, and replaces the existing Disk Utility app.
Please note - this will leave you without an official El Capitan Disk Utility app, something not recommended. There is no reason to believe that the "old" app will stop working, but if you do not want to replace the app, please use the below method to patch the app manually.
The Manual Way - [Original]
(Note - It is recommended you follow the "Original" instructions. The below instructions are a shorter, summarized version.)
You will need:
- A Time Machine back up of your system from OS X Yosemite 10.10.5.
- The App "Hex Fiend" which can be found HERE.
- Confidence and patience.
1. Recover a copy of the Yosemite Disk Utility from a Time Machine backup and copy it to your Desktop. The Disk Utility app will be in the /Applications/Utilities folder. Enter your password when asked.
2. Right click your restored 10.10 Disk Utility app and select "Show Package Contents." Navigate into "Contents" and then "MacOS." You will see a binary file called "Disk Utility." Right click the file and open it with Hex Editor.
3. Scroll down to line 25056 and find the block that reads, "D584C00F 85440100" and change the "85" in the second line to read "84". Save the file.
4. Grant "root:wheel" control over the app. You can do this with a terminal command:
Code:
sudo chown -R 0:0 ~/Desktop/Disk\ Utility.app5. (optional) Copy your new Disk Utility app to your Applications folder.
No Time Machine Backup?
Method posted below by Flyinace2000:
Notes -Extract the "Disk Utility" app from a Combo Update using a combination of both methods:
Code:
# See: https://github.com/wdas/reposadocurl -ORL http://swcdn.apple.com/content/down...n2agnf5kiz9eed134n7y3q4c/RecoveryHDUpdate.pkg
xar -xf RecoveryHDUpdate.pkg
hdiutil attach -nobrowse RecoveryHDMeta.dmg
hdiutil attach -nobrowse "/Volumes/Recovery HD Update/BaseSystem.dmg"
cp -Rp "/Volumes/OS X Base System/Applications/Utilities/Disk Utility.app" .
1. curl -ORL http://swcdn.apple.com/content/downl...ryHDUpdate.pkg
This downloads the restore image to your home folder's directory.
2. Mount the DMG that just downloaded (RecoveryHDUpdate)
3. Mount the DMG in that DMG (BaseSystem)
4. Navigate to /Applications/Utilities/
5. Copy Disk Utility to Desktop.
Proceed w/ hex edit and permissions.
Please note that in the "Manual Way," my instructions here are a very short, abridged version. I recommend reading the source article and following those instructions if you have any questions. The steps outlined in the original article are thorough and well-written.
Again, I did not come up with these solutions or write any of the code cited here. These instructions were posted by Justis Beyer at http://justis.berlin and geoff-codes's GitHub. If these instructions were useful to you, please let them know on their respective sites. They have certainly helped me.


