- Joined
- Aug 18, 2012
- Messages
- 143
- Motherboard
- Sabertooth x79
- CPU
- Core i7-3930k
- Graphics
- EVGA GeForce GTX 670 4GB
- Mac
- Classic Mac
- Mobile Phone
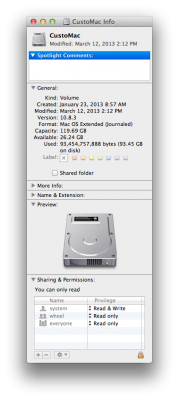
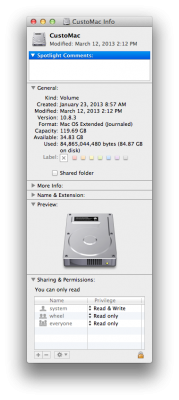
I recently used CCC to clone my main OS drive only to notice that it copied only about 37gb of the 70gb on my OS drive. I was so puzzled about this. Then I discovered the culprit: a 34gb sleep image file that CCC doesn't copy... but as soon as I booted into my clone drive, the file appeared and the clone was bloated to the 70gb drive size.
But here's the kicker: for desktops, you don't really need that sleep image file! The file is generally about the size of the RAM you have installed on your system (mine is 32gb RAM)... So you could easily get this space back. On top of that: my computer goes to sleep instantly now rather than waiting a while to do so (as it has to write the sleep image file anew when you go to sleep with sleep image enabled or "safe sleep").
There's a previous thread started asking about whether it's ok to do this here: http://www.tonymacx86.com/general-help/85674-safe-disable-safe-sleep.html ...But I thought this was a significant enough gain to point it out with a separate thread!
Here's the guide I followed: http://www.maclife.com/article/howtos/how_remove_diskhogging_sleepimage_file_your_mac
And here's some useful reading on this function: http://www.tuaw.com/2011/08/22/why-hibernate-or-safe-sleep-mode-is-no-longer-necessary-in-os/
To remove the sleep image file:
To disable safe sleep mode:
Happy hacking!
But here's the kicker: for desktops, you don't really need that sleep image file! The file is generally about the size of the RAM you have installed on your system (mine is 32gb RAM)... So you could easily get this space back. On top of that: my computer goes to sleep instantly now rather than waiting a while to do so (as it has to write the sleep image file anew when you go to sleep with sleep image enabled or "safe sleep").
There's a previous thread started asking about whether it's ok to do this here: http://www.tonymacx86.com/general-help/85674-safe-disable-safe-sleep.html ...But I thought this was a significant enough gain to point it out with a separate thread!
Here's the guide I followed: http://www.maclife.com/article/howtos/how_remove_diskhogging_sleepimage_file_your_mac
And here's some useful reading on this function: http://www.tuaw.com/2011/08/22/why-hibernate-or-safe-sleep-mode-is-no-longer-necessary-in-os/
To remove the sleep image file:
Code:
sudo rm -rf /var/vm/sleepimageTo disable safe sleep mode:
Code:
sudo pmset hibernatemode 0

