
- Joined
- Jun 16, 2013
- Messages
- 75
- Motherboard
- Gigabyte GA-X79-UD3
- CPU
- i7 3930K
- Graphics
- 2x GTX 970 SLI
- Mac
- Classic Mac
- Mobile Phone
Rayd's Build: Powermac G4 MDD - Core i7 3930K - GA-X79-UD3 - 16gb 2133mhz - GTX970
Powermac G4 MDD caseCore i7 3930K - GA-X79-UD3 - 16gb 2133mhz - GTX970
]
Components
Core i7 3930k 6 Core 12 Thread CPU
http://www.amazon.com/Intel-i7-3930K-Hexa-Core-Processor-Cache/dp/B00603QXPM
Gigabyte GA-X79-UD3 Motherboard
http://www.amazon.com/GIGABYTE-GA-X79-UD3-2011-Intel-Motherboard/dp/B0064Z6YD2/
Antec HCG-750 PSU
http://www.amazon.com/Antec-Current-HCG-750-BRONZE-Supply/dp/B0046L1PC6/
RipJaws Z 16gb 2133mhz DDR3 Ram
http://www.amazon.com/G-SKILL-Ripjaws-240-Pin-Desktop-F3-17000CL11Q-16GBZL/dp/B00694IKUI/
2x MSI GTX 970 OC edition
http://www.amazon.com/MSI-N670GTX-PM2D2GD5-OC-GeForce-256-bit/dp/B007Z574RU/
Corsair H70 Closed Loop liquid cooler
http://www.amazon.com/Corsair-Performance-Liquid-Cooler-CW-9060002-WW/dp/B005QUQP8U/
WD 4TB HDD x2
http://www.amazon.com/Black-Desktop-Hard-Drive-WD4001FAEX/dp/B00A2IM76K/
Already owned
Apple PowerMac G4 MDD Dual 1.25ghz (with broken PSU)
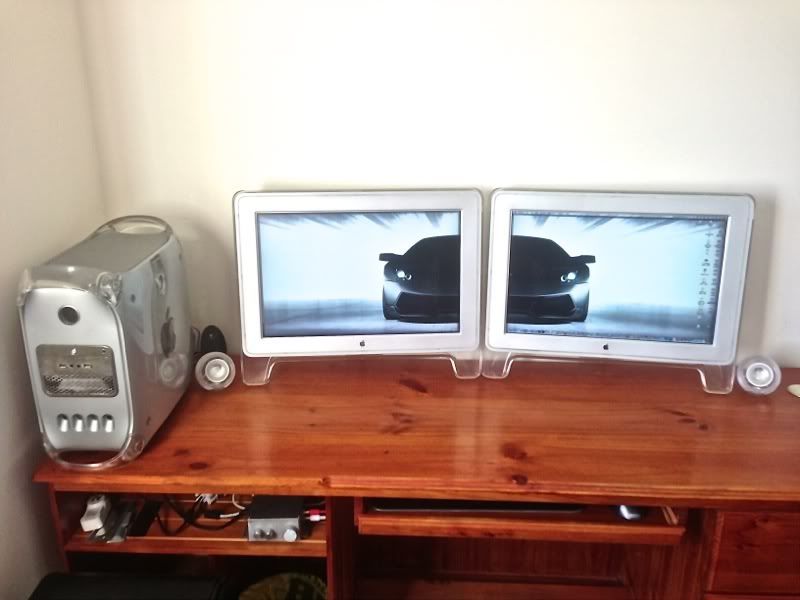
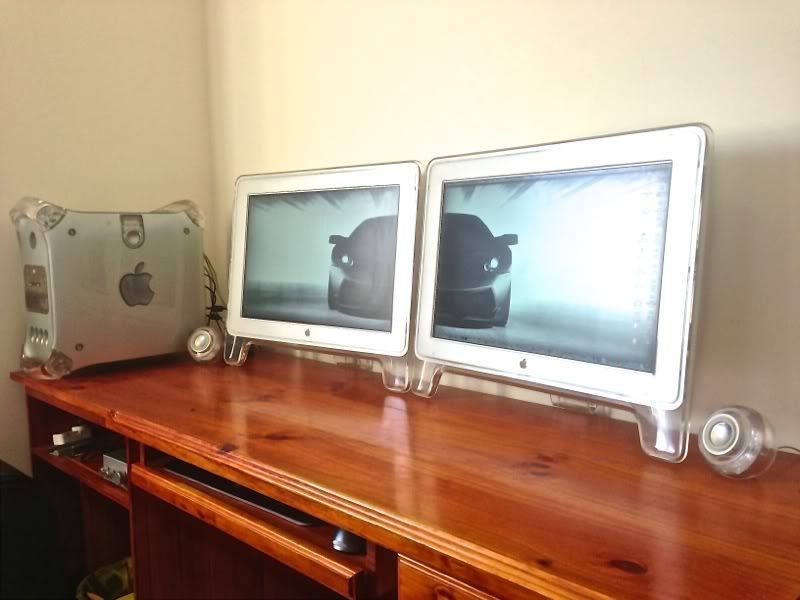
Apple 23" HD Cinema Display x2

Apple Pro Speakers

Logitech K800 Wireless Illuminated Keyboard
http://www.amazon.com/Logitech-Wireless-Illuminated-Keyboard-K800/dp/B003VAGXWK/
Logitech MX1000 Wireless Mouse
http://www.amazon.com/Logitech-MX1000-Laser-Cordless-Mouse/dp/B0002UM0JW/
Generic USB Bluetooth
Front I/O panel
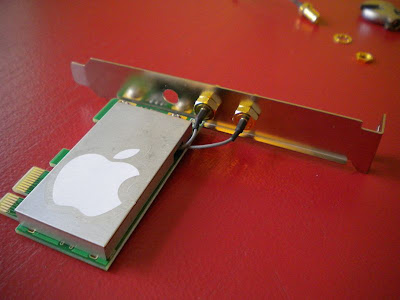
PCIe to mini PCI Convertor with Airport extreme card inserted
Apple IR sensor from old iMac G5

Various cables required, SATA, ribbon cable, etc
Comments
I have always been an apple user, never actually owned a PC system before and I'm abit of a hoarder I've never thrown a Apple Mac computer out, I've just got a collection of old machines lying around as memorabilia. So when i found this site, i got excited by the idea that i could have a crazy powerful machine in ANY case i wanted.
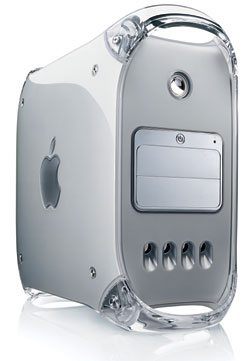
so naturally i picked the best looking case ever to be made; the Powermac G4 MDD.
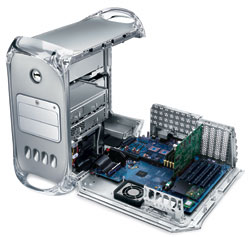
this case is simply beautiful, plus with the way the door opens up to expose the inside, simply magic!
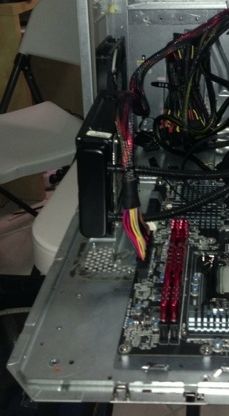
however as research continued i realised this was not going to be an easy task. since the MDD model (differing from the rest of the powermac G4 series) had a BTX style motherboard, which meant the PCI slots and the i/o ports were upside down (as apposed to a standard ATX style)
plus fitting a full sized ATX board is pushing the limits in itself...
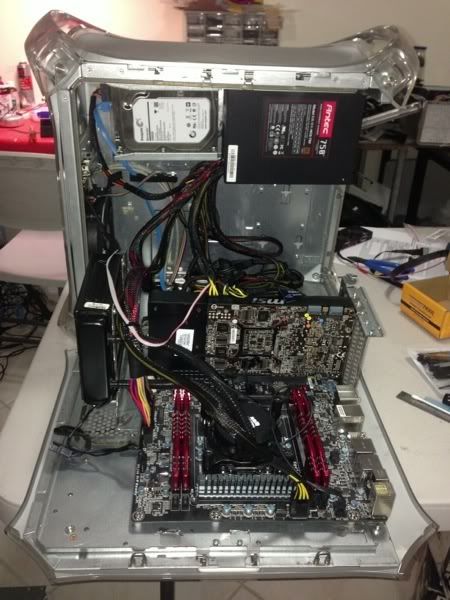
I regret not taking more pictures of how i modded the case itself. but here are some notes:
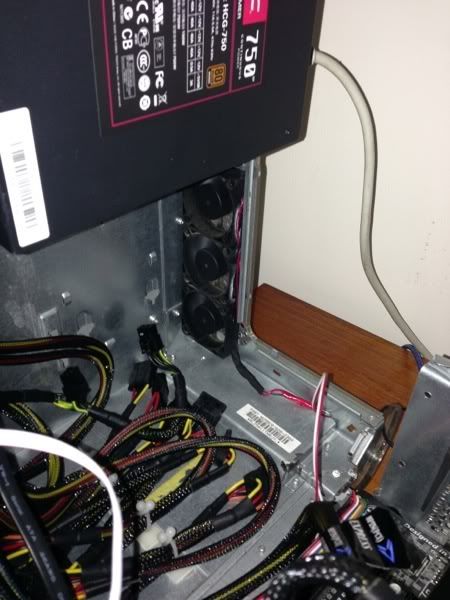
• I had to grind everything on the inside off, the only thing that stood there is the tiny shelf for the stock PSU. i used that to hold my Antec PSU.
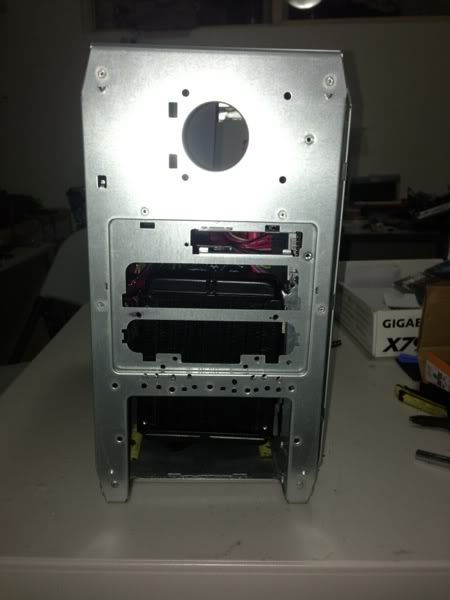
• The Door is made of a two metal skins riveted together, i had to separate these two, grind the PCI slot holders off and remount them to the correct position for the ATX Board
• I needed to relocated the stock HDD caddy to the top left of the machine, so new "hanger" holes had to be drilled to mount the removable caddy.
• Since the ATX board is so large, when you closed the door one corner would hit the case, so i grinded a little 90 degree corner out so it closes nice now")
• Made a bracket to fit my H70 cooler on in a way that when it closes up it sits behind a intake fan, and also mounted an exhaust fan on the back of the cooler for a nice push-pull setup
Opened:
Closed:
• Also mounted 3x 50mmx20mm Fans as exhaust fans.
• Drilling and modding the Mirrored stainless steel is tough stuff, it bends and warps very easily take time and care!
Electronic issues:
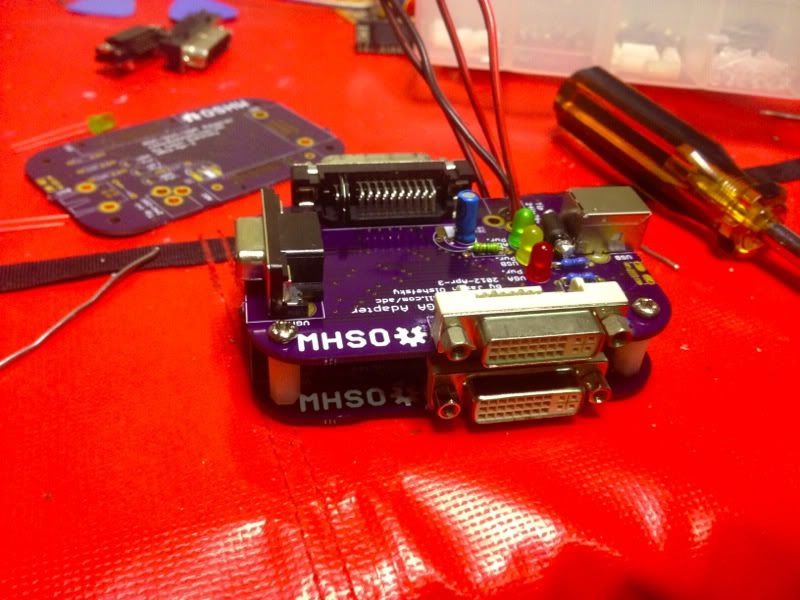
• The Apple HD Cinema Displays use a apple designed connector called an ADC (Apple display connector), which is basically a combination of DVI + USB + 24V DC in one cable, handy in theory, pain in the ass when you want to connect it to a standard computer.
Apple sell these convertors separately, but they are crazy expensive.
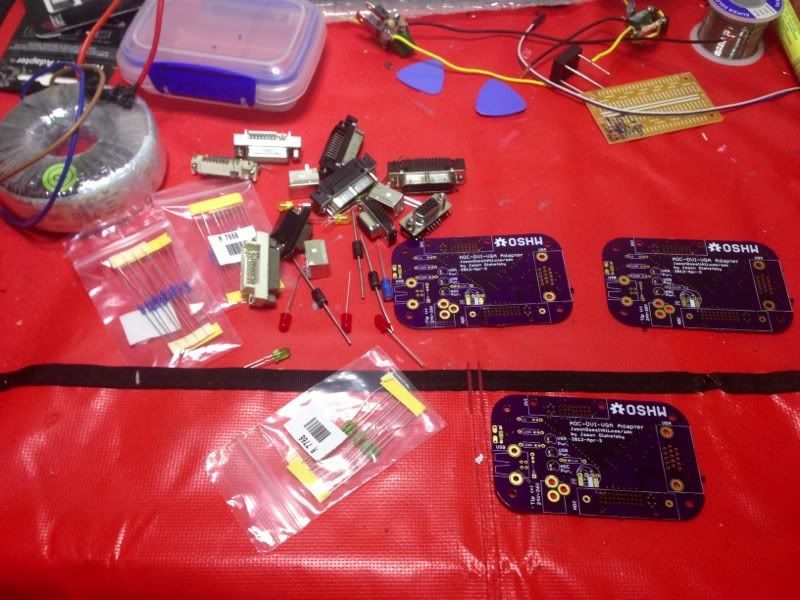
Solution -> Found some cad files online which demonstrate a separating circuit for each connector got them printed and i went to work assembling my custom ADC->DVI powered convertor.
Made 3 of them for $45
Heres a pic of them after the PCB boards arrived:
Pic of two after i assembled and stacked onto of each other:
Living under my desk:
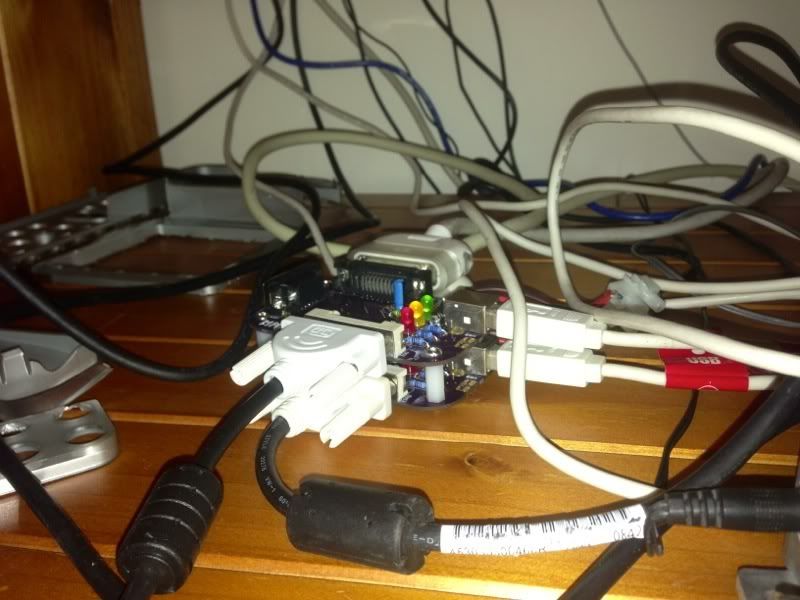
First test: Working!

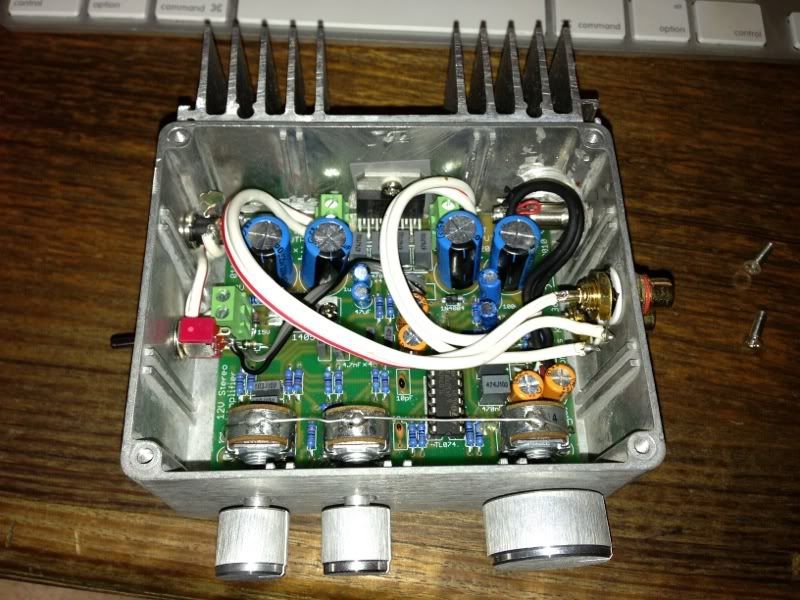
• The Apple Pro speakers Also have a apple designed connector on them since the powermac computers had a small amplifier built into the motherboard they drew power from that originally. Obviously gigabyte did not.
Solution -> Build my own small stereo 20W amplifier!
•Also had to wire up the Apple IR sensor to the USB on the motherboard which wasn't too bad.
ended up settling for mounting the IR target in the hole that use to serve as the headphone jack on the MDD originally.
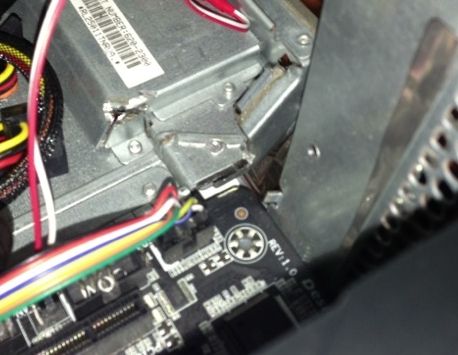
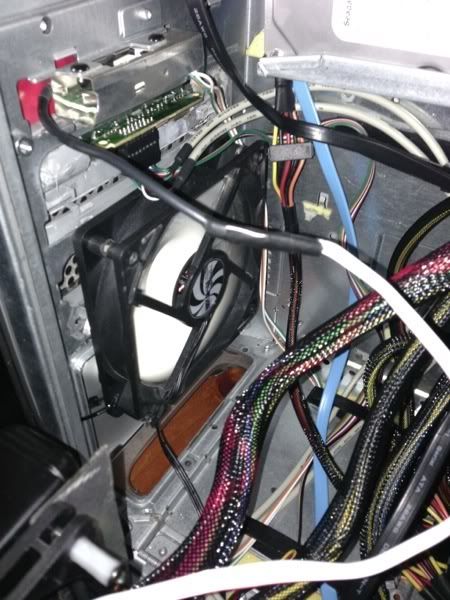
• Wanted to retain the original power button and LED so i tapped into the circuit board for the power button and LED and ran some ribbon cable to the motherboard. (picture shows mounted circuit board with cables for IR sensor, power button, LED swell as intake fan.
Other pictures:
Mounted up!
UPDATE:
Heres the latest addition to my hackintosh, added two zantec 135mm Fan's for the push pull system on the H70 cooler. it mounts via a 120mm pattern so it fits nicely, and JUST clears the graphics cards! speaking of which, ive also added another MSI GTX 670 OC edition and am now running in SLI My 3D mark score is now at 14350
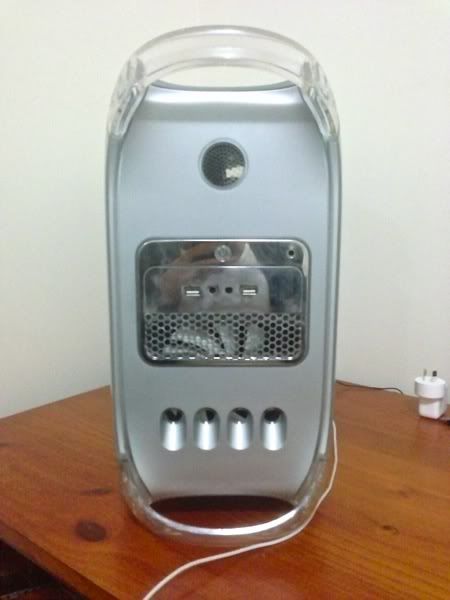
Front of case - mounted the front I/O as close to centre as i could. the IR sensor hidden inside where the headphone jack was.
I did some testing of before and after i used the grille on the bottom "flap" and it with the grille i found a 4 degree Celsius improvement in cooler temp.
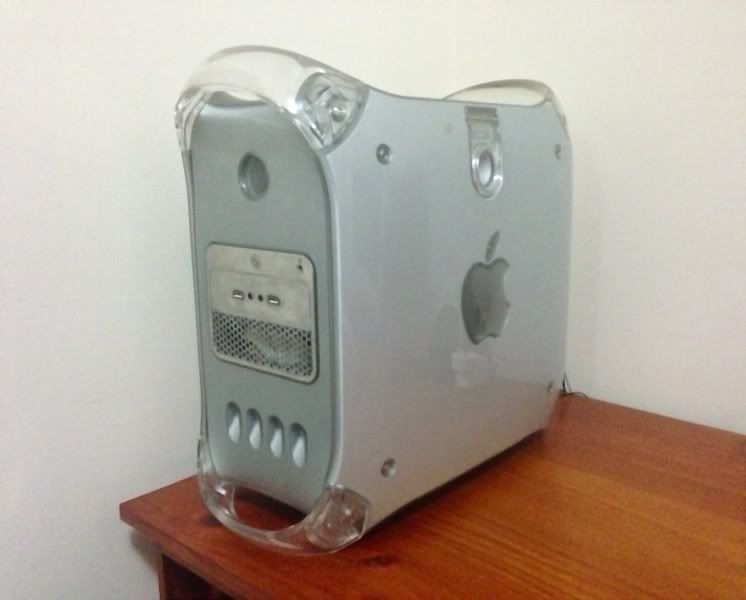
Side of Case:
More Pics:
Installation:
Standard USB install
Needed boot flags:
PCIRootUID=1 npci=0x2000 GraphicsEnabler=No
Post installation:
I tried DSDT vs Non DSDT, found that non DSDT performed better (strangely)
So I'm running non DSDT 10.8.4
Sleep works fine with sleep enabler
Sound working almost 100% with VooDooHDA (theres a small larsen effect but i can easily live with it.
No issues so far, just that "About this mac" won't list more than 4.3ghz. However, I'm currently over clocked at 4.5ghz.
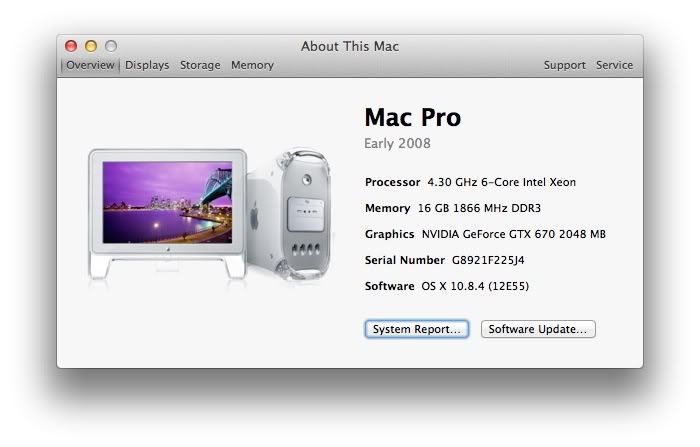
Anyway at 4.5ghz with 16gb DDR3 @ 2133mhz heres where it stands
GB:22050 and CB:12.94
Temps very stable, graphics under full load gets to about 75 degrees and CPU is well below max temp.
its crazy fast and i absolutely love it!
thanks to all the people who contributed to the forums to make this process possible and thanks for reading my build
EDIT: i've also successfully updated straight to 10.9 Mavericks from my current install, still working great
Powermac G4 MDD caseCore i7 3930K - GA-X79-UD3 - 16gb 2133mhz - GTX970
]
Components
Core i7 3930k 6 Core 12 Thread CPU
http://www.amazon.com/Intel-i7-3930K-Hexa-Core-Processor-Cache/dp/B00603QXPM
Gigabyte GA-X79-UD3 Motherboard
http://www.amazon.com/GIGABYTE-GA-X79-UD3-2011-Intel-Motherboard/dp/B0064Z6YD2/
Antec HCG-750 PSU
http://www.amazon.com/Antec-Current-HCG-750-BRONZE-Supply/dp/B0046L1PC6/
RipJaws Z 16gb 2133mhz DDR3 Ram
http://www.amazon.com/G-SKILL-Ripjaws-240-Pin-Desktop-F3-17000CL11Q-16GBZL/dp/B00694IKUI/
2x MSI GTX 970 OC edition
http://www.amazon.com/MSI-N670GTX-PM2D2GD5-OC-GeForce-256-bit/dp/B007Z574RU/
Corsair H70 Closed Loop liquid cooler
http://www.amazon.com/Corsair-Performance-Liquid-Cooler-CW-9060002-WW/dp/B005QUQP8U/
WD 4TB HDD x2
http://www.amazon.com/Black-Desktop-Hard-Drive-WD4001FAEX/dp/B00A2IM76K/
Already owned
Apple PowerMac G4 MDD Dual 1.25ghz (with broken PSU)
Apple 23" HD Cinema Display x2
Apple Pro Speakers
Logitech K800 Wireless Illuminated Keyboard
http://www.amazon.com/Logitech-Wireless-Illuminated-Keyboard-K800/dp/B003VAGXWK/
Logitech MX1000 Wireless Mouse
http://www.amazon.com/Logitech-MX1000-Laser-Cordless-Mouse/dp/B0002UM0JW/
Generic USB Bluetooth
Front I/O panel
PCIe to mini PCI Convertor with Airport extreme card inserted
Apple IR sensor from old iMac G5
Various cables required, SATA, ribbon cable, etc
Comments
I have always been an apple user, never actually owned a PC system before and I'm abit of a hoarder I've never thrown a Apple Mac computer out, I've just got a collection of old machines lying around as memorabilia. So when i found this site, i got excited by the idea that i could have a crazy powerful machine in ANY case i wanted.
so naturally i picked the best looking case ever to be made; the Powermac G4 MDD.
this case is simply beautiful, plus with the way the door opens up to expose the inside, simply magic!
however as research continued i realised this was not going to be an easy task. since the MDD model (differing from the rest of the powermac G4 series) had a BTX style motherboard, which meant the PCI slots and the i/o ports were upside down (as apposed to a standard ATX style)
plus fitting a full sized ATX board is pushing the limits in itself...
I regret not taking more pictures of how i modded the case itself. but here are some notes:
• I had to grind everything on the inside off, the only thing that stood there is the tiny shelf for the stock PSU. i used that to hold my Antec PSU.
• The Door is made of a two metal skins riveted together, i had to separate these two, grind the PCI slot holders off and remount them to the correct position for the ATX Board
• I needed to relocated the stock HDD caddy to the top left of the machine, so new "hanger" holes had to be drilled to mount the removable caddy.
• Since the ATX board is so large, when you closed the door one corner would hit the case, so i grinded a little 90 degree corner out so it closes nice now

• Made a bracket to fit my H70 cooler on in a way that when it closes up it sits behind a intake fan, and also mounted an exhaust fan on the back of the cooler for a nice push-pull setup
Opened:

Closed:

• Also mounted 3x 50mmx20mm Fans as exhaust fans.

• Drilling and modding the Mirrored stainless steel is tough stuff, it bends and warps very easily take time and care!
Electronic issues:
• The Apple HD Cinema Displays use a apple designed connector called an ADC (Apple display connector), which is basically a combination of DVI + USB + 24V DC in one cable, handy in theory, pain in the ass when you want to connect it to a standard computer.
Apple sell these convertors separately, but they are crazy expensive.
Solution -> Found some cad files online which demonstrate a separating circuit for each connector got them printed and i went to work assembling my custom ADC->DVI powered convertor.
Made 3 of them for $45
Heres a pic of them after the PCB boards arrived:

Pic of two after i assembled and stacked onto of each other:

Living under my desk:

First test: Working!

• The Apple Pro speakers Also have a apple designed connector on them since the powermac computers had a small amplifier built into the motherboard they drew power from that originally. Obviously gigabyte did not.
Solution -> Build my own small stereo 20W amplifier!

•Also had to wire up the Apple IR sensor to the USB on the motherboard which wasn't too bad.
ended up settling for mounting the IR target in the hole that use to serve as the headphone jack on the MDD originally.
• Wanted to retain the original power button and LED so i tapped into the circuit board for the power button and LED and ran some ribbon cable to the motherboard. (picture shows mounted circuit board with cables for IR sensor, power button, LED swell as intake fan.

Other pictures:
Mounted up!

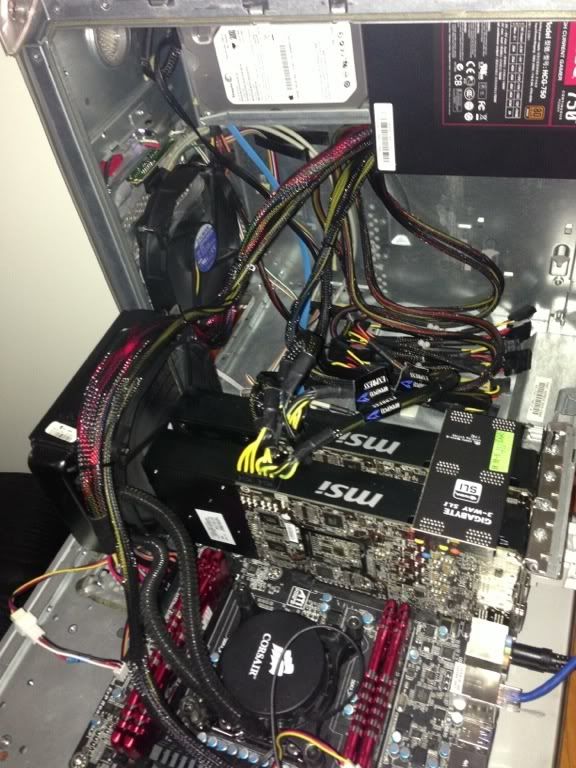
UPDATE:
Heres the latest addition to my hackintosh, added two zantec 135mm Fan's for the push pull system on the H70 cooler. it mounts via a 120mm pattern so it fits nicely, and JUST clears the graphics cards! speaking of which, ive also added another MSI GTX 670 OC edition and am now running in SLI
My 3D mark score is now at 14350 
Front of case - mounted the front I/O as close to centre as i could. the IR sensor hidden inside where the headphone jack was.
I did some testing of before and after i used the grille on the bottom "flap" and it with the grille i found a 4 degree Celsius improvement in cooler temp.

Side of Case:

More Pics:


Installation:
Standard USB install
Needed boot flags:
PCIRootUID=1 npci=0x2000 GraphicsEnabler=No
Post installation:
I tried DSDT vs Non DSDT, found that non DSDT performed better (strangely)
So I'm running non DSDT 10.8.4
Sleep works fine with sleep enabler
Sound working almost 100% with VooDooHDA (theres a small larsen effect but i can easily live with it.
No issues so far, just that "About this mac" won't list more than 4.3ghz. However, I'm currently over clocked at 4.5ghz.

Anyway at 4.5ghz with 16gb DDR3 @ 2133mhz heres where it stands
GB:22050 and CB:12.94
Temps very stable, graphics under full load gets to about 75 degrees and CPU is well below max temp.
its crazy fast and i absolutely love it!
thanks to all the people who contributed to the forums to make this process possible and thanks for reading my build
EDIT: i've also successfully updated straight to 10.9 Mavericks from my current install, still working great
Last edited: