- Joined
- Aug 10, 2011
- Messages
- 64
- Motherboard
- Asrock Fatal1ty Z370 Gaming-ITXac
- CPU
- i7-8700K
- Graphics
- GTX 1080
- Mac
- Classic Mac
Hello all!
Let me introduce my progress in building water cooled G4 with Skylake inside.

Components list
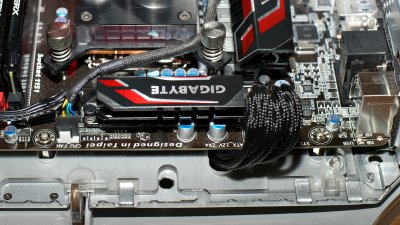
Motherboard – Gigabyte GA-Z170MX-Gaming 5 (http://www.gigabyte.com/products/product-page.aspx?pid=5530&dl=#ov)
CPU – Intel® Core™ i7-6700K (http://ark.intel.com/products/88195/Intel-Core-i7-6700K-Processor-8M-Cache-up-to-4_20-GHz)
GPU - nVidia GeForce GTX980 EVGA Superclocked ACX 2.0 (http://www.evga.com/Products/Product.aspx?pn=04G-P4-2983-KR)
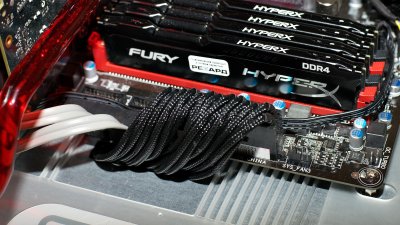
Memory – Kingston FURY 32GB Kit* (4x8GB) - DDR4 2400MHz CL15
PSU – SeaSonic Platinum 760 (https://seasonic.com/product/platinum-760/)
SSD - 256Gb Samsung 950 Pro Series (MZ-V5P256BW) (http://www.samsung.com/uk/consumer/memory-storage/ssd/950-pro/MZ-V5P256BW)
Fans - Corsair SP120 Quiet Edition Twin Pack, EK-Vardar F4-120ER (comes with EK-Predator)
Cooling - EK-XLC Predator 240 (https://www.ekwb.com/shop/ek-xlc-predator-240), EK-FC980 GTX (https://www.ekwb.com/shop/ek-fc980-gtx), a few fittings, PrimoChill PrimoFlex™ Advanced LRT™ 15,9 / 9,5mm soft tubing and EK-HD PETG Tube 10/12mm 500mm (2pcs).
Let me know if I forgot to mention something important
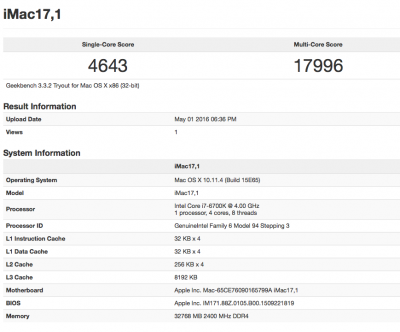
Several benchmarks for beginning.
It doesn't particularly noteworthy, but provide an opportunity to evaluate the cooling capability of the build.
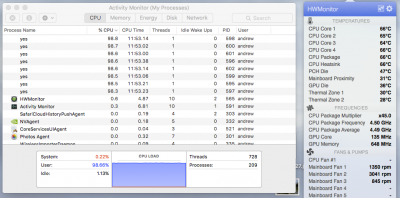

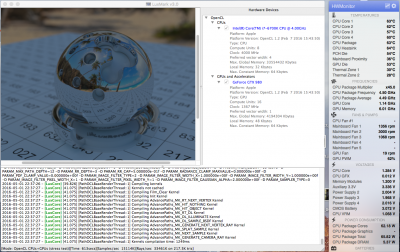
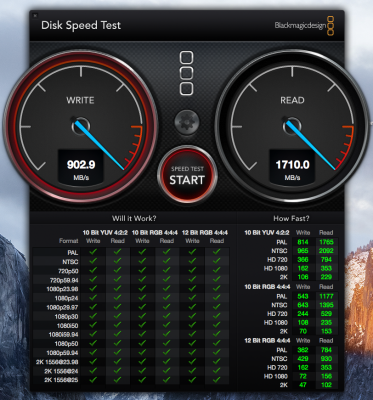
First of all I would like to note that this build has been done accidentally in some ways. Once Apple Macs Confirmed to Come Out with Intel Skylake Processors, I decided to use Skylake in my next build. The first was the motherboard, it was followed by the processor and memory.
I vigorously tested the new platform. Once it became clear that everything will be successful, I bought a GPU, PSU, SSD and case for final assembly. The case was well-known BitFenix Prodigy M in red colour
Now you understand why I have called the build somewhat incidental.
I got G4 case from my colleague absolutely free. At the time the computer is not functioning and just collecting dust in the corner. Sadly, it had a lot of scratches that I had to polish.
Anyway, I started to build my new G4. My main goal was to keep the original look and beauty of G4 and of course I wanted to get it cheap. I bought a second-hand Predator (it had a leak and the pump didn't work) and EK-FC980 GTX waterblock.
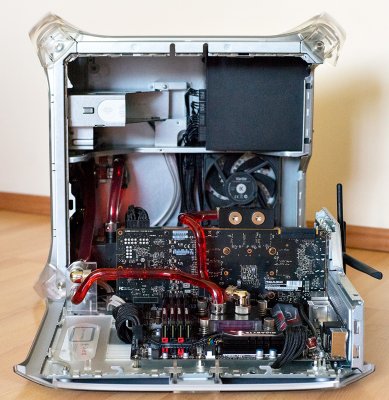
First I made some drawings to see how i can fit all my stuff into the case and next proceeded to the final test using 10 mm copper wires. At this step I realized that I can't install dvd-drive into the original space due to memory slots placement.


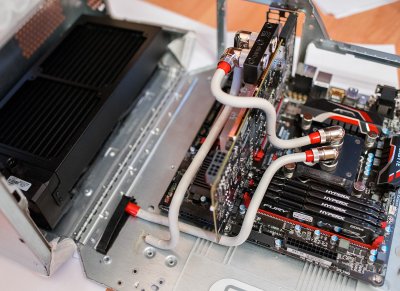
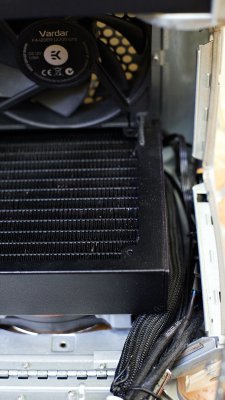
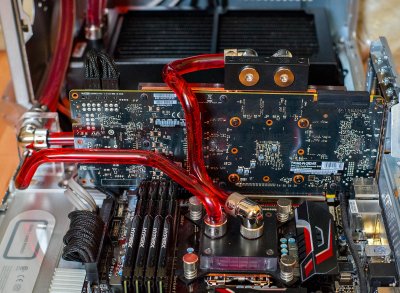
Flexible tubing segment is made of PrimoChill LRT™ 15,9 / 9,5mm, the hard part of EK-HD PETG Tube 10/12mm. Radiator mounted with rubber gaskets to prevent vibrations from the pump and fans.
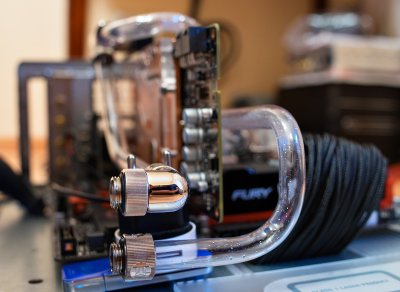

I am very happy with the result, the reloaded G4 is almost silent and powerful enough.
I polished the case, now it looks like new. I need to finalize two things: decide what to do with the dvd-drive and change the position of the socket in the PSU to match the case.
I’m sorry for my bad english, but I’ll do my best to answer all your questions.

Let me introduce my progress in building water cooled G4 with Skylake inside.
Components list
Motherboard – Gigabyte GA-Z170MX-Gaming 5 (http://www.gigabyte.com/products/product-page.aspx?pid=5530&dl=#ov)
CPU – Intel® Core™ i7-6700K (http://ark.intel.com/products/88195/Intel-Core-i7-6700K-Processor-8M-Cache-up-to-4_20-GHz)
GPU - nVidia GeForce GTX980 EVGA Superclocked ACX 2.0 (http://www.evga.com/Products/Product.aspx?pn=04G-P4-2983-KR)
Memory – Kingston FURY 32GB Kit* (4x8GB) - DDR4 2400MHz CL15
PSU – SeaSonic Platinum 760 (https://seasonic.com/product/platinum-760/)
SSD - 256Gb Samsung 950 Pro Series (MZ-V5P256BW) (http://www.samsung.com/uk/consumer/memory-storage/ssd/950-pro/MZ-V5P256BW)
Fans - Corsair SP120 Quiet Edition Twin Pack, EK-Vardar F4-120ER (comes with EK-Predator)
Cooling - EK-XLC Predator 240 (https://www.ekwb.com/shop/ek-xlc-predator-240), EK-FC980 GTX (https://www.ekwb.com/shop/ek-fc980-gtx), a few fittings, PrimoChill PrimoFlex™ Advanced LRT™ 15,9 / 9,5mm soft tubing and EK-HD PETG Tube 10/12mm 500mm (2pcs).
Let me know if I forgot to mention something important
Several benchmarks for beginning.
It doesn't particularly noteworthy, but provide an opportunity to evaluate the cooling capability of the build.


First of all I would like to note that this build has been done accidentally in some ways. Once Apple Macs Confirmed to Come Out with Intel Skylake Processors, I decided to use Skylake in my next build. The first was the motherboard, it was followed by the processor and memory.
I vigorously tested the new platform. Once it became clear that everything will be successful, I bought a GPU, PSU, SSD and case for final assembly. The case was well-known BitFenix Prodigy M in red colour
Now you understand why I have called the build somewhat incidental.
I got G4 case from my colleague absolutely free. At the time the computer is not functioning and just collecting dust in the corner. Sadly, it had a lot of scratches that I had to polish.
Anyway, I started to build my new G4. My main goal was to keep the original look and beauty of G4 and of course I wanted to get it cheap. I bought a second-hand Predator (it had a leak and the pump didn't work) and EK-FC980 GTX waterblock.
First I made some drawings to see how i can fit all my stuff into the case and next proceeded to the final test using 10 mm copper wires. At this step I realized that I can't install dvd-drive into the original space due to memory slots placement.


Flexible tubing segment is made of PrimoChill LRT™ 15,9 / 9,5mm, the hard part of EK-HD PETG Tube 10/12mm. Radiator mounted with rubber gaskets to prevent vibrations from the pump and fans.


I am very happy with the result, the reloaded G4 is almost silent and powerful enough.
I polished the case, now it looks like new. I need to finalize two things: decide what to do with the dvd-drive and change the position of the socket in the PSU to match the case.
I’m sorry for my bad english, but I’ll do my best to answer all your questions.


Last edited:

