pastrychef
Moderator
- Joined
- May 29, 2013
- Messages
- 19,458
- Motherboard
- Mac Studio - Mac13,1
- CPU
- M1 Max
- Graphics
- 32 Core
- Mac
- Classic Mac
- Mobile Phone
Components
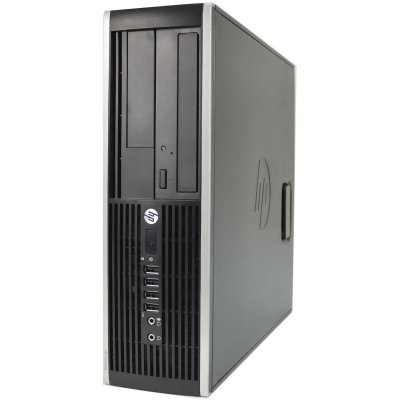
HP Elite 8300 SFF
http://www.newegg.com/Product/Product.aspx?Item=9SIA7RB4CU1488
Already Owned
Crucial Ballistic Sport 8GB (2x4GB) DDR3 1600
http://www.newegg.com/Product/Product.aspx?Item=N82E16820148544
Zotac GeForce GT 630 2GB DDR 3 Zone Edition
http://www.newegg.com/Product/Product.aspx?Item=N82E16814500346
Logitech Wireless Touch Keyboard K400 Plus
http://www.newegg.com/Product/Product.aspx?Item=9SIAAHH4839661
Broadcom BCM94360CS with PCI-e Adaptor
https://www.amazon.com/gp/product/B0144KU1EG/?tag=tonymacx86com-20
Comments
I made the mistake of roaming this forum and stumbling upon this thread: HP 8300 Elite w/ Intel i5-3570 Quad Core $222.75 at Newegg | tonymacx86.com
I did all that I could to resist purchasing yet another computer especially since I really had no need for it. However, due to the absolutely horrible summer we are having here in NYC, I found myself staying in the comfortable confines of home a lot recently, to avoid the oppressive heat and humidity, and enjoying my air conditioning... So, I started browsing Ebay and managed to find an HP Elite 8300 SFF with i7 3770 for $200 and couldn't resist...

Installation
1. Bios Settings
Storage
SATA Emulation > AHCI
SecuritySystem Security
AdvancedVirtualization Technology Directed I/O (VTd) > Disabled
Onboard Devices
Serial Port A > Disabled
Parallel Port > Disabled
Device OptionsParallel Port > Disabled
Turbo > Enabled
Integrated Video > Disabled
Multi-Processor > Enabled
Hyperthreading > Enabled
Integrated Video > Disabled
Multi-Processor > Enabled
Hyperthreading > Enabled
2. Make your UniBeast USB Flash Drive. UniBeast: Install OS X El Capitan on Any Supported Intel-based PC | tonymacx86.com
3. Install OS X.
4. Run MultiBeast with following parameters:
5. Enable native power management.
- Download ssdtPRGen.sh from https://github.com/Piker-Alpha/ssdtPRGen.sh
- Open Terminal.
- Drag the ssdtPRGen.sh file to your Terminal window and press enter.
- When ssdtPRGen.sh is done generating your ssdt.aml file, it will ask if you want to open it. Answer with n.
- Navigate to ~/Library/ssdtPRGen/
- Copy the ssdt.aml file and paste it to /EFI/CLOVER/ACPI/patched/.
7. There are multiple options to enable audio.
- Download and install the HDMIAudio-1.1.dmg found at the end of this post. (Note: Apologies to the original author. Idk who wrote this and can not give credit.) *This broke form me in High Sierra. YMMV.
- VoodooHDA. I used version 2.8.8 but other users have reported better success with alternate versions. (Poor quality audio. Easy to install.)
- Enable audio using DSDT. Detailed instructions are here. (Best method. Highest quality audio. Recommended.)
Code:
sudo pmset -a autopoweroff 010. Done.
Note: I highly recommend that you DO NOT attempt to use the iMac14,2 system definition. While most things will continue to work as it does when using the iMac13,2 system definition, CPU power management will be broken and the CPU will not enter Turbo mode.
Additional Tweaks
Enable AirPlay and Quick Sync
Generate Serial Number and UUID to get iMessage working. Follow An Idiot's Guide To iMessage to get it all working.
*Note: Regardless of whether you use iMessage or not, the guide should be followed to implement clean Board Serial Number, Serial Number, and UUID. Not having this setup can be cause for things like Bluetooth issues.
- Open your config.plist with Clover Configurator
- Go to the Graphics section
- Check Inject Intel and enter 0x01620007 in the "ig-platform-id" section
- After making these changes to your config.plist, you can enable the Intel HD 4000 graphics in BIOS. Also, keep the boot video on your discrete graphics card.
Generate Serial Number and UUID to get iMessage working. Follow An Idiot's Guide To iMessage to get it all working.
*Note: Regardless of whether you use iMessage or not, the guide should be followed to implement clean Board Serial Number, Serial Number, and UUID. Not having this setup can be cause for things like Bluetooth issues.
What works
- Sleep/Wake
- App Store
- Gigabit Ethernet
- USB 3
- HDMI Audio
- Quartz Extreme/Core Image
- Messages
- Continuity/Handoff
- Wifi/Bluetooth
- AirPlay mirroring
- Quick Sync
What doesn't work
- Playback of purchased videos from iTunes. (There's a fix, but I have not attempted to implement it.)
Untested
MessagesContinuity/HandoffWifi/Bluetooth
Epilogue
This was truly an extremely easy system to hackintosh. I was able to boot in to El Capitan within half an hour of plugging the computer's power cord. As a challenge, I didn't even bother to look for any guides or read about anyone else's successful installs. I just jumped in head first and got everything working. I chose to use the iMac13,1 or iMac13,2 system definitions because I felt the hardware most closely resembled those systems.
When time permits, I will try to do a reinstall with the built-in Intel HD 4000 graphics and document it here.
I will use my Kill-A-Watt clone to measure power consumption in the coming days and report back with my findings. Depending on the results, I may use this as a replacement for my very old 2009 Mac mini.
For someone looking for a good performing OS X system on a tight budget, this HP Elite 8300 is extremely tough to beat.
Ambient temp: ~25C
Idle temp: ~38C
Full load temp: ~67C
Power consumption:
Sleep: 2.4W
Idle: ~31W
Browsing: ~35-52W
Full load: ~72W
Update #1 (December 19, 2016):
Here is what I did to upgrade from El Capitan to Sierra: #55
Update #2 (March 6, 2017):
To enable AirPlay Mirroring, follow directions on post #279.
Update #3 (September 29, 2017):
I've updated to High Sierra (APFS). Details are in post #561.
To recap:
- Update to the latest version of the Clover bootloader.
- Install apfs.efi to /EFI/CLOVER/drivers64UEFI/.
- Download and install High Sierra update from App Store.
- After the update, the Nvidia web driver control panel will inform you that an update is needed. Just follow the on screen menus.
iBooks is working now:
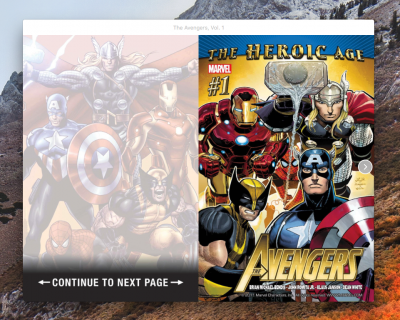
If you enabled the HD 4000 as per Update #2, Quick Sync is also working:
Update #4 (October 8, 2017):
To install the High Sierra Supplemental Update:
- Uninstall the Nvidia web drivers.
- Download and install the High Sierra Supplemental Update.
- Install latest Nvidia web drivers.
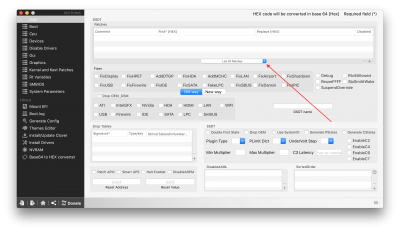
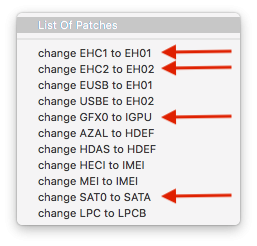
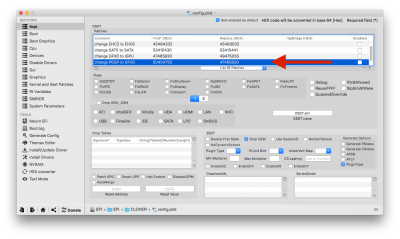
I patched my DTST file as per directions here. I also added the SMBUS patch. Now, I can use the AppleALC.kext for much better audio quality. To restore HDMI audio, use the HDMIaudio.kext found here.
Also, my PCI slot (not PCI-e) is now functioning since adding the patched DTST!!
Update #6 (February 20, 2018):
FileVault works fine. Just add AsAmiShim.efi to /EFI/CLOVER/drivers64UEFI/.
*Note: I use a wired USB keyboard. I don't know if there would be any issues if you use a Bluetooth keyboard.
Update #7 (March 11, 2018):
I have posted step-by-step instructions on how to patch your DSDT to properly enable ALC221 audio and the PCI slot here.
Also, in light of the increasing number of issues with Nvidia web drivers, I can not recommend their use in macOS any longer. I suggest looking in to AMD FirePro W4100, W4300, or WX 4100. If you do not mind a double wide card, consider the AMD Radeon RX 560.
Update #8 (March 28, 2018):
For those of you with multiple hackintoshes, I posted instructions on how to have just one USB macOS installer that can be used on all your hacks here.
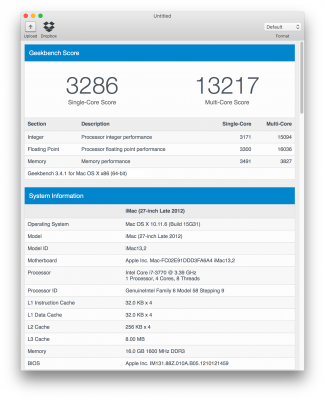
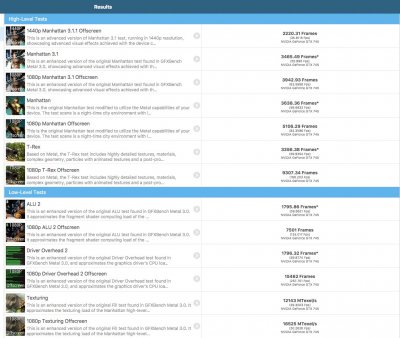
Attachments
Last edited:

