- Joined
- Feb 28, 2011
- Messages
- 36
- Motherboard
- OSX 10.8.5
- CPU
- 2 x Xeon 5355 2.66 GHz
- Graphics
- XFX 6870 2GB Dual Fan
- Mac
- Classic Mac
- Mobile Phone
All I did was make sure that the surface was clean smooth, dry and dust free.
I did sand some scratches smooth, but that was purely to give a smooth surface not for paint adhesion.
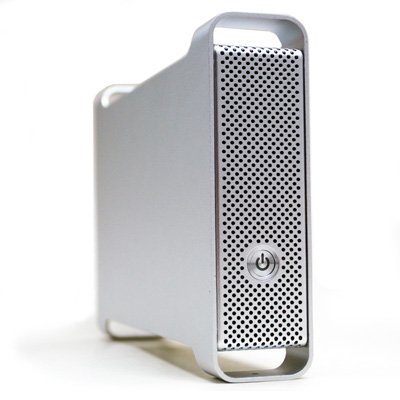
The only other thing I did was to make sure I applied a thick enough coat so as to hide the Apple Logo on the side panel. I then re-added it using a vinyl sticker as mentioned earlier. The photos I have posted do not have the stickers on them though. The upside is that you can see that the Apple Logo is completely covered with the paint job.
I sprayed an even coat, not too thick, over the entire case and panels. At this point it looked really good, but you could still see the logo through the paint. I also did not see an easy way to remove the power button so left it on and used a q-tip to remove the paint from it between coats. I found this to be better than masking the power button. I did try masking it but when you remove the mask it takes some of the surrounding paint with it as this is a thick plastic like paint. I then cleaned it up and re-sprayed using the q-tip idea. To hide the logo I just sprayed a thicker coating of paint on that area going more lightly as I worked my way out.
If you are going to use paint from the range I mentioned then it would not (in my opinion) make any difference wither you sand the case or not. As for durability...This machine lives in my kids sitting room where it is bumped and knock by toys and baby buggies all day and not a scratch (I have two girls ages two and just under one). My secret to the tough finish was spraying a coat of polyurethane on to it before it drys. If you are going to spray it like this then apply the polyurethane while the paint is still wet or it will cause it to crack ( at least this is what I have found in earlier test cases). Environment makes a big difference when spray painting. I live in a cold and humid climate. I would recommend getting an old metal panel to practice on first. with these paints it will make no difference wither it is aluminum or steel, the end result would be the same.
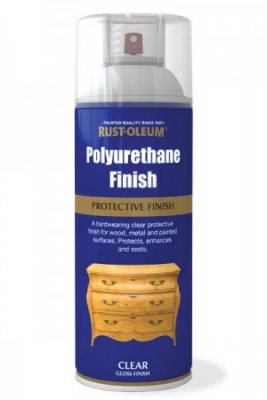
Here is a picture of the polyurethane spray can I used. It is once again by the same company. Very, very tough finish. The only downside is that it can give a very slight sepia tint to the finish on light colors when a thick coating is applied. Once again I would say that experimenting and practice are key. When I first used spray paint I learned that it was not as easy as I thought. It really does require a bit of technique and that requires practice.
All the best and let us all know how it goes, also post pics so we can all admire. I love checking out what others have done and getting new ideas from their work.
I did sand some scratches smooth, but that was purely to give a smooth surface not for paint adhesion.
The only other thing I did was to make sure I applied a thick enough coat so as to hide the Apple Logo on the side panel. I then re-added it using a vinyl sticker as mentioned earlier. The photos I have posted do not have the stickers on them though. The upside is that you can see that the Apple Logo is completely covered with the paint job.
I sprayed an even coat, not too thick, over the entire case and panels. At this point it looked really good, but you could still see the logo through the paint. I also did not see an easy way to remove the power button so left it on and used a q-tip to remove the paint from it between coats. I found this to be better than masking the power button. I did try masking it but when you remove the mask it takes some of the surrounding paint with it as this is a thick plastic like paint. I then cleaned it up and re-sprayed using the q-tip idea. To hide the logo I just sprayed a thicker coating of paint on that area going more lightly as I worked my way out.
If you are going to use paint from the range I mentioned then it would not (in my opinion) make any difference wither you sand the case or not. As for durability...This machine lives in my kids sitting room where it is bumped and knock by toys and baby buggies all day and not a scratch (I have two girls ages two and just under one). My secret to the tough finish was spraying a coat of polyurethane on to it before it drys. If you are going to spray it like this then apply the polyurethane while the paint is still wet or it will cause it to crack ( at least this is what I have found in earlier test cases). Environment makes a big difference when spray painting. I live in a cold and humid climate. I would recommend getting an old metal panel to practice on first. with these paints it will make no difference wither it is aluminum or steel, the end result would be the same.
Here is a picture of the polyurethane spray can I used. It is once again by the same company. Very, very tough finish. The only downside is that it can give a very slight sepia tint to the finish on light colors when a thick coating is applied. Once again I would say that experimenting and practice are key. When I first used spray paint I learned that it was not as easy as I thought. It really does require a bit of technique and that requires practice.
All the best and let us all know how it goes, also post pics so we can all admire. I love checking out what others have done and getting new ideas from their work.