- Joined
- Jan 15, 2014
- Messages
- 14
- Motherboard
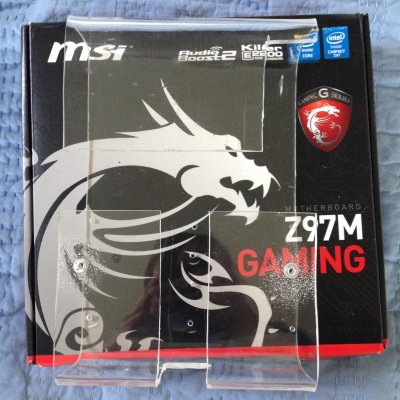
- MSI Gaming z97m
- CPU
- i7 4790K
- Graphics
- GTX 960
- Mobile Phone
***This is my first post here on tonymac, so please let me know If I'm doing something incorrectly.***
Hey guys!
Here is my latest hackintosh project - The G5 Phantom.
Components:
The Build:
To Start off, I'm going to just skip the disassembly. Most of you probably know how to do it by now,
and It's the same every time.
*** If you would like me to post instructions on how to do so, please message me and I will make a new post for it. ***
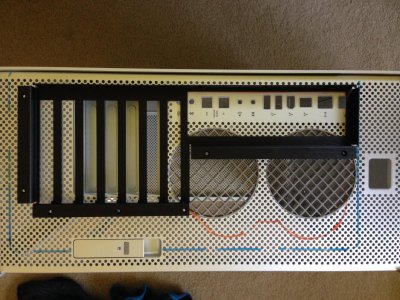
I began by marking out the front I/O Panel and then cutting it out with a Dremel (3 Layers of masking for Dremel whoopsies ).
).


The process was fairly similar for the rear I/O Panel as well. The upper tray had to be trimmed so that the ATX tray could fit underneath it. Though this case could easily support an ATX mobo, I opted for an mATX board so that I could utilize the original hard drive cage as you will see later.


Next I went on the cut out he window from the door panel and began to shape plexiglass for my custom H100i GTX radiator bracket. I drilled holes in the glass and melted the original G5 PSU's nuts into the glass so that the bracket could mount in the original holes of the case.


For aesthetic reasons, I opted to mount the PSU vertically. I love the look of it through the window, though some may not, and that's okay!


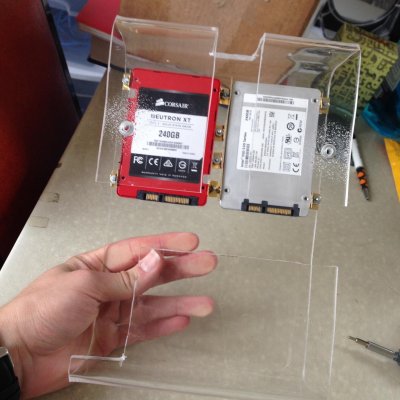
Next came my custom SSD tray. I built this out of plexi as well, as I wanted to be able to put LED's under it. This tray was designed to hold 2 SSDs and also act as a backer for the power plug, all while being perfectly visible from the side panel window.
To accomplish this, I created a rough brick shaped mold from layers of thick cardboard and wrapped the glass around it. Unfortunately I didn't take any pictures of it, but I spliced a right angel PSU cable with the original Apple plug to create my extension to the exterior port.
.jpg")


Mounting the SSD's required me to make some custom L brackets from some spare metal strips I had laying around. Though they were simply hand cut, crude brackets, I am very happy with the result.


Due to a chassis fire (Liquid cooler leaked on the original build) I had to re-paint the original chassis after stripping the burnt paint. This is why you are seeing this AFTER everything else as this IS the correct chronological order.
Everything was primed twice with a rust-oleum bonding primer, then covered with 3 coats of a flat primer + paint combo. The result is a nice, flat looking soft touch finish which is very pleasing to both to look at and feel.


I rigged up a way to hang the inner chassis in my garage to be able to cover everything and avoid drips.


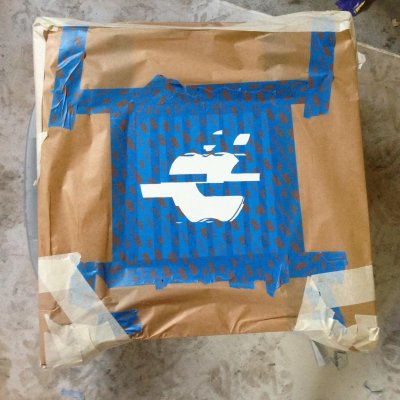
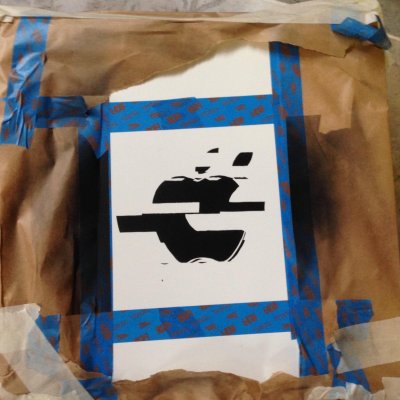
Next up was the Apple logo... Now that I had covered it up with white paint I was going to have to do something with it. Putting the Apple back felt a bit odd however so I opted to design my own logo. You guys are welcome to use it if you want but PLEASE TELL ME FIRST. This is MY DESIGN and I would love to see where you use it . The Layers of color denote what would stay or become the background.
I decided that since It was no longer an Apple product, but a Hackintosh, I would "Glitch" up the Apple a bit. I did this by first designing the logo in photoshop and then cutting it out of a layer of Blue tape with an exacto knife. These are the times I am grateful for my parents encouraging my artistic skills as a kid.


Now all that is really left is some assembly! Though at first glance, cable management may look non-existant, remember that this is a VERTICAL psu mount. This means that cables coming out of the top are un-avoidable. Cables ARE actually routed very well past that however.


First boot = Success!!!!11one


Beauty Shots -


Thats it! I'm writing this post on her right now. I have overclocked the i7 to 4.4ghz and have been running OSX 10.10 Yosemite & Clover without a hitch. I will be experimenting with
El Capitan soon though, but due to college I just haven't had time. This build took about a month with all of the custom aspects of it having to be fabricated by hand, but it was well worth it! Please let me know what you think of it below or if you have any questions and have a good one!
Thanks,
-Oni Enzeru
Hey guys!
Here is my latest hackintosh project - The G5 Phantom.
Components:
Chassis: ---------- Powermac G5
Motherboard: ---- MSI z97M
Ram: ------------- 16 GB HyperX Fury
Processor: -------- i7 4790K
Cooler: ----------- Corsair H100i GTX
GPU: ------------- ASUS STRIX GTX 960 4GB
WIFI/BT: --------- Broadcom BCM94331CD
FP I/O: ----------- LaserHive G5 Front Panel Kit
RP I/O: ----------- Mountain Mods ATX Tray + RI/O
Storage: ---------- 240GB Corsair Neutron (OSX)
-------------------- 240GB Intel 530 (Windows 10)
-------------------- 320GB Hitatchi (OSX Clone for testing OSX Updates)
Disc Drive: --------ASUS DRW-24B1ST
The Build:
To Start off, I'm going to just skip the disassembly. Most of you probably know how to do it by now,
and It's the same every time.
*** If you would like me to post instructions on how to do so, please message me and I will make a new post for it. ***
I began by marking out the front I/O Panel and then cutting it out with a Dremel (3 Layers of masking for Dremel whoopsies
The process was fairly similar for the rear I/O Panel as well. The upper tray had to be trimmed so that the ATX tray could fit underneath it. Though this case could easily support an ATX mobo, I opted for an mATX board so that I could utilize the original hard drive cage as you will see later.
Next I went on the cut out he window from the door panel and began to shape plexiglass for my custom H100i GTX radiator bracket. I drilled holes in the glass and melted the original G5 PSU's nuts into the glass so that the bracket could mount in the original holes of the case.
For aesthetic reasons, I opted to mount the PSU vertically. I love the look of it through the window, though some may not, and that's okay!
Next came my custom SSD tray. I built this out of plexi as well, as I wanted to be able to put LED's under it. This tray was designed to hold 2 SSDs and also act as a backer for the power plug, all while being perfectly visible from the side panel window.
To accomplish this, I created a rough brick shaped mold from layers of thick cardboard and wrapped the glass around it. Unfortunately I didn't take any pictures of it, but I spliced a right angel PSU cable with the original Apple plug to create my extension to the exterior port.
Mounting the SSD's required me to make some custom L brackets from some spare metal strips I had laying around. Though they were simply hand cut, crude brackets, I am very happy with the result.
Due to a chassis fire (Liquid cooler leaked on the original build) I had to re-paint the original chassis after stripping the burnt paint. This is why you are seeing this AFTER everything else as this IS the correct chronological order.
Everything was primed twice with a rust-oleum bonding primer, then covered with 3 coats of a flat primer + paint combo. The result is a nice, flat looking soft touch finish which is very pleasing to both to look at and feel.
I rigged up a way to hang the inner chassis in my garage to be able to cover everything and avoid drips.
Next up was the Apple logo... Now that I had covered it up with white paint I was going to have to do something with it. Putting the Apple back felt a bit odd however so I opted to design my own logo. You guys are welcome to use it if you want but PLEASE TELL ME FIRST. This is MY DESIGN and I would love to see where you use it
. The Layers of color denote what would stay or become the background.I decided that since It was no longer an Apple product, but a Hackintosh, I would "Glitch" up the Apple a bit. I did this by first designing the logo in photoshop and then cutting it out of a layer of Blue tape with an exacto knife. These are the times I am grateful for my parents encouraging my artistic skills as a kid.
Now all that is really left is some assembly! Though at first glance, cable management may look non-existant, remember that this is a VERTICAL psu mount. This means that cables coming out of the top are un-avoidable. Cables ARE actually routed very well past that however.
First boot = Success!!!!11one
Beauty Shots -
Thats it! I'm writing this post on her right now. I have overclocked the i7 to 4.4ghz and have been running OSX 10.10 Yosemite & Clover without a hitch. I will be experimenting with
El Capitan soon though, but due to college I just haven't had time. This build took about a month with all of the custom aspects of it having to be fabricated by hand, but it was well worth it! Please let me know what you think of it below or if you have any questions and have a good one!
Thanks,
-Oni Enzeru