Contribute
Register

My Third Case Mod....Thawing an Ice Cube

Status
Not open for further replies.
Having Fun With The Touch Sensor

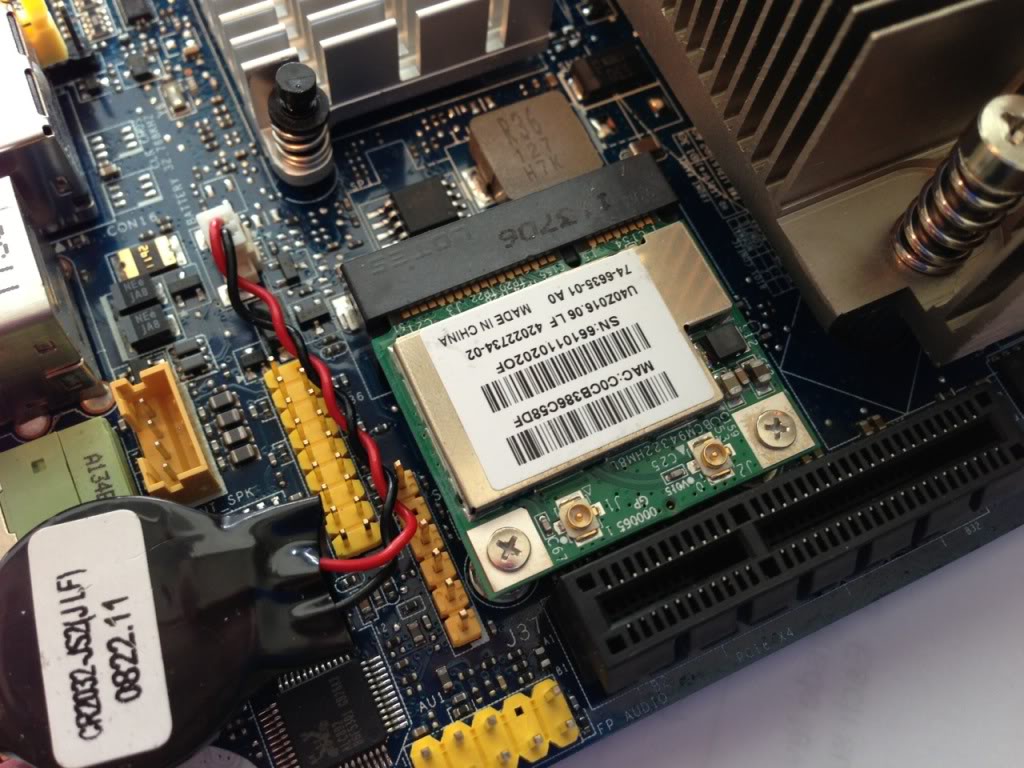
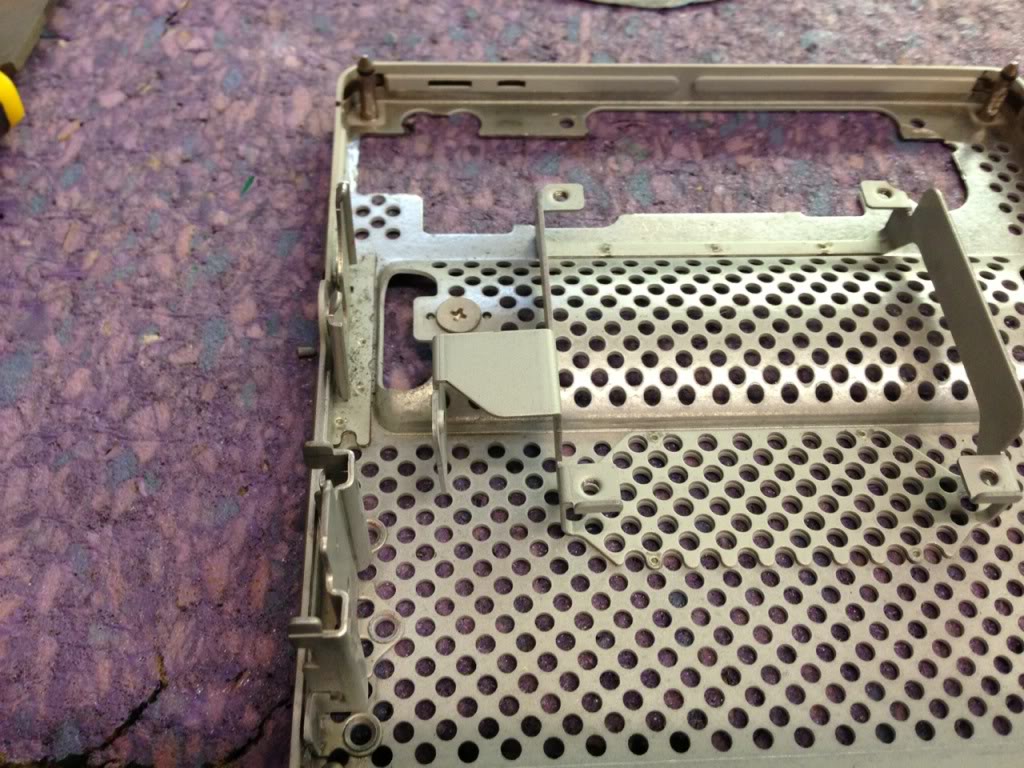
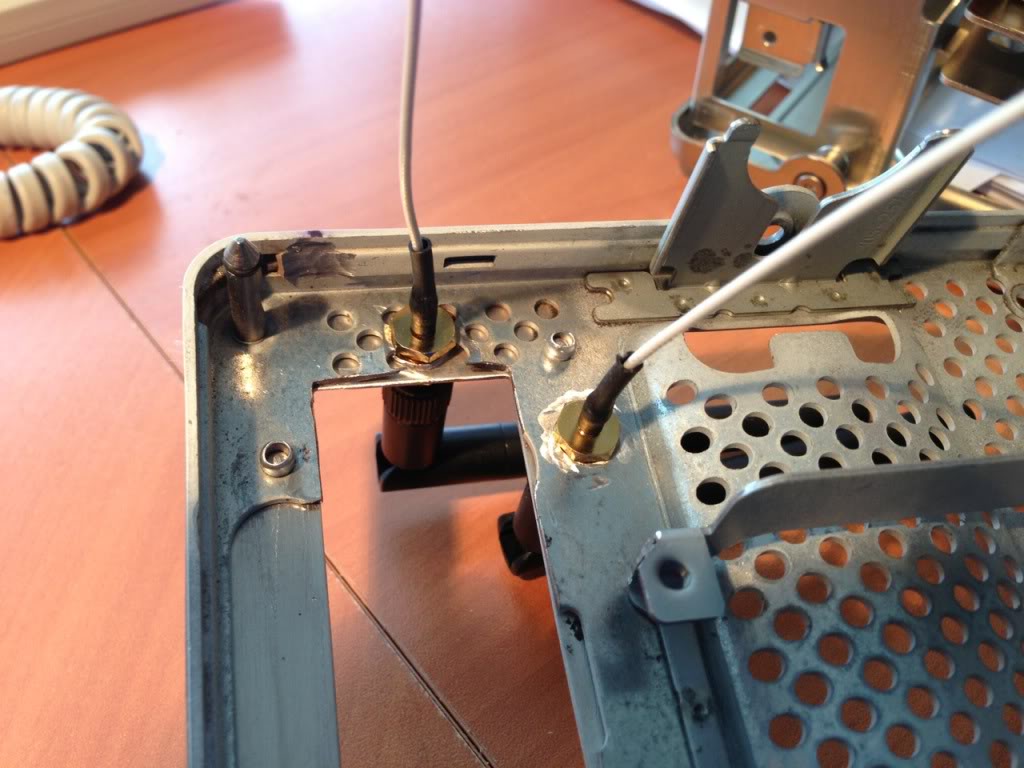
I wanted to post this after I got it working, but I figured since Minihack asked, I would post. I wanted to do somehing original and so I thought wouldn't it be cool if you could touch the apple to start the Cube. So I wired up the touch sensor according to Minihack's fantastic directions, ( http://legacy.tonymacx86.com/viewtopic.php?f=76&t=50035&hilit=sensor ) and proceeded to create a mount for it at the front of the cube, just behind the Apple symbol.

100_1721.jpg


100_1736.jpg


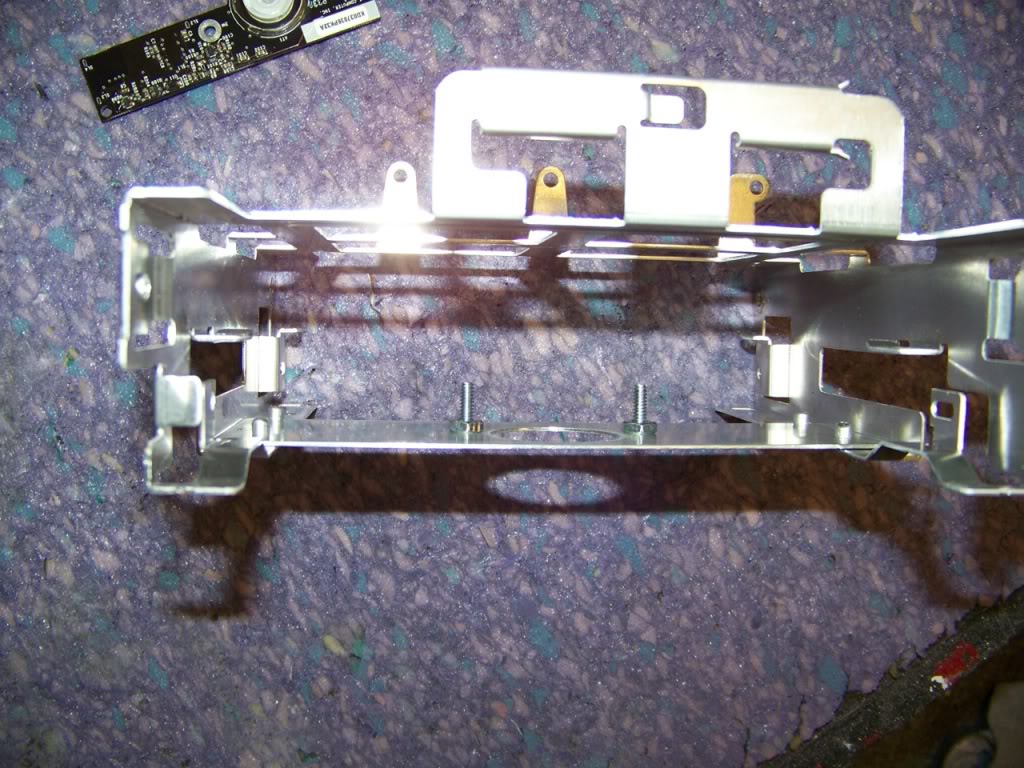
I pop riveted it to the hard drive bracket...
100_1737.jpg


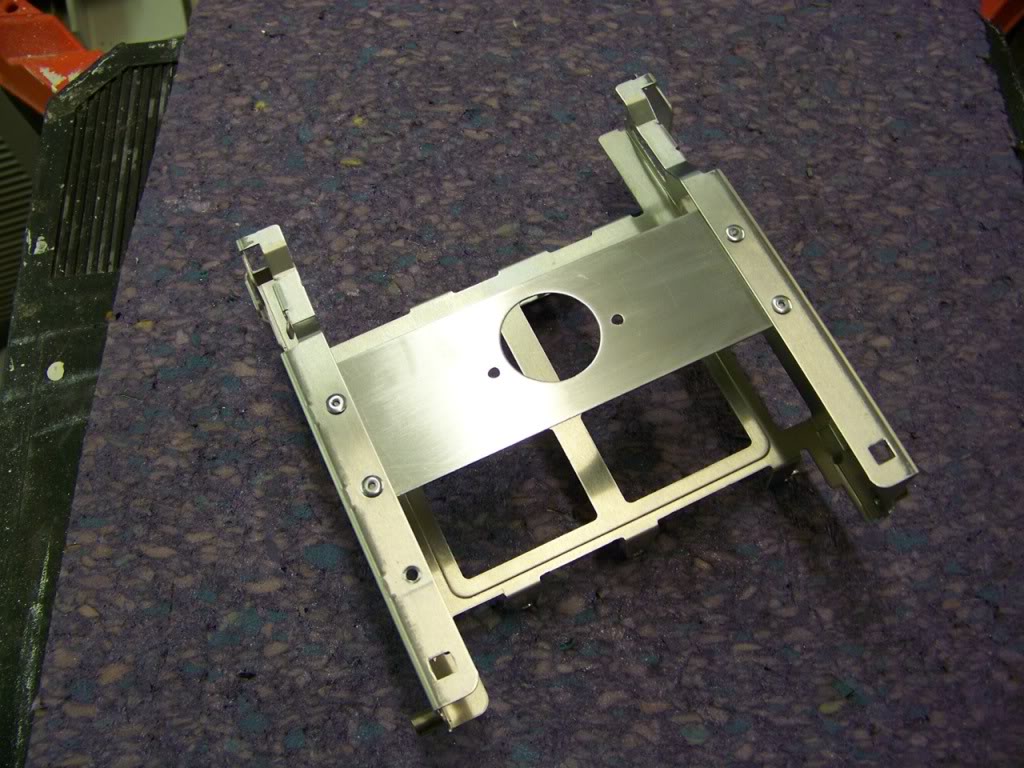
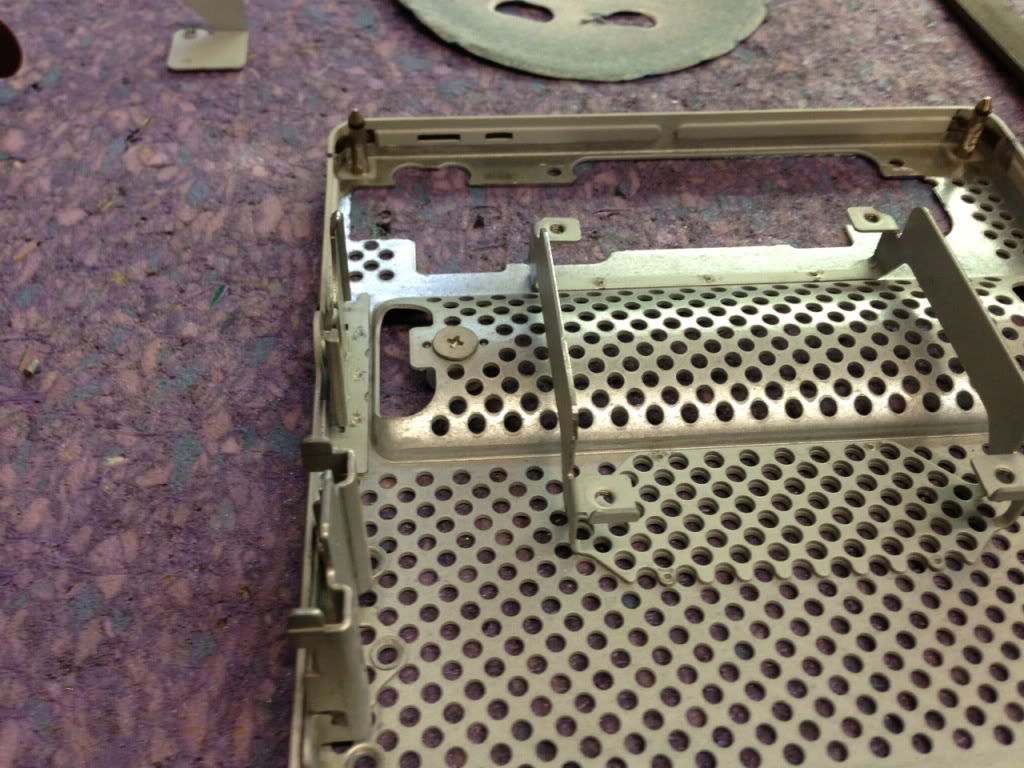
...added two bolts with nuts...
100_1739.jpg


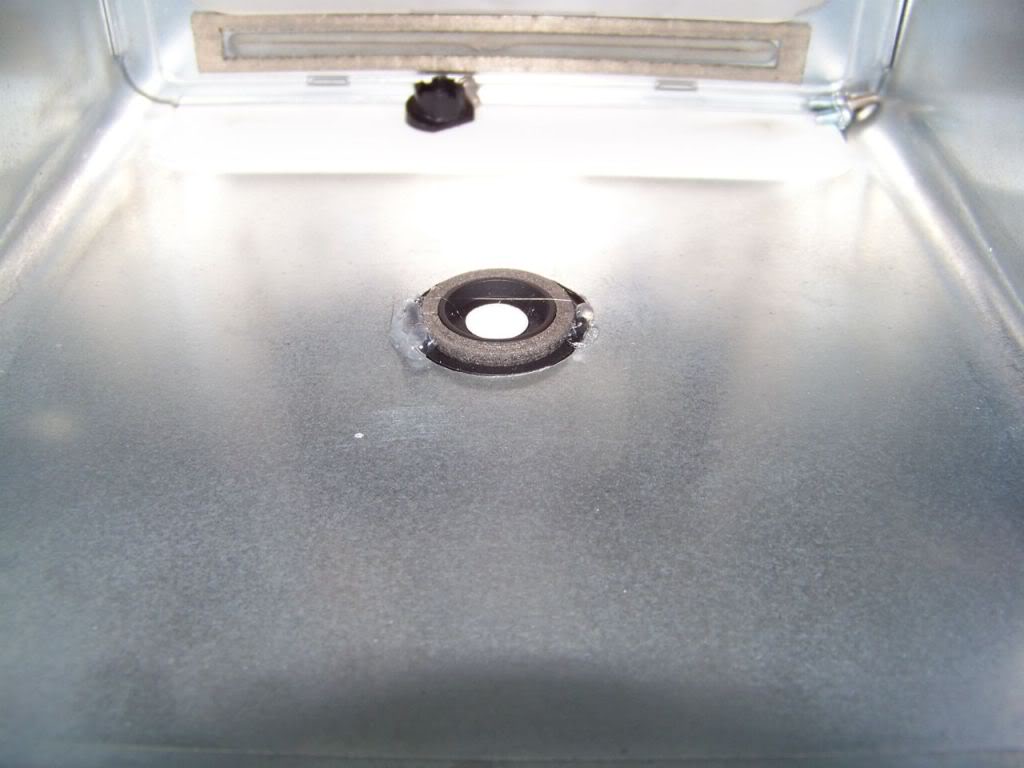
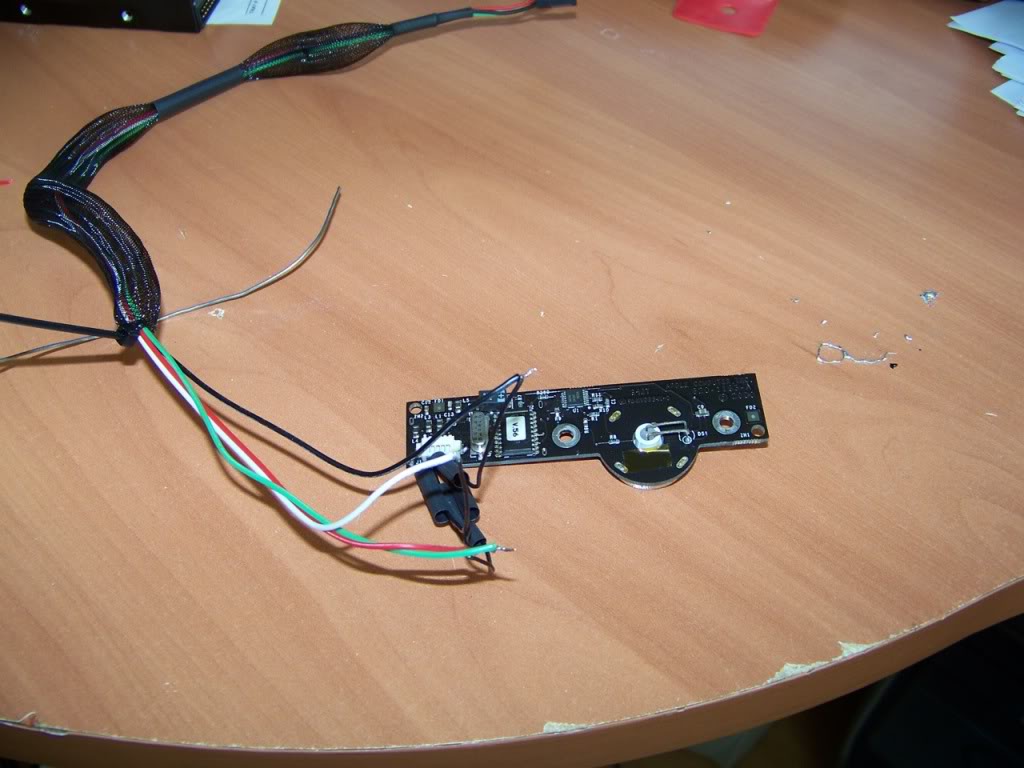
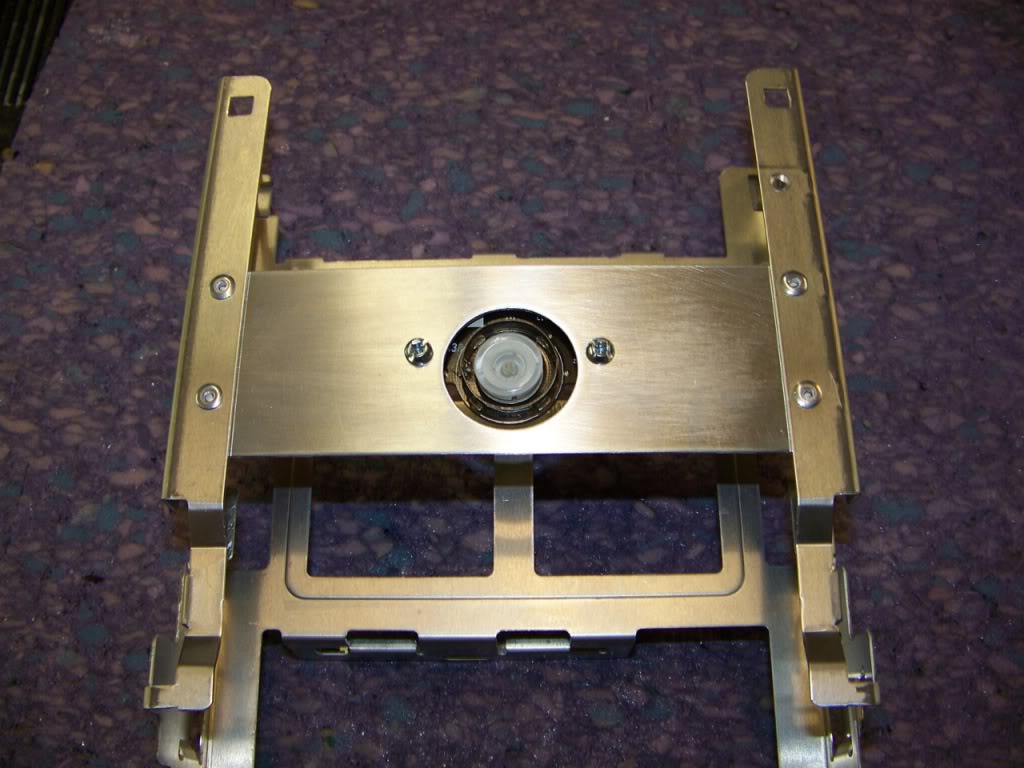
...and installed the sensor.
100_1741.jpg


100_1740.jpg


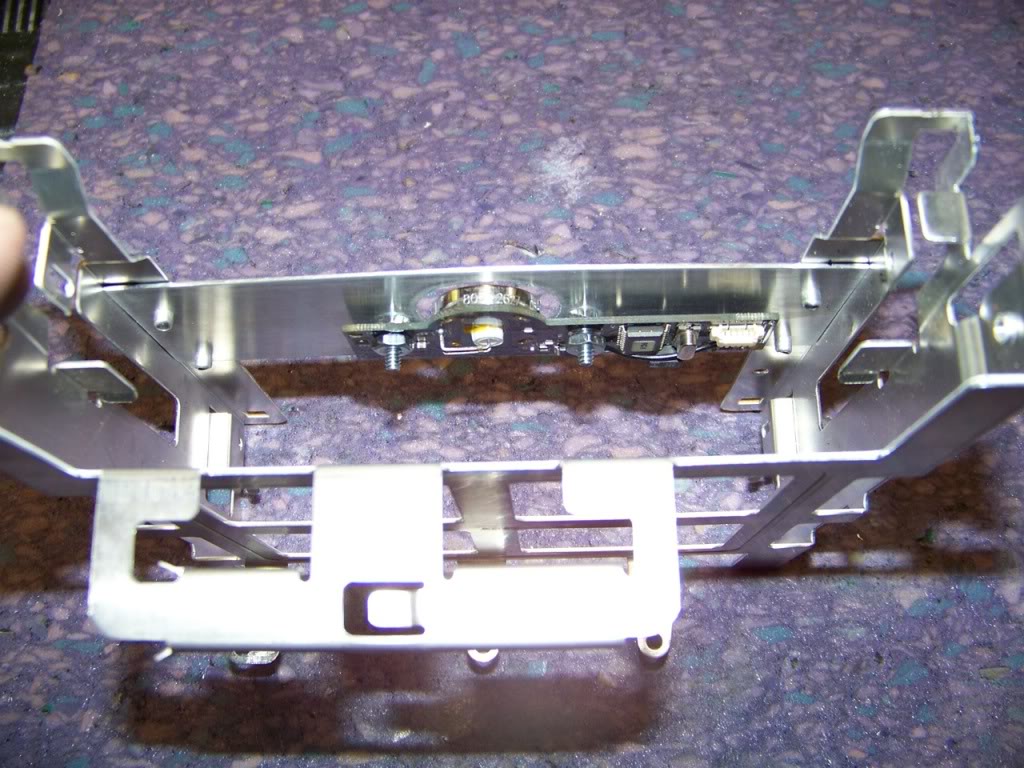
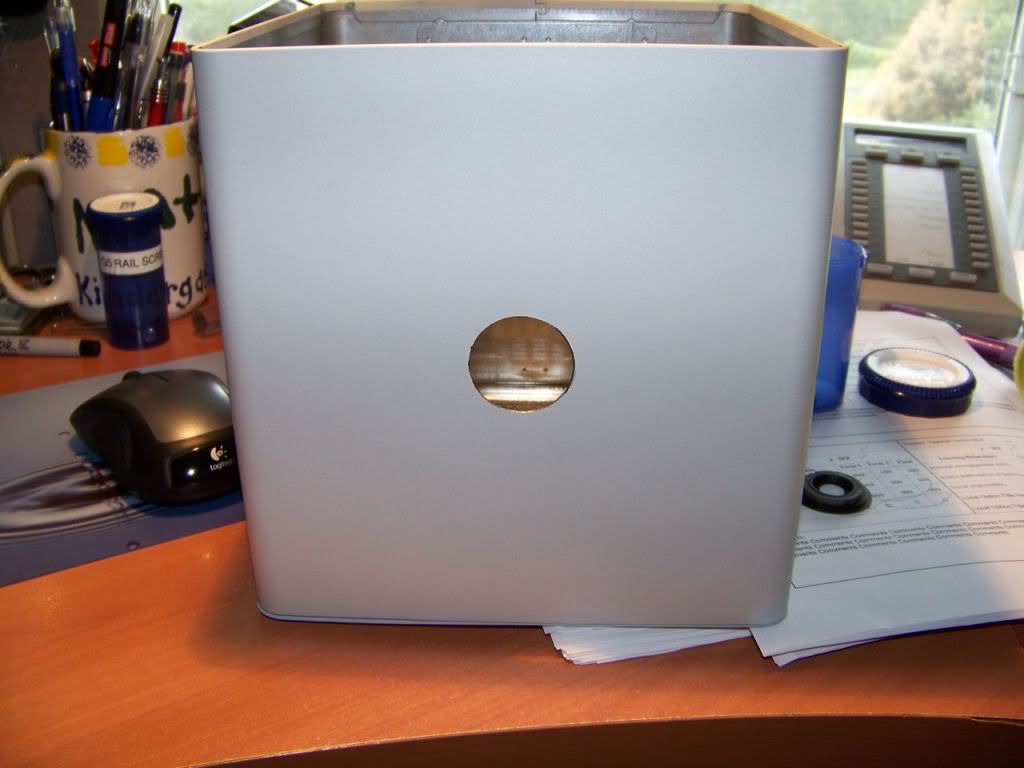
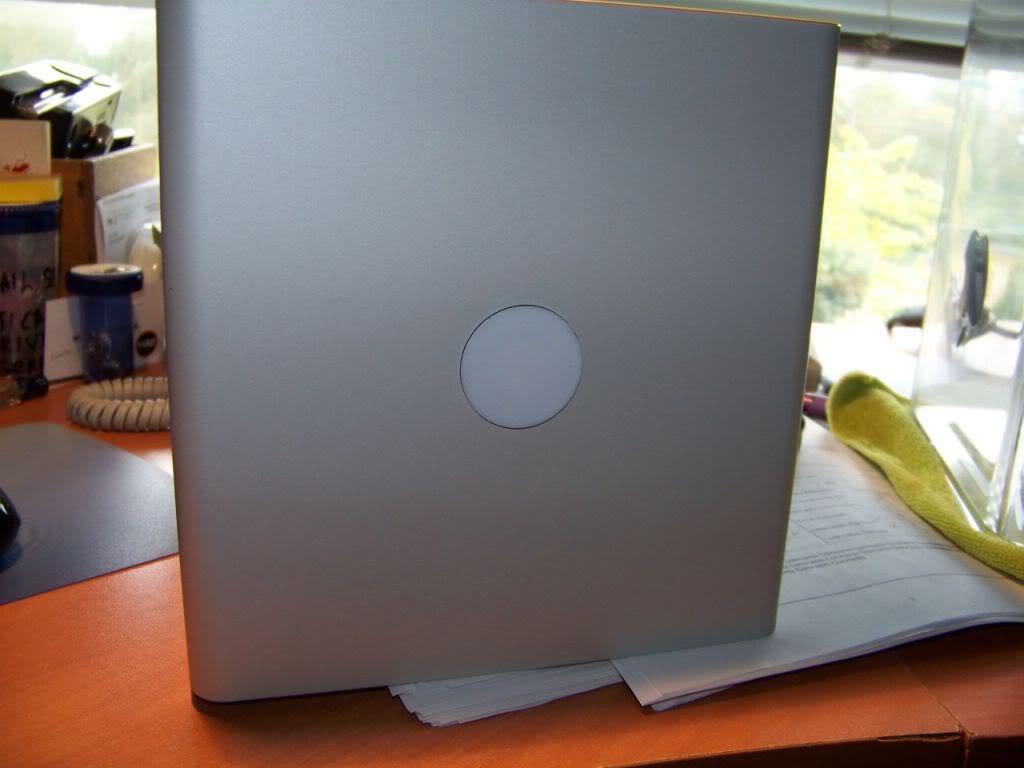
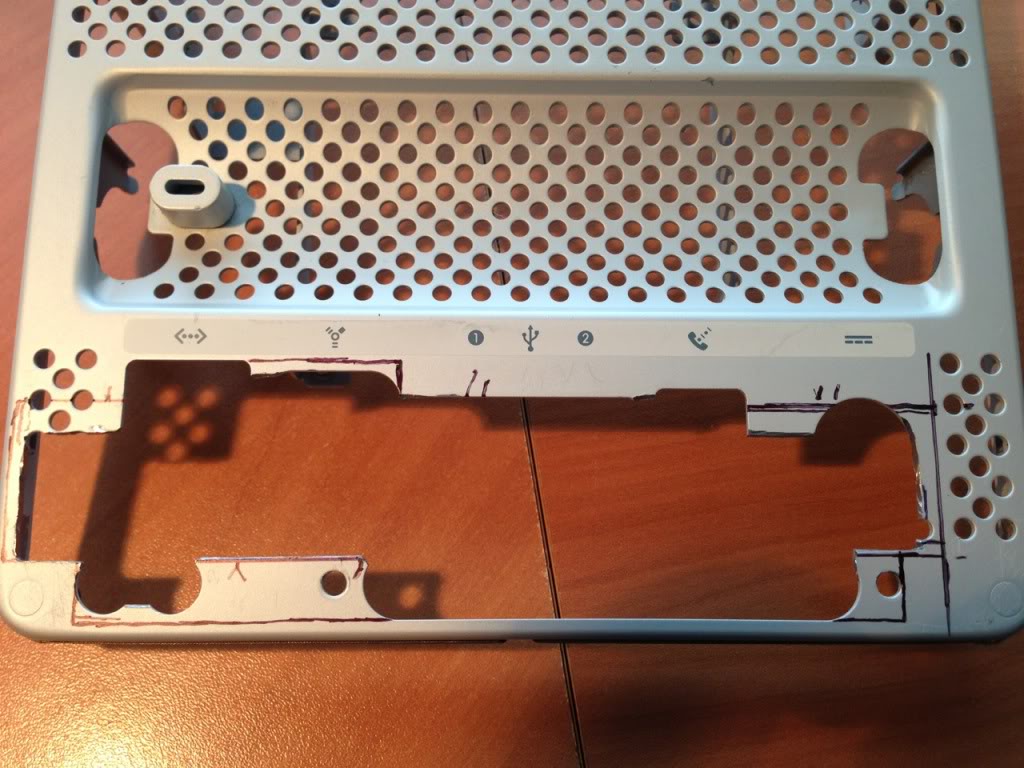
I also drilled a hole in the "can" that will line up with the sensor.
100_1743.jpg


Here is my clearance.
100_1744.jpg


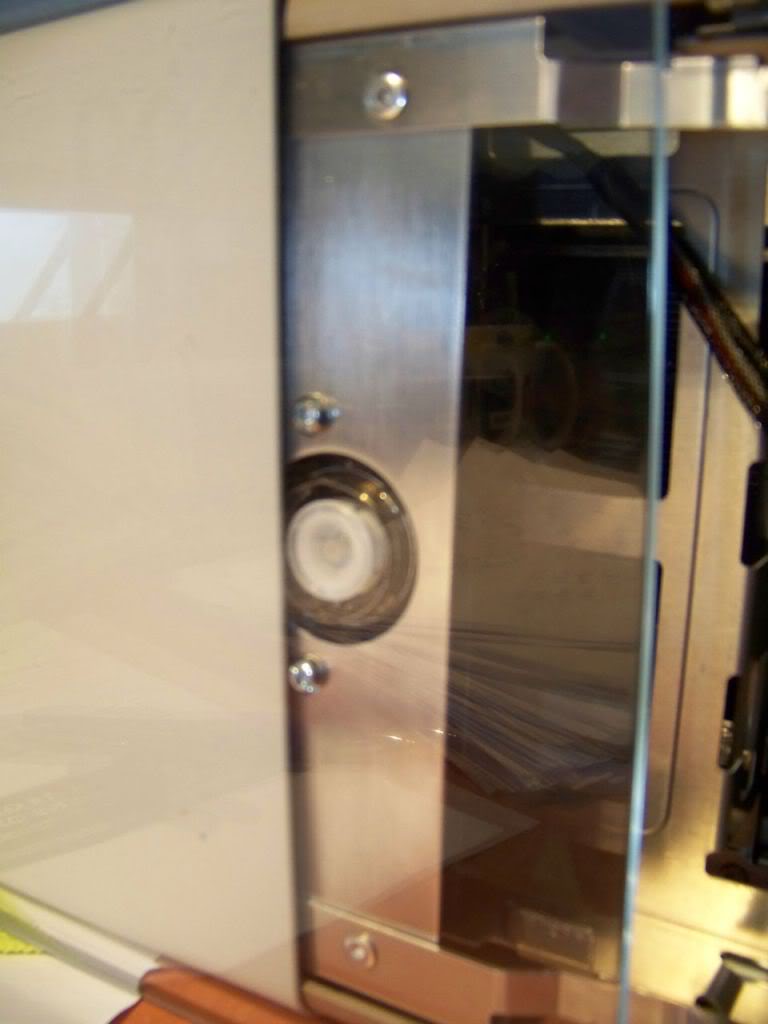
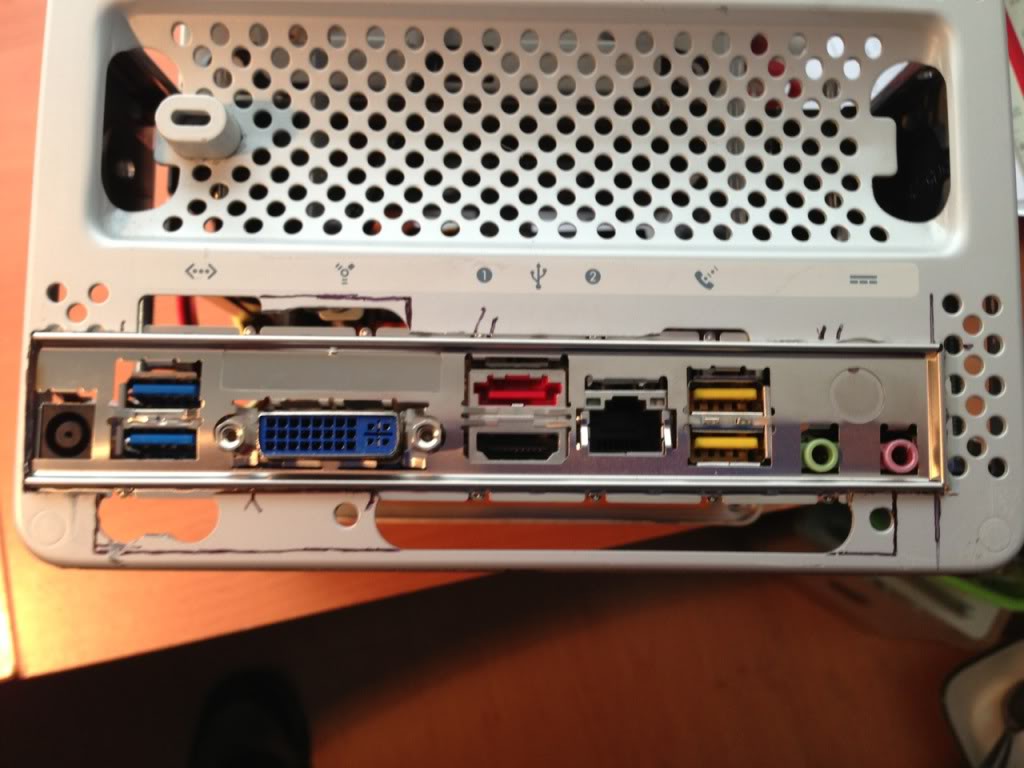
So..... the bad news, is, once the core is installed in the shell, the sensor does not sense my finger. I think I need to move the sensor closer, but I have , maybe, 1mm to 1.5mm to play with. If I move it too far out, the core wont slide in.

Thoughts, criticisms, spells, always welcome!

chaos
 
Last edited:
Try two fingers! No, that isn't me being rude, but a sensible suggestion. For my all acrylic Cube where I had a full 10mm thickness of acrylic and an air gap over my sensor sometimes (not all the time) it needs two fingers close together and held against it to register.
 
Can you also reuse the ring/cover it originally had over it, I think it was also a conductor for the touch area as well as an insulator from the side metal edges.
 
Can you also reuse the ring/cover it originally had over it, I think it was also a conductor for the touch area as well as an insulator from the side metal edges.
 
Thanks Guys!! It was a combination of both suggestions that worked. Two fingers alone didn't activate the switch. So I pulled out my glue gun (which I hate using!) and sparingly applied a blob on either side of the diffusing ring. It seems to have a graphite infused ring around it which may be needed to focus the field.

I had to remove the can to install it, I placed the face of it on the outside of the can, closer to the plexiglas that way.
100_1745.jpg


Applying the glue.
100_1746.jpg


Finished look.
100_1747.jpg


Then I carefully inserted the core...it rubs lightly against the white diffuser now, and pressed with a finger...no luck...so I tried two...and VOILA! the cube turned on. It also works with a thumb! :headbang:
 
Last edited:
Thanks Guys!! It was a combination of both suggestions that worked. Two fingers alone didn't activate the switch. So I pulled out my glue gun (which I hate using!) and sparingly applied a blob on either side of the diffusing ring. It seems to have a graphite infused ring around it which maw be needed to focus the field.

I had to remove the can to install it, I placed the face of it on the outside of the can, closer to the plexiglas that way.
100_1745.jpg


Applying the glue.
100_1746.jpg


Finished look.
100_1747.jpg


Then I carefully inserted the core...it rubs lightly against the white diffuser now, and pressed with a finger...no luck...so I tried two...and VOILA! the cube turned on. It also works with a thumb! :headbang:

Pretty neat trick and elegant solution of getting around not being able to use the top sensor!
 
Installing the WiFi card.

Yesterday my wifi card arrived, so today I installed it. I booted the cube, and it is completely recognized right out of the box.
IMG_1405.jpg
 
Last edited:
Finishing the Bottom

Today I spent some time working on the bottom of the cube, making it presentable to the world.

First I chopped off the extra arm on the fan mounting bracket. It was simply not needed.
Before:

IMG_1415.jpg


And After:

IMG_1416.jpg


I then laid out the I/O shield and cut the remaining parts of the cube base.

IMG_1414.jpg


And I made sure the motherboard still fit with the I/O shield in place:

IMG_1417.jpg


After that, I sat there and tried to figure out what to do with the remaining gaps. Do I glue scrap pieces in and then sand and paint? While I was holding a scrap piece of aluminum up against the back I had a brainstorm..maybe I could create a nice plate to cover all this mess. Its a small piece so power tools were out of the question, so I laid it out, cut and filed and filed some more, and then filed even more until I had this:
IMG_1419.jpg


IMG_1420.jpg


Then I sanded it to give it a brushed look, drilled some holes and pop-riveted it onto the baseplate and installed the I/O shield:

IMG_1421.jpg


Here is what it looks like with the motherboard in place:

IMG_1422.jpg


While I was working on the bottom, I decided on the spots where I would mount my wifi antennas. I grouped them in this corner because the short antenna wires will reach to the wifi card, and it seems like a reasonable place to put them.
Inside:

IMG_1424.jpg


and the bottom, outside:
IMG_1425.jpg


So now I have a question for all of you. Should I paint it or not?

chaos
 
Last edited:
Status
Not open for further replies.
Back
Top