
- Joined
- Jul 25, 2012
- Messages
- 6,663
- Motherboard
- Gigabyte GA-Z77X-UP5 TH
- CPU
- i7-3770K
- Graphics
- HD 4000+GT 710
- Mac
- Mobile Phone
I have been able to install Mojave 10.14.0 or 10.14.1 in all of the following Intel Series Motherboards: 6, 7, 8, 9 100 and 200.
TPLink TL WDN4800 is the PCIE Wireless card in all the systems.
In all systems where I started with Mojave, I have installed Mojave as a Clean install. Later I upgraded some of them to Mojave 14.1
In some systems, I went straight to a clean install of Mojave 10.14.1.
In the clean install, I had created the macOS Mojave or Mojave 14.1 in a 16GB Flash disk mostly Lexar or Kootion: USB 2.0 and occasionally 16GB Silicon Power USB 3.0.
I Partitioned & Formatted the USB Flash disks through the Disk Utility of my Real Mac or working macOS High Sierra Hackintosh computers in GUID +HFS+J.
For the ****Intel DH 67 BL**** I followed RehabMan’s Excellent GUIDE(s)
https://www.tonymacx86.com/threads/guide-intel-dh67xx-with-hd3000-using-clover-uefi-hotpatch.233257/that specifically emphasizes the ****strange behavior of the BIOS of this series of Intel Boards which will IGNORE a GPT partitioned USB Installer but will deal OK with a GPT HDD. I therefore created a USB installer using Terminal with two Partitions using Master Boot Record scheme+ HFS+J format.
RehabMan's GUIDE is the ONLY Source of reference that clearly explains how to install OS X/macOS in this ****peculiar Intel Motherboard.
Using the steps in the above GUIDE, I have been installing macOS from el Capitan to Mojave 14.1 on this board. I encourage anyone with this board contemplating OS x /macOS installation to read Rehabman’s GUIDE way back from his use of Chimera to Clover as bootloaders.
For all my USB Installer creation, I used "createinstallmedia" command and manually installed and configured Clover EFI downloaded from RehabMan's Bucket.
Here is the Mojave Installation command:
sudo /Applications/Install\ macOS\ Mojave.app/Contents/Resources/createinstallmedia --volume /Volumes/UNTITLED && echo Mojave Drive Created
I will be uploading the screen shots of
I will be uploading a brief introduction about each system and the related images one after the other as time permits under the same Title as a series of Mojave installations.
Mojave 10.14. 1 on GA-H61HD2+i3-3245+ Nvidia GT 710 PCIE Graphics
I have been already running a Triple boot system with macOS High Sierra 10.13.6, Windows 10 Pro and Linux Mint on this Computer from 3 separate Disks using CLOVER as the Boot Manager. It used to have ATI Radeon 5450 that worked flawlessly in all the 3 systems until Mojave came along.
The uploaded Images will cover the entire installation and will include
- GA-H61HD2
- Intel DH67BL
- GA-H77-DS3H
- GA77XUP-5TH
- GA-77XUP4TH
- GA-X79-UP4
- GA-H85M-DS3H
- GA-Z97X-UD5H
- GA-B150M-DS3H
- GA-Z270X-Gaming Ultra
- GA-Z370P D3+i5-8600K+IntelHD630
TPLink TL WDN4800 is the PCIE Wireless card in all the systems.
In all systems where I started with Mojave, I have installed Mojave as a Clean install. Later I upgraded some of them to Mojave 14.1
In some systems, I went straight to a clean install of Mojave 10.14.1.
In the clean install, I had created the macOS Mojave or Mojave 14.1 in a 16GB Flash disk mostly Lexar or Kootion: USB 2.0 and occasionally 16GB Silicon Power USB 3.0.
I Partitioned & Formatted the USB Flash disks through the Disk Utility of my Real Mac or working macOS High Sierra Hackintosh computers in GUID +HFS+J.
For the ****Intel DH 67 BL**** I followed RehabMan’s Excellent GUIDE(s)
https://www.tonymacx86.com/threads/guide-intel-dh67xx-with-hd3000-using-clover-uefi-hotpatch.233257/that specifically emphasizes the ****strange behavior of the BIOS of this series of Intel Boards which will IGNORE a GPT partitioned USB Installer but will deal OK with a GPT HDD. I therefore created a USB installer using Terminal with two Partitions using Master Boot Record scheme+ HFS+J format.
RehabMan's GUIDE is the ONLY Source of reference that clearly explains how to install OS X/macOS in this ****peculiar Intel Motherboard.
Using the steps in the above GUIDE, I have been installing macOS from el Capitan to Mojave 14.1 on this board. I encourage anyone with this board contemplating OS x /macOS installation to read Rehabman’s GUIDE way back from his use of Chimera to Clover as bootloaders.
For all my USB Installer creation, I used "createinstallmedia" command and manually installed and configured Clover EFI downloaded from RehabMan's Bucket.
Here is the Mojave Installation command:
sudo /Applications/Install\ macOS\ Mojave.app/Contents/Resources/createinstallmedia --volume /Volumes/UNTITLED && echo Mojave Drive Created
I will be uploading the screen shots of
- BIOS options I have chosen,
- The Screen Captures of EFI_CLOVER File structure and
- Contents of /CLOVER/drvers64UEFI,
- /CLOVER/kexts/Other,
- config. plist edited in the current Clover Configurator Global,
- the Clover Boot Manager Screen and its sub-menu Screens and
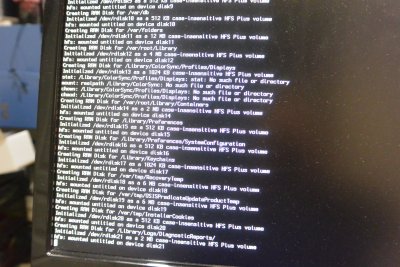
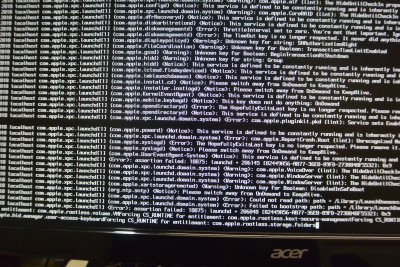
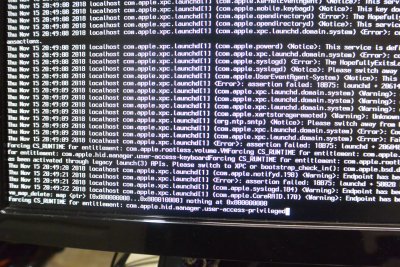
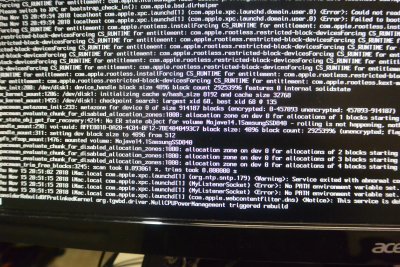
- relevant Verbose Boot Screens during successful installation and
- finally, the new Desktop,
- “About This Mac” and
- System Report Screen Captures.
I will be uploading a brief introduction about each system and the related images one after the other as time permits under the same Title as a series of Mojave installations.
Mojave 10.14. 1 on GA-H61HD2+i3-3245+ Nvidia GT 710 PCIE Graphics
I have been already running a Triple boot system with macOS High Sierra 10.13.6, Windows 10 Pro and Linux Mint on this Computer from 3 separate Disks using CLOVER as the Boot Manager. It used to have ATI Radeon 5450 that worked flawlessly in all the 3 systems until Mojave came along.
- Since Mojave does not support ATI Radeon 5 Series, I installed Nvidia GeForce GT 710 which is natively supported in Mojave and High Sierra as well as Windows 10 and Linux.
- After successful System Hard disk Installation, for post-install, I simply copied and pasted the EFI folder from the perfectly working USB installer on the mounted EFI partition of System disk.
- I had a few annoying problems post install, which I have fixed with tips from various sources
- I had problems with Preview not opening JPG and I fixed them with a modified kext in CLOVER/kexts/Other and /Library/Extensions.
- I also had problem with my TPLink TL WDN4800PCI E WiFi which I have so far managed to run using AirPortAtheros40.kext installed using Kext Utility.
- I realize reading Rehabman's comments about Atheros Wifi Chip that Mac may pull that rug out anytime and a long term solution would be to choose a PCIE WiFi with Broadcom chip. As many have pointed out, its more pricy now!
The uploaded Images will cover the entire installation and will include
- CLOVER configuration
- BIOS setup choices,
- CBM Screen and its Options,
- Verbose boot,
- System installation screens,
- Desktop and
- System Report
- Tabulated hardware SPECS of all the computers with Mojave installation
Attachments
-
 1.Mounting EFI Partition.png533.8 KB · Views: 548
 -
 2.EFI of Mojave SSD mounted and opened.png480.3 KB · Views: 565
 -
 3.CLOVER_drivers64UEFI_kexts_Other.png181 KB · Views: 610
 -
 2.M.I.T Advanced Memory Settings_XMP 1.png171.5 KB · Views: 585
 -
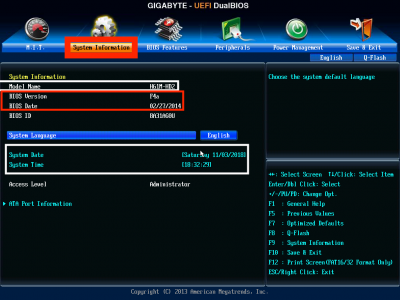 3.System Informtion_Model Name_BIOS VerionDate_Date and Time.png155.4 KB · Views: 536
 -
 4.SATA Ports and Devices.png181.9 KB · Views: 565
 -
 5.First Boot Device and BIOS Features.png210.6 KB · Views: 545
 -
 7. System Report Ethernet Cards RTl8168E.png36.6 KB · Views: 567
 -
 7.BIOS Features "Other OS" .png193.7 KB · Views: 555
 -
 8.Peripherals_Init. Display First, Audio, USB and LAN controllers ENABLED.png208.5 KB · Views: 506
 -
 9.Peripherals ISCT Disabled.png154.2 KB · Views: 520
 -
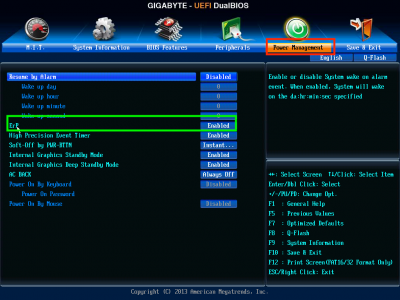 10.Power Management ErP ENABLED.png179.8 KB · Views: 526
 -
 1.CBM-Mojave USB Installer.JPG3.8 MB · Views: 505
 -
 2. Verbose boot.JPG3.8 MB · Views: 483
 -
 3.USB Installer Verbose Boot.JPG3.8 MB · Views: 433
 -
 4.USB Installer Verbose Boot.JPG3.8 MB · Views: 444
 -
 5.USB Installer Verbose Boot.JPG3.7 MB · Views: 424
 -
 6.USB Installer Verbose Boot.JPG3.9 MB · Views: 410
 -
 7.USB Installer Verbose Boot.JPG3.9 MB · Views: 386
 -
 8.USB Installer Verbose Boot.JPG3.9 MB · Views: 382
 -
 9.USB Installer Verbose Boot.JPG3.8 MB · Views: 382
 -
 10.USB Installer Verbose Boot.JPG3.8 MB · Views: 367
 -
 11.USB Installer Verbose Boot.JPG3.9 MB · Views: 364
 -
 12.USB Installer Verbose Boot.JPG3.9 MB · Views: 363
 -
 13.USB Installer Verbose Boot.JPG3.9 MB · Views: 341
 -
 14.USB Installer Verbose Boot.JPG3.8 MB · Views: 350
 -
 15.USB Installer Verbose Boot.JPG3.9 MB · Views: 352
 -
 16.USB Installer Verbose Boot.JPG3.8 MB · Views: 373
 -
 17.USB Installer Verbose Boot.JPG3.8 MB · Views: 371
 -
 18.USB Installer Verbose Boot.JPG3.8 MB · Views: 370
 -
 19.USB Installer Verbose Boot.JPG3.9 MB · Views: 380
 -
 20.Verbose Boot Ended momentary grey screen .JPG3.7 MB · Views: 384
 -
 21.Apple logo with Progressbar screen.JPG3.9 MB · Views: 364
 -
 22.End of Apple Logo_Progressbar.JPG3.8 MB · Views: 371
 -
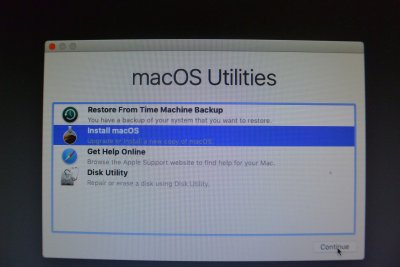
 23.MacOS Utilities Screen.JPG3.8 MB · Views: 391
 -
 24.Disk Utilities selectedJPG.JPG3.8 MB · Views: 397
 -
 25.DU Show All Devices.JPG3.8 MB · Views: 387
 -
 26.Erase Target SSD:HDD .JPG3.7 MB · Views: 375
 -
 27.SSD Erased.JPG3.8 MB · Views: 368
 -
 28.Launch Install macOS.JPG3.8 MB · Views: 388
 -
 29.Agree MacOS Installation.JPG3.9 MB · Views: 387
 -
 30.Choose SSD to Install macOS Mojave 14.1.JPG3.9 MB · Views: 386
 -
 31.7-10 Minutes ist stage of macOS Install .JPG3.9 MB · Views: 396
 -
 32.2 Minutes remaining First Stage .JPG3.9 MB · Views: 408
 -
 33.Error Validating Installer Data .JPG3.8 MB · Views: 419
 -
 34.Restarted amcOS Installer screen with 6 Minutes remianing.JPG3.8 MB · Views: 419
 -
 35.2 minutes remaining .JPG3.9 MB · Views: 406
 -
 36.Sudden reboot.JPG3.8 MB · Views: 420
 -
 37.New USB 3 Installer chosen in BIOS.JPG3.3 MB · Views: 425
 -
 38.F-12 Boot Menub_UEFI USB 3 Installer.JPG3.1 MB · Views: 443
 -
 39. CBM switch to Mojacve SSD to boot .JPG3.7 MB · Views: 424
 -
 40.Mojave SSD Verbose boot .JPG3.8 MB · Views: 411
 -
 41.Mojave SSD Verbose boot.JPG3.9 MB · Views: 416
 -
 42. USB 3 Port Problem .JPG3.8 MB · Views: 379
 -
 43.Mojave SSD Verbose Boot.JPG3.9 MB · Views: 353
 -
 44.Mojave SSD Verbose boot ending.JPG3.8 MB · Views: 364
 -
 45.Grey screen Mojave SSD.JPG3.7 MB · Views: 368
 -
 46.Apple Logo Progressbar Mojave SSD.JPG3.8 MB · Views: 370
 -
 47.Sudden Reboot Mojave SSD.JPG3.8 MB · Views: 325
 -
 48.Verbose boot Mojave SSD.JPG3.9 MB · Views: 346
 -
 49.Apple logo Progressbar Mojave SSD.JPG4 MB · Views: 359
 -
 50.12 minutes remaining Mojave SSD.JPG3.9 MB · Views: 343
 -
 51.2 minutes remaining Mojave SSD .JPG3.8 MB · Views: 327
 -
 52.Rebooting Mojave SSD.JPG3.8 MB · Views: 328
 -
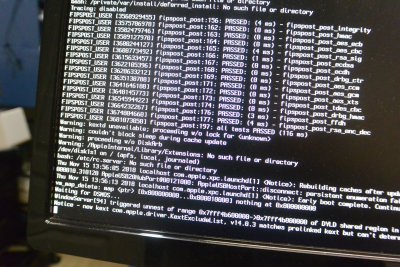 53.Verbose boot Mojave SSD.JPG3.8 MB · Views: 365
 -
 54.Mojave SSD Apple logo boot ending.JPG3.8 MB · Views: 356
 -
 55.CBM screen after SSD Install .JPG3.8 MB · Views: 364
 -
 56.Last Verbose boot Mojave SSD.JPG3.9 MB · Views: 343
 -
 57.Welcome Screen _Country Selection.JPG3.8 MB · Views: 315
 -
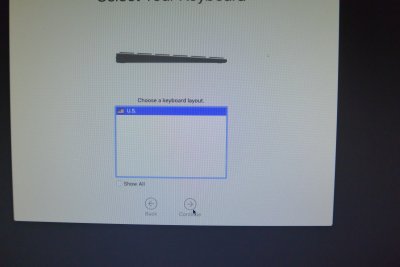 58.Keyboard layout.JPG3.8 MB · Views: 315
 -
 59.Data & Privacy.JPG3.7 MB · Views: 292
 -
 60.Transfer Information Time Machine .JPG3.8 MB · Views: 276
 -
 61.Sign with your Apple ID.JPG3.8 MB · Views: 286
 -
 62.Sign with your Apple ID and password.JPG3.3 MB · Views: 303
 -
 63.Apple ID Verification Code .JPG3.8 MB · Views: 280
 -
 64.Terms and conditions.JPG3.7 MB · Views: 257
 -
 65.Agree to Terms and conditions.JPG3.8 MB · Views: 289
 -
 66.Create Account.JPG3.9 MB · Views: 276
 -
 67.iCloud Setup .JPG3.3 MB · Views: 257
 -
 68.Express Setup.JPG3.7 MB · Views: 269
 -
 69. Files in iCloud?.JPG3.9 MB · Views: 285
 -
 70.Choose your Look.JPG3.8 MB · Views: 276
 -
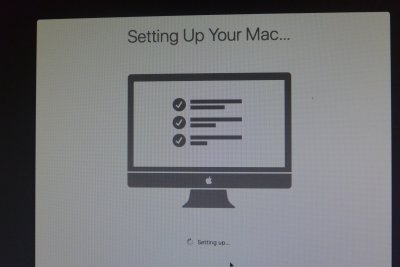 71.Setting up your Mac.JPG3.8 MB · Views: 308
 -
 1.Desktop Screen.png3.2 MB · Views: 300
 -
 2. Finder_PreferencesScreen Shot 2018-11-02 at 9.25.58 PM.png69.1 KB · Views: 348
 -
 3. AboutThisMac-Overview.png82.7 KB · Views: 368
 -
 4.System Reports_Hardware_Hardware Overview.png67.8 KB · Views: 361
 -
 5.System Report_Audio.png59.4 KB · Views: 343
 -
 6.System Report_Camera.png24.2 KB · Views: 337
 -
 7.System Report_Ethernet Cards RealtekRTL 816.png36.6 KB · Views: 327
 -
 8.Graphics:Displays .png83.9 KB · Views: 343
 -
 9.System Report_Memory.png65.1 KB · Views: 331
 -
 10.System Report_SATA_SATA Express_Disks.png119.7 KB · Views: 316
 -
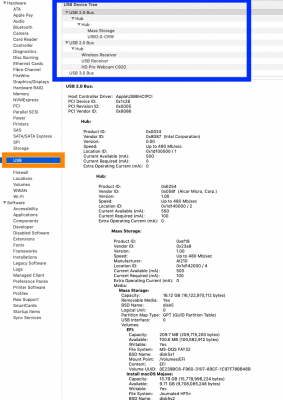 11.System Reports USB .png171.4 KB · Views: 336
 -
 12.System Report_WiFi.png167 KB · Views: 357
 -
 1.HARDWARE SPECS of multiple Systems.png69.8 KB · Views: 263
Last edited: