- Joined
- Dec 3, 2015
- Messages
- 13
- Motherboard
- Gigabyte H97M-D3H
- CPU
- i5-4690
- Graphics
- GTX 650
Just thought I would add my two peneth worth to the G5 case modding tread.
I managed to purchase 2 G5's on Ebay from a guy not far from me for 22 quid. 1 of them has a few scratches on the side and the other is pretty tidy. The tidy on happens to be a late 2005 G5 and the other is an older on so I went with the late 2005 one.
Unfortunately I never got round to taking any pictures of the build, which isn't like me at all, but have got a couple of the nearly complete job.
Firstly, parts:
After 2 weeks of head scratching building, dismantling and rebuilding, dismantling, cutting them more rebuilding, here she is:


I have El Capitan 10.11.3 installed and running pretty sweet. I did upgrade to 11.4, but kept getting Finder crashes. I do have iMessage and FaceTime working for the other 2 accounts on the system, but mine Id won't work. Apple in process of fault finding.
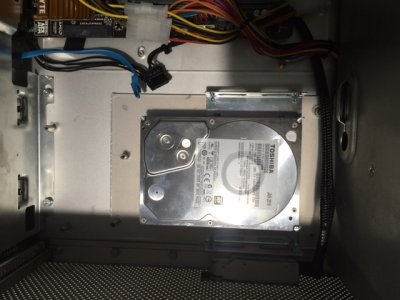
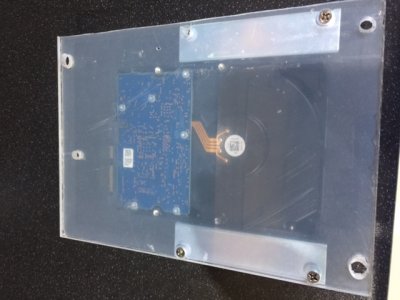
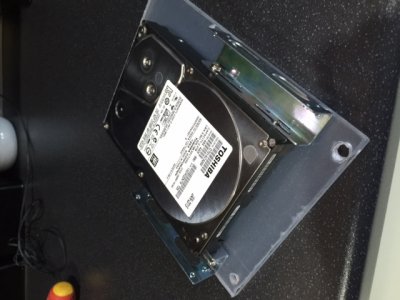
I have ordered a piece of perspex to make a back plate to attach a hard drive bracket to mount on the fixed side panel just to the side of the front power switch. I will post my progress with that when complete. As soon as that is done the clear plastic cover can go back in and I will be made up.
Si
I managed to purchase 2 G5's on Ebay from a guy not far from me for 22 quid. 1 of them has a few scratches on the side and the other is pretty tidy. The tidy on happens to be a late 2005 G5 and the other is an older on so I went with the late 2005 one.
Unfortunately I never got round to taking any pictures of the build, which isn't like me at all, but have got a couple of the nearly complete job.
Firstly, parts:
- 1 Powermac G5 (late 2005)
- 1 laserhive Original mATX kit http://www.thelaserhive.com/kits/powermac-g5-conversion-products/g5-matx-original-kit/ I asked David (nice guy by the way) if he could supply the full ATX motherboard tray instead of mATX, which he did.
- Gigabyte H97-d3h (full ATX)
- Intel i5 4590
- 1 x 8gb ddr3
- EVGA Geforce 650 GTX
- Samsung Evo 850 240gb SSD (OSX install)
- 1 Toshiba 2TB DT01ACA200 Sata HDD (Storage)
- 650w Power Supply (can't remember make)
- 4 Arctic F9 case fans
- 1 Arctic F8 case fan
- 2 Gellid Silent 6 case fans for PSU
After 2 weeks of head scratching building, dismantling and rebuilding, dismantling, cutting them more rebuilding, here she is:
I have El Capitan 10.11.3 installed and running pretty sweet. I did upgrade to 11.4, but kept getting Finder crashes. I do have iMessage and FaceTime working for the other 2 accounts on the system, but mine Id won't work. Apple in process of fault finding.
I have ordered a piece of perspex to make a back plate to attach a hard drive bracket to mount on the fixed side panel just to the side of the front power switch. I will post my progress with that when complete. As soon as that is done the clear plastic cover can go back in and I will be made up.
Si