- Joined
- Jan 13, 2011
- Messages
- 35
- Motherboard
- CustoMac Mini
- CPU
- i7-860
- Graphics
- Nvidia GTX 570
- Mac
- Classic Mac
- Mobile Phone
Hey Guys,
Over the last year I have fallen in love with the design of the G4 cube. I spent the last couple months reading articles of people putting Mini ITX mobos in cubes, so i started making measurements and picking parts. I wasn't able to come up with a configuration that I really liked, as I wanted to maintain the handle in the cube, but with a GPU that is difficult. Once tonymac published that HD3000 graphics would work with the i3 sandy bridge series, I got excited and started making plans. I was going to build this computer for my family as a HTPC using the Mac Wireless Keyboard and Trackpad with the MagicWand Connector and the Apple IR Remote.
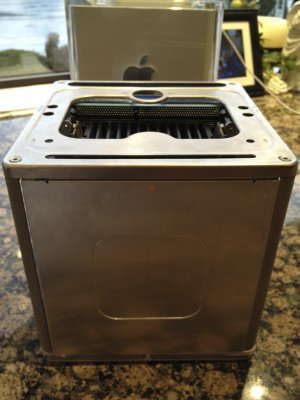
I picked up a non working Cube on Craigslist, for $75, from a church that had two working and a non working Cube that they were selling.
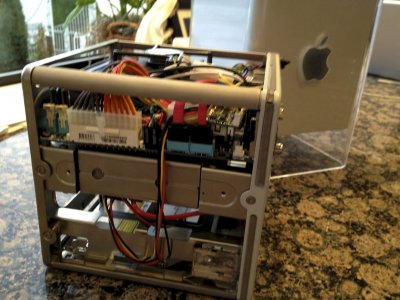
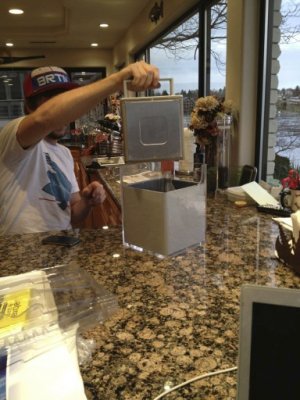
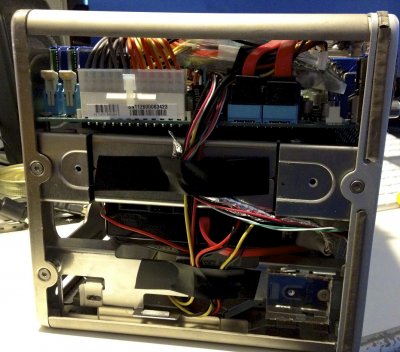
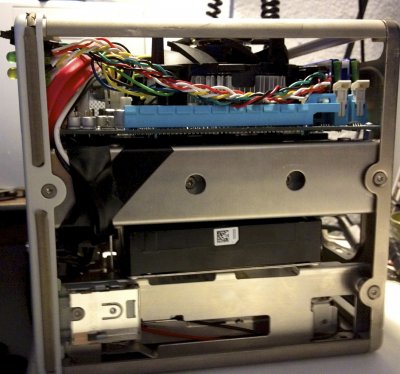
Here are a couple pictures from when I first bought the Cube and started taking it apart. I love how the handle was built into the passive cpu cooler. Pretty awesome and ahead of its time.
IMG_0370.jpg
I bought the cube in September, but with my classes and work, I was not able to do much more than striping the components that I knew I wouldn't need. As an act of procrastination, I started really planning and buying the parts I'd need for the build during finals at the beginning of December.
Most of the build is off of TonyMac's Mini Mac build http://tonymacx86.blogspot.com/2011/11/building-sandy-bridge-customac-buyers.html with some additions and using the 2125 at 3.2ghz.
Here is the BOM for my build. I bought most of the parts on Ebay/Amazon/Newegg, so as you will see, the prices I paid are lower than retail.
Mac Cube
Case Mac Cube $75.00
Motherboard Gigabyte H67-USB3 $110.00
Ram Kingston DDR3 8gb $40.00
Harddrive Seagate 500gb $75.00
CPU Intel Core i3-2125 $120.00
Bluetooth Adapter Jaba $10.00
Power Supply PicoPSU-160-XT $94.00
IR Receiver Mira USB IR Receiver $30.00
Keyboard Apple Bluetooth wireless $35.00
Remote Apple Remote $20.00
Mouse Apple Magic Trackpad $40.00
BluRay Drive Hitachi Blu-ray-ROM DVD-RW SATA Slot Drive CA10N X043H $45.00
=Total $689.00
I started getting all these parts shipped back home to Washington, where my family and tools live and where I would be building this Cube hack.
I could wright for days on all the thoughts and trials that I had while putting this together, but I'll just post the pictures that I took and if you have any questions, feel free to ask.
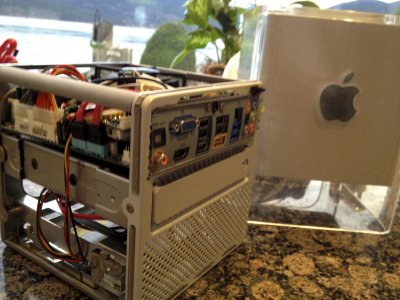
My main goals for this build was to retain as much of the original functionality as possible (especially the locking handle), and to make as small of visual modifications as I could.
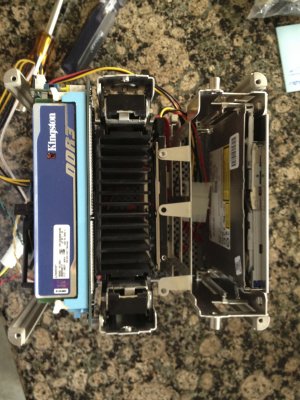
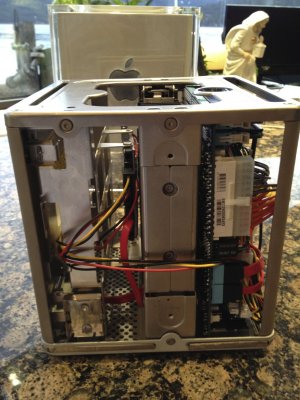
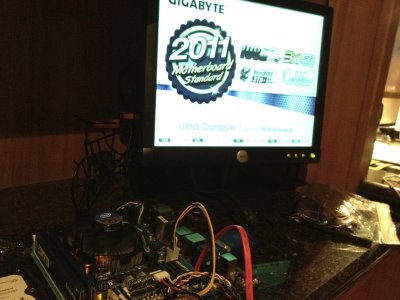
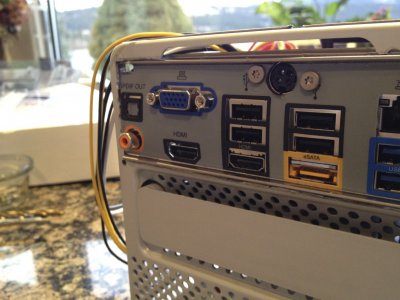
Here is the first boot picture. I wanted to make sure all hardware was working before I started installing in the case.
IMG_1187.jpg
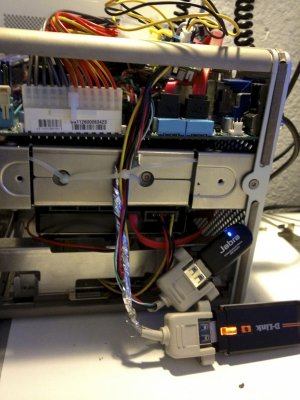
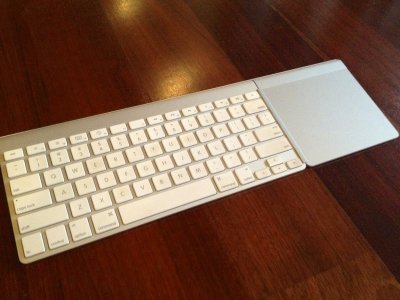
Here is the MagicWand holding the wireless keyboard and trackpad.
IMG_1202.jpg
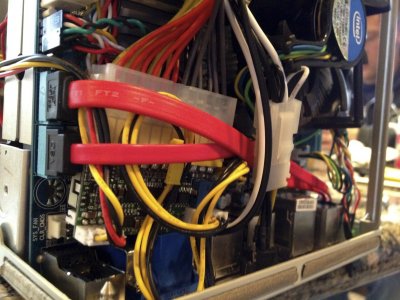
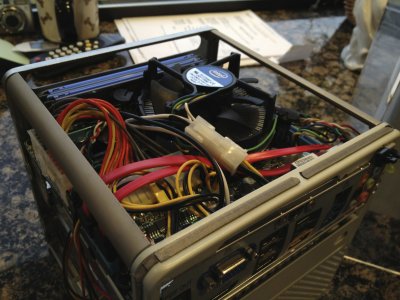
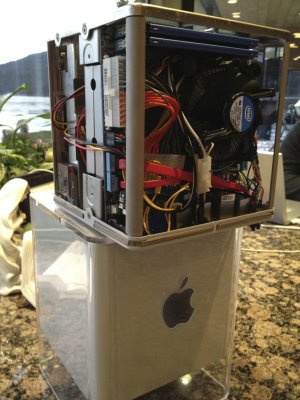
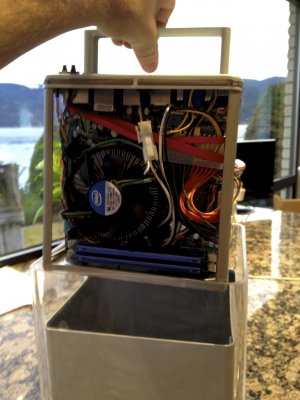
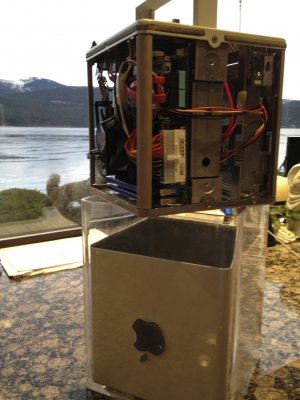
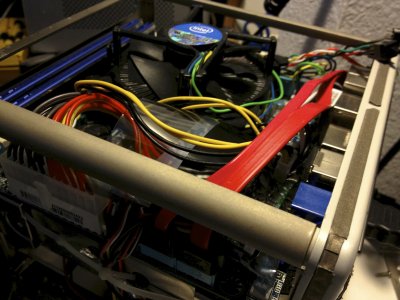
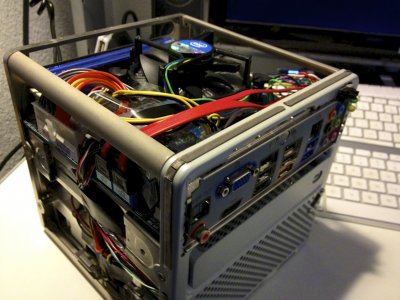
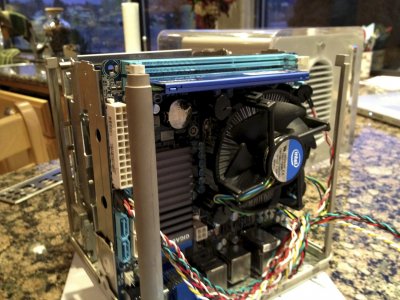
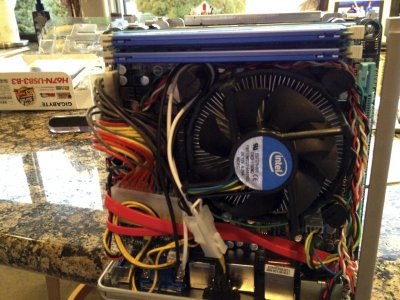
This is where I decided to place the motherboard. It fit the best and required the least amount of modification to the cube. I was not very excited to have the fan up against the case wall, but in order to keep the handle lock and DVD drive in their fitting places, it was the best place I could find.
IMG_1224.jpg
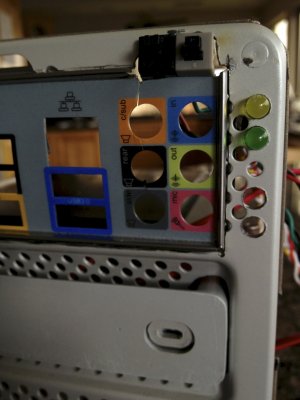
Here is a couple pictures of where i dremeled out the bottom of the case and inserted the mobo cover. I found the explanations to get the touch power button working, but my christmas break wasn't long enough and my soldering equipment had been left in San Diego. So instead I just bought replacement Case buttons and leds from newegg.
IMG_1244.jpg
IMG_1245.jpg
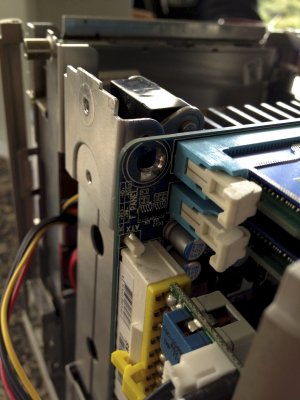
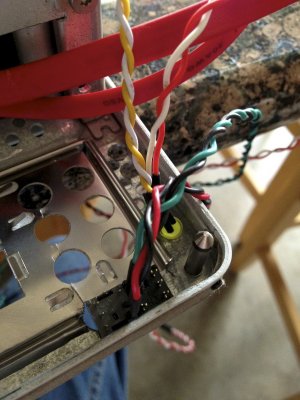
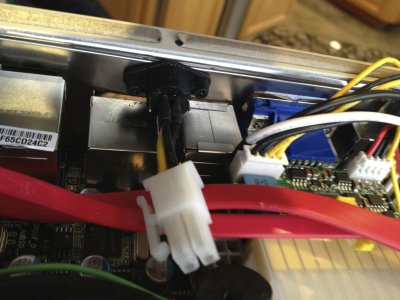
This is where I mounted the Pico powersupply female receptor. Looking back at it though, I wish I would have located it somewhere else, as the aluminum is much more flimsy then putting it elsewhere into steel.
IMG_1248.jpg
IMG_1247.jpg
IMG_1249.jpg
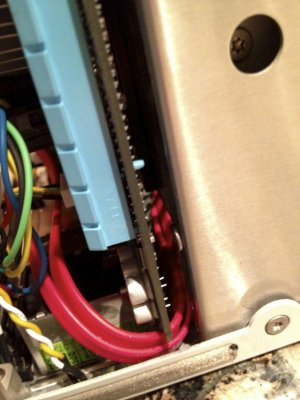
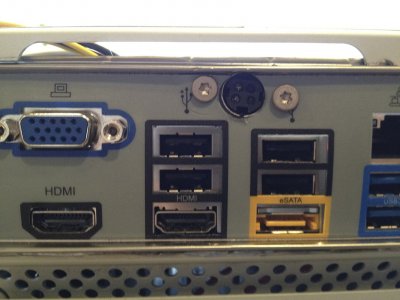
One of the first majore issues that I ran into was that the Pico ATX plug didn't fit inside the case and extruded outside of the allotted space between the corner support. I quickly expidited a ATX extension that fixted that problem as shown here.
IMG_1250.jpg
Over the last year I have fallen in love with the design of the G4 cube. I spent the last couple months reading articles of people putting Mini ITX mobos in cubes, so i started making measurements and picking parts. I wasn't able to come up with a configuration that I really liked, as I wanted to maintain the handle in the cube, but with a GPU that is difficult. Once tonymac published that HD3000 graphics would work with the i3 sandy bridge series, I got excited and started making plans. I was going to build this computer for my family as a HTPC using the Mac Wireless Keyboard and Trackpad with the MagicWand Connector and the Apple IR Remote.
I picked up a non working Cube on Craigslist, for $75, from a church that had two working and a non working Cube that they were selling.
Here are a couple pictures from when I first bought the Cube and started taking it apart. I love how the handle was built into the passive cpu cooler. Pretty awesome and ahead of its time.
IMG_0370.jpg
I bought the cube in September, but with my classes and work, I was not able to do much more than striping the components that I knew I wouldn't need. As an act of procrastination, I started really planning and buying the parts I'd need for the build during finals at the beginning of December.
Most of the build is off of TonyMac's Mini Mac build http://tonymacx86.blogspot.com/2011/11/building-sandy-bridge-customac-buyers.html with some additions and using the 2125 at 3.2ghz.
Here is the BOM for my build. I bought most of the parts on Ebay/Amazon/Newegg, so as you will see, the prices I paid are lower than retail.
Mac Cube
Case Mac Cube $75.00
Motherboard Gigabyte H67-USB3 $110.00
Ram Kingston DDR3 8gb $40.00
Harddrive Seagate 500gb $75.00
CPU Intel Core i3-2125 $120.00
Bluetooth Adapter Jaba $10.00
Power Supply PicoPSU-160-XT $94.00
IR Receiver Mira USB IR Receiver $30.00
Keyboard Apple Bluetooth wireless $35.00
Remote Apple Remote $20.00
Mouse Apple Magic Trackpad $40.00
BluRay Drive Hitachi Blu-ray-ROM DVD-RW SATA Slot Drive CA10N X043H $45.00
=Total $689.00
I started getting all these parts shipped back home to Washington, where my family and tools live and where I would be building this Cube hack.
I could wright for days on all the thoughts and trials that I had while putting this together, but I'll just post the pictures that I took and if you have any questions, feel free to ask.
My main goals for this build was to retain as much of the original functionality as possible (especially the locking handle), and to make as small of visual modifications as I could.
Here is the first boot picture. I wanted to make sure all hardware was working before I started installing in the case.
IMG_1187.jpg
Here is the MagicWand holding the wireless keyboard and trackpad.
IMG_1202.jpg
This is where I decided to place the motherboard. It fit the best and required the least amount of modification to the cube. I was not very excited to have the fan up against the case wall, but in order to keep the handle lock and DVD drive in their fitting places, it was the best place I could find.
IMG_1224.jpg
Here is a couple pictures of where i dremeled out the bottom of the case and inserted the mobo cover. I found the explanations to get the touch power button working, but my christmas break wasn't long enough and my soldering equipment had been left in San Diego. So instead I just bought replacement Case buttons and leds from newegg.
IMG_1244.jpg
IMG_1245.jpg
This is where I mounted the Pico powersupply female receptor. Looking back at it though, I wish I would have located it somewhere else, as the aluminum is much more flimsy then putting it elsewhere into steel.
IMG_1248.jpg
IMG_1247.jpg
IMG_1249.jpg
One of the first majore issues that I ran into was that the Pico ATX plug didn't fit inside the case and extruded outside of the allotted space between the corner support. I quickly expidited a ATX extension that fixted that problem as shown here.
IMG_1250.jpg
Attachments
-
 IMG_0370.jpg306.6 KB · Views: 2,673
 -
 IMG_1224.jpg490.9 KB · Views: 2,366
 -
 IMG_1187.jpg391.3 KB · Views: 1,762
 -
 IMG_1202.jpg507.7 KB · Views: 1,672
 -
 IMG_1244.jpg459.5 KB · Views: 1,619
 -
 IMG_1245.jpg315.8 KB · Views: 1,506
 -
 IMG_1248.jpg381.2 KB · Views: 1,641
 -
 IMG_1247.jpg390.2 KB · Views: 1,404
 -
 IMG_1249.jpg386.4 KB · Views: 1,475
 -
 IMG_1250.jpg524.8 KB · Views: 1,511