jaymonkey
Moderator
- Joined
- Aug 27, 2011
- Messages
- 4,077
- Motherboard
- GB Z490 Vision D
- CPU
- i9-10850K OC @ 5.2 GHz
- Graphics
- RX6800-XT+UHD630
- Mac
- Mobile Phone
Jay's - Monkey Media-MAC
Ultimate OSX - XBMC Media Centre
Components - Version 1.0
CPU: Intel Core i3-3225
http://www.amazon.com/dp/B0093H8H8I/
Motherboard: GA-H77N-WIFI
http://www.amazon.com/dp/product/B009JDTWVC/
Components - Version 2.0
CPU: Intel Core i3-4330
http://www.amazon.com/dp/B00EUUN76U/
Motherboard: GA-H87N-WIFI
http://www.amazon.com/dp/product/B00D94X4DO/
Components - Common
Memory: 16GB 1600Mhz DDR3
http://www.amazon.com/dp/product/B007TG8QRW/
Storage: SanDisk SATA 6Gb/s 120GB SSD
http://www.amazon.com/dp/product/B006EKJCWM
Already Owned
Origen AE S10V Media Centre HTPC Case
LogiTech K400 Wireless keyboard with Touchpad
2 x Westen Digital 4TB Red HDD's
Corsair CX500M PSU
Additional existing Media Centre components
Panasonic 42" LED TV
Dennon 5.1 HDMI AV Amp
Custom Wooden Cabinet with built-in UPS
Xbox-360 & Sky-HD Box
Ultimate OSX - XBMC Media Centre

Components - Version 1.0
CPU: Intel Core i3-3225
http://www.amazon.com/dp/B0093H8H8I/
Motherboard: GA-H77N-WIFI
http://www.amazon.com/dp/product/B009JDTWVC/
Components - Version 2.0
CPU: Intel Core i3-4330
http://www.amazon.com/dp/B00EUUN76U/
Motherboard: GA-H87N-WIFI
http://www.amazon.com/dp/product/B00D94X4DO/
Components - Common
Memory: 16GB 1600Mhz DDR3
http://www.amazon.com/dp/product/B007TG8QRW/
Storage: SanDisk SATA 6Gb/s 120GB SSD
http://www.amazon.com/dp/product/B006EKJCWM
Already Owned
Origen AE S10V Media Centre HTPC Case
LogiTech K400 Wireless keyboard with Touchpad
2 x Westen Digital 4TB Red HDD's
Corsair CX500M PSU
Additional existing Media Centre components
Panasonic 42" LED TV
Dennon 5.1 HDMI AV Amp
Custom Wooden Cabinet with built-in UPS
Xbox-360 & Sky-HD Box
 |
 |
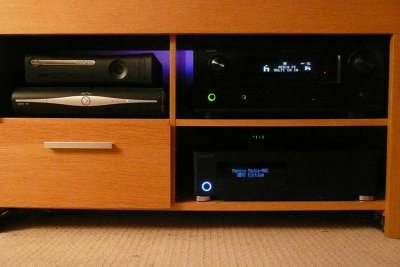
Wooden Cabinet is a modified ARGOS unit
Comments
Background
I’ve been a long time user of the fantastic XBMC media centre, its a project that has grown in size and support over the last few years and is - in my option the best and most flexible media centre software you can run on OSX.
Until recently I was running OSX Lion on a dual core Intel E3300 CPU on a XFX mini-atx motherboard that had integrated Nvidia 9300 (ion) Video Graphics with HDMI output. It was a good and relatively cheep solution about four years ago, but things move on and the CPU is no longer supported by the latest incarnation of OSX (Mavericks), the ion video chipset struggled with high-bit rate 1080P video and despite a 2TB drive - my audio/visual library will soon outgrow what was at the time the largest drive I could get ...... time for an update.
My latest build is centred around tried and tested components, I wanted to try and keep the whole thing neat and simple but i also wanted to implement full IR control using the stupidly simple but amazingly well designed Apple IR Remote. I also wanted this system to act as a Media Server so I could stream my videos and music to other systems running XBMC on my network. I have a large collection of CD’s, DVD’s and BluRay movies which i’ve been gradually digitising over the years and combined with my photo library they now total almost 2TB, which has been a lot of work so I also wanted to implement some sort of redundancy so for my build I decided to use two 4TB drives in a mirrored raid for my library to live on and still have plenty of space for future use.
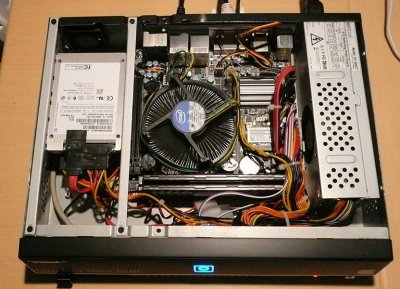
I already had a Origen AE S10V Media Centre PC case from the old build, complete with modular Corsair CX500M PSU. Origen AE make probably the best Media Centre PC cases available, Designed to look good and blend in with other media components in your front room or private home theatre.

Origen-AE S10V HTPC Case
Origen-AE HTPC all metal cases are designed with care and attention and include an IR receiver which allows for remote power on/off, a VFD Display and minimal external controls but most importantly they are quiet. Lowering a small panel on the front gives you access to the slot loading optical drive, two usb ports an a SD card reader. Thats quite a lot for a case to pull off and still look good which is why they are horrendously expensive but if you can find one on a good deal I can recommend them, the build quality is possibly the best i’ve ever seen - you will not be disappointed. Of corse you are free to use what ever case you want.
System Components
Gigabyte HA77N-WiFi Motherboard
Intel i3 3225 3.3Ghz Dual core CPU with integrated HD4000 GPU
Corsair Vengeance 8GB (2 x 4GB) RAM
SanDisk SSD 64GB SATA-III SSD
2 x Westen Digital RED 4TB HDD
Sony Optiarc BC-5600S DVD-RW/BR Slot loading Optical drive
For IR Remote
Apple IR PCB from 2010 iMac - Part no 922-8169 or 922-8461, 820-2151
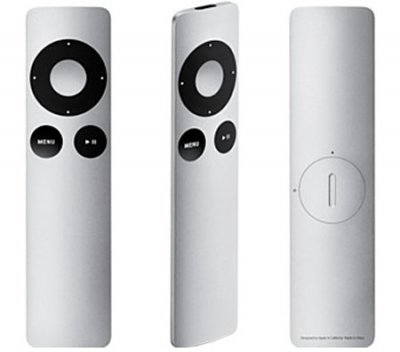
Apple IR GEN2 Remote Control - Model No. MC377
Small Plastic Box
1M USB cable (type A to B)
All of the components for the remote where bought on ebay for about £25.00 in total.
Main System Assembly
This is a fairly straight forward build, just take your time and install the hardware in a logical order. Start by fitting the CPU and RAM to the motherboard. As the factory fitted mini-PCIe WiFi card is not supported by OSX, I removed it as I will be using wired-gigabit ethernet but in other builds I replaced it with a BCM943225HMB combo card (see the notes in my MonkeyBook build for further info and kexts for this card). Now install the CPU cooler, the stock Intel cooler is quiet and low profile and i’ve never seen CPU temps > 40 Degs-C even when playing high-bit rate full 1080P with DTS soundtrack, so no need to buy an expensive cooler.
I cant stress how impressed I am with the capabilities of the Intel i3 3225 CPU, despite being a 'entry' level CPU I have not had any instance where I felt this system needed anymore horse-power. Playing back a high-bit-rate, 1080P video file with full 5.1 DTS soundtrack over the i3 HDMI port I never see the CPU go above about 25% on both cores. Sure you can spend more on a more powerful CPU but for running XBMC and playback this entry level CPU represents good value for money.
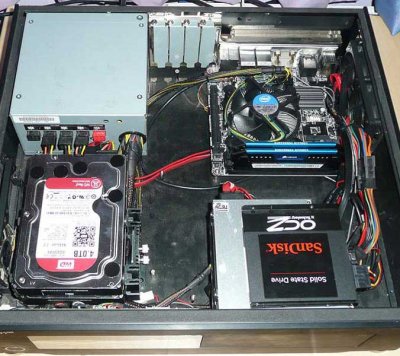
Once You’ve assembled the motherboard components, mount it into the case, I routed a few of the SATA cables underneath the motherboard for neatness. Now install the Hard drives and the Optical Drive and connect all the power cables. In order for the IR to power up the system you need to connect the supplied in-line PSU brake-out cable between your motherboard and your PSU connector. This allows the internal VFD/IR control board to change the state of the PSU power-on sense wire - the documentation with the Origen cases is pretty good at showing what goes where.
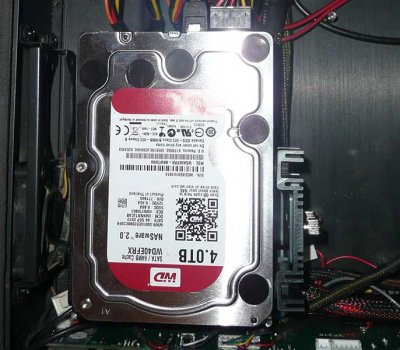
For the internal drives I attached the two 4TB HDD's to the secondary SATA-II ports (2 & 3), the SSD was attached to the 1st primary SATA-III port(0) and the Optical Drive connected to the 2nd primary SATA-III port(1).
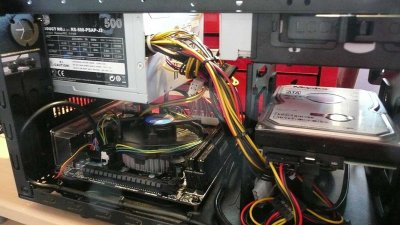
Within the Origen AE S10V case there is a nice space underneath the optical drive where a lot of the cables can be placed (this space is needed if using a mATX sized motherboard). I found the case cooling fans to be running flat out so i installed some ballast resistors in-line with the fan power connections, this halved the speed of the cooling fans and reduced the case noise to practically nothing without drastically effecting the cooling of the system. I made these myself but you can find plenty of suppliers on ebay.
As the Origen AE S10V is a low profile case there is only room for two internal 3.5” hard drives and one low profile, slot loading optical drive (like a laptop) however there is plenty of space on top of the optical drive to mount a 2.5” SSD, I mounted mine on a 2.5”/3.5” adapter I had left over from another build and used double-sided rubber sticky pads to fix it to the top of the optical drive.
 |
 |
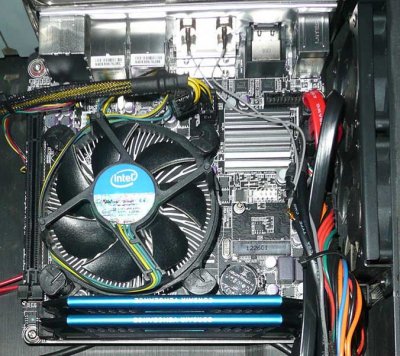 |
Originally I had a mATX Motherboard in the S10V case, H77N ITX board is half the size
Like I said take your time and make a neat job of routing all the power and SATA cables, in order to connect the slot-loading optical drive i had to buy a special 'slimline' cable adapter. Use tie wraps to keep all the cables in place and away from any fans. A tidy internal build will allow more efficient air circulation within the case thus keep things cool and quiet.
Update: 2nd March 2014
Since building the Initial (Version 1.0) of this system I have built a clone of it for one of my friends. I decided to try the Haswell version of this base build using a Gigabyte H87N-WiFi Motherboard and Intel i3 4330 CPU (see latest CusoMAC Mini guide), Assembly, configuration and installation is identical to the Version 1.0 build, however enabling HDMI audio is not quite as straight forward but is possible and works great if you follow Toleda's guide here.
As you would expect, the Version 2.0 Spec runs a little bit faster than the Version 1.0 spec, but to be honest there was no real noticeable difference when running XBMC. Of course, benchmarks (Geekbench) show a slight improvement in CPU performance and obviously the integrated Intel HD4600 GPU is much improved over the HD4000 GPU. But unless your going to be running other graphics intensive tasks there is not much point in the higher spec, so if you don't need the extra performance save your self a few bucks and stick with the Version 1.0 hardware spec.
To make the Apple IR Receiver.
The built-in IR receiver on the Origen AE S10V case can be re-programmed to switch on the system by any IR command received, unfortunately once powered up it can not work with the Apple IR remote. You might be able to get the supplied Microsoft Media Centre remote to work.
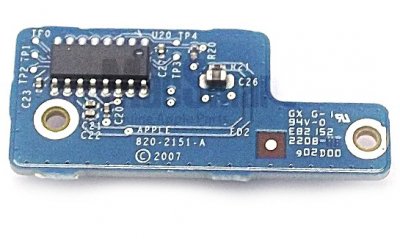
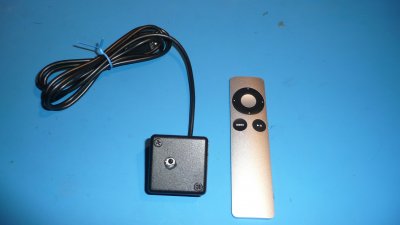
I wanted to keep my experience as 'Apple' as i could, so in order to use the Apple IR Remote with OSX you need to add an OSX supported IR receiver. I bought a second hand iMac one on Ebay for just a few pounds (Apple part no of 820-2151). On a real MAC this board is connected to an internal USB port via a bespoke cabe, so all we have to do is solder a standard USB cable to it and we're good to go. All of these IR parts are supported out of the box by OSX, no additional kext or driver is required to make it work.
Like the iPod and iPhone the Apple IR Remote is strangely pleasing to hold in your hand, stupidly simple, well made and just works. As you can see in the pictures I mounted the IR receiver PCB in a small box and connected it to my HTPC via the USB cable, we sometimes have a sofa in that part of the room which can cut off an IR transmission to the HTPC but having the 'eye' remote to the computer means it works no matter.
 |
 |
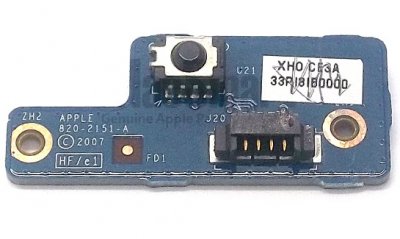 |
Apple IR Remote & IR Controller Board
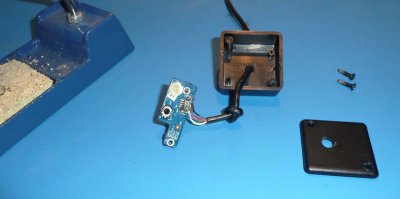
I found an old USB cable and cut one end off, stripped back the wires and tinned them, then I made a hole in the back of a small plastic box i bought on-line and threaded the cable through, tie the cable in a knot a few inches before the end to act as a strain relief.
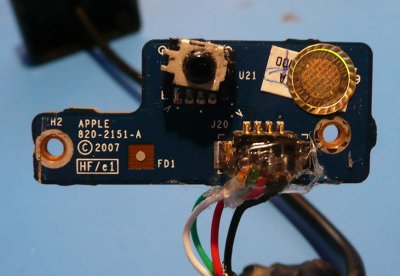
Using a scalpel, carefully cut away the black plastic at the top of the connector on the IR PCB so that you can get to the 4 gold pins easily and tin them, then solder the four wires of the USB cable to the pins. Be sure to check the connections , if you wire it wrong it could burn the IR board and you will have to get another. I covered the soldered wires with some clear glue and let it set to help with reducing the strain on the wires and pins.
Pin No 1 on the Apple IR Controller Board is identified by a small 'v' symbol, if the wire colours on your USB cable are different to mine, use a test meter or DVM to check which pair carries the 5V.
| Pin | Wire Colour | Description |
| 1 | White | Data + |
| 2 | Green | Data - |
| 3 | Red | Vcc + |
| 4 | Black | Vcc Gnd |
Once your happy with your work, mount the IR board into your box (I used some double sided sticky tabs) and make a small hole in the lid for the IR 'eye' to see the world. Screw the box together and set it aside with the remote for now.
 |
 |
 |
Not my tidiest soldering but it works flawlessly
Installing OSX
Make a Makericks Unibeast USB installer as per the instructions provided by TonyMacx86 here. If you want to use HDMI Digital Audio make sure that you also get the DSDT provided in the database here. Select Gigabyte, then 'Optional 7-Series DSDT's' then 'F2' under H77N-WiFi, copy it along with Multibeast on to a folder on the root of your Unibeast USB, while your at it grab 'Show-all files' and 'Kext Utility' if you don't have them from the Community Section and copy them to the same folder on the USB - we'll need them later.
Plug-in the keyboard, power and a monitor and switch on, go into the BIOS, Make sure you have BIOS version F2, if not you'll have to use anther system to download the BIOS update from the GigaByte website and flash it.
Load the BIOS defaults and set the following options :-
Peripherals
- xHCI Mode = AUTO (default)
- XHCI Hand-off = Enabled (default)
- EHCI Hand-off = Enabled (default was Disabled)
Power Management
- High Precision Event Timer = Enabled (default)
BIOS Features
- Intel Virtualization Technology = Enabled (default was Disabled)
- VT-d = Disabled (default was Enabled) - not available on some i3 CPU's
Other than the above settings your free to set the rest of the BIOS options to how you like.
Once done save the settings, insert you Unibeast USB and reboot, select the OSX installer and wait for it to load. Go past the welcome screen and move on until you get to the Install OSX option. Select 'Disk Utility' from the sub menu 'Utilities' on the top menu;. Select your SSD and create a single partition with a table type of GUID and format it as Mac OS Extended (Journalised).
Now create the Mirrored-Raid set, click on the RAID tab, enter a name, set format to Mac OS Extended (Journalised) and the Raid Type to Mirrored RAID Set, drag each of the 4TB drives to the newly created raid set and then click on create and apply.
Quit Disk Utility and return to the Installer, select your SSD as the target drive and let the installer do its job. See here for the full step by step guide.
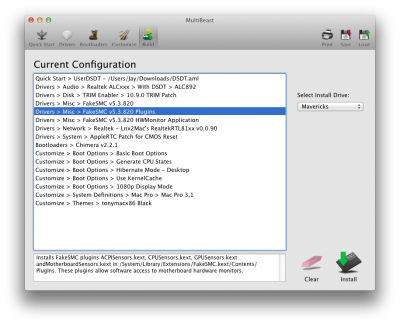
Once OSX is installed reboot with your Unibeast USB and select your freshly installed OSX, go through the setup wizards, when done copy the DSDT and Multibeast to your Downloads folder. Run Multibeast and select the following options:-
Select any additional Boot Options if you need them (1080p is one I use) and click on build and then install. Once Multibeast has finished and before you re-boot edit the file 'org.chameleon.Boot.plist' in your /Extra folder using textedit and add or change the following keys and strings :-
Code:
<key>IGPEnabler</key>
<string>Yes</string>
<key>Kernel Flags</key>
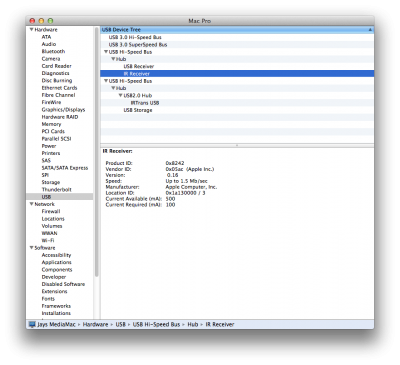
<string>darkwake=8</string>If you’ve opted to build the IR Receiver open up System Information and look in the USB section, somewhere you should see the Apple IR receiver with a device ID of 0x8242 or similar.
Complete setting up OSX how you like it and install any additional utilities that you usually use.
Install XBMC
Once you’ve got things to your liking, download and install the latest version of XBMC from the web site. The current stable release is 'Frodo - 12.3' which includes a number of fixes to make XBMC Mavericks safe, be sure to get the 64 Bit version
XBMC is a very complex piece of software that supports skinning and all sorts of plug-ins, if your not familiar with it then use the support forums and the wiki to find answers. like all community software the learning curve can seem overwhelming at first but if you keep chipping away at it, it all starts to make sense. I can control every feature and access all of XBMC using just a few button pushes on the Apple IR Remote.
I use the add-on skin MQ5 which i think looks amazing and takes XBMC to the next level, I also have a few video plug-ins such as BBC iPlayer, Apple Movie Trailers and some program plug-ins that automatically manage the thumbnail/fanart/poster images when new items are added.
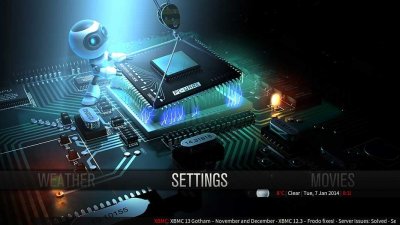
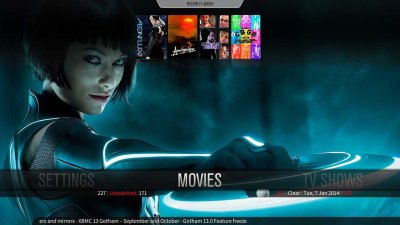
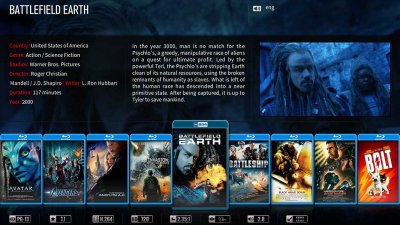
Finally, using finder - create a folder structure for your video and audio files on the mirrored raid and add the paths to XBMC and put it into library mode, XBMC will use its ’scrapers’ to find additional information about the all the items in your libraries such as artist information, actors, fan made art work, synopsis .. etc. It really is amazing how much information XBMC can find and display.
 |
 |
 |
 |
 |
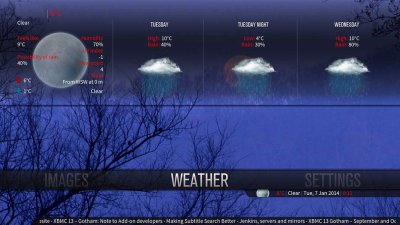 |
Screen grabs of my OSX - XBMC Media System in action
Sharing Media Content
You have two options when it comes to sharing the media files on your XBMC media centre, you can enable XBMC UPnP service which works very well despite being a beta feature, however this relies on your remote player to support the source format. Most smart TV's and small media players do not support the MKV format, so in this case I find it better to share the Media files via the OSX File Sharing service and stream via SNP or AFP to a remote XBMC player running on my laptop.
I find it works best if you add the media source paths to a remote XBMC system based on the full source OSX volume name such as:-
/Volumes/M_Data/Videos/Movies
/Volumes/M_Data/MP3
 |
 |
In these examples the volume name of my raid on my main XBMC system is ‘M_Data’, in order to share the library contents over your network simply set up a network share for the root of volume ‘M_Data’ then on your remote machine you can connect to the share ‘M_Data’ which will be added as a virtual mounted volume thus keeping the same path name on the remote system as the local system.
On my remote XBMC system (My MonkeyBook Pro) I create the following network connections :-
As the relative path on both XBMC systems will be the same eg: /Volumes/M_Data/Videos/Movies I can use a shared SQL Database running on my NAS (cmmp/media) for the XBMC Library, so i can start watching a movie on my Media-MAC in the lounge and if i'm feeling tired, I can watch the rest in bed by plugging in the HDMI of the bedroom TV in to my Sony Vaio MonkeyBook and running XBMC, it gets the position of the last movie played and carries on, its pretty cool and works faultlessly, although you do need a decent NAS and at least Gigabit Ethernet for it to work with out any 1080P streaming problems. There are plenty of guides on advanced configuration techniques for XBMC in the forum section of the XBMC website
IR Configuration
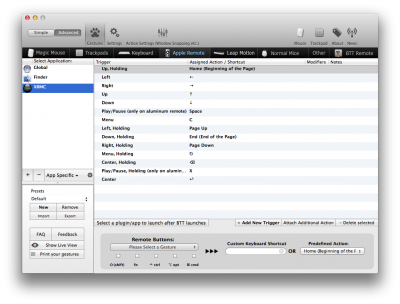
In order to use the Apple IR Remote to control XBMC I use the fantastic 'Better Touch Tool’ (BTT). Simply download and install the free app from the creators website here. Once installed you can create a custom set of actions for XBMC by clicking on the 'Apple Remote' tab and adding XBMC to the list of Apps, then configure each of the IR remote actions to its equivalent XBMC keyboard shortcut. The great thing about the Apple IR Remote is that whilst it looks very simplistic each button actually has two commands, a short-press and a long-press. you can set it up however you like but i have mine set up like this.
 |
 |
Note the two different IR command sets, one to control XBMC and one to control OSX (when XBMC is not running) here you can see that a long press of the <down> button with XBMC not running, calls an Applescript which in turn calls the system shutdown dialogue and a long press of the <menu> button will start XBMC if not already running. BTT is by far the easiest and most reliable way to add IR control to XBMC or any other app for that matter.
About this MAC & VFD Customisation
 |
 |
ATM & VFD Customisations
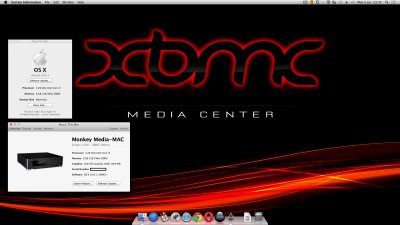
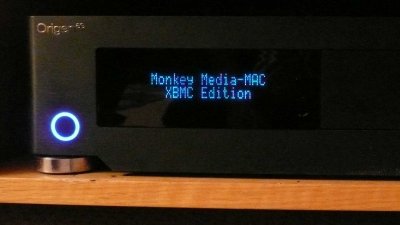
For completeness I applied the method I developed for my MonkeyBook and customised ATM with an appropriate image and description. The icon-image file I made is attached below for those who want it, in order to perform the customisations see the second part of my guide here (skip past the part about modifying the boot-loader).
In order to change the VFD's default message and re-program the IR power on/off commands I had to boot the system with Windoze-7 on a USB thumb-drive and install the IR-TRANS driver and VFD Setup Utility from the Origen-AE website, there is no compatible MAC version of this software (at least not for the VFD firmware I have). Once the VFD controller is re-programmed you can reboot back in to OSX, the changes will keep even after a full power off as the settings are flashed on to the VFD micro-controller.
At the moment I have not been able to get XBMC to use the VFD an an information display, however community software is developing rapidly which should allow this in the next few months, I'll update this guide once I have it working.
Final Thoughts
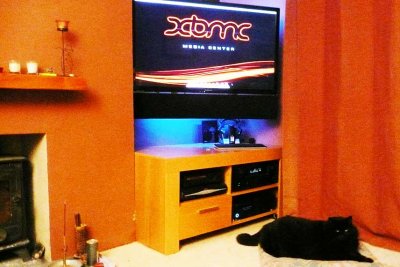
I'm really pleased with the final outcome, this media system looks and runs great, it never staggers or stutters leading to a very fluid experience which is fully controllable via IR, it just never fails to work. As you can see from the images at the start of this guide I have it hooked up to my Dennon HDMI AV amp driving a 5.1 QED Speaker system and a Panasonic 42" OLED TV. Playback of surround encoded movies via HDMI has never worked so well, the system seems more than capable of playing anything I throw at it including direct playing of BR-Disks in the optical drive using Mac BluRay Player.
The whole system is housed in an Argos wooden cabinet that we bought on ebay, I had to modify it slightly so that it fitted exactly in the alcove where we have the TV. I also incorporated a 1600W UPS which powers all of the equipment, we live in a rural village and we are always suffering power brown-outs, I've lost count of the amount of equipment I've lost over the years to surges so running my Media System off a UPS is a no brainer.
Almost all of my CD/DVD/BR disks I rip and save to my media library, for BR disks I use MakeMKV and then transcode the output to a smaller file size using Handbrake. Having the ability to share my media content around my home via my network is a real bonus with the comfort of knowing there's some good redundancy built in. I really could not ask for more, I hope that you find this guide inspiring and build your own Monkey Media-MAC, if you do please hit the 'Recommended' button at the top of the post, would be nice to get a Golden Build.
Cheers
Jay

