- Joined
- Sep 23, 2018
- Messages
- 19
- Motherboard
- Gigabyte Z370N WiFi
- CPU
- i5-8600K
- Graphics
- RX 580
- Mac
- Mobile Phone
MOBO: Gigabyte Z370N WiFi
CPU: i5-8600K
GPU: Sapphire Radeon Nitro+ RX 580 4GB
SSD: Samsung 860 EVO 1TB 2.5 Inch SATA III
----
I am following this guide this TonyMac guide.
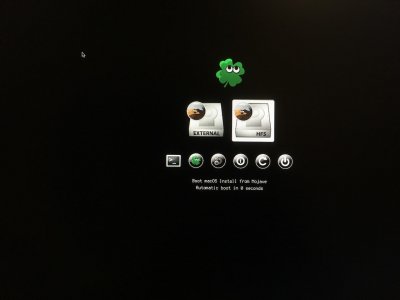
My installation is stuck. It keeps looping back to the clover boot page, giving me two options:
1. Boot macOS Install from Install macOS Mojave (This is my USB)
2. Boot macOS Install from Mojave (This is my SSD)
Here's what happens with option 1, Boot macOS Install from Install macOS Mojave:


And then at some point during the install, the system restarts and I get looped back to the Clover boot page.
Here's what happens with option 2, Boot macOS Install from Mojave:

Same thing in the end, I restart and get looped back to the Clover boot page.
I'm not sure if it helps but this is what's in Disk Utility:


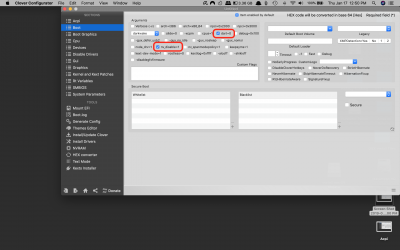
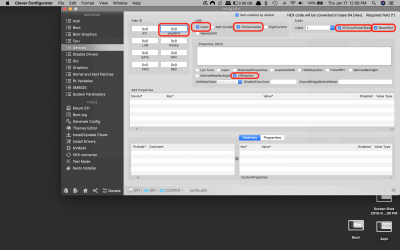
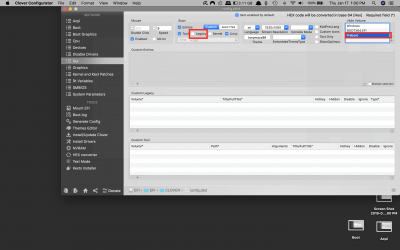
In BIOS I made the following changes:
- Load Optimized Defaults
- VT-d Disabled
- XHCI Hand-off Enabled
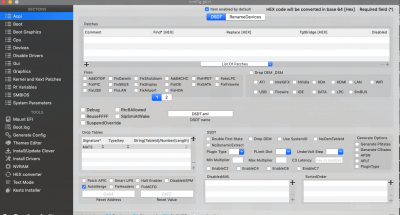
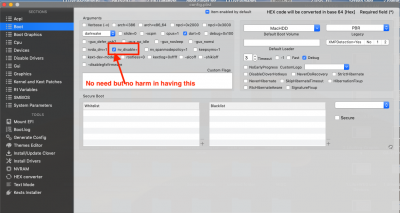
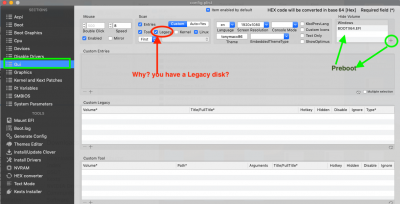
Here are my BOIS settings:


It's frustrating because I completed an install already on a different, identical Samsung SSD and it worked perfectly but for some reason this one has had me spinning in circles googling and trying potential solutions for 2 days now. I'm sure it's something silly and simple that I've overlooked but I'm out of ideas now so hopefully someone can help.
CPU: i5-8600K
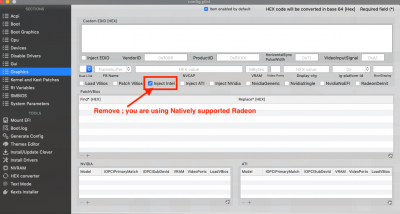
GPU: Sapphire Radeon Nitro+ RX 580 4GB
SSD: Samsung 860 EVO 1TB 2.5 Inch SATA III
----
I am following this guide this TonyMac guide.
My installation is stuck. It keeps looping back to the clover boot page, giving me two options:
1. Boot macOS Install from Install macOS Mojave (This is my USB)
2. Boot macOS Install from Mojave (This is my SSD)
Here's what happens with option 1, Boot macOS Install from Install macOS Mojave:
And then at some point during the install, the system restarts and I get looped back to the Clover boot page.
Here's what happens with option 2, Boot macOS Install from Mojave:
Same thing in the end, I restart and get looped back to the Clover boot page.
I'm not sure if it helps but this is what's in Disk Utility:
In BIOS I made the following changes:
- Load Optimized Defaults
- VT-d Disabled
- XHCI Hand-off Enabled
Here are my BOIS settings:
It's frustrating because I completed an install already on a different, identical Samsung SSD and it worked perfectly but for some reason this one has had me spinning in circles googling and trying potential solutions for 2 days now. I'm sure it's something silly and simple that I've overlooked but I'm out of ideas now so hopefully someone can help.


")