Contribute
Register

macOS Native CPU/IGPU Power Management

The latest Intel Power Gadget works for me. I downloaded it a few days ago from the Intel site.
It works for me too, it has Core Max, Core Avg, Core Min and Core Req. None of them shows the current clock and it's hard to troubleshoot without seeing the current clock. I compared with iStat to see if Core Req is current clock or not and it showed that it is not.
 
It works for me too, it has Core Max, Core Avg, Core Min and Core Req. None of them shows the current clock and it's hard to troubleshoot without seeing the current clock. I compared with iStat to see if Core Req is current clock or not and it showed that it is not.

iStat Menus won't show the CPU frequency for me either. I have to use the Intel Power Gadget app to see it.

Another alternative would be to try FakeSMC instead of VirtualSMC.
 
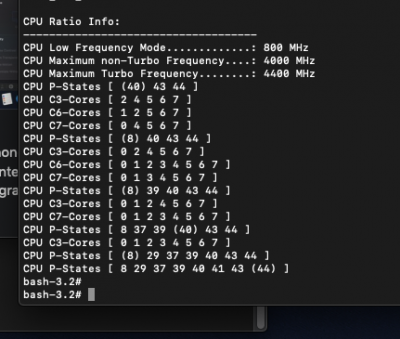
Yes, there is no issue seeing all PStates but someone with similar h/w mentioned freq spikes and when I check my freqs I realized I have the spikes as well then I wanted to dig to make sure PM is working and tried to fix it. That's what I'm after. With the extra config file items and SSDT, I still have spikes, then it's either PM is working and this is the behavior of Haswell CPUs under hackOS or PM is partially working (IOReg confirmes loaded X86PlatformPlugin w/ 32 PStates and X86PlatformShim) and I need to find out what is causing the spikes.

Anyways, thanks for all your answers, much appreciated!

Ps: Last 2 versions of IPG doesn't show current CPU freq as it can be seen from my earlier IPG screenshots. Where can I find IPG version that shows current clock?

I came to this thread for the same issue you are reporting, i am running Mojave on HP 400 g1 with i5 4570 and i see the cpu load always very high in power gadget. Also cinebench score is a lot worst on macOs (490 vs 530 on windows) while i am used to seeing better on Mac on usual hacks.
Sadly on my machine (prebuilt) i have fewer bios options to play with, so i am scared i will never get this to work properly..
 
EIST in BIOS set to auto

Load Clover Configurator and mount EFI, load config.plist
In Acpi enable "pluginType"
In Kernel and Kext patches enable "KernalXCPM"
Save config.plist

Reboot

This allowed overclocking and speed stepping with Overclocked values without need for SSDT on my GA-Z77X-UPH TH motherboard.

I tried this in Catalina and my system runs at 800mhz (0.8ghz).
 
Sry for this question, what is the difference between SSDT-PLUG.aml and SSDT-XCPM.aml? and which should be use :rolleyes:
 
Hey guys! Awesome thread! Thanks for all the info!
I have an issue and I can't seem to put my thumb on this one.

For my setup (< signature) power management seems to be working out of the box, but there's this huge temperature reading gap between OSX and BIOS / W10 readings, I'm taking W10 and BIOS's side on this one. My temp readings are WAY to high in OSX and I can't seem to find the reason why.

OSX:
CPU Temp OSX.png

W10 & BIOS
W10 CPU Temp.PNG
IMG-2196.jpg

I followed @ModMike's tutorial to get Catalina working https://www.tonymacx86.com/threads/...rx-vega-64-build.272572/page-381#post-2118694
 
Hey all. I built a hackintosh following glasgood's guide. Everything works (except wifi/bluetooth related things because I'm yet to buy a compatible card). My only issue is that some processes use over 100% of CPU, such as Mail.app, or Sonarr. Temps start soaring, fans start blasting.

This thread seems very relevant to me, but unfortunately a lot of the terminology is over my head. I'm not confident with all of the steps listed, so I'll just recap what I believe I need to do, and if someone could correct any mistakes I'm about to make, that would be lovely. So:

1. Back up using SuperDuper and copied over EFI folder from my main drive
2. Download and install IOReg, Intel Power Gadget, EFI Mounter and Xcode. I don't need to download AppleIntelInfo.kext, because it seems this isn't required when using Hackintool.
3. Restart
4. Open IOReg and hit File>Save a Copy As...
5. Call it whatever I want.
6. Open Hackintool and click on Utilites at the top, then click Get AppleIntelInfo
7. Select all of the text that Hackintool generates in the window above, and copy and paste the text into a text doc and call it AppleIntelInfo.txt (or should I change the extension to .kext?)
8. Open Clover Configurator and Mount the EFI on my main drive
9. I don't have EFI/CLOVER/ACPI/Patched/SSDT.aml, I have EFI/CLOVER/ACPI/Patched/SSDT-6-A M I.aml, AND DSDT.aml. Should I remove both or just one?
10. Open Xcode and open EFI/CLOVER/config.plist
11. Set the following states:
  • DropOEM/NO
  • Generate/CStates/NO
  • Generate/PStates/NO
12. Under Generate/PluginType/, should I choose NO or YES? I don't understand the following:
  • No entry or NO (with XCPM ssdt or ssdtPRGen ssdt)
  • YES (no PM ssdt)
How do I find out if my system is "with XCPM ssdt or ssdtPRGen ssdt or no PM ssdt"? I don't know what any of this means
13. My CPU doesn't have integrated GPU -- I only use the RX 580. Does this mean I skip steps 6 (PM ssdts (If using 5. Clover Settings, skip to Step 7. GPU)) and 7 (GPU: All Systems/CLOVER/config.plist/ACPI/DSDT/Patches/Item 0/Intel GPU PM- Rename GFX0 to IGPU) and just restart and I'm done?

Finally, About This Mac is showing my CPU as an Intel Core i9 processor, when it's a core i7. Is this going to cause issues?

Thanks in advance for your help (and patience!).

Ben
 
Hey all,

I generated some SSDT's with the help of Toleda that were confirmed to enable Power Management in 10.10. Just wondering should I generate new versions for Mac OS Catalina

I have the x86plugin loaded but I'm getting kernel panics when I boot the system.


Withdrawn, fixed my Wifi solved the boot issue
 

Attachments

  • error1.txt
    4.8 KB · Views: 115
Last edited:
Hello, nice post I got a i7 4790k, Asus hero vii, gtx 760 native supported but cant seem to make pm work properly any help.
 

Attachments

  • iMac no ssdt.ioreg
    7.1 MB · Views: 108
  • Screenshot 2020-08-10 at 00.00.28.png
    Screenshot 2020-08-10 at 00.00.28.png
    55.6 KB · Views: 123
  • config.plist
    8.3 KB · Views: 123
I 've been having my Hack for around 10 months now, and was using a Gigabyte z390 Aorus Pro motherboard with an i9-9900K.

I wanted to switch to an ITX form factor and was not interested in overclocking so I switched the motherboard with a Gigabyte B360N WIFI. I re-did the whole EFI using the Dortania guide (kept iMac19,1 SMBIOS but with different Serial / MLB / ROM / UUID but set according to the guides.

The weird issue is that although with the previous motherboard, the CPU was hitting turbo frequencies when requested, now it doesn't.

Any idea what I could be doing wrong?

Steps taken:

  • Disabled CGF Lock on B360N Wifi (I had it disabled on the Aorus as well) and set the related quirks to NO on config.plist
  • Flashed F15a (latest UEFI Bios FW version), no change, flashed back F13, no change.
  • Tried setting Turbo Boost to Enabled instead of Auto on the UEFI Bios, no change.

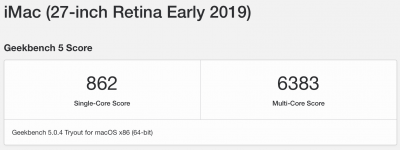
This is the GeekBench 5 Score on MacOS (quite low since on my previous motherboard I scored Single 1263, Multi 8717:

Screenshot 2020-09-03 at 9.59.39 AM.png

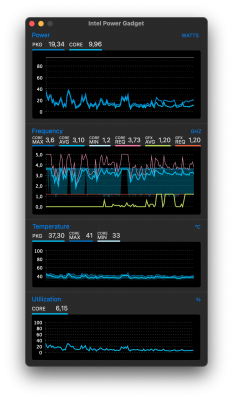
This is what Intel Power Gadget shows (doing random stuff on the Hack):

Screenshot 2020-09-03 at 8.02.51 AM.png
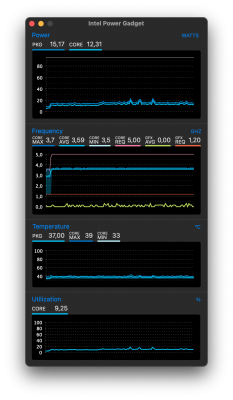
And this is what is shows when I run Tests -> Maximum Frequency:

Screenshot 2020-09-03 at 8.05.20 AM.png

On windows it is way better:

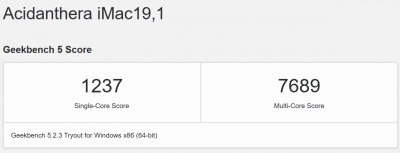
Geekbench on Windows (Higher than MacOS but not as high as with the previous motherboard on MacOS):

Geekbench-Windows.PNG

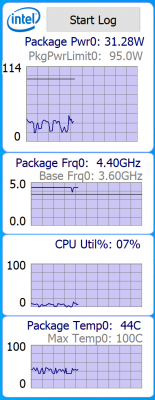
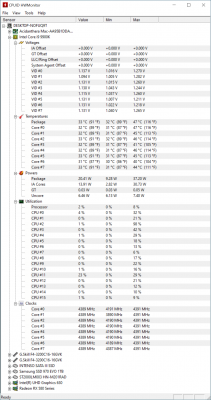
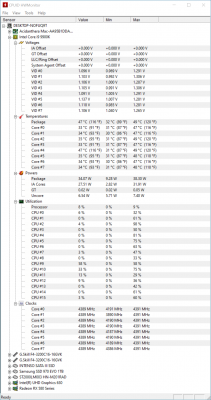
Intel Power Gadget and CPUID HWMonitor before Geekbench:

BeforeI-PG.PNGBefore.PNG

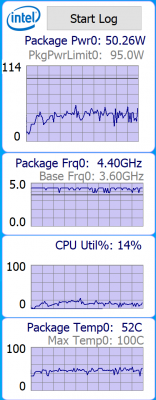
Intel Power Gadget and CPUID HWMonitor while I was running the Geekbench Test

While-IPG.PNGwhile.PNG
 
Back
Top