Contribute
Register

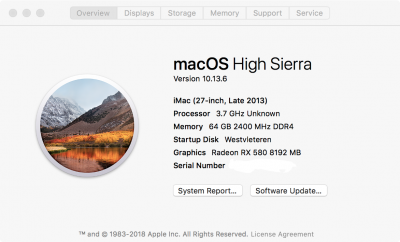
macOS 10.13.6 Update

Upgraded lilu, shiki, AppleALC, CoreDisplayFixup, IntelGraphicsFixup kexts to latest versions (rebooted), then upgraded Clover to latest (copied .efi file over from backup of EFI folder) & rebooted, then finally upgraded from 10.13.5 to 10.13.6 via MAS.

Upgrade went well until I discovered dual monitor support no longer worked via my HD630.

Fiddled around for a day or so with cables, adapters, connections and SMBIOS settings in config.plist. Previously it was working with 17,1 (after 18,1 & 18,3 both went belly up recently) but this time I switched to 14,2 and removed the DP->HDMI adapter I was using previously to get 2 monitors working, et voilà, now both monitors work as they should, yay!!

No adapters required any longer, I'm getting full 4K on the DP connection & 60 Hertz on my 1080p monitor.
 
Updated via App Store. Updated NVIDIA drivers and applied new USB port limit patch via Clover Configurator. No problems.
 
Guys, I found the solution for strange fonts.

OS X thinks my monitor is a TV, and is using the YCbCr colour space rather than RGB. It happened with my RX560.

Follow this instruction for RGB.

To disable SIP:
  1. Open config.plist in Clover Configurator
  2. Navigate RT Variables > CsrActivateConfig
  3. Change CsrActivateConfig to appropriate value
    1. Disable SIP: 0x67
    2. Enable SIP: 0x00
  4. Reboot Hackintosh to apply changes
Ok! Decided to do the update again on a quiet Sunday morning. Used your link, and NO MORE Pink!!! Thank you so much. Weird thing is the SIP has been disabled all along. Go figure.
Screen Shot 2018-07-15 at 11.59.46 AM.png
 
Last edited:
Updated via combo update. All went smooth. Had to reset audio. USB 3.0 and USB C all work. Nvidia driver updated no problem.
I did lose sleep. It now shuts down and reboots. With 10.13.5 it worked perfectly. Any thoughts anyone?
 
Updated via combo update. All went smooth. Had to reset audio. USB 3.0 and USB C all work. Nvidia driver updated no problem.
I did lose sleep. It now shuts down and reboots. With 10.13.5 it worked perfectly. Any thoughts anyone?
Did you update the USB patch?
 
Where do I have to point the Installer to. "High Sierra" or "macOS Install"?
Booted into your current drive, you start the update installer; on restart, you point to "Boot macOS Install on [whatever the name of your drive is]." As long as you see "Boot macOS Install..." you point there. When that option disappears, you boot as usual into your regular drive "Boot macOS...on [whatever the name of your drive is]."
 
Update went well for me on my MSI Gaming Pro Carbon, but I did read a lot before attempting it. Thanks goes out to all the early troubleshooters who solved all the difficult issues before me. Here is what I did:

  1. Updated Clover. Details here: https://www.tonymacx86.com/threads/...tiofix3drv-64-efi.255174/page-10#post-1779065
  2. Backed up new Clover system with Clonezilla, for a bootable clone in case everything went wrong.
  3. Updated via the App store. I think it took 3 restarts to do it.
  4. Installed updated Nvidia Drivers using the bash script in this thread: https://www.tonymacx86.com/threads/nvidia-update-simple-way-to-install-nvidia-web-drivers.244987/. It really is just as easy as pasting the line from this thread into the terminal (and waiting for a bit while it does its work).
    Execution

    Simply paste the following line in a terminal:

    bash <(curl -s https://raw.githubusercontent.com/Benjamin-Dobell/nvidia-update/master/nvidia-update.sh)

    You can of course download/save the script to your computer if you prefer to, doing so gives you access to a couple of advanced options, but for normal use they're not required.

    This is my current favorite way to update Nvidia web drivers as I very often had trouble with the latest web drivers causing slowdowns on my system. This script has always worked to get me up and running quickly.
  5. Updated Clover Configurator. The update function in the app was not working, so I downloaded and installed the most current version from here: https://mackie100projects.altervista.org/download-clover-configurator/
  6. Mounted the EFI partition in the terminal. Since Clover Configurator has been reportedly having trouble mounting the partition in 10.13.6, I thought I would do it manually in the terminal (I tend to do this anyway to make sure I get the right EFI partition). Now in 10.13.6 you will need to use "sudo diskutil mount," and then enter your password at the question mark (you will not see any change as you type your password) to mount the EFI partition. Here is what my terminal session looked like:

    Code:
    Users-iMac:~ Username$ diskutil list
    /dev/disk0 (internal, physical):
       #:                       TYPE NAME                    SIZE       IDENTIFIER
       0:      GUID_partition_scheme                        *250.1 GB   disk0
       1:                        EFI EFI                     209.7 MB   disk0s1
       2:                 Apple_APFS Container disk1         249.8 GB   disk0s2
    
    /dev/disk1 (synthesized):
       #:                       TYPE NAME                    SIZE       IDENTIFIER
       0:      APFS Container Scheme -                      +249.8 GB   disk1
                                     Physical Store disk0s2
       1:                APFS Volume High Sierra Emerald     74.2 GB    disk1s1
       2:                APFS Volume Preboot                 21.1 MB    disk1s2
       3:                APFS Volume Recovery                519.0 MB   disk1s3
       4:                APFS Volume VM                      2.1 GB     disk1s4
    
    /dev/disk2 (internal, physical):
       #:                       TYPE NAME                    SIZE       IDENTIFIER
       0:      GUID_partition_scheme                        *500.1 GB   disk2
       1:                        EFI EFI                     209.7 MB   disk2s1
       2:                  Apple_HFS Media 500 GB            499.8 GB   disk2s2
    
    Users-iMac:~ Username$ sudo diskutil mount disk0s1
    Password:
    Volume EFI on disk0s1 mounted
    Users-iMac:~ Username$

  7. Updated the USB patch to get USB3 working. For those that are having trouble pasting the code, here is what it looks like in the Clover Configurator GUI:

    CC New USB3 ext.png


    You can just copy the text from this image into the correct fields and save. Alternatively, You can choose Text Mode which is the last option on the left under TOOLS. Then you can just paste over the old code for the USB patch, and click the Synchronise button with the new patch code (and more detailed instructions) from here: https://www.tonymacx86.com/threads/macos-10-13-6-update.255911/page-5#post-1775784
    Don't forget to save the config.plist before you quit Clover Configurator. I know that the USB port limit extension patch isn't the most elegant way to do things, but it is the easiest.
  8. Restart and all is well.
I hope all this detail helps some of you trying to do this update. Thanks again to all of the skilled contributors on TonyMac who made this so easy.
 
Last edited:
All working, updates through MAS.
Did nothing for audio on a Gigabyte z370 HD3 after upgrade.

Reboots several times during update, including one hard reboot once stuck in dark screen
 

Attachments

Back
Top