Contribute
Register

Mac Pro Mod, or something close to it

Status
Not open for further replies.
Joined
Dec 22, 2018
Messages
15
Motherboard
ASUS ROG STRIX Z390-F Gaming
CPU
i7-8700
Graphics
RX 580
Mac
  1. MacBook Air
  2. Mac mini
Mobile Phone
  1. iOS
First off, I'm new at this whole Hackintosh thing. I own a really old Mac Pro 1.1 that I upgraded with new Xeon CPU's and extra memory a couple years ago. in order to make that work with some more recent versions of MacOs I had to use UniBeast to hack the version up to Mac Pro 1.2. Thats as far as I got then and I was happy that i could make that work.
However old things seem to die out so at some point the Mac Pro just became too slow to be useful.
So last week i got the stupid (I now see that) plan to go out and buy some cool hardware for a new computer and I would install that into my old Mac Pro case.
the list:
ASUS-ROG STRIX Z390-F Gaming motherboard (ATX size)
ASUS-GEFORCE GTX 1060 STRIX 6G GAMING Videocard ==> not supported in Mojave
GIGABYTE RADION RX580 GAMING 8G GDDR5
INTEL-Core i7 8700 (6core) CPU
CORSAIR-RM650X V2 650W PSU
CORSAIR-16G (2x8) 3000MHz DDR4 Vengance LPX BLACK memory
NOCTUA-NH-D15 cooler (massive huge thing)
SAMSUNG-500GB 970EVO M.2 NVMe SSD storage
Basically I got me a decent set of components to make a really fast computer. And my guess is that it might not run any version of MacOS soon. But that will not stop me from trying.

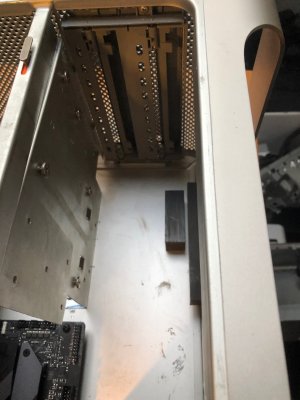
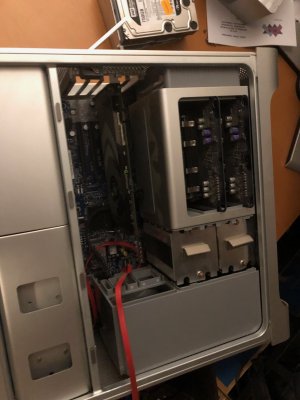
reading up on the forum about modding the Mac Pro case gave me confidence that it could be done, but while dismantling the case (that took me far longer then i expected) i figured out that most of the cases used where based on the G5 case and not the Mac Pro case. removing the components was hard, but now i think i know how i could do it without damaging the case (inside only) as much as i did on this one.

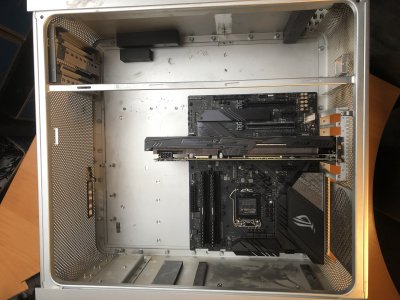
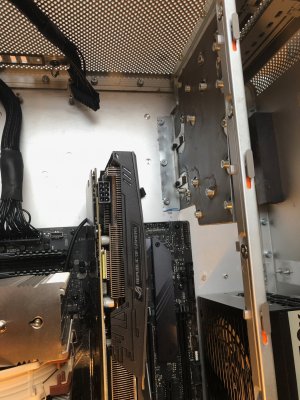
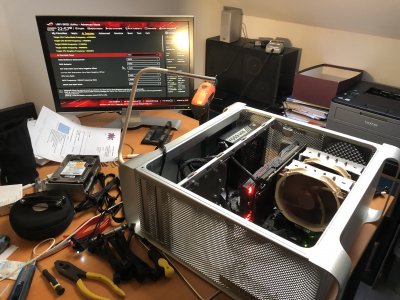
I'm far from done, but i got to the part where I have installed the components, and i got Ubuntu installed just to see if it boots.
it does, but not much else :(

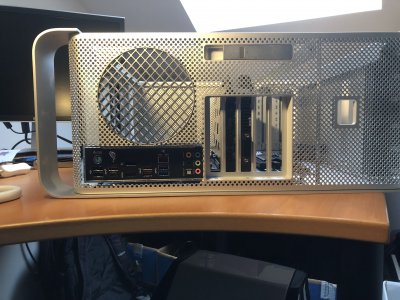
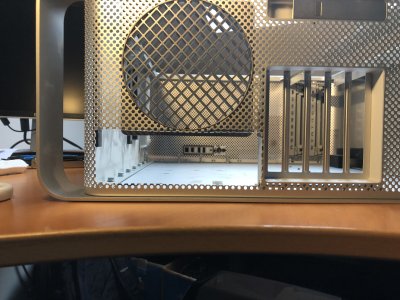
The case still closes and the system runs as silently as you can imagine, but i do feel bad about how i kinda messed up the backside a bit.

And I might need some help moving on, but its my first try at this so ... be gentle.

Keep you posted on my progress.
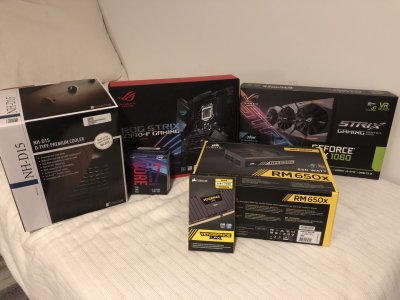
IMG_0907.jpgIMG_0908.jpgIMG_0909.jpgIMG_0910.jpgIMG_0914.jpgIMG_0920.jpgIMG_0921.jpgIMG_0922.jpg

and if you need tips on how to do things in this case.. I sort of know my way around it now.
 
Last edited:
What have you used to mount the motherboard on?
 
I reused the existing mounts... first snapped them off using pliers (the just snap off easy).
Cleaned the surface a bit and then atteched them to my ATX using the same screws. Positioned the board, adapted the back side, annd the superglued the mounts using the board. When dried unscrewed the board, and 3 mounts did not seems to be fixed, those a glued manually in place. Fitted the board. Done
 
Update: It took me a bit of digging but I could not get my brand new system to boot from any Mac based USB I tried to create using UniBeast. Basically it failed during drive creation.
I had meanwhile been able to run the latest version of Ubuntu and got the network and video card to work without too much issues.
in a desperate move I decided to backup my MacBook Pro and erase it, setup a clean install of Mojave and see if that improved stuff (pretty desperate move I know).
But... it seemed I had issues on my MBP before the reinstall, because after doing a clean install my MBP was behaving much better again.
and to be honest its not really that big a deal doing a reinstall if you use iCloud.

Tried the creation of the boot USB again and this time it worked from the first time, and it even boots on my brand new machine just like the documentation describes. Now getting Mojave installed might be something else.

Let's see how far I get now.

PS: whatever you might be thinking, I'm having fun, its all about the journey right.
PS2: if Mojave fails, then I have to redo all this based on Sierra that is still running on my iMac...
 
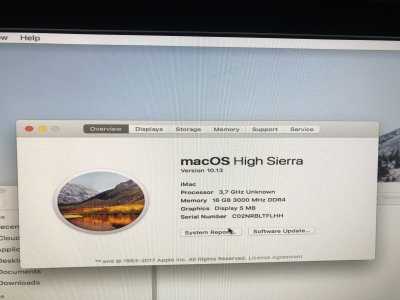
Had to go back to High Sierra to make any progress. probably to learn more about this whole clover, UniBeast, multiBeast thing
. But eventually did manage to get some stuff installed and running.
Right now not a lot is working correctly, but I seem to be able to boot cleanly into a working base OS High Sierra.
Network. Camera works!!! but that's about it, next up getting the video and network connected correctly.


IMG_0937.jpg
 
Like I said at the top of this post, I am new at this.
finally starting to get my head around this kext thing.
I today installed the latest version of https://bitbucket.org/RehabMan/os-x-intel-network/overview intel driver (including support for my Intel® I219V NiC) and I have a working onboard network card.
Still not having the GPU working, but one step at the time.
USB seems to work fine, reboot or shutdown still needs some work (read: does not work).
used clover to drop the driver in. it did not work at first, but once I unmounted the EFI drive before rebooting that seemed to do the trick.
 
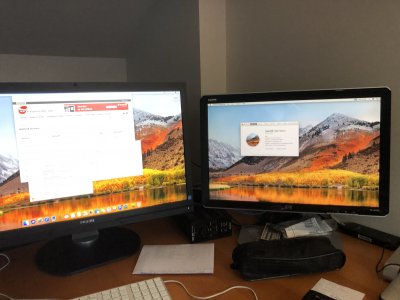
Update: I'm posting this from my hackingtosh

IMG_0938.jpg
got the Nvidea card to work after being patient... basically it works fine under High Sierra, I just ended to do the updates then install the drivers and enable a few additional (all described well on this website) kext's.
Now is it worth the effort?

YES IT IS.

Like to thank this community and Google (not that the info is not here, you just need other insights now and then to understand the stuff).
 
Final update:
got the power switch connected, and decided to add the 4 disk bays back, and add 4x 2Tb disks in a raid 10 config (unfortunately not using the onboard raid but the OSX raid)
IMG_0982.jpg
IMG_0983.jpg

Did some minor overclocking and CPU now running at 5GHZ while keeping cool enough without the need for high RPM on the fans.
I also solved my stupid shutdown and reboot problem (neither worked correctly) by setting the boot_clover.jpeg clover boot tab slide=0

The hard drives are a really tight fit. do not think I had 2mm to spare, but they are placed using the original bays, locked using the cover locking mechanism as per original design.
if I ever do this again, I will probably need to find a better solution for the power supply. this could become a temp problem over time, but for now this works just fine.
the disks are fairly silent, and in the raid 10 config pretty fast for 5400rpm SATA drives.

This has been a really fun thing to do and I can recommend it to any Mac loving geek out there. I sure learned a few tricks.
and can't wait for NVIDIA (my one regret, not picking a ATI based card) so I can tryout the latest version of MACOS on my hackingtosh.

Have fun.
 
Last edited:
First off, I'm new at this whole Hackintosh thing. I own a really old Mac Pro 1.1 that I upgraded with new Xeon CPU's and extra memory a couple years ago. in order to make that work with some more recent versions of MacOs I had to use UniBeast to hack the version up to Mac Pro 1.2. Thats as far as I got then and I was happy that i could make that work.
However old things seem to die out so at some point the Mac Pro just became too slow to be useful.
So last week i got the stupid (I now see that) plan to go out and buy some cool hardware for a new computer and I would install that into my old Mac Pro case.
the list:
ASUS-ROG STRIX Z390-F Gaming motherboard (ATX size)
ASUS-GEFORCE GTX 1060 STRIX 6G GAMING Videocard
INTEL-Core i7 8700 (6core) CPU
CORSAIR-RM650X V2 650W PSU
CORSAIR-16G (2x8) 3000MHz DDR4 Vengance LPX BLACK memory
NOCTUA-NH-D15 cooler (massive huge thing)
SAMSUNG-500GB 970EVO M.2 NVMe SSD storage
Basically I got me a decent set of components to make a really fast computer. And my guess is that it might not run any version of MacOS soon. But that will not stop me from trying.

reading up on the forum about modding the Mac Pro case gave me confidence that it could be done, but while dismantling the case (that took me far longer then i expected) i figured out that most of the cases used where based on the G5 case and not the Mac Pro case. removing the components was hard, but now i think i know how i could do it without damaging the case (inside only) as much as i did on this one.

I'm far from done, but i got to the part where I have installed the components, and i got Ubuntu installed just to see if it boots.
it does, but not much else :(

The case still closes and the system runs as silently as you can imagine, but i do feel bad about how i kinda messed up the backside a bit.

And I might need some help moving on, but its my first try at this so ... be gentle.

Keep you posted on my progress.
View attachment 374551 View attachment 374552 View attachment 374553 View attachment 374554 View attachment 374555 View attachment 374556 View attachment 374557 View attachment 374558

and if you need tips on how to do things in this case.. I sort of know my way around it now.


DUDE! i'm doing this with the same case and similar motherboard, how did you took the side panel lock "thing" apart? i'm stuck at this part, just got the gase today! help me out.
ps: sorry for my inglish but i'm from Brazil :)
 
Status
Not open for further replies.
Back
Top