Contribute
Register

Mac Pro (2013) Mod

Status
Not open for further replies.
Joined
Jan 24, 2019
Messages
8
I first discovered this mod inside this forum and quickly decided I needed in in my life.

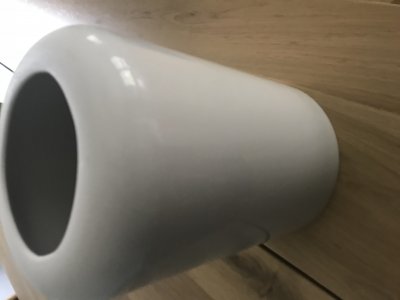
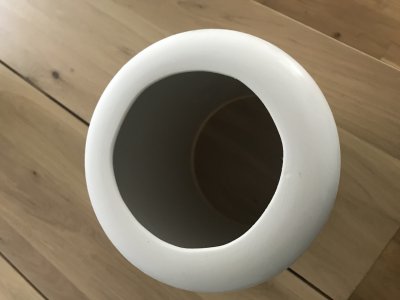
I'm going with the good ol' trash can mod and have purchased a lot of the parts for the case itself, including the trash can.

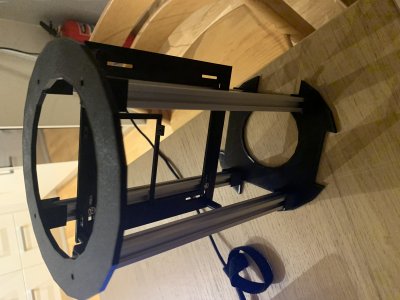
I'll update this thread as I get started with my mod.

First off, I have a question for you mod gurus.

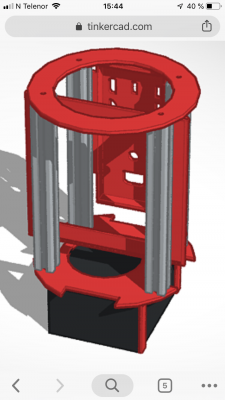
I want to include a single fan radiator for my CPU. I'm hoping I can fit a Corsair H60 cooler as a top exaust, but I'm not an expert on thermals. I was thinking of having one fan at the bottom for intake and then set the radiator fan for exaust. Would this be enough to cool the CPU or would it generate too much heat inside the case? I won't be putting a GPU in there to begin with, but might extend with a GT 1030 fanless GPU some time in the future. What do you think? Could it work?
 
Corsair will not fit in the Lunar trash can. Tried that already myself.
 
They all have similar sizes / square. Hence do not fit into the cylinder shape. Also I read somewhere it has almost none value over a traditional fan solution. I would suggest to use a low profile 1151 fan, which drafts the air upwards.

You are going to 3d print the internal parts or how will your build look like?
 
I think it will be a mix of some 3d prints and some really poor craftsmanship.

I’ve attached the initial 3D render of the inside. Everything red should be printed.

Also attached is the trashcan with the top cut off. The hole is not perfectly round yet. First time using a dremmel and had to do a lot of sanding just to get to this point.

Going to try installing macOS on my hardware today.
 

Attachments

  • 77D82C57-E759-4959-BA06-C69AD5DF4019.jpeg
    77D82C57-E759-4959-BA06-C69AD5DF4019.jpeg
    1.7 MB · Views: 277
  • DA6D5349-0518-4C68-B292-B7CE95CDB15B.jpeg
    DA6D5349-0518-4C68-B292-B7CE95CDB15B.jpeg
    1.6 MB · Views: 254
  • 413D86AD-C643-4B6C-A822-B3610A42D0A0.png
    413D86AD-C643-4B6C-A822-B3610A42D0A0.png
    1.3 MB · Views: 277
  • 9E4CECB4-4869-4D99-B854-FEDC0BE60653.jpeg
    9E4CECB4-4869-4D99-B854-FEDC0BE60653.jpeg
    1.7 MB · Views: 245
A bit more progress. I got myself a 3d printer, so I have made more progress the last week than I’ve done all year. Top cover, motherboard tray and psu shroud. Next to print is the base.
 

Attachments

  • 14F818EB-CC65-467B-B1B9-F3D31D0FD8E9.jpeg
    14F818EB-CC65-467B-B1B9-F3D31D0FD8E9.jpeg
    2.4 MB · Views: 210
  • E8007DB6-5736-4FD2-9BC3-9C58E3F2422A.jpeg
    E8007DB6-5736-4FD2-9BC3-9C58E3F2422A.jpeg
    2.2 MB · Views: 163
  • 2BE1288C-8691-4813-B1CB-52F439ECFF7B.jpeg
    2BE1288C-8691-4813-B1CB-52F439ECFF7B.jpeg
    3.4 MB · Views: 243
Fitted the motherboard in. Since I probably wont be gaming or running anything in 4k I don’t have a dedicated GPU.

Current specs:

Motherboard: Biostar H110
Cpu: Intel i5 6400
Ram: 6gb Ddr3
Psu: Be Quiet 300W

I want to get a modular psu since it is waay to tight already.

Still, making progress.
 

Attachments

  • 1DDBD80A-F3BA-4BEE-87F5-430416CE6CED.jpeg
    1DDBD80A-F3BA-4BEE-87F5-430416CE6CED.jpeg
    3.1 MB · Views: 269
Starting to get how Fusion 360 works now, so I did a new model on how the framing will look. I liked how modular the pockets for the profiles were so will continue with them for the next iteration. Also added support for a 120mm Be Quiet-fan I had laying around. It almost looks fully circular, so will go well with the over-all look and feel.

Using 15x15mm aluminium profiles for the framing. Decided to stop spending on the project, so I'll have to work with what I've got. Hopefully it will materialize soon. ;)
 

Attachments

  • Screenshot 2020-01-26 at 12.54.36.png
    Screenshot 2020-01-26 at 12.54.36.png
    1,009.5 KB · Views: 282
Status
Not open for further replies.
Back
Top