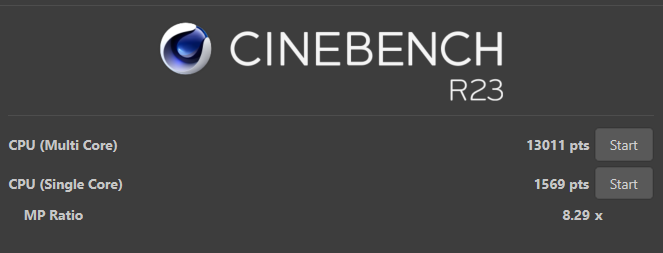
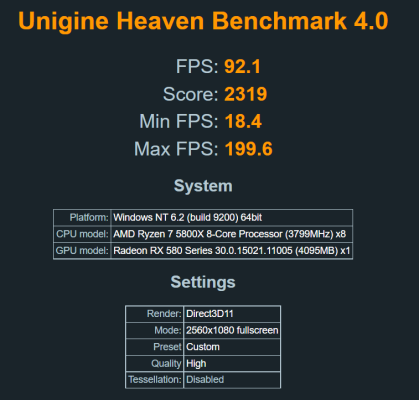
- Joined
- Aug 4, 2022
- Messages
- 2
- Motherboard
- B450m plus ll
- CPU
- Ryzen 7 5800x
- Graphics
- Radeon RX 580
Hello all, this is my first time doing this I really like the "cheese grater" look and decided to take on tihs great project
Components
1. Asus Tuf Gaming B450M Plus ll motherboard
2. Ryzen 7 5800x
3. Radeon RX 580
4. Kingston Fury Beast 2x8GB 3200MHz
5. Kingston Fury Beast RGB 2x8GB 3200MHz
6. Gigabyte P-B 650 W 80+ Bronze PSU
7. Wndows 11 Pro from vip-Scdkey
8. Tuf Gaming Fans x3 from my brothers case
reference for fan
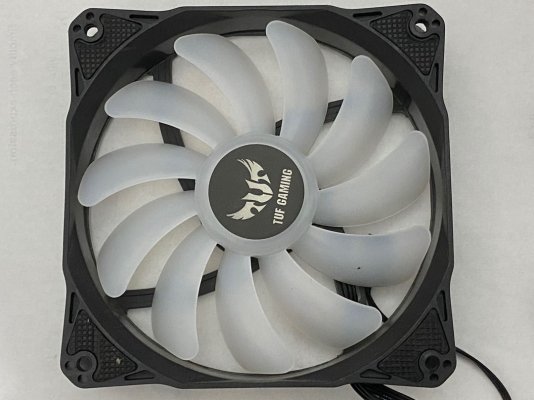
For storage:
1. 3TB Western Digital Green
2. 1TB Toshiba drive
3. 320GB hard drive from 2008
4. 240GB Kingston A400
5. 1TB M.2 SSD Kingston NV1
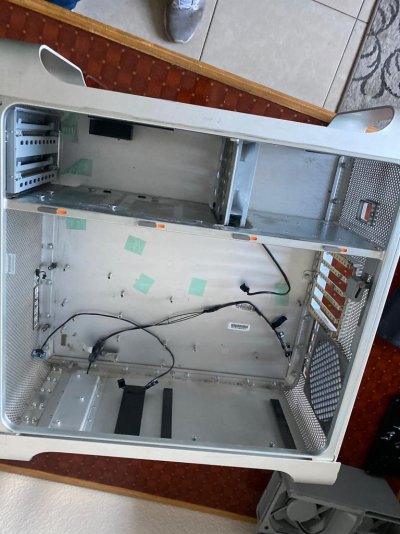
First, the Mac Pro case and stripping everything from it
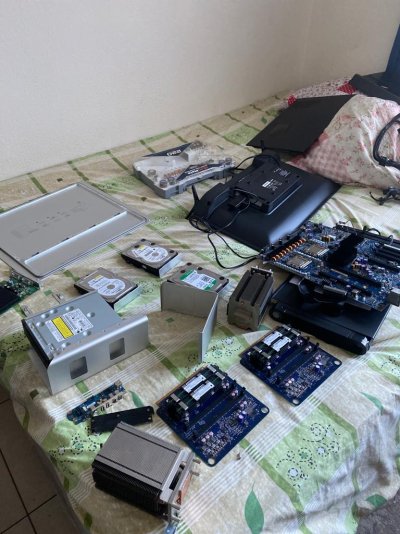
I also had to take a motherboard from another computer for reference on where to put the supports
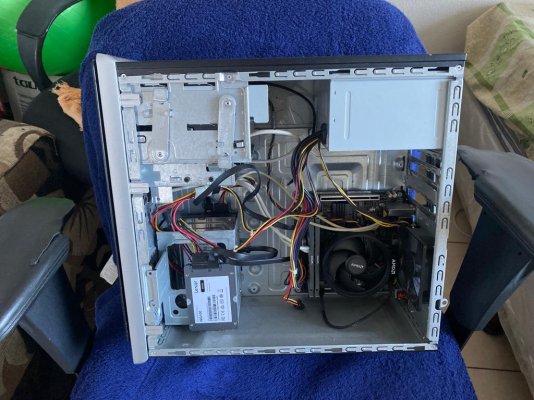
very small board
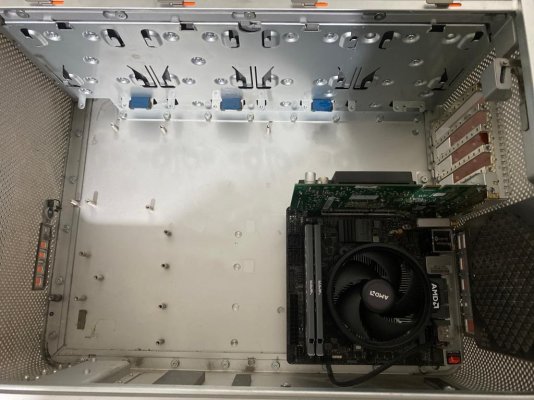
Also, as you might have guessed, I did used JB Weld for the supports.
let it dry and add hard drive bays and a power supply for reference

Since I dont have access to the laser hive back panel, I used a dremel and cut what i needed, also decided to cut a little of the pice where the PSU cables go so there was more room for the future power supply
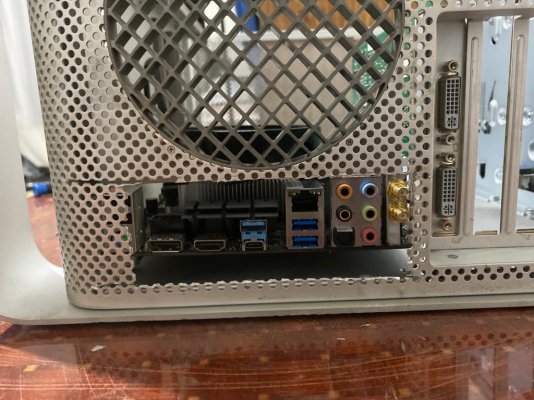
after the supports dried up and aquired the new motherboard and power supply it was time to fit it in
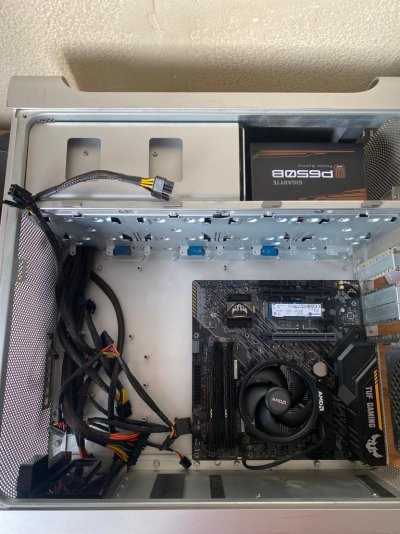
the only problem was that the cpu connector of the psu didnt reached so I got an extension for it
the power button was a little more complicated than i thought, I didnt wanted to take it out of the case in fear of breaking it so i strpped the cables and soldered them inside which was a little tedious and it didnt really works well because if you move the cables it will stop working
then fitted the cables to the motherboard
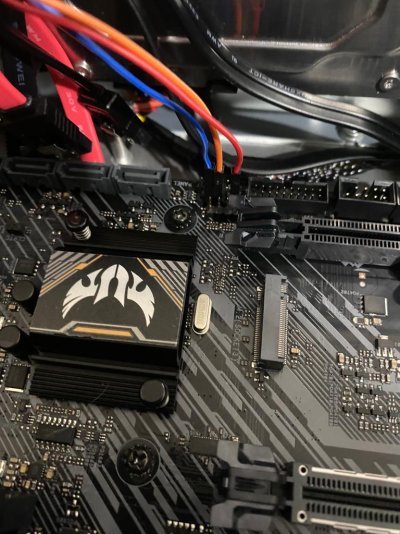
basically a power_led+ the power button and a shared ground
after that issue, i fitted the fans inside the shroud and take a final look at how it was going
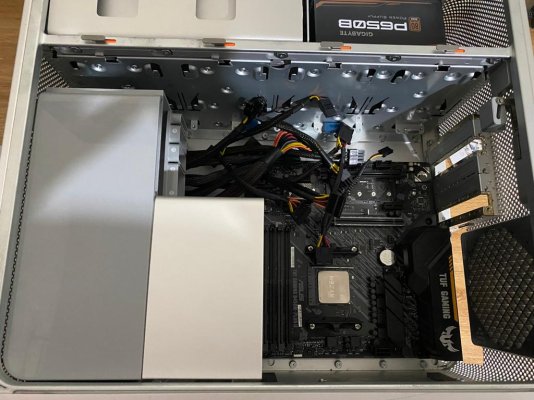
I used the front panel I/O as a cable management to keep the ones i didnt used down low
To keep the stock look I cut the original power supply just so i could use the first two screws to keep it in place.
finally had to cut approximately 3 cm from the ram and exhaust fan piece in order for it to fit, also had to take the tuf gaming shroud from the motherboard, routed the sata cables and added the GPU at last and was it is now good to go
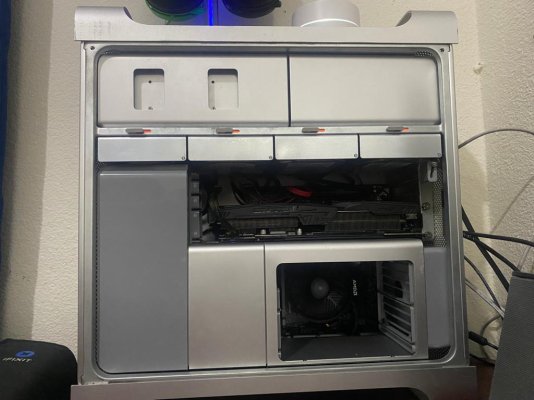
Overall really fun project, love the look of the mac pro but the orignal components cant keep up with my needs. I am planning on adding usb connectors to the front, adding a tower cooler and fixing the janky power button, but that is a tale for another day.
Components
1. Asus Tuf Gaming B450M Plus ll motherboard
2. Ryzen 7 5800x
3. Radeon RX 580
4. Kingston Fury Beast 2x8GB 3200MHz
5. Kingston Fury Beast RGB 2x8GB 3200MHz
6. Gigabyte P-B 650 W 80+ Bronze PSU
7. Wndows 11 Pro from vip-Scdkey
8. Tuf Gaming Fans x3 from my brothers case
reference for fan

For storage:
1. 3TB Western Digital Green
2. 1TB Toshiba drive
3. 320GB hard drive from 2008
4. 240GB Kingston A400
5. 1TB M.2 SSD Kingston NV1
First, the Mac Pro case and stripping everything from it


I also had to take a motherboard from another computer for reference on where to put the supports

very small board

Also, as you might have guessed, I did used JB Weld for the supports.
let it dry and add hard drive bays and a power supply for reference

Since I dont have access to the laser hive back panel, I used a dremel and cut what i needed, also decided to cut a little of the pice where the PSU cables go so there was more room for the future power supply

after the supports dried up and aquired the new motherboard and power supply it was time to fit it in

the only problem was that the cpu connector of the psu didnt reached so I got an extension for it
the power button was a little more complicated than i thought, I didnt wanted to take it out of the case in fear of breaking it so i strpped the cables and soldered them inside which was a little tedious and it didnt really works well because if you move the cables it will stop working
then fitted the cables to the motherboard

basically a power_led+ the power button and a shared ground
after that issue, i fitted the fans inside the shroud and take a final look at how it was going

I used the front panel I/O as a cable management to keep the ones i didnt used down low
To keep the stock look I cut the original power supply just so i could use the first two screws to keep it in place.
finally had to cut approximately 3 cm from the ram and exhaust fan piece in order for it to fit, also had to take the tuf gaming shroud from the motherboard, routed the sata cables and added the GPU at last and was it is now good to go

Overall really fun project, love the look of the mac pro but the orignal components cant keep up with my needs. I am planning on adding usb connectors to the front, adding a tower cooler and fixing the janky power button, but that is a tale for another day.

