Contribute
Register

Mac Pro 1.1 Hackintosh Z390 Designare Build 2021

Status
Not open for further replies.
@willaholic89

Thanks for sharing more photos, I'm trying to live through you bit since I'm not able to finish my own conversion project. I really dig the up close shots of the epoxy jobs. The fact that you took the time to space the front usb evenly instead of just using the existing firewire holes is a really nice detail. The backside with the 180mm fan turned out very nice, do you plan on painting with spray paint or something else? I was thinking I might spring for powder coating, your project is so nice it might warrant something like that. Another nice detail you did was on the back I/O plate, it originally had some extra bumps but you epoxied it out to make it uniform. Totally worth it! I found these PCI slots, they hole isn't exactly the same 3mm as the mac pro but it's really close and the look great on a mac pro/powermac case: https://www.amazon.com/gp/product/B00F4Q69HI/?tag=tonymacx86com-20
Thank you for your kind words, hope to have a update soon.
Sad to hear that your conversion project has halted, may I ask what happend or the obstacle is?

the things i’m trying to work out are on solving/finding the best way to is straighten the back fan aluminum with out making it worse and finding the right dril-bit to make the holes that where filled by the epoxy open again.

I want those things to be done right , so I’m taking a little time to do it right and find the correct dril-bit That’s sadly been mis placed...

i am going to paint it was thinking of spray painting it but after your message I’m not so sure yet what to do, do it myself or paying a professional painter to do it. I have to look into it what the cost will be

sadly it’s probably coming down to how much money it going to cost.

every time I look at the front now after my usb mod I wonder how it will look when it painted because it looks so nice.

but the hard part is going to be making a new pcb or modding the original pcb

I saw usb3.0 cables they hot glued in place but alsoa diy pcb with breadboard and usb 3.0 heads


but i need to look into that. Here on the forum to find info on how others did it and where to buy the items

those back I/O shields look so nice and would definitely look great on the back, thanks for you tip

a lot off steps I did not really planned a head for, I know

but i though about how I would do it by myself the painting of the case I would follow these steps:

1) find a vinyl wrap store to cut 2 Mac Pro side panel size Apple logo and a usb/headphone icon

2) paint the first layer with the lighter toon the case

3) let it dry than if it’s perfect then apply the vinyl apple logo’s and the headphone/usb icon at the original position

4)and spraypaint it with the darker paint

5 when the paint is almost dry I will remove the headphone/usb icon and te Apple logo vinyl sticker

6 clear coding it

that was my plan I came up with that I thought would look good
 
Small update on the case mod

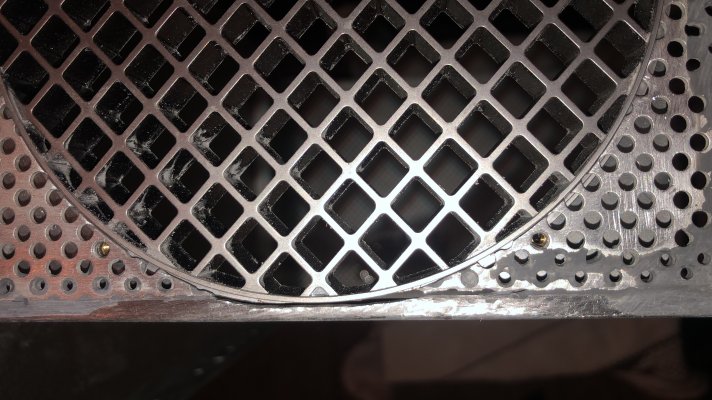
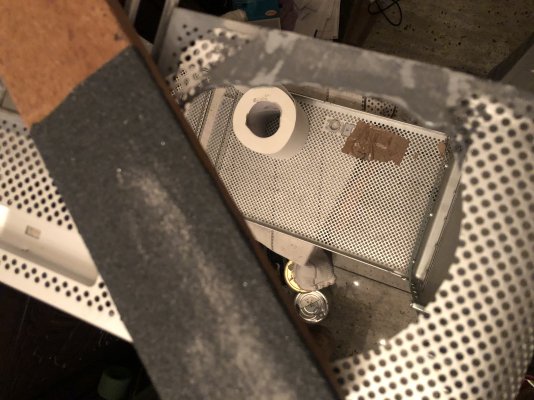
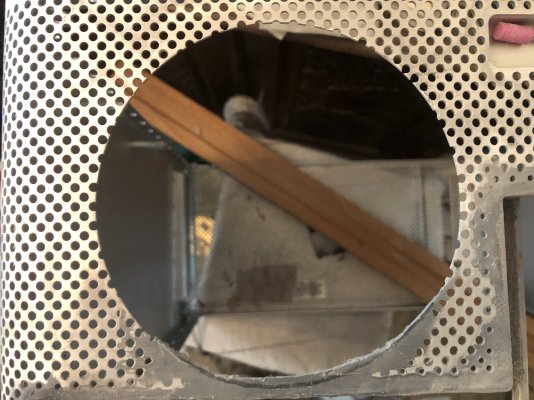
had to redo a small part of the back I/O plate for the fan protector shield to make it flush plus fill in the gap
92693B3A-FC35-4CF8-B35D-246BA3F5AF97.jpeg
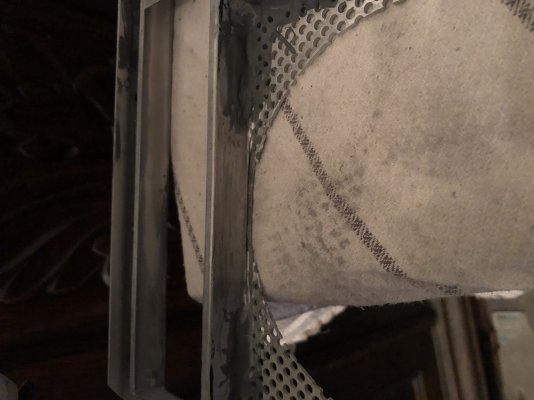
Also had to grind the inside a bit so the fan protector shield would fit better
0D4778AD-31B0-4830-BE1C-2F30A73DBD4B.jpeg

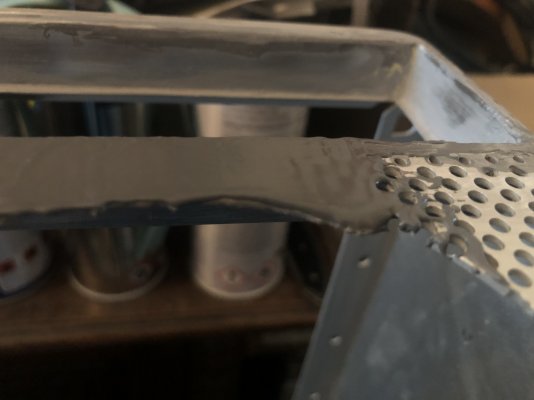
first I tried bending it but that did not work so I decided to break the epoxy at the beginning of the rounding where the back fan is.
Then I made it flush by tweaking the aluminum till it was flush
558A6F6E-ED94-4F0D-A5B6-8D0DEA7B1D9F.jpeg
2075AB5F-C1E0-467C-9712-597175F6600B.jpeg
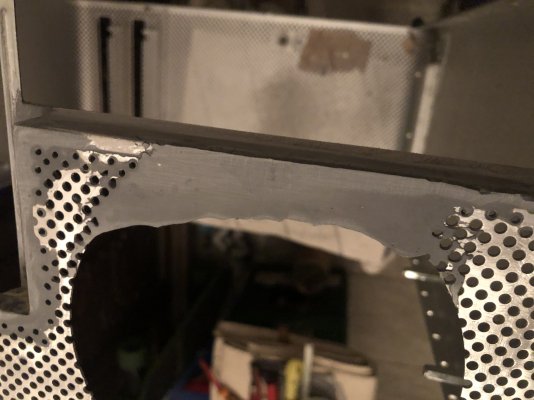
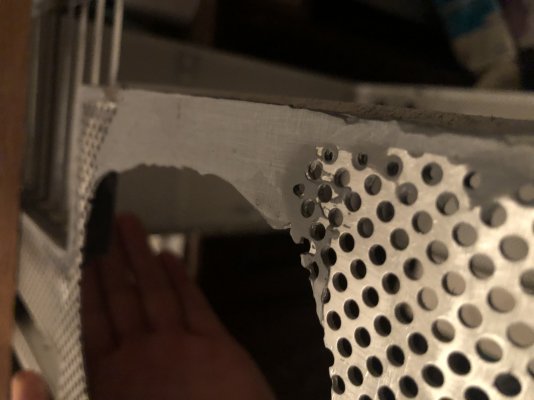
after that I made the epoxy to make it one piece again but also put al little more so when it is dry I can use a grindstone to make a perfect fitting circle for the fan protector shield with no gap between it and the case
2618D2E5-1B62-467B-A170-CECC87A6FA86.jpeg

hope now that this will be the last time going back on that part of the case mod.

when it’s completely dry and hardened and i will finish it by sanding and grinding the epoxy to a perfect circle for a perfect fit and in the next update I will so you how it came out
 
I have never seen this much glue been used, wow.

I'm looking forward to seeing how you make the final finish.
 
I have never seen this much glue been used, wow.

I'm looking forward to seeing how you make the final finish.
I know it’s a lot of epoxy glue in total it’s 3 layers of it to make it the same tightness as the aluminum. Plus my thought was/is to slowly cut it to the correct size and circle for the back fan bit by bit so I don’t have to redo it1FD868D0-9FE2-4A40-B30C-4B01B6B4B80A.jpeg
68E7DA76-D321-444D-B25F-C8853A47AB28.jpeg
plus before cutting and making it to be a circle again I am going to sand it flush before cutting
291071FE-3537-4193-B339-6446FE16A32A.jpeg
still a lot of work a head of me before getting started with putting hardware in it
 
Would it be easier to have some sort of template for cutting the circle?

I'm terrible at cutting and sanding, it will be quite challenging for me to cut something nice.
 
Would it be easier to have some sort of template for cutting the circle?

I'm terrible at cutting and sanding, it will be quite challenging for me to cut something nice.
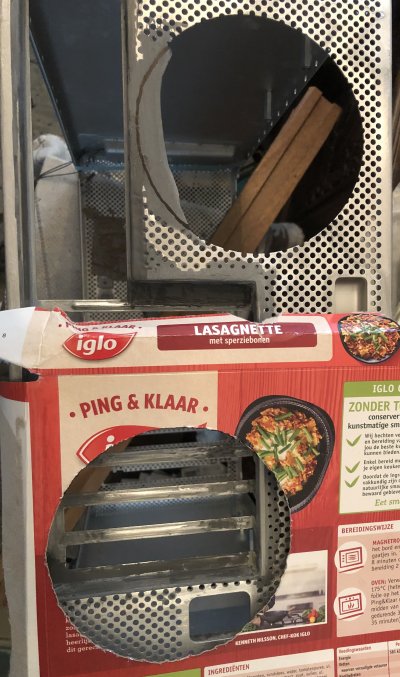
Thanks for your idea about a template for cutting forgotten about that and now I am going to make one out of cardboard from the other Mac Pro case I have so it’s the correct size. Will update the progress soon.

it’s not my strong suit also but by slowly and steady and taking the time for it it will work. From me it works so far well I think
8B18C63B-71F8-49E9-B409-E0F97016BF04.jpeg
47B719DE-AC31-42BB-A40A-1B14F2FA8B1C.jpeg
This is how far I gotten so far it still needs more sanding but I have to Finnish it some other time have to get ready to work tomorrow
 
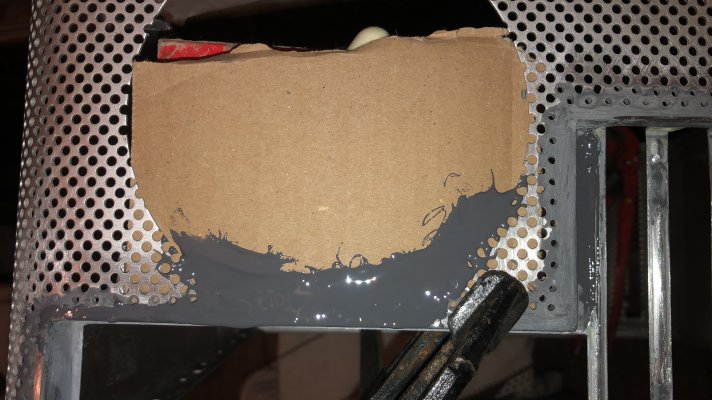
Today I started with making a template of the back fan circle out of cardboard of the other Mac Pro 1.1 case I have then I marked the circle using the template I made on my project caseB37DE4C2-E71E-447D-BAF7-2906F6045569.jpeg

then I prepared the dremel to start cutting the excess epoxy away so I could just a rounded grindstone to slowly make the circle as close to the original circle0CEF35B4-64C6-4BEA-A1D8-39D14FABCE39.jpeg

when I was at the marked line I test fitted it and adjusted where needed until the back fan protector shield would fitA6C48A3F-2C8B-4AE8-B613-7E594C7A9B61.jpeg

it’s not perfect yet but close enuf still needs a good sanding making it flush with the aluminum plus at a few spots in de circle I took away alittle to much but I have a plan to fix that for getting the perfect original circle size back and correct

What I am going to do is use transparant foil to cover the back fan protector shield and using a bit of epoxy to fill in the spots I took to much of off getting it to fit perfect

hope to update about that soon
 
It’s been a while since I posted something about my build progress.

That had to reasons why I went dark

1) I lost my job but luckily I found a new job in less than two weeks being jobless
2) been looking around what to do with the front I/O USB ports

And I think I found a way with out make a new front I/O panel from scratch

I bought this online
453B4FF8-3386-4139-B60F-A0C67211260C.jpeg

It’s a front usb hub floppy panel I can mod so it lines up with the 4 USB ports I made in me case

only thing I have to still think of how to fix/make it is the Audio plug plus soldering the power-button to achieve the stock Mac Pro front look with 4 usb 3.0 ports

But before it arrives I am still busy with the back drilling the holes I filled with epoxy out and sanding the back I/O plate so I can rebuild it to epoxy the motherboard stand-off in place.

and now I am waiting for my processor that is on it’s way to me so I have the important items in house.

That so far my update for now but I will give a update soon on the progress
 
Small update

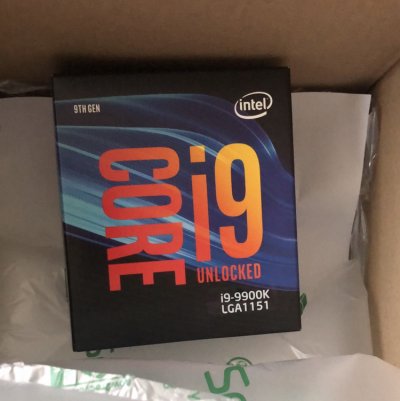
I recieved the processor I ordered today.
AEBE1540-CE5C-4790-9DF2-38A820924092.jpeg

plus I redid the front fan assembly with the extension cable’s that came with the fan’s, because I thought with out the extension cables there was to much stress on the small cables.
EA59E283-8D23-4C10-A2BF-3E8DAA20FCC1.jpeg
I tryed to hide the cables as much as possible.
D04BAA76-2700-415A-B0FA-798EA6C83F0C.jpeg
Plus I tried to make it look as stock as possible.

only thing I have to figure out is how to plug it to the motherboard wich cable/plug I need to do so.
57D2417B-484F-4695-96CF-7A93D104A732.jpeg
if I can’t find a cable with that plug I am going to take the plug from my other Mac Pro 1.1 motherboard and make a custom cable.

Next update will follow as soon as possible.
 
Today I finally had some time to make some progress in my build.

started off with cutting the USB 3.0 hub pcb in 4 pieces so I can line them up in my custom front panel

then I started cutting the top mounts off the power supply unit plus cutting the bottom part of the power supply unit in half to test fit the Seasonic power supply unit hopefully it will fit perfectly else some more cutting
59EE3949-4790-47AF-8A2E-E4E867778DD8.jpeg


C131D0BB-98D1-4A75-9321-F18EBF545A72.jpeg

774545BF-1403-426E-A65F-2A8141C2BD1F.jpeg

after cutting i sanded alle the sharp edges before cleaned all the parts before test fitting the Seasonic power supply unit

see how it fits inside the old Mac Pro power supply unit
44905A3F-C9CF-4689-9348-60DEF29227B5.jpeg

7006170C-1450-4E0A-B502-3A695F359495.jpeg

C1EBAF2D-D866-4364-B7D8-69B46843D8F9.jpeg


Now I just need to screws that are long enuff to fasten the Seasonic power supply unit inside the old Mac Pro power supply unit

this is a future look of my Mac Pro case. Still need to make a good holder of adjust the old front PCB so I can hot glue them on there
5DE87AED-9999-433E-AC9A-F8360641E3FA.jpeg

but wanted to let you all see the progress so far hope to give a update soon still a long way to go
 
Last edited:
Status
Not open for further replies.
Back
Top