
- Joined
- Jul 6, 2010
- Messages
- 2,573
- Motherboard
- Asus Z170M-Plus
- CPU
- i5-6600K
- Graphics
- R9 280
- Mac
- Mobile Phone
Little Mac Pro: i5-6600K - ASUS Z170M-PLUS - R9 280 - Fusion Drive
Components
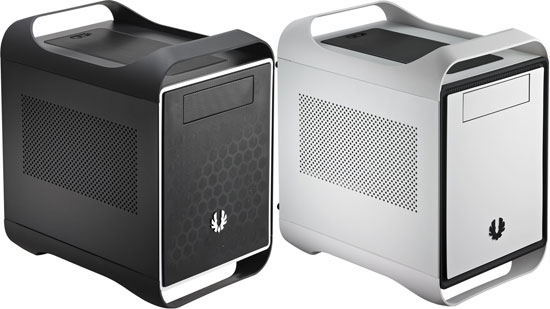
BitFenix Prodigy M - Tower - Mikro-ATX
http://www.amazon.de/dp/B00EKS9BQM/
ASUS Z170M-Plus Micro-ATX Mainboard
http://www.amazon.de/dp/B0126R44FG/
Intel i5-6600K "Skylake"
http://www.amazon.de/dp/B010T6DCBS/
EKL Alpenföhn Brocken ECO CPU Cooler
http://www.amazon.de/dp/B00KIRLV58
G.Skill Value Series - DDR4 - 2 x 4 GB
http://www.amazon.de/dp/B015FXXGJI/
Corsair CX500 - 500W ATX/EPS 80 PLUS Bronze PSU
http://www.amazon.de/dp/B009D79N3G/
Already Owned
Dell U2515H - 25" 1440p IPS LED Display
http://www.amazon.de/dp/B00P6O3YYO/
Sapphire R9 280 Dual-X 3GB
http://www.sapphiretech.com/productdetial.asp?pid=C4D1B443-6105-4A63-85DE-1732CC9C443D&lang=eng
Crucial M4 128GB SSD
https://www.crucial.com/wcsstore/Cr.../productflyer-crucial-m4-ssd-7mm-9-5mm-en.pdf
Samsung 850 EVO 256GB SSD
http://www.amazon.de/dp/B00P736UEU/
Western Digital Blue 2TB
Comments
The Build
So I've finally decided to do a new build to replace my trusty old i5-750 / P55M. It has been rock-solid over the years, but despite several upgrades (Radeon R9 280, USB 3, more RAM) it starts to show its age in several applications and games.
Amusingly I didn't start my build with the mainboard or the processor, but with the case. After I first saw the Bitfenix Prodigy, I knew I had to do a hackintosh build with it, especially because I have a genuine MacPro and a hackintosh in a modded G5 case at home.
It comes with two preinstalled 120mm case fans (which might get replaced with more silent ones in the future). I also might buy some additional fans if the temperatures under load gets critical.
After multiple positive reports on Skylake builds, I decided to go for Skylake. In my opinion, the i5-6500 and i5-6600K are the best value-for-money choices in the current Skylake setup. In the end I chose the K-version because of its overclocking possibilities.
I don't want to push it to it's limits on the first day, but it's good to know that there are some power reserves which can be easily unlocked. Since I want to use this build as long as my last one, this will help me getting another year out of it.
Nevertheless I'll (carefully) tinker with the BIOS settings and post results in this thread.
I didn't have any special requirements on the motherboard besides the mATX form factor and a "Z" chipset for overclocking. When I planned this build, ASUS had a nice cash back campaign, which got me the Z170M-Plus for less than 95€, so the choice was simple.


Of course this drive won't be able to compete with a real SSD in terms of read/write speeds, but it's way faster than a usual HDD and I won't have to care about splitting up the data between 2 drives, so it's fine for now.
I'd like to keep using my Sapphire R9 280 Dual-X, which has done a great job in the past 9 months since I bought it. However, the ongoing issues with AMD graphics have kept me from upgrading my P55M build to El Capitan, and I might have to consider switching to a NVIDIA card if they won't get solved.
The Installation
Thanks to the pioneering work of many brave people, the installation was surprisingly easy. I won't cover every step in great detail (you can read that up in the Skylake Starter Guide), but focus on specifics of this build. Especially the combination "Skylake & Radeon graphics" is something only very few people did so far.
Before starting the installation, I had to tweak a few BIOS settings:
- Load optimized defaults
- Disabled Serial port
- Disabled Parallel Port
- Adjusted DRAM frequency (not necessary)
- Enabled XHCI Handoff
- OS Type: Other OS
Installation of OS X:
I started of making a bootable USB drive with latest UniBeast. To make it bootable on Skylake, I had to
applied the following fixes from http://www.tonymacx86.com/el-capitan-desktop-guides/179221-skylake-starter-guide.html:
- 2. IOAPIC Fix
- 7. USB: USBInjectAll.kext (in /EFI/Clover/kexts/10.11) & raised port limit (otherwise garbled screen at boot)
- 5. Ethernet: IntelMausiEthernet.kext in /EFI/Clover/kexts/10.11
- 6. Audio: HDAS to HDEF patch
After installing OS X I rebooted to El Capitan with full graphics acceleration and working Ethernet.
To enable audio, I mounted the ESP, ran CloverALC with Codec = 887, Audio ID = 2 and rebooted with working audio!
Note: Above I said that I wanted to recycle my old Fusion Drive form my last hack. I still plan to do this, but since I had to keep my old hack in a usable state for a little longer, I've installed OS X on an empty Samsung EVO 850 256GB. I'll do another install to the Fusion Drive when I get a chance.
Fine Tuning:
Sadly OS X El Capitan introduced a very annoying bug: Hacks with AMD Radeon graphics won't wake from sleep (more @ IM). Luckily there's a workaround: You have to use your integrated graphics as primary GPU. All I had to do was changing two BIOS settings:
- Primary Display = CPU graphics
- iGPU Multi-Monitor = Enabled
Code:
<key>ig-platform-id</key>
<string>0x19120000</string>You can see that the iGPU is now properly working as headless OpenCL device:

The machine won't sleep when anything is connected to iGPU, most likely due to the buggy Skylake iGPU driver.
Additionally I've installed the HWSensors FakeSMC plugins to monitor temperatures and others. The latest official build won't work due to missing Skylake support, so I used these binaries (based on Kozlek's latest Git code).
Fan readings and voltages are missing, besides that it's working fine.

My audio output will break randomly (happened 3-4 times so far), I'm not sure why. It'll come back after sleeping & waking the machine.
I've added a i5-6600K SSDT to EFI/Clover/ACPI/patched and dropped SSDT/CpuPM and SSDT/Cpu0Ist to improve power management and SpeedStep. Turbo Boost states will be missing otherwise, maxing out at 3.5GHz. With this setup it'll turbo-boost up to 3.9GHz (single-core load) as it's supposed to.
The CPU was once stuck in 3.6GHz state until reboot, I don't know why. Beside that single issue it has always worked fine.
Summary
This Hack is really awesome! The installation went better than I had expected and so far it's rock-solid and blazing fast. I hope the Radeon-issue will be solved in the future, but since I rarely reboot my machine, the workaround will do for now.
What works:
- All ports (USB, Audio, Ethernet)
- Sleep/Wake
- SpeedStep / PowerManagement
- USB C port
- iMessage
- Better solution for Radeon issue
- Track down random audio issues
- Redo USB properly without using USBInjectAll (works perfectly fine until now though)
Benchmarks
Well, as mentioned in the "Components" section I planned to install a huge air cooler on the CPU. When I unpacked it, I had to find out that a pair of mounting bars was missing, so it couldn't be installed. I've RMA'ed it and am currently waiting to receive a proper one, but for now I'm stuck with the boxed cooler from my old i5-750. It does its job, but it's definitely overchallenged at full load, so I'll postpone any heavy benchmarking (and overclocking) until I have a proper CPU cooler mounted. The temperatures will easily go beyond 70°C without OC, and I didn't want to fry the CPU on the first day...

I did some more GPU demanding benchmarks though:


Overclocking
No cooler => no overclocking

Undervolting
Since I still don't have a proper CPU cooler, I decided to tweak the CPU in the other direction: Undervolting (while maintaining the stock clock speed) to decrease the power draw.
This doesn't require any modifications in OS X, just the usual BIOS tweaks. Sadly, HWSensors doesn't (yet?) support CPU voltage readings, so I don't know the stock voltage exactly. When entering the BIOS, it usually shows a core voltage around 1.2V-1.23V.
I think this is already quite high for a 14nm CPU, so I decided to lower the turbo voltage ("adaptive mode" in my ASUS BIOS) to 1.05V (instead of "Auto").
I'm running my machine for a few days with this setting now, and it's still perfectly stable. The maximum power draw when running Prime95 has decreased by almost 15W!
Due to Prime95's excessive use of AVX instructions, it'll draw way more power than you'll ever see in any real workload, so I decided to do my final testing with an x264 encoder (Handbrake).
As you can see in the following screenshot from Intel's "Power Gadget", the power draw maxes out at ~56W, so the temperatures will reach a steady state around 61°C, which I think is very good, considering my crappy Intel stock cooler.

Attachments
Last edited by a moderator:
